
WiFi with WSSO using Windows NPS and FortiGate Groups
This is an example of wireless single sign-on (WSSO) with a FortiGate. The WiFi users are students at a school. These users belong to a Windows Active Directory (AD) group called WiFiAccess. When users enter their WiFi username and password, the FortiGate checks the local group WiFi. Since the group has been set up with remote RADIUS server, the FortiGate performs user authentication against the Network Policy Server (NPS) or RADIUS server. If the user is authenticated successfully, the FortiGate will check for a policy that allows the WiFi group access.
There is an alternative way to setup WiFi with WSSO. To learn more about it, see WiFi with WSSO using Windows NPS and Attributes.

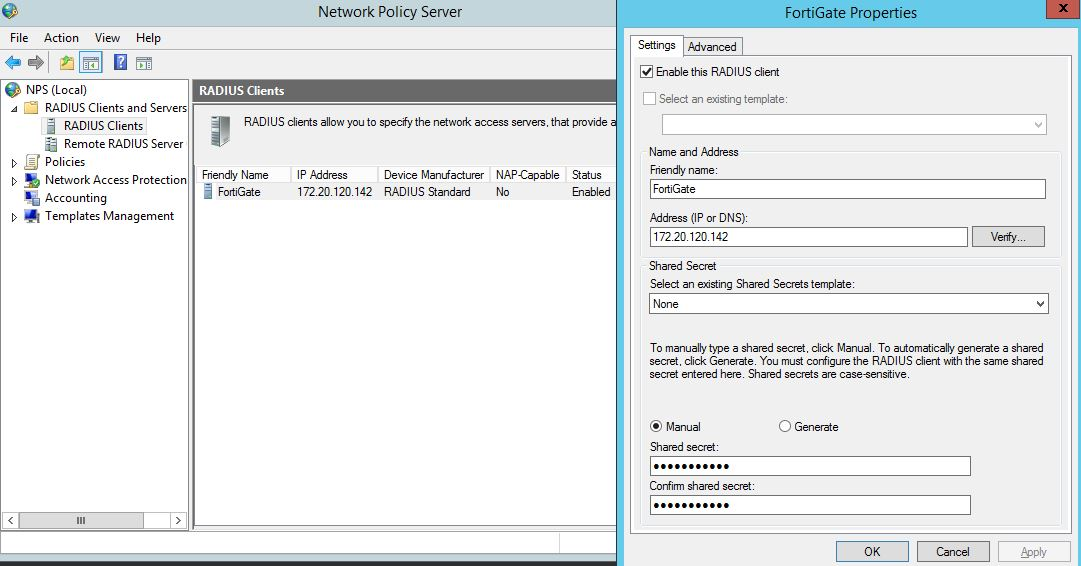
1. Registering the FortiGate as a RADIUS client on NPS
From the NPS, right click on RADIUS Clients, and create an entry for the FortiGate. Enter the FortiGate’s IP address. Enter the Shared secret (password).
2. Creating a Connection Request Policy
Right click Connection Request Policies under Policies and select New. Leave default values for Overview and Settings tab. Under Conditions tab, enter Client IPv4 Address as the FortiGate’s IP address.

3. Creating a Network Policy
Right click Network Policies under Policies and selectNew to create a new policy. Leave default values in Overview tab. In Conditions tab, click on Add, select Windows Group, then select Add. Finally Add Groups, then enter WiFiAccess, and select OK.

In Constraints tab, under Authentication Methods, click Add, then select Microsoft: Protected EAP (PEAP) then OK. Next select Microsoft Encrypted Authentication version 2 (MS-CHAP-v2), and finally select User can change password after it has expired and select OK.

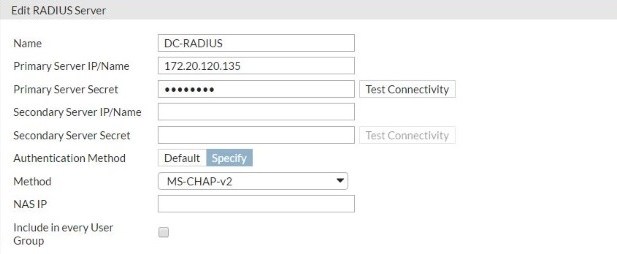
4. Configuring FortiGate to use the RADIUS server
On the FortiGate, go to User & Device > RADIUS Servers. Select Create New DC-RADIUS. Enter the Domain Controller IP address and the Server Secret that you entered on NPS. Optionally, you can click Test Connectivity. Enter a RADIUS user’s ID and password. The result should be “Successful”.
5. Configuring a user group on the FortiGate
Go to User & Device > User Groups. Create a group named WiFi. Click on Create New underRemote groups, then enter DC-RADIUS for Remote Server, and Any for Groups. Select OK, and OK again.

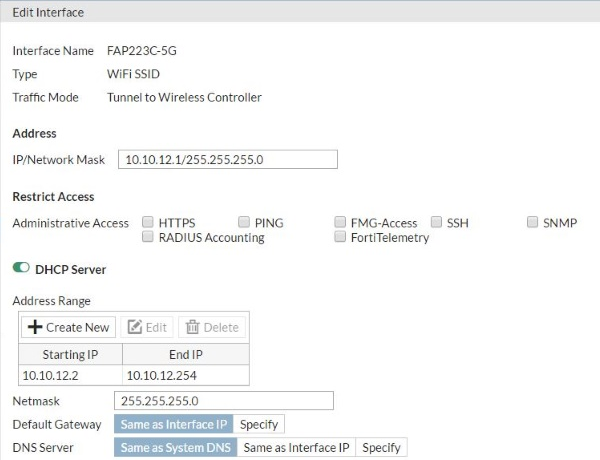
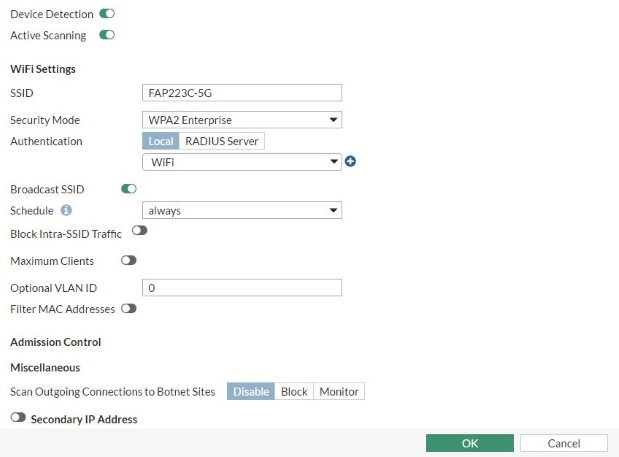
6. Creating an SSID with RADIUS authentication
Go to WiFi & Switch Controller > SSID. Create an SSID and set up DHCP for clients.
Set WPA2-Enterprise with Local authentication, and choose the local group WiFi.
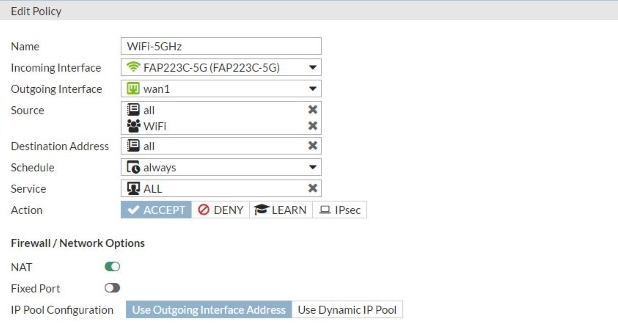
7. Creating a security policy
Go to Policy & Objects > IPv4 Policy. Create a WiFi-to-Internet policy. Use WiFi group as the Source.
8. Results
Connect to the WiFi network, authenticate, and browse the Internet. Try this with a user that belongs to the WiFiAccess Windows AD Group.
Go to Monitor > Firewall User Monitor. You can see the User Name, User Group and verify that WSSO authentication Method was used.
