
Configurations
The Configurations page contains the analyzed resources required to protect your application, which includes the protected URL entries and the locations where JavaScript is inserted through your connector devices to collect client information for bot detection.
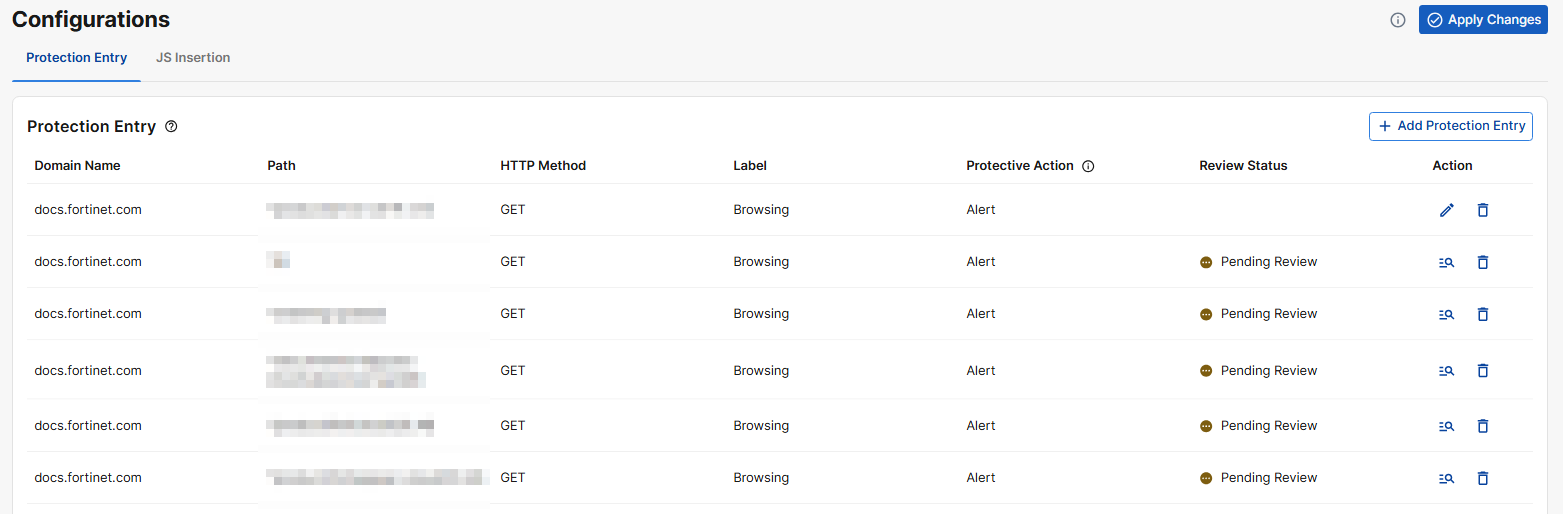
Protection Entry
The Protection Entry table lists all the URL paths under your Application domain that ABP has identified should be protected.
|
Parameter |
Description |
|---|---|
| Domain | Domain of the ABP Application to be protected. |
| Path | The URL path identified from the Application domain. Supports PCRE regex format. |
| HTTP Method | HTTP requests using any of the listed methods in the protected URL will initiate the attack query to the Advanced Bot Protection Cloud Service. |
|
Label |
The primary function of the page.
|
|
Protective Action |
The action ABP takes when bot activity is detected.
|
|
Review Status |
Indicates whether the protection entry must be reviewed before it can be applied. Manually added entries do not require review; only entries suggested by Auto Discovery trigger a review notification. |
|
Action |
The available actions to be taken on the protection entry. May include Edit, Review, and Delete. |
Add Protection Entry
-
Click Add Protection Entry.
-
Enter the following:
Setting
Description
Entry Point URL
Entry Points are URLs in your application that are likely targets for bots. This typically includes pages where users enter sensitive information, such as login or checkout pages.
If the port number is not 80 for HTTP or 443 for HTTPS, please include the custom port number in the Entry Point URL.
Example input where the port number is 1111:
example.com:1111/loginFor more details on this concept, please refer to Entry points.
Protection Category
Select the attack categories relevant to the URL entered above. Note that selecting more protection categories may increase the time required for the AutoDiscovery process to complete.
- Denial of Service (DoS): Attempts to overwhelm your site with traffic, causing downtime or slow performance. AutoDiscovery primarily detects DoS activity targeting search pages.
-
Account Takeover: Attempts to gain unauthorized access to user accounts. Typically targets login or password-reset pages.
-
Automated Account Creation: Bots create fake accounts to exploit services or commit fraud. Typically targets registration or signup pages.
-
Content Scraping: Bots extract content from your site, such as articles or images. Typically targets browsing pages.
-
Price Scraping: Bots collect pricing information for competitive analysis. Typically targets browsing pages.
Credentials
Optional; Provide the username and password for an existing, non-critical test account. This allows the system to determine the conditions for successful authentication, such as expected HTTP responses.
Edit Protective Action
As of release 26.1.a, the Protective Action is configured per Protection Entry rather than per application.
|
|
|
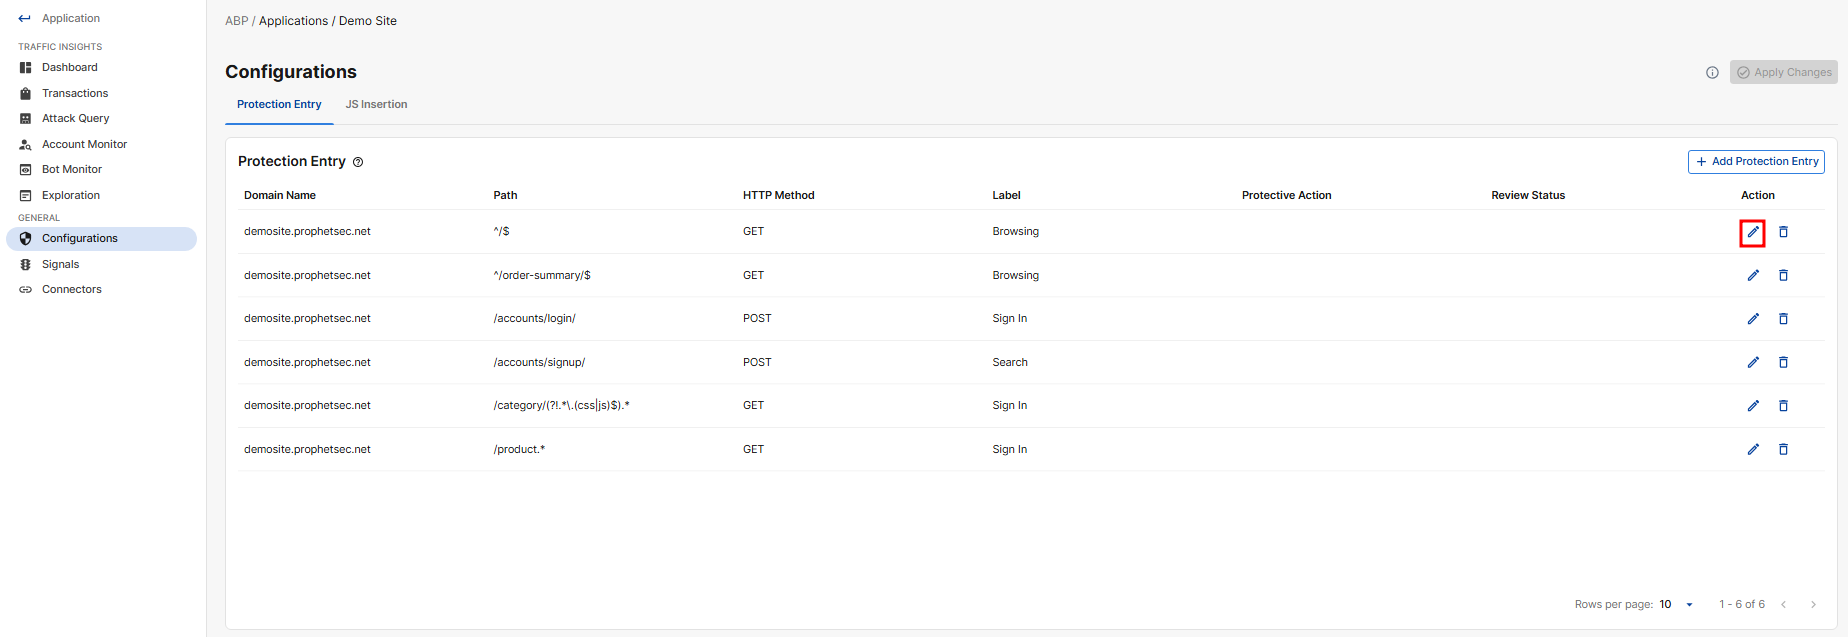
To change it:
-
Go to Advanced Bot Protection > Application > General > Configurations.
-
Under Action, click the edit icon.
-
At the top of the page, the currently configured action is displayed as a dropdown. Click it to expand the menu and select a different protective action.

-
Review and edit the following:
Description
Protective Action
The action ABP takes when bot activity is detected. The currently configured or suggested action is displayed as a dropdown at the top of the page. Click it to expand the menu and select a different protective action.
-
Alert: Record the invalid request in the attack log.
-
Alert and Deny: Block the invalid request and send a "block page" back to the browser, as well as record the request in the attack log.
-
Deny (no log): Block the invalid request and send a "block page" back to the browser, without recording the request in the attack log.
-
Block Period:Block the current request and all subsequent requests from the same client for the configured duration. When this option is selected, you must also enter the Block Period in seconds.
Please note, the Deny (no log) and Block Period actions will not take effect until Block Mode is enabled. During onboarding, these actions can be safely configured without risk of impacting live traffic.
The Protective Action setting is supported for FortiAppSec Cloud WAF Applications and FortiWeb Versions 7.4.12 and later, 7.6.6 and later, and 8.0.3 and later. If you are using FortiADC or an older version of FortiWeb, configure the protective action directly from your FortiADC/FortiWeb interface.
Domain Name
The domain of the relevant application.
Path
The path that indicates the page being protected on the relevant application.
HTTP Method
The HTTP Method to be protected in this protection entry.
-
GET – Retrieve data (e.g., loading a page)
-
POST – Submit data (e.g., login, form submission)
-
PUT / PATCH – Update resources
-
DELETE – Remove resources
Label
Select a label in the dropdown menu to indicate the primary function of the page.
-
Sign In
-
Sign Up
-
Search
-
Forget Password
-
Browsing
Username Field
Specify the field used for the username in the API request.
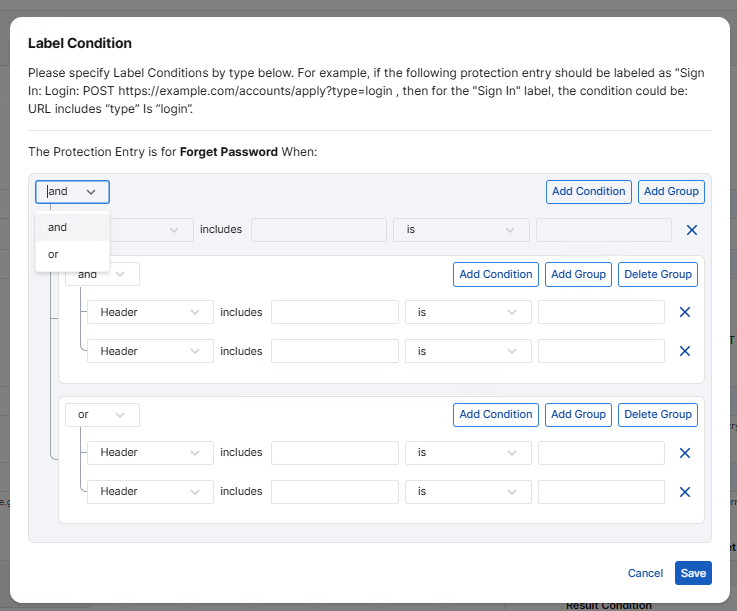
Label Condition
Click Edit to specify the Label Conditions for the selected Label type.
For example, if the following protection entry should be labeled as Sign In:
Login: POST https://.com/accounts/apply?type=loginthen the condition for the Sign In label could be:
URL includes "type" = "login".To add a new condition, click Add Condition. To create a subgroup of related conditions, click Add Group.
Define how the conditions within a group are evaluated by selecting a logical operator:
-
and: All conditions in the group must be met.
-
or: At least one condition in the group must be met.
Result Condition
Define the conditions for both successful and failed actions. For example, if Sign In is selected as the Label, the Result Condition specifies what indicates a successful or failed sign-in.
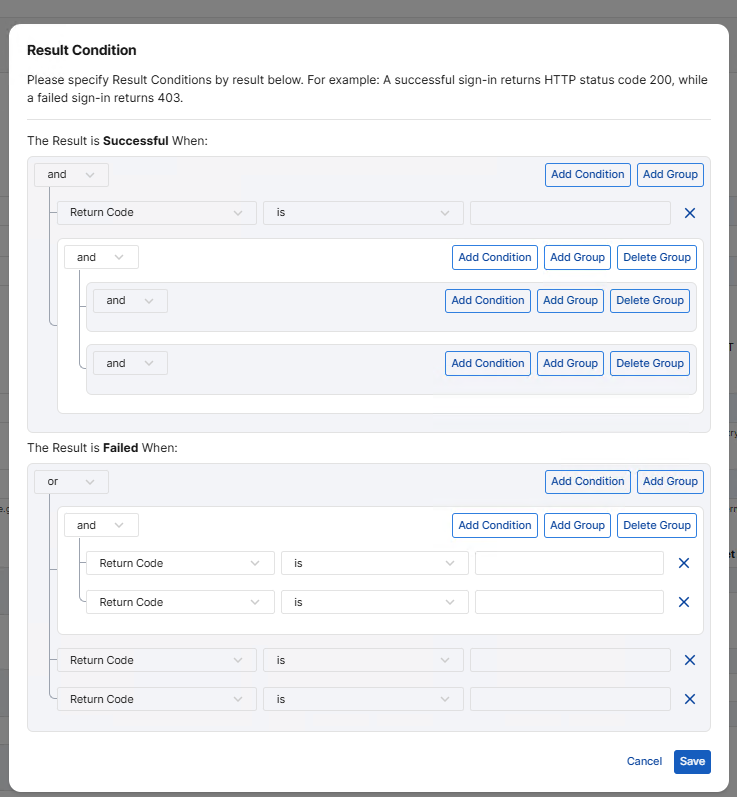
To add a new condition, click Add Condition. To create a subgroup of related conditions, click Add Group.
Define how the conditions within a group are evaluated by selecting a logical operator:
-
and: All conditions in the group must be met.
-
or: At least one condition in the group must be met.
-
-
Click Save to apply changes.
JS Insertion
The Insert JS Entries table lists all the locations ABP has identified in your Application domain that should be inserted with the JavaScript to collect client information.
By default, a custom JavaScript is automatically inserted into all pages that return HTTP 200 responses and have a text/html content type within the application's domains. This is essential for Advanced Bot Protection (ABP) to collect client information and secure your website.
JS Insertion Exclude
Temporarily exclude pages from JavaScript injection. Excluded pages will not be protected by Advanced Bot Protection.
|
Parameter |
Description |
|---|---|
| Domain | The domain name of the ABP application to be protected. |
| URL | The path portion of the application’s domain identified for this protection entry. Supports PCRE regex format. |
| Action |
The available actions to be taken on the protection entry. Includes Edit and Delete. |
Add JS Inertion Exclude
-
Click Add JS Insertion Exclude.
-
Enter the Domain and URL as per the descriptions above.
JS Insertion Special
Define custom injection rules for non-HTML content or non-200 responses to override the default behavior.
|
Parameter |
Description |
|---|---|
| Domain |
The domain name of the ABP application to be excluded from protection. If the port number is not 80 for HTTP or 443 for HTTPS, please include the custom port number in the Domain. Example input where the port number is 1111: |
| URL | The path portion of the application’s domain to be excluded from protection. Supports PCRE regex format. |
| (Status) Code |
The HTTP response status codes that this rule applies to. When a response matches one of these status codes, this custom injection rule overrides the default behavior. You can select one or more status codes from the drop-down list, or enter new ones to create them. |
|
Content Type |
Specify the HTTP Select one or more content types from the drop-down list, or enter new ones to create them. |
|
Action |
The available actions to be taken on the protection entry. Includes Edit and Delete. |
Add JS Insertion Special
-
Click Add JS Insertion Special.
-
Enter the Domain, URL, Status Code, and Content Type as per the descriptions above.