
Configuring a WVS Profile
Creates a WVS Profile that can be selected in Web Vulnerability ScannerIt gives you the option to select which types of scans you want.
To configure a WVS Profile:
1. Go to Web Application Firewall > Web Vulnerability Scanner
2. Select the WVS Profile tab.
3. Click Create New on the top right. It will open a dialogue box.
4. Complete the configuration as described the table below.
5. Save the configuration.
6. The configured profile will appear as an option in the WVS Task dialogue box.
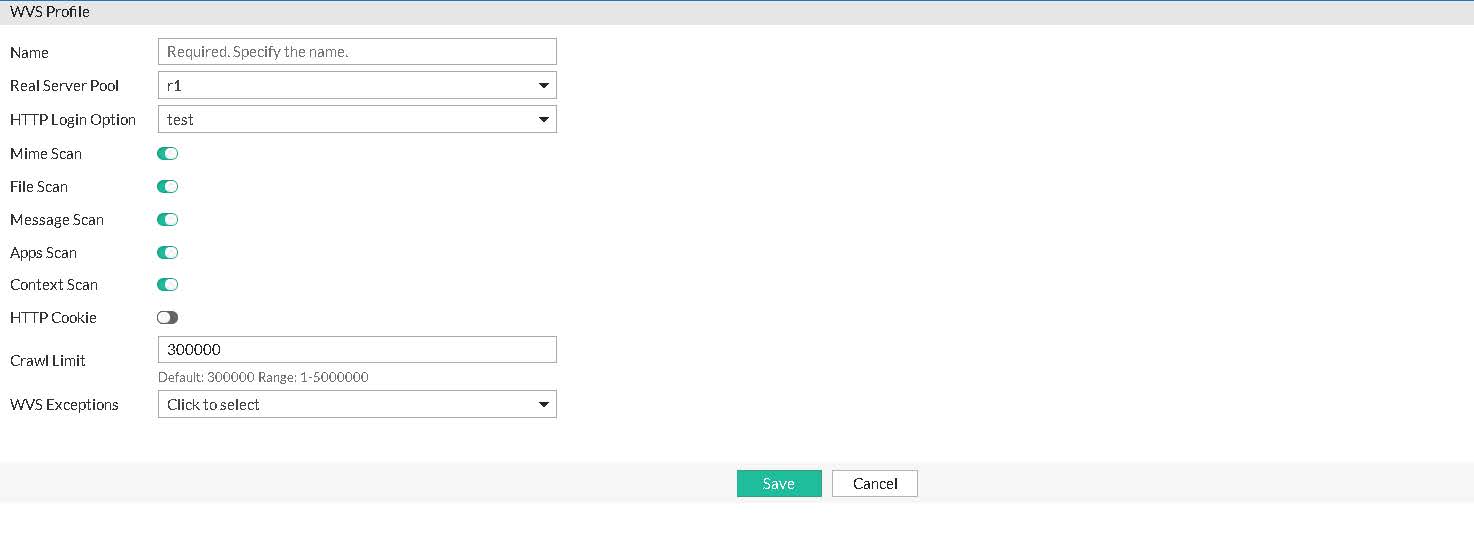
| Settings | Guidelines |
|---|---|
|
Name |
Configuration name. Valid characters are After you initially save the configuration, you cannot edit the name. |
|
Real Server Pool |
Select a real sever from the real server pool. To configure a scheduler, you have two options. You can create it from the WVS profile dialogue, or you can go to Server Load Balance > Real Server Pool. See Using real server pools |
|
HTTP Login Option |
Select an HTTP Login Option. Configure a login option in Configuring a WVS Login |
|
Mime Scan File Scan Message Scan Apps Scan Context Scan |
You have five scan options. See Web Vulnerability Scanner |
|
HTTP Cookie |
Enable HTTP Cookie in Web Vulnerability Scanner profile. |
|
Crawl Limit |
Specify a crawl limit. |
|
WVS Exceptions |
Specify a WVS Exception. See Configuring WVS Exceptions. |