


Creating XSW Detection rules
XML Signature Wrapping (XSW) allows a malicious client to modify or forge a digitally signed document without breaking the included signature. This attack is accomplished by moving the original nodeset to another location within the document and replacing the contents.
To counter XSW attacks, FortiWeb will locates the signed node within the XML file and execute verification specifically at that location. Consequently, if a forged node is positioned at the original node's location or the original node is moved to another location, FortiWeb will be able to detect it. In the XSW Detection rule, XPath is employed to specify the correct location of the signed node, while a certificate is used to verify whether the content of the signed node is legitimate.
To create a XSW Detection rule
- Go to XML Protection > XSW Detection Rule.
- Click Create New.
- Configure these settings:
- Click OK.
- Click Create New to configure the namespace mappings table.
This step is essential for instructing the system on how to associate a prefix with its corresponding namespace during XPath parsing.
You can map the namespace with the prefix that is defined in the XML file, or with a custom prefix that you prefer.
Please note that defining the mapping table is not required if the XML file to be protected does not associate a prefix with the namespace.
- For Prefix, enter the prefix to be paired with the intended namespace.
- For Namespace, enter the namespace.
- Click OK.
- Click Create New to configure the elements list. The elements list defines the XPath.
- For XPath, enter an XPath to specify which part of the XML file is the signed node.
For ID Attribute Name, enter the name of the attribute to be protected.
Example 1:
To protect the content within the<soapenv: Body>tag in the screenshot below, you can define the Xpath as/soapenv:Envelope/soapenv:Body, and ID Attribute Name isId.
Alternatively, you can enhance customization by adding your preferred prefix in mapping, such asaa(prefix), and associating it with the namespacehttp://schemas.xmlsoap.org/soap/envelope/. Subsequently, you would define the XPath as/aa:Envelope/aa:Body.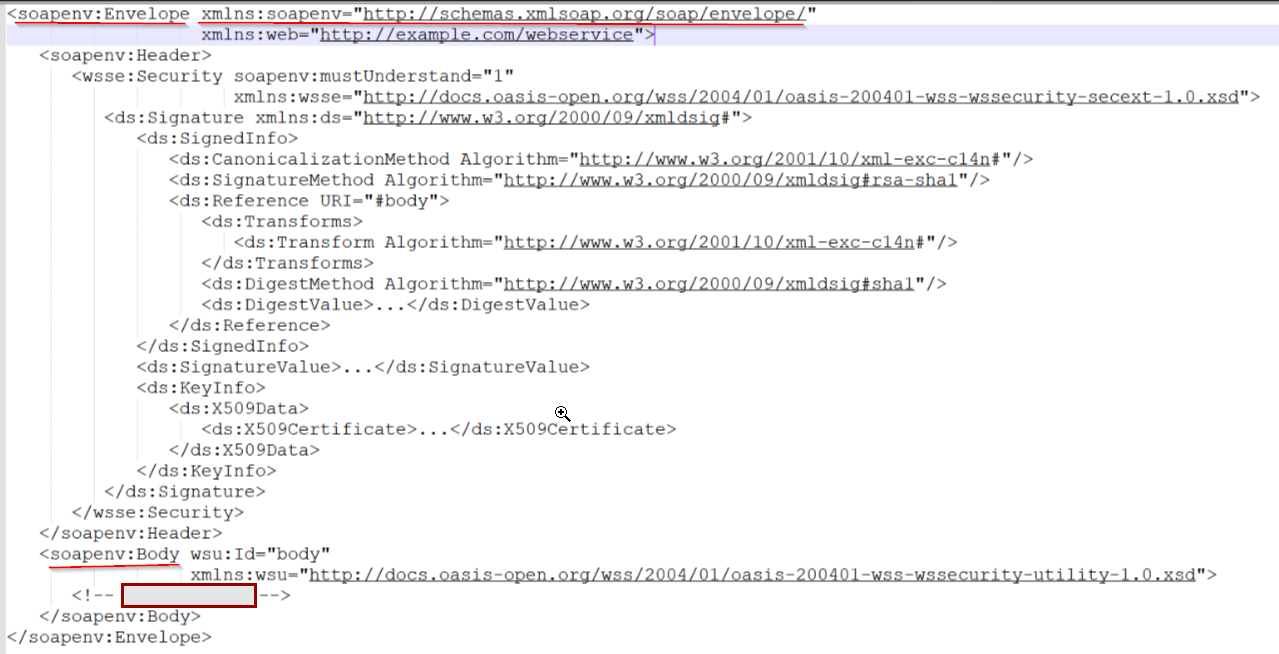
Example 2:
In this example, the XML doesn't define a prefix and namespace mapping. To protect the content within the<item>tag in the screenshot below, you can define the Xpath as/document/data/item, and leave the ID Attribute Name empty .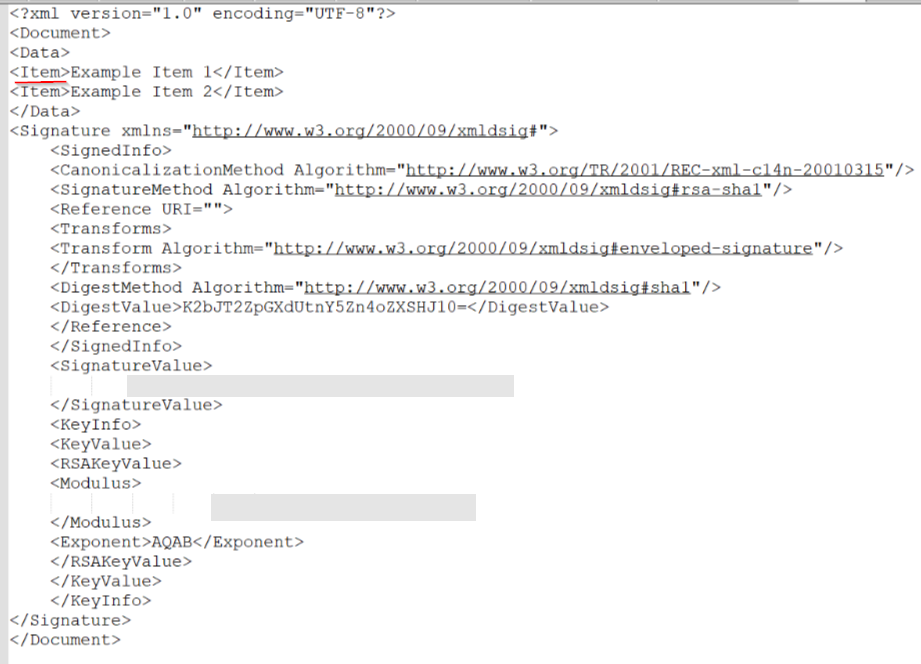
- Click OK.
To access this part of the web UI, your administrator's account access profile must have Read and Write permission to items in the Web Protection Configuration category. For details, see Permissions.
|
Name |
Enter a name that can be referenced by other parts of the configuration. You will use the name to select the rule in an XML protection rule. |
|
XML Client Certificate Group |
Select the XML client certificate group created from Server Objects > Certificate > XML Certificate > Client Certificate Group. |
To add an XSW Detection rule to an XML protection rule, see Creating XML protection rules.