


Creating the FortiWeb-VM instance
In Custom Images, navigate to the uploaded image and click Create Instance. Configure the following settings. 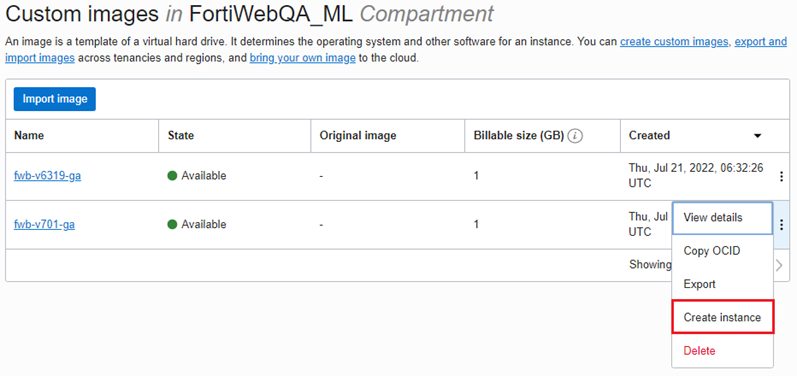
- In the Name field, enter the desired name to identify the instance by.
- Under Availability domain, select the desired domain.
- Under Shape, select one of the supported instance shapes. Currently, the instance should be at least 1 OCPU and 8 GB memory.
- In the Primary network field, select a network to launch the instance.
- In the Subnet field, select a subnet on the Internet-facing side of the network. See Optional: Creating a security list for the ports that should be allowed for inbound traffic.
- Select Assign a Public IPv4 Address so you can access the FortiWeb-VM over the Internet. You can disable this once you have configured everything as desired.
- Add SSH keys.
- Click Create. Wait until the PROVISIONING… status changes to RUNNING. You can also check the FortiWeb’s public IP address https://<public-ip>:8443 in this screen once it becomes available. The username to access FortiWeb-VM is admin, and the password is the <ocid>, where <ocid> can be found under OCI Instance General Information.