


Importing the FortiWeb-VM virtual machine
You deploy FortiWeb-VM on KVM (for Kernel-based Virtual Machine) by importing a disk image.
To import the FortiWeb-VM virtual machine
- Obtain the FortiWeb-VM installation files using the instructions provided in Downloading the FortiWeb-VM software.
The images in the .zip file are different depending on which version you are installing.
v5.8.3 and earlier versions
boot.qcow2: This image contains only the FortiWeb boot disk. You need to use this image file with 'log.qcow2' together on two virtual disks when deploying FortiWeb-VM appliance.
log.qcow2: This image contains only the FortiWeb log disk. You need to use this image file with 'boot.qcow2' image file together on two virtual disks when deploying FortiWeb-VM appliance.
You need to install boot.qcow2 and log.qcow2 onto two virtual disks. This will result in the FortiWeb-VM appliance having the FortiWeb boot disk on one virtual disk and the FortiWeb log disk on another.
v5.8.5 ~ v7.2.2
boot.qcow2: This image contains FortiWeb boot disk as well as FortiWeb log disk. Install boot.qcow2 onto a virtual disk. The FortiWeb-VM appliance will have FortiWeb boot disk and FortiWeb log disk within the same virtual disk.
v7.2.3 and later versions
If you want the FortiWeb boot disk and FortiWeb log disk to be installed onto the same virtual disk, use boot.qcow2.
If you prefer to have the FortiWeb boot disk and FortiWeb log disk distributed across two separate virtual disks, use boot_2g.qcow2 and log.qcow2.
- On your KVM host server, launch Virtual Machine Manager (virt-manager), and then select Create a new virtual machine.
- Enter a name for the VM (for example,
FortiWeb-VM). - Ensure that Connection is localhost (the default value).
- Select Import existing disk image.
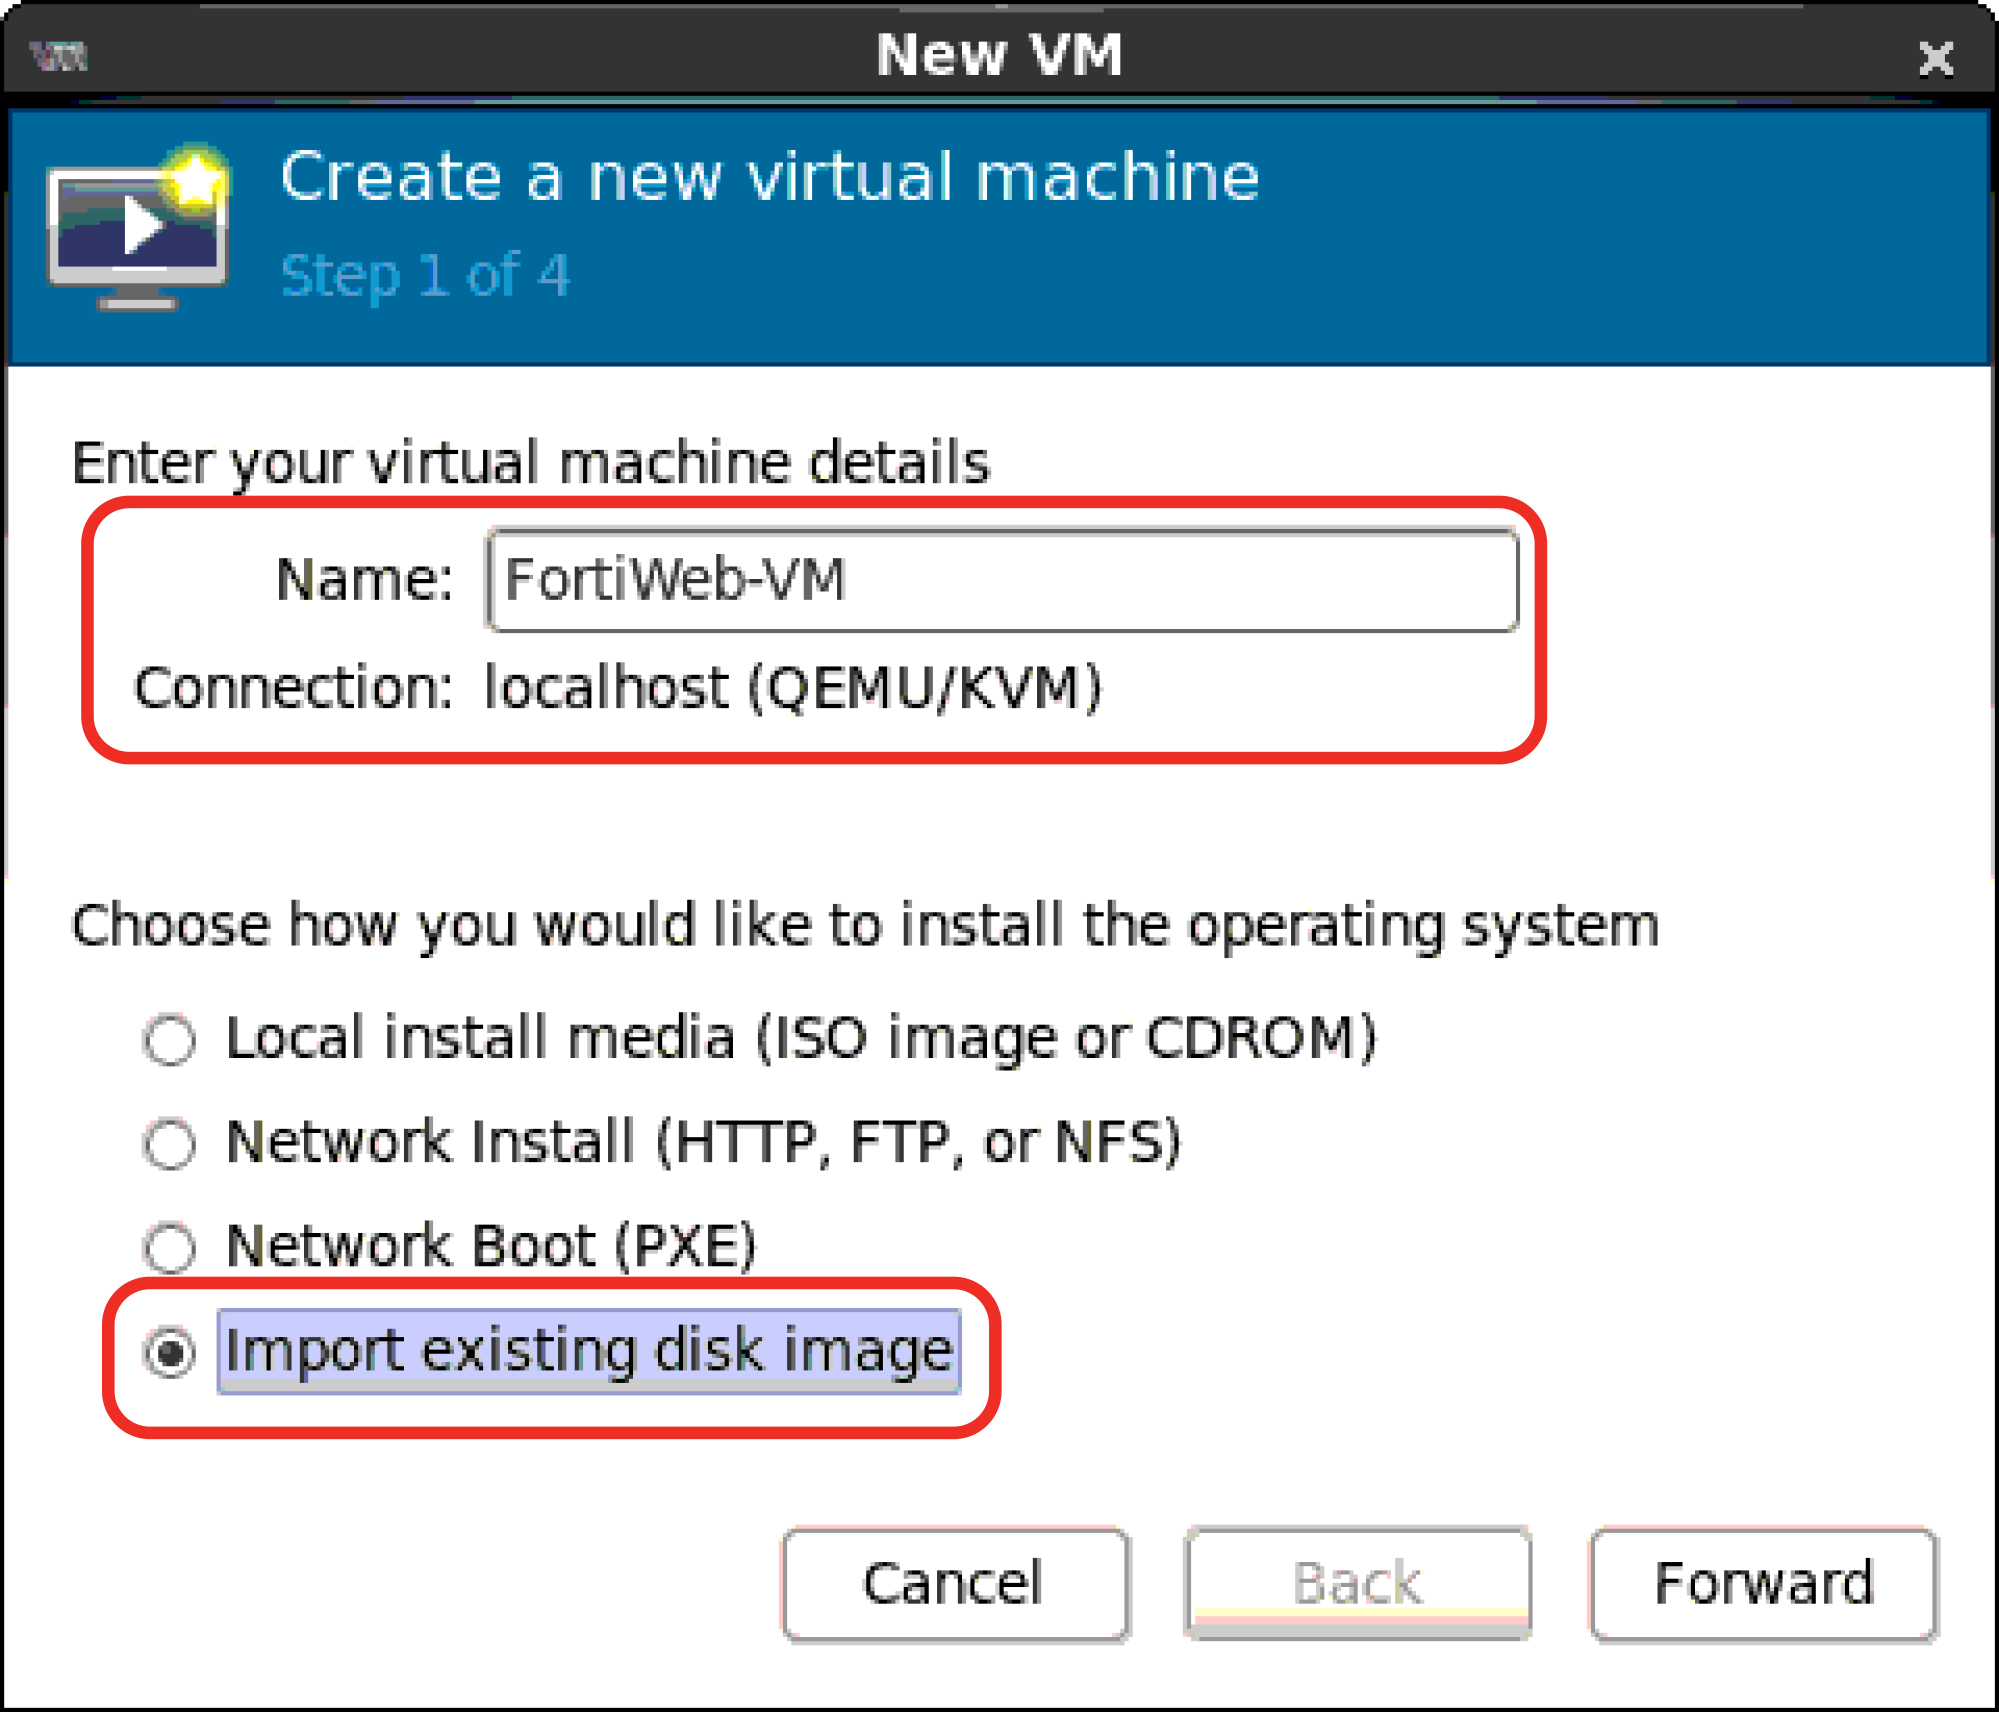
- Click Forward.
- Click Browse to navigate to boot.qcow2 or boot_2g.qcow2 and select either of them according to the image version you are using.
- Use the default values for OS Type and Version.
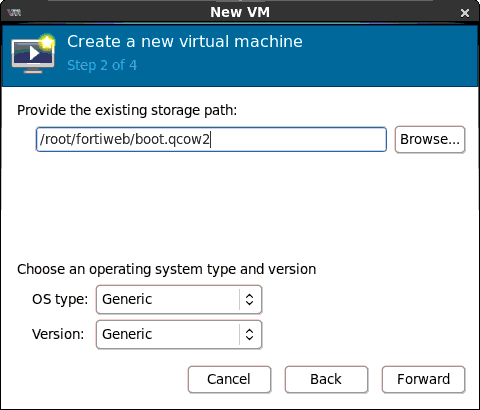
- Click Forward.
- Specify the amount of memory and number of CPUs to allocate to this virtual machine.
- Click Forward.
- Select Customize configuration before install.
- Click Finish.
- Optionally, to add a serial device, click Add Hardware, and then do the following:
Ensure the values do not exceed the maximums for your license. 
- Ensure Serial is selected.
- For Device type, select TCP network console(tcp).
- For Mode, select Server mode(bind)
- For Host, enter
127.0.0.1. - For Port, enter
10301. - Click Finish.
This serial device allows you to connect to the CLI. Once you have a CLI connection, you can perform the basic configuration that allows you to connect to the web UI to complete your configuration tasks, or complete your configuration using the CLI only. Otherwise, use the instructions in Configuring access to FortiWeb’s web UI & CLI


- Click Add Hardware.
- Select Storage.
- Select Select managed or other existing storage.
- Click Browse to navigate to log.gcow2 and select it.
- For Device type, select Virtio disk.
- For Storage format, select qcow2.
- Click Apply.


|
|
When you deploy the FortiWeb-VM package, network adapters are created automatically. If you want to delete network adapters, do it during the deployment process. It's not recommended to delete network adapters once the FortiWeb is deployed, otherwise unexpected error will occur. |