
High Availability Capability for FortiSOAR Cloud
FortiSOAR Cloud supports provisioning multiple FortiSOAR instances per account, allowing the creation of an active-active cluster to enable horizontal scaling.
Creating a cluster on the FortiSOAR Cloud portal
Access your FortiSOAR Cloud account as described in the Beginning with FortiSOAR Cloud chapter.
- Click on the account where you want to create the cluster, then select the Clusters tab:
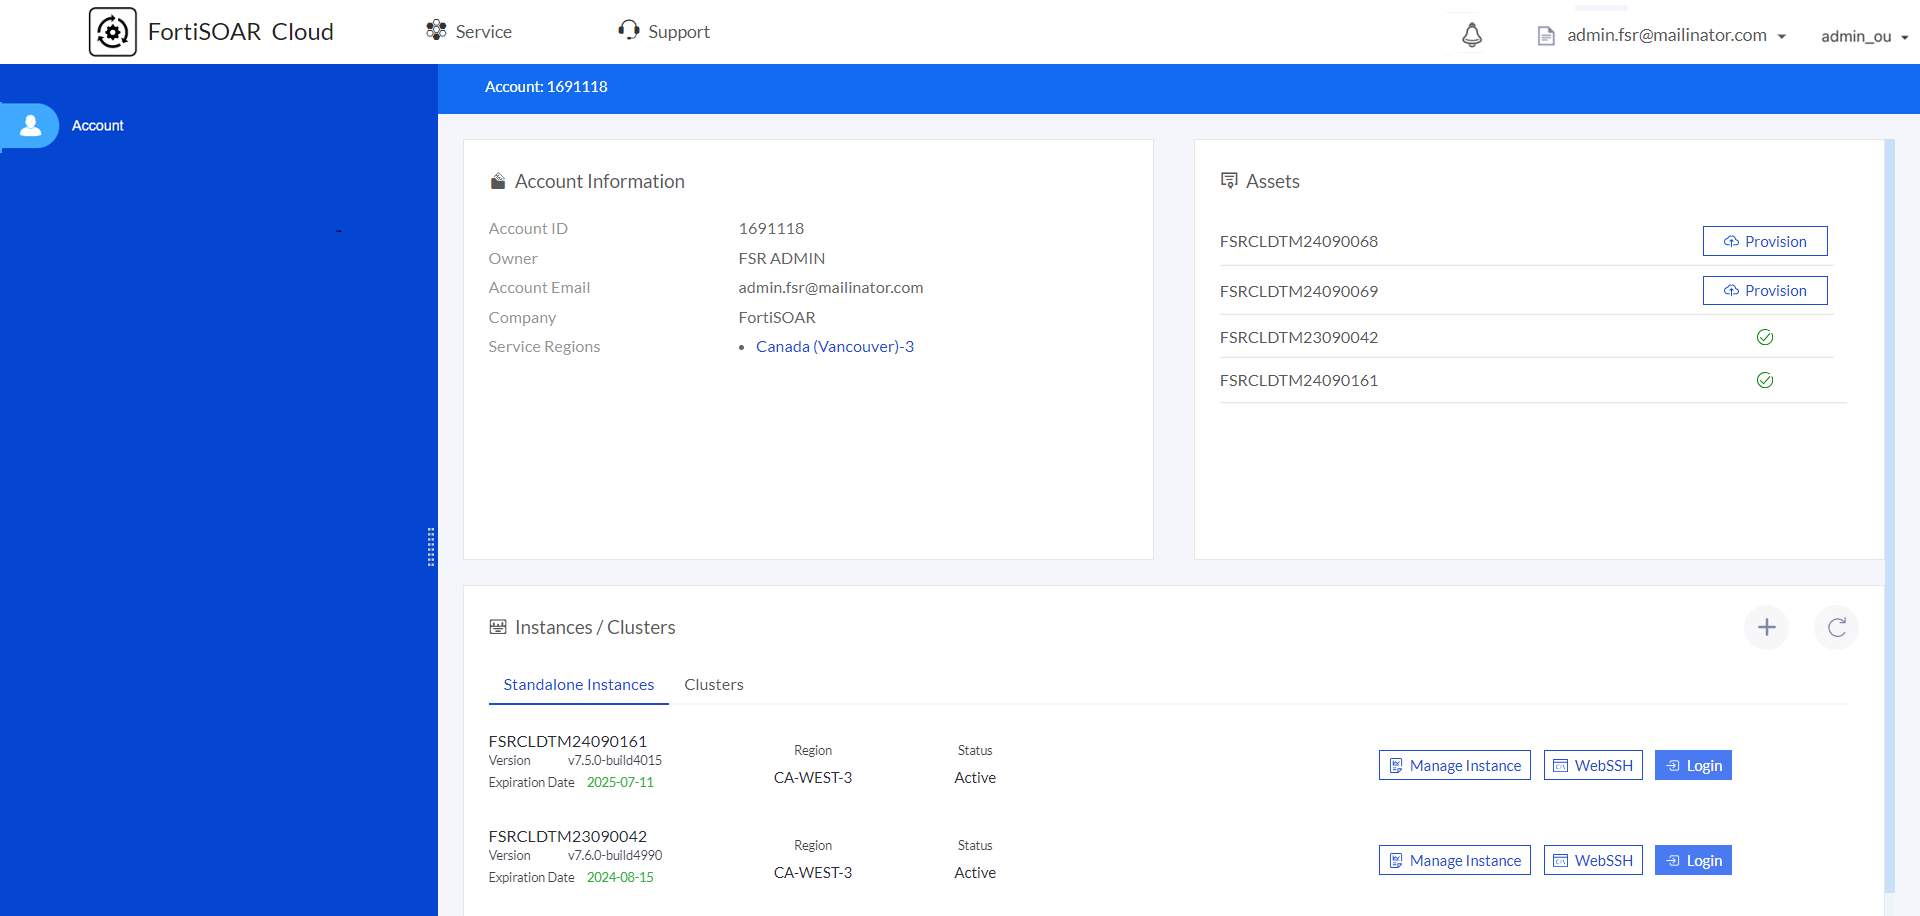
NOTE: Only the 'Master' account can create a cluster, and a cluster can only be created using provisioned instances. - Click the + button to open the
Cluster Createpage. - Enter the following details on the
Cluster Createpage, then click Submit to create an cluster on FortiSOAR Cloud:- Cluster Name: Enter the name of the HA cluster.
- Region: Select the FortiCloud service region where you want to create the cluster.
- Instances: Select the instances to include in the cluster.
NOTE: The FortiSOAR version and license type of the instances must match for cluster creation. - Notes: (Optional) Provide the support team with additional details about the HA cluster to be created. Designating a specific instance as Active/Secondary or Active/Primary in the cluster is an example of what could be added in the Notes field.
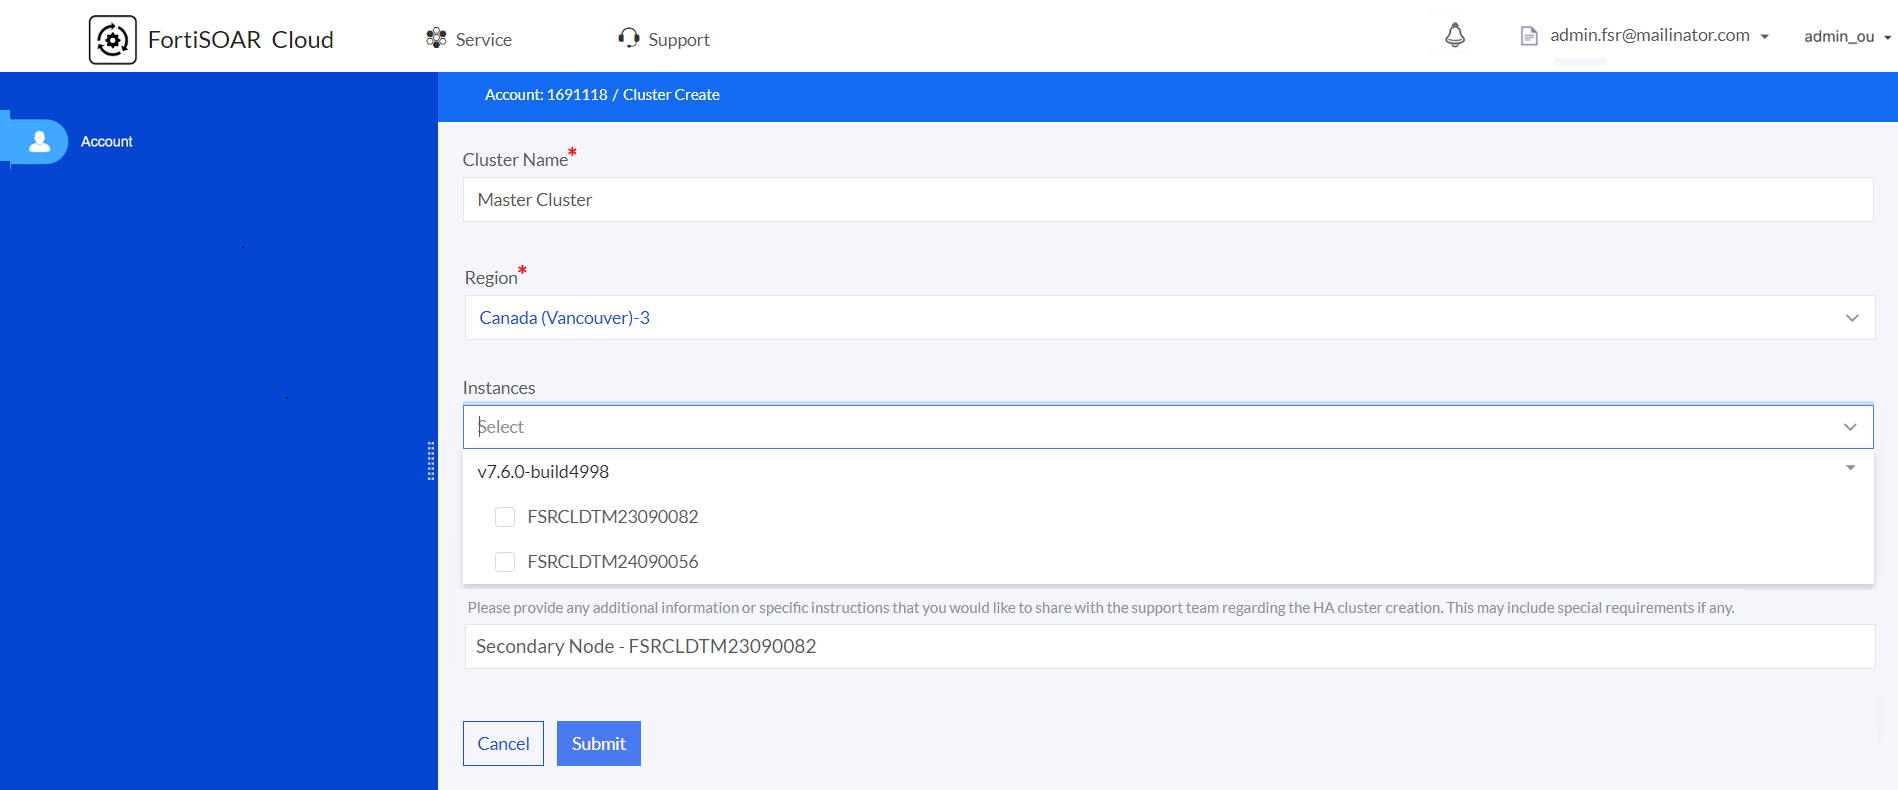
Once instances are selected, click Submit to create the cluster:
After clicking Submit, a notification is sent to Fortinet Support to set up a cluster between the selected instances and configure a load balancer. They will create a support ticket on your behalf and contact you if needed to complete the process. After the support team completes the setup, you will receive a notification and can view your cluster in your account. For detailed information on high availability support in FortiSOAR, see the High Availability support in FortiSOAR chapter in the "FortiSOAR Administration Guide".
Managing a cluster on the FortiSOAR Cloud portal
Access your FortiSOAR Cloud account as described in the Beginning with FortiSOAR Cloud chapter. On your account page, click the Clusters tab: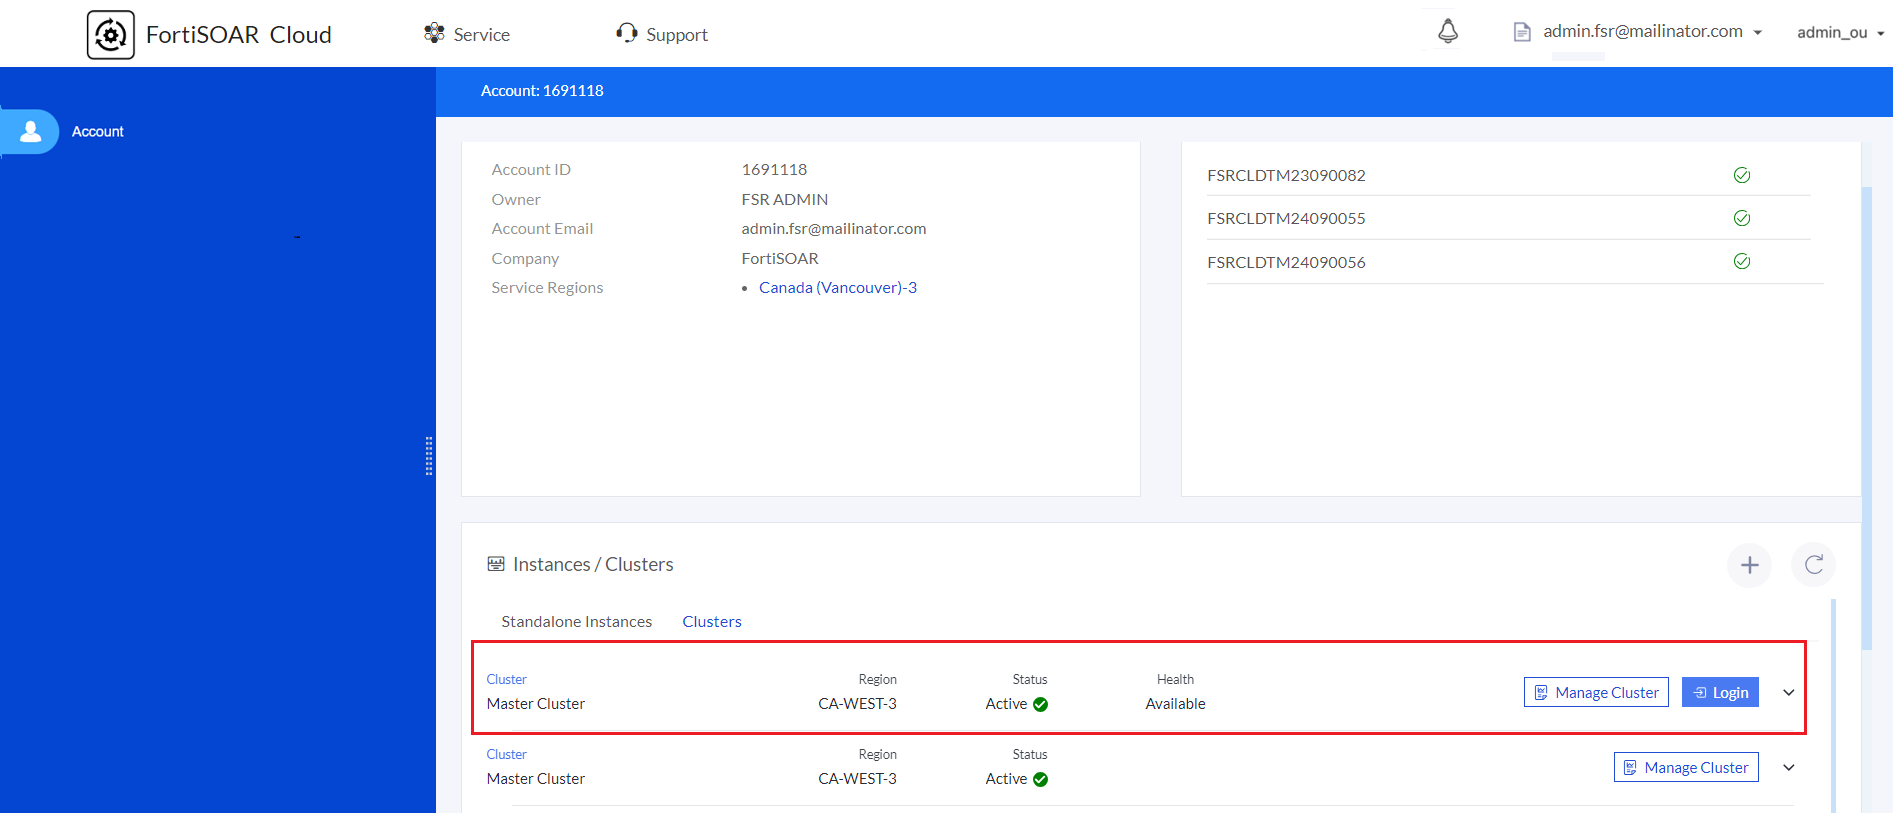
The cluster created in your account will display the following details:
- Name: Name of the cluster
- Region: Region where the cluster is provisioned
- Status: Indicates if the cluster is successfully provisioned and ready to use. It can be in the following states:
- Configuring: Initial configuration and network setup for the selected instances.
- Active: Cluster is successfully formed and ready to use.
- Health: Indicates the health of the cluster with values like Available, Requires Attention, or Error.
- You can also perform the following actions using the following available buttons:
- Login: Access the FortiSOAR UI of an instance within the cluster.
NOTE: The load balancer determines which FortiSOAR instance's UI is displayed. For more information, see the Accessing FortiSOAR Cloud UI topic in the Beginning with FortiSOAR Cloud chapter. - Manage Cluster: View the
Cluster Infopage, which includes details about that cluster and is used to manage the cluster. For more information, see the Cluster Info page details topic.
- Login: Access the FortiSOAR UI of an instance within the cluster.
Click the arrow to expand the cluster row and view information about instances in the cluster: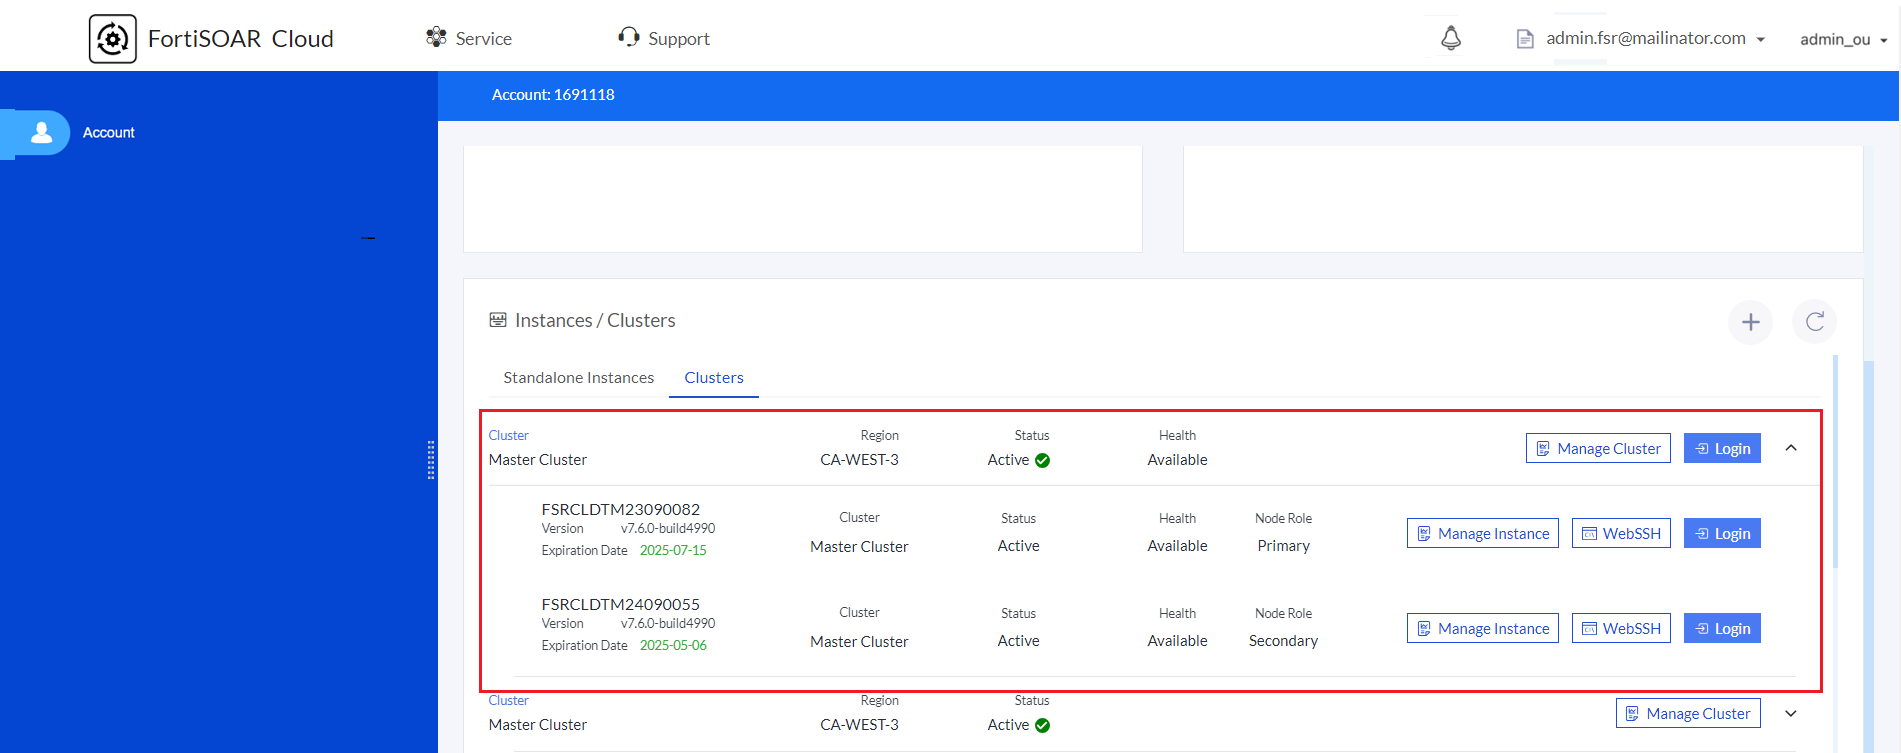
The expanded view shows the following details of the instances within the cluster:
- Node Details, including the instance's ID, its expiration date, and the FortiSOAR release on which the instance is provisioned.
- Name of the cluster associated with the instance.
- Status of the node, whether Active or Inactive.
- Role of the node, whether Primary or Secondary.
NOTE: Initially, all nodes are set as 'Primary' on FortiCloud. Roles are updated during HA cluster creation in FortiSOAR using the 'csadm ha' CLI. For information on thecsadm hacommand, see the High Availability support in FortiSOAR chapter in the "FortiSOAR Administration Guide". - You can also perform the following actions using the following available buttons:
- Login: Access the FortiSOAR UI of an instance.
- WebSSH: Access the FortiSOAR Cloud console of an instance.
- Manage Instance: View the
Instancepage that includes details about that instance and is used to manage the instance.
For more information, see the Beginning with FortiSOAR Cloud chapter.
Cluster Info page details
The Cluster Info page that displays details about a cluster including its name, region, description, and status. It also lists the instances within the cluster, along with their IDs, regions, health statuses, etc. 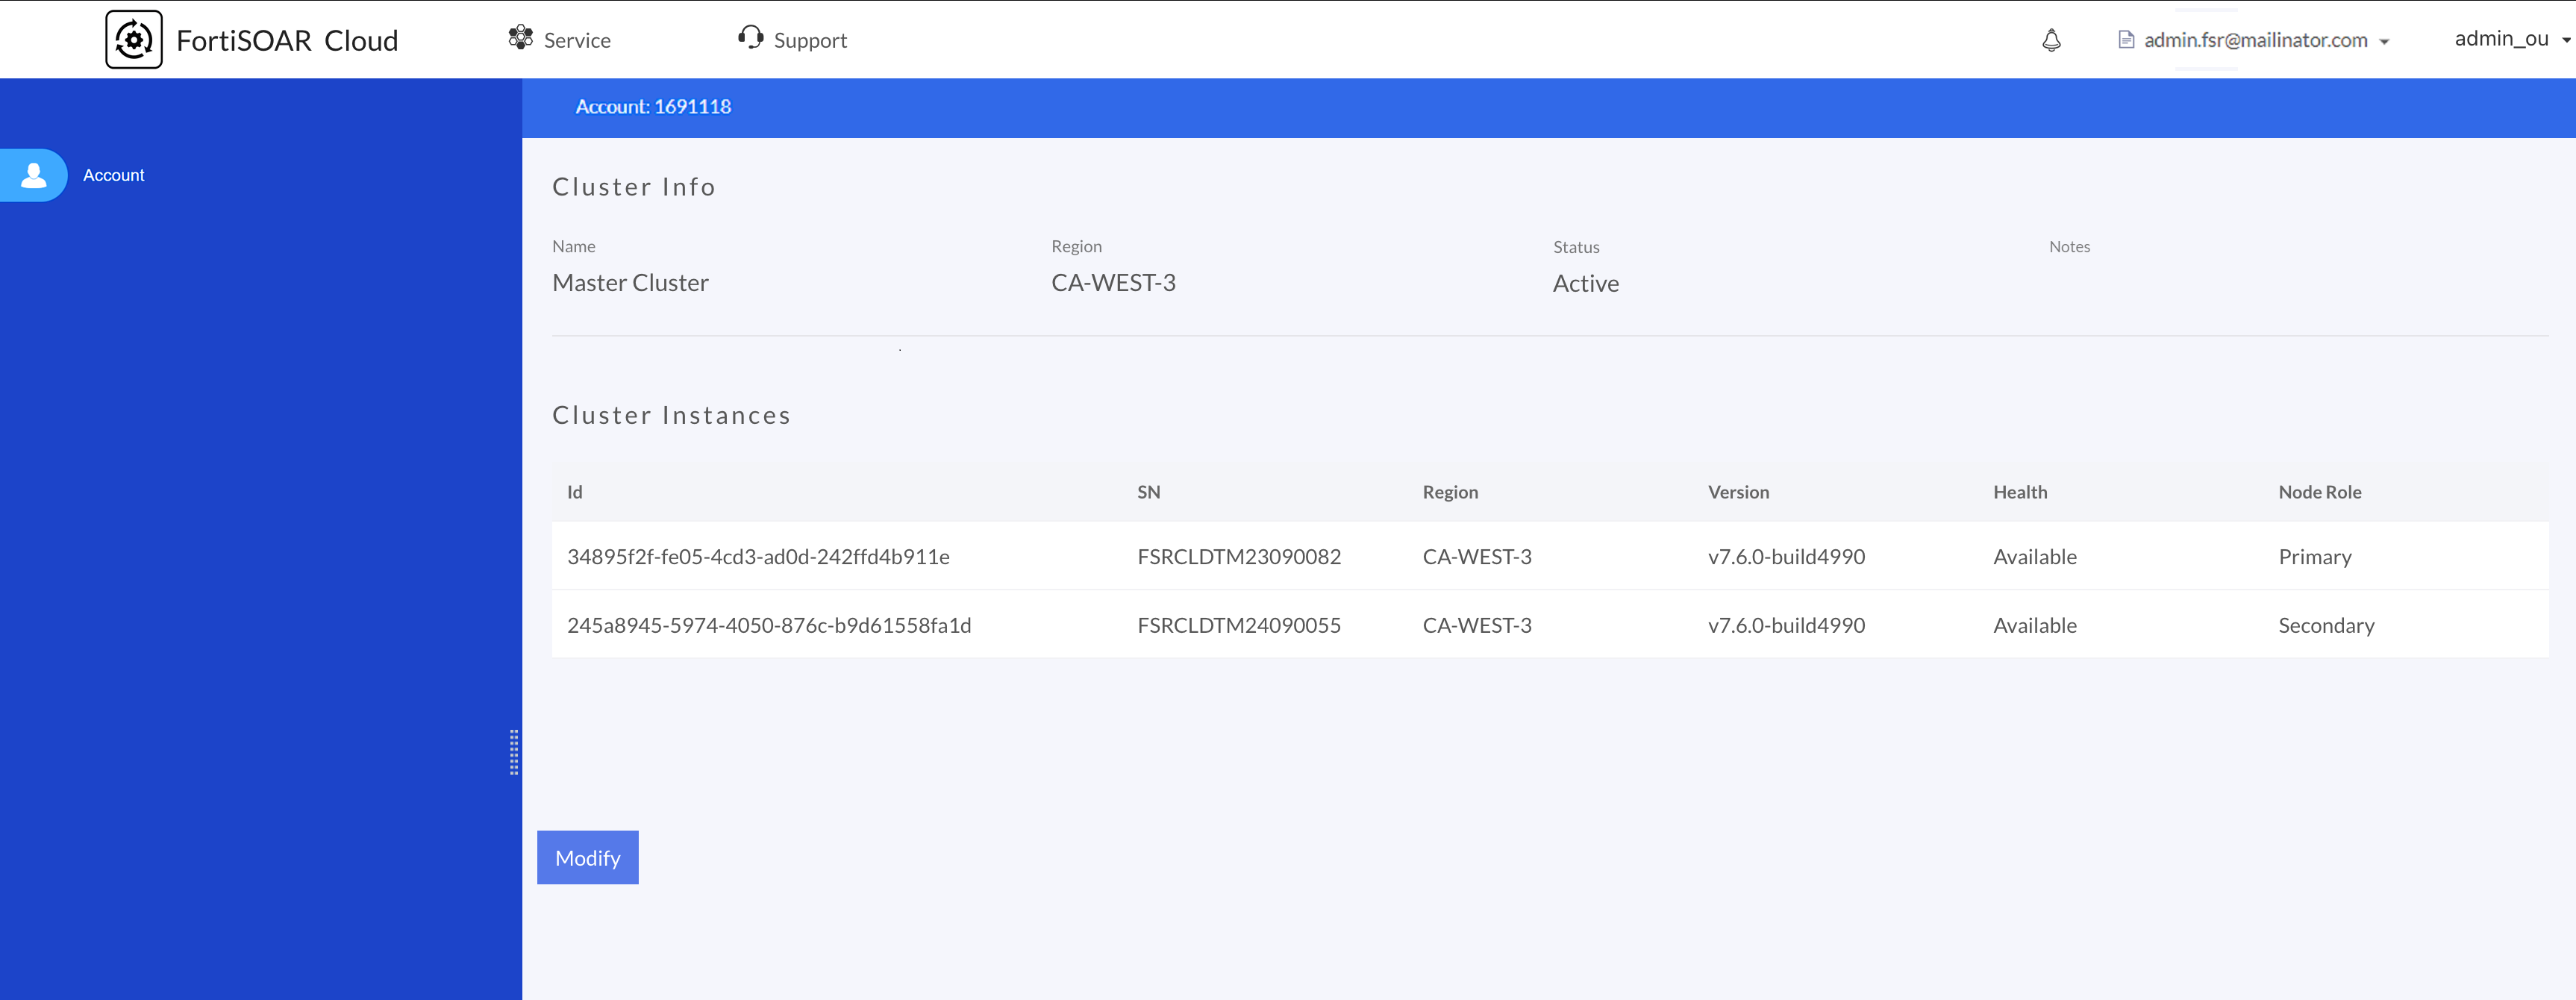
To make changes to the cluster, click the Modify button to access the Modify Cluster page: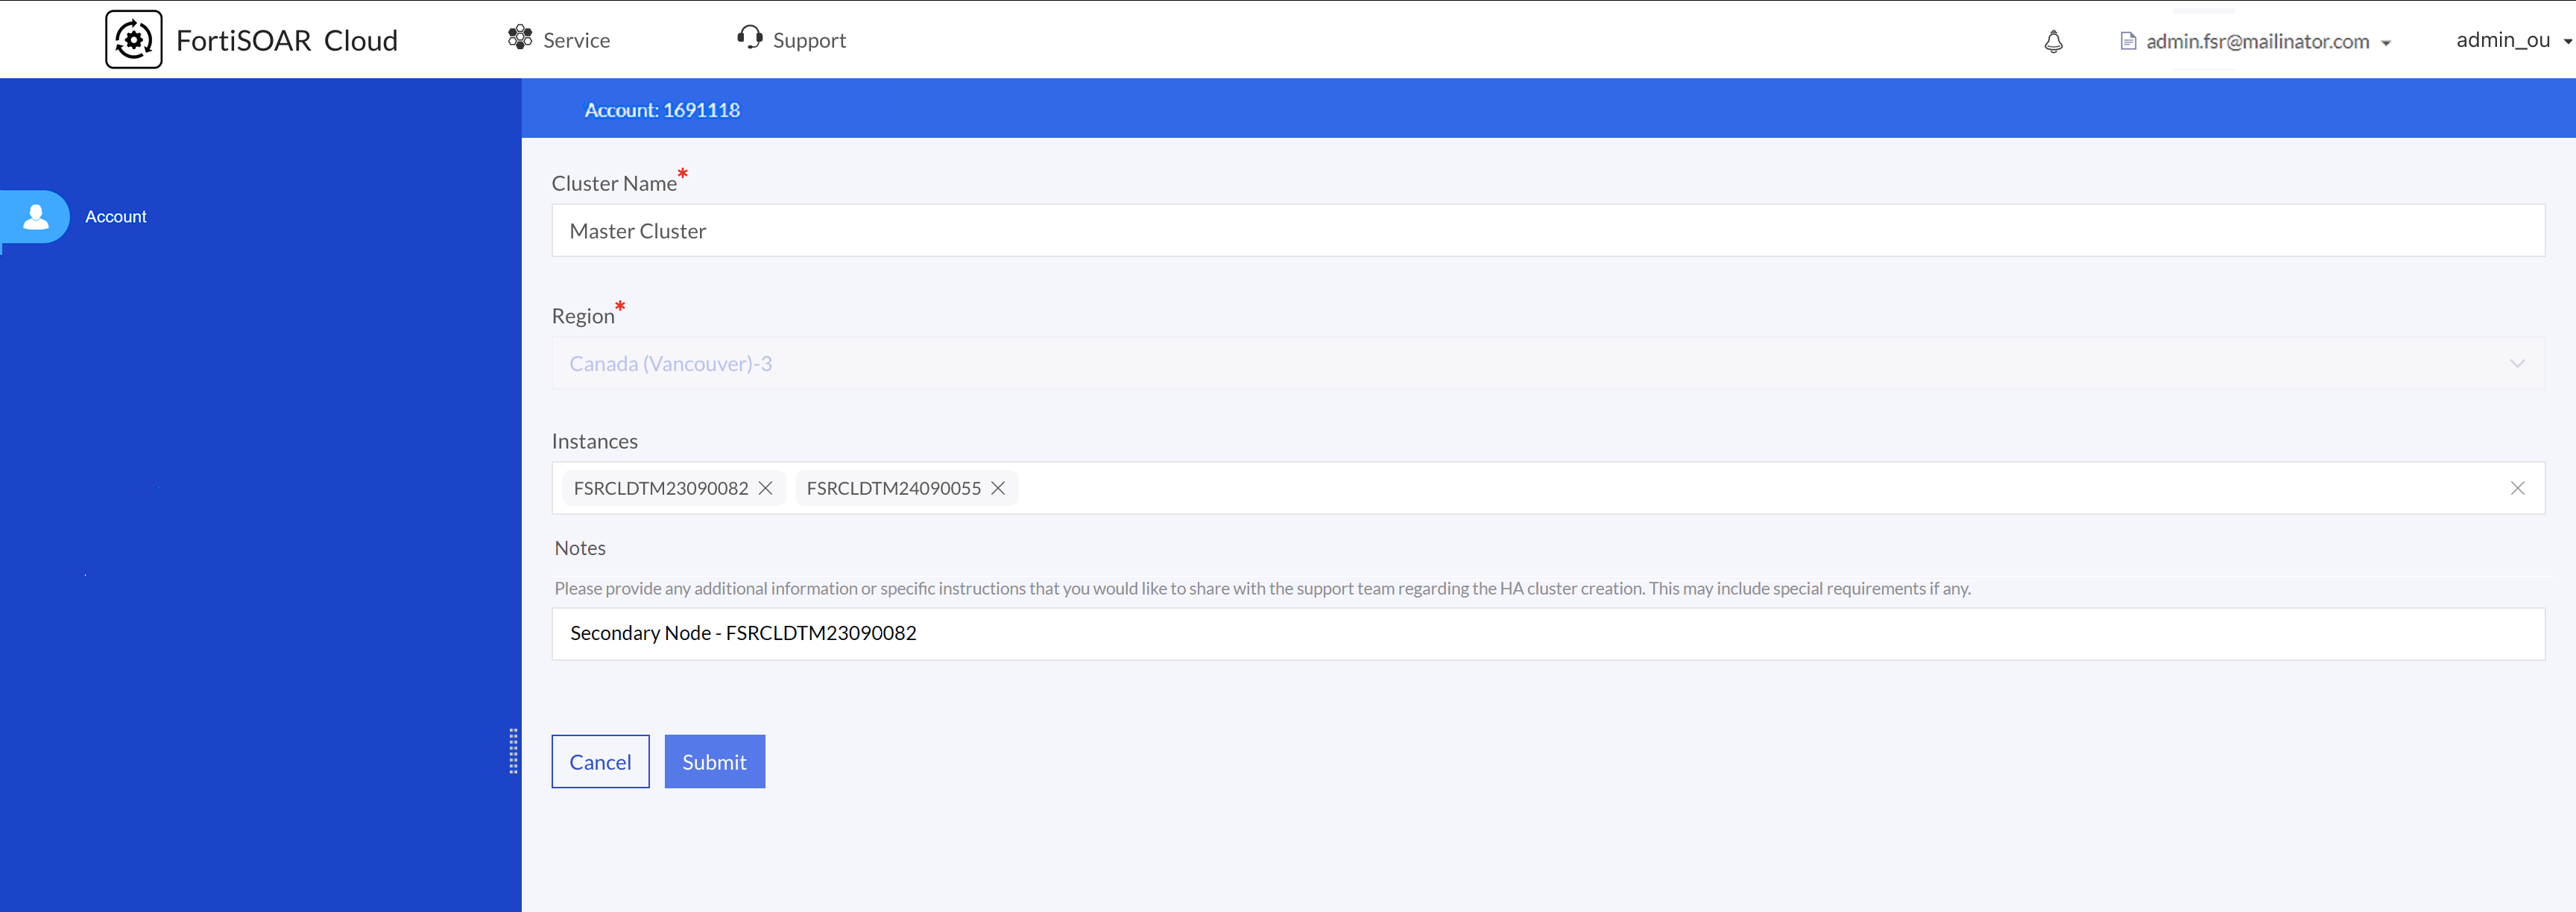
On the Modify Cluster page, where you can:
-
Update the cluster's name or notes.
- Add or remove instances.
- Add an instance: When you add an instance to the cluster, a notification is sent to Fortinet Support, who will update the cluster and load balancer. They will create a support ticket on your behalf and contact you if needed to complete the process. After the support team completes adding the instance to the existing FortiSOAR cluster, you will receive a notification and can view your cluster in your account.
- Remove an instance: When you remove an instance from the cluster, the cluster on FortiSOAR will be automatically broken.
For detailed information on high availability support in FortiSOAR, see the High Availability support in FortiSOAR chapter in the "FortiSOAR Administration Guide".
NOTE: The region of the cluster cannot be changed.