Fortinet white logo
Fortinet white logo

Administration Guide

File Job

File Job

Go to Scan Job > File Job to search and view all files. You can apply search filters to drill down the information displayed. Filenames can also be searched based on name patterns, and a snapshot report can be created for all search results.

If the device is the primary node of a cluster, all jobs processed by the cluster are available to be searched. If the device is a worker node of a cluster, only jobs processed by this device are available to be searched.

The following options are available:

Refresh

Click the Refresh icon to refresh the entries displayed after applying search filters.

Search

  • Click the plus symbol to open the Filterable Columns list. The filters include Detection, File Name, Rating, Malware, Source, Destination, Device, Email From, Email Subject, Email To, File MD5, File SHA1, File SHA256, File Type, Infected OS, Job ID, Job Status, Rated by, Scan Unit, Service, Submit User, Submit Filename and Suspicious Type.
  • Hover over a column heading to activate the filter icon. Click the icon to create a filter. The options will vary depending on the column.

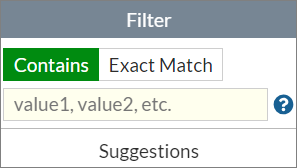
    To create a filter, enter values or select values from the Suggestions list, click Contains or Exact Match and click Apply.

    In the Detection column, you can use the date picker to choose the time period and apply a range that is equal to, greater or less than the time period.

    Click Resize to Contents to close the filter.

Job List

All the jobs that match your search criteria are displayed.

Click the sort icon to sort columns in ascending and descending order.

The File Name column displays the following icons:

  • Rescan job
  • Archive file
  • Archived file
  • Video available

The Rating column displays the following icons:

  • Manual overwrite
  • Customized rating
  • FortiGuard Allowlist/Blocklist

Export to Report

Select to open the Report Generator dialog box. Select to generate a PDF or CSV report. You can wait until the report is ready to view, or navigate away and find the report later in Log & Report > Report Center page.

Customize

Click the Customize icon to customize the Job View settings page. For more information, see Job View Settings.

Action

Click a job in the list to view more actions. The available actions are listed below.

View Details

Click the View Details to view file information. The information displayed in the view details page is dependent upon the file type and risk level.

Video

Click the Video button to play the video of the scan. Scan videos are available in On-Demand scans if the user has the privilege.

Perform Rescan

Click the icon to rescan the entry that is not rated by the dynamic scan.

Tooltip

The Perform Rescan icon is only available for malicious or suspicious jobs which are not rated by dynamic scan. In cluster mode, the icon is only available on the primary node.

In the Rescan Configuration dialog, you can force the job to perform a Sandboxing scan.

The rescan job will also be shown in Scan Job > File On-Demand.

The following information is displayed at the bottom right-hand corner of the page:

Display percentage

The percentage of jobs depending on your position in the page. The percentage increases as you scroll down the page.

Total Jobs

The number of file jobs available to view.

The displayed columns are determined by settings defined in System > Job View Settings > File Detection Columns page. For more information, see Job View Settings.

File Job

File Job

Go to Scan Job > File Job to search and view all files. You can apply search filters to drill down the information displayed. Filenames can also be searched based on name patterns, and a snapshot report can be created for all search results.

If the device is the primary node of a cluster, all jobs processed by the cluster are available to be searched. If the device is a worker node of a cluster, only jobs processed by this device are available to be searched.

The following options are available:

Refresh

Click the Refresh icon to refresh the entries displayed after applying search filters.

Search

  • Click the plus symbol to open the Filterable Columns list. The filters include Detection, File Name, Rating, Malware, Source, Destination, Device, Email From, Email Subject, Email To, File MD5, File SHA1, File SHA256, File Type, Infected OS, Job ID, Job Status, Rated by, Scan Unit, Service, Submit User, Submit Filename and Suspicious Type.
  • Hover over a column heading to activate the filter icon. Click the icon to create a filter. The options will vary depending on the column.

    To create a filter, enter values or select values from the Suggestions list, click Contains or Exact Match and click Apply.

    In the Detection column, you can use the date picker to choose the time period and apply a range that is equal to, greater or less than the time period.

    Click Resize to Contents to close the filter.

Job List

All the jobs that match your search criteria are displayed.

Click the sort icon to sort columns in ascending and descending order.

The File Name column displays the following icons:

  • Rescan job
  • Archive file
  • Archived file
  • Video available

The Rating column displays the following icons:

  • Manual overwrite
  • Customized rating
  • FortiGuard Allowlist/Blocklist

Export to Report

Select to open the Report Generator dialog box. Select to generate a PDF or CSV report. You can wait until the report is ready to view, or navigate away and find the report later in Log & Report > Report Center page.

Customize

Click the Customize icon to customize the Job View settings page. For more information, see Job View Settings.

Action

Click a job in the list to view more actions. The available actions are listed below.

View Details

Click the View Details to view file information. The information displayed in the view details page is dependent upon the file type and risk level.

Video

Click the Video button to play the video of the scan. Scan videos are available in On-Demand scans if the user has the privilege.

Perform Rescan

Click the icon to rescan the entry that is not rated by the dynamic scan.

Tooltip

The Perform Rescan icon is only available for malicious or suspicious jobs which are not rated by dynamic scan. In cluster mode, the icon is only available on the primary node.

In the Rescan Configuration dialog, you can force the job to perform a Sandboxing scan.

The rescan job will also be shown in Scan Job > File On-Demand.

The following information is displayed at the bottom right-hand corner of the page:

Display percentage

The percentage of jobs depending on your position in the page. The percentage increases as you scroll down the page.

Total Jobs

The number of file jobs available to view.

The displayed columns are determined by settings defined in System > Job View Settings > File Detection Columns page. For more information, see Job View Settings.