


Setting up a custom VM
Upload Custom VM
You can use the GUI to upload a Custom VM in appliance-based and private cloud FortiSandbox devices. Admins must have Read Write privileges to upload a custom VM.
|
|
This feature is not supported on AWS, Azure, GCP and FortiSandbox Cloud. |
|
|
Please refer to the FortiSandbox Custom VM Guide when creating your Custom VM. This guide is available to FortiSandbox customers with access to the Fortinet Developer Network or is available upon request from Customer Support. A Custom VM requires a perpetual license. Once the license is registered with FortiCloud, download it from the support site and then upload it to FortiSandbox. If successful, the License widget in the Dashboard will display a green icon indicating the VM is enabled and ready to use. |
To upload a custom VM:
- Go to Scan Policy and Object > VM Settings.
- In the toolbar, click Upload Custom VM.
- Configure the Custom VM.
Name
The name cannot exceed 15 characters. Only letters and numbers are supported.
CPU Cores
Default is 1.
Maximum of two cores are supported.
Memory
Default is 1024MB.
Maximum of 4096 MB memory is supported. Using a large size of memory may result in not being able to run the maximum number of clones allowed.
Activate VM
If the VM is pre-activated, please select this option and input the system UUID of the Custom VM, otherwise the VM may not remain in an activated status after uploading.
OS Type
Default is Windows7.
Options include: Windows7, Windows8, Windows10, Linux, etc.
Select VM Image
Select the Custom VM image file to be uploaded from the local folder. This should be a
vdifile.
- Click Upload VM Image. The system starts uploading VM images. Uplaod time will vary depending on your network.

- After the upload is complete, the system will automatically install the Custom VM. If the installation is successful, refresh the VM Settings page to view the VM in the Custom VMs list.
Configure a custom VM
Custom VM modification is supported on the appliance-based and private cloud. It is not supported on cloud deployments such as FortiSandbox on AWS and Azure and FortiSandbox Cloud. Admins must have "Read Write" privileges to modify a custom VM.
|
|
Please refer to the FortiSandboxCustom VM Guide when developing your Custom VM. This guide is available to FortiSandbox customers with access to the Fortinet Developer Network or is available upon request from Customer Support. A Custom VM requires a perpetual license. Once the license is registered with FortiCloud, download it from the support site and then upload it to FortiSandbox. If successful, the License widget in the Dashboard will display a green icon indicating the VM is enabled and ready to use. |
To modify a custom VM:
- Go to Scan Policy and Object > VM Settings.
- Under Custom VMs, ensure the Clone # is zero.

- Click the Customize VM icon
 .
. - Configure the VM settings that will be used for the VNC session only. FortiSandbox uses pre-defined VM resources for the Dynamic Scan.
VM Name The name cannot exceed 15 characters. Only letters and numbers are supported. CPU Cores Default is 1.
Maximum of two cores are supported. Once VNC terminates the CPU value reverts to default.
Memory Default is 1024.
Maximum of 4096 MB memory is supported. Once VNC terminates the Memory value reverts to default.
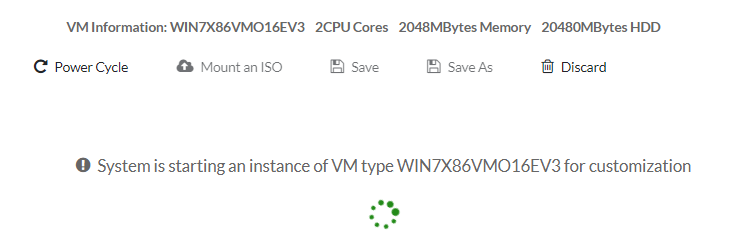
- Click Start. The system starts an instance of the VM type. This may take some time to complete.
- Click Mount an ISO to install the software. Only ISO format is supported.
The mounted ISO will be connected as CD drive. Alternatively, you can transfer files via file sharing site over the Internet. YOu should only visit a trusted site to avoid any unexpected changes on your VM.
- To allow the custom VM to connect to the Internet:
- Set IP 192.168.56.31/24 on the interface with the last 3 and 4 digits of the Mac address being 38. For example: 00-15-5D-C8-38-20
- Set IP 192.168.57.31/24 on another interface with the last 3 and 4 digits of the Mac address being 39. For example: 00-15-5D-C8-39-20
- Set the default gateway as 192.168.57.1
- Click Power Cycle to restart the instance.
- To save your modifications, shutdown first the custom VM instance via VNC.
- Click the Save icon to save all changes.
- Click the Save As icon to save changes and then assign the current instance under a new name.
- (Optional) Return to VM Settings and click the Download icon
 to download the VDI of all un-used custom VM(s).