Preparing VM subnet for FortiSandbox
Creating a private subnet
The Private Subnet ( IPv4 CIDR 10.0.1.0/24) is connected to all VM clones and FSA-VM.
- Click Create Subnet. The Create Subnet dialog box will open.
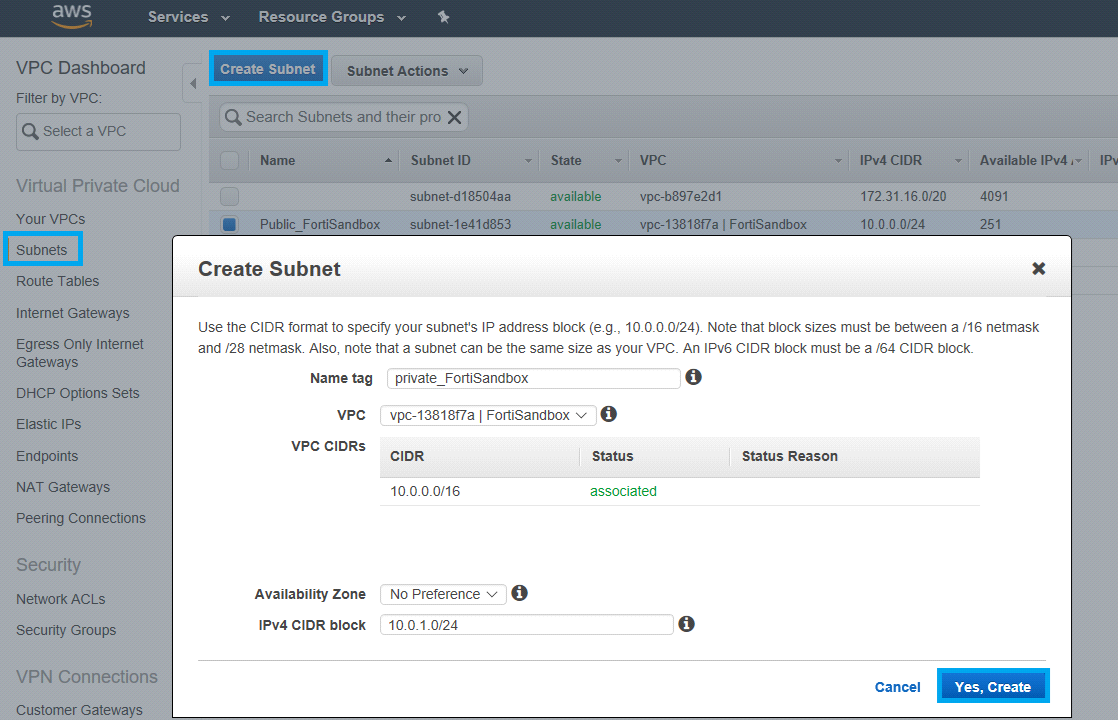
- Under the Name Tag field, enter a name. For example,
private_FortiSandbox. - Under VPC, select the VPC you created.
- In the IPv4 CIDR block field, enter
10.0.1.0/24(for private subnet). - Click on Yes, Create.
Creating a NAT gateway and setting the route table
|
|
The NAT/Internet Gateway for Private subnet is not recommended by AWS security team, and should be temporary for testing and not running real malware |
|
|
AWS security recommends to use AWS VPN or AWS Direct Connect to route out of an egress point to any third party Internet provider. |
To create a NAT Gateway:
- Under Virtual Private Cloud select NAT Gateways.
- Click Create NAT Gateway and select the public subnet you created.
- Under the Subnet drop down, select the Elastic IP you created.
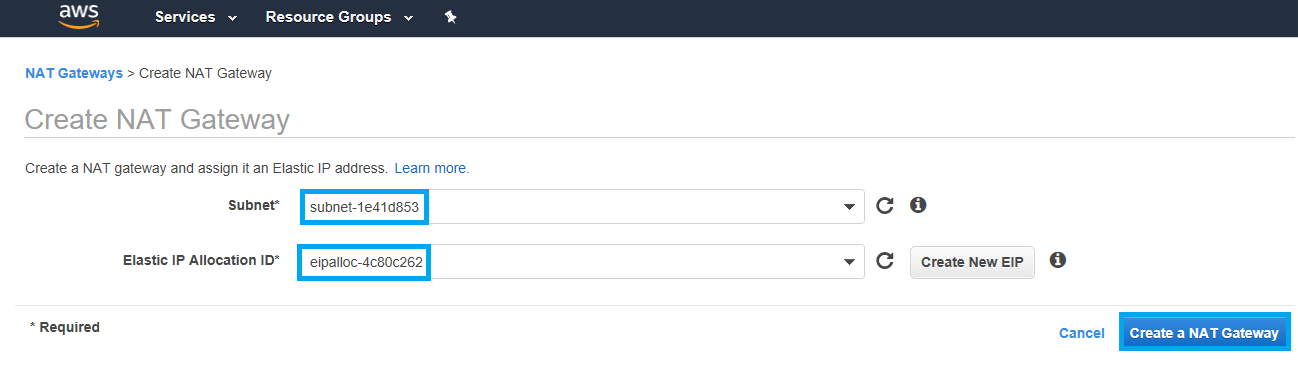
- Click Create a NAT Gateway.
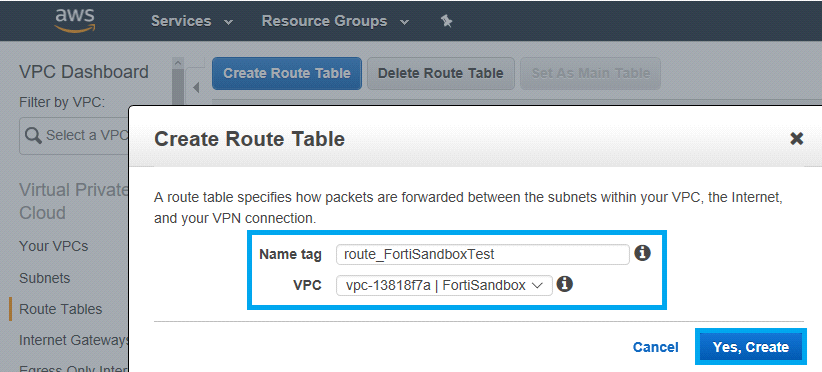
- Under Virtual Private Cloud select Route Tables.
- Click Create Route Table for the public subnet.
- In the Name Tag field, enter a name.
- In the VPC field, select the VPC you created. Click Yes, Create.
- Go to Subnet Associations.
- Click Edit, select the public subnet, then click Save.
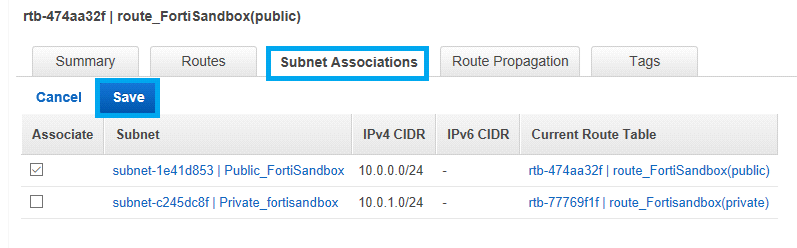
- Go to Routes, click Add Another Route
- In the Destination field, enter
0.0.0.0/0. - In the Target field, select the Internet Gateway for public subnet you created.
- Click Save.
- Repeat the steps to create a route table for your private subnet.
Creating and attaching DHCP options to VPC
- Under Virtual Private Cloud, select DHCP Options Sets.
- Click Create DHCP Options Sets.
- Under the Name Tag field, enter a name. For example, dhcp_fortisandbox.
- In the Domain Name Servers field, enter the primary IP address you provided when creating
eth1. If auto-assigned, enter the IP address from Instance Details.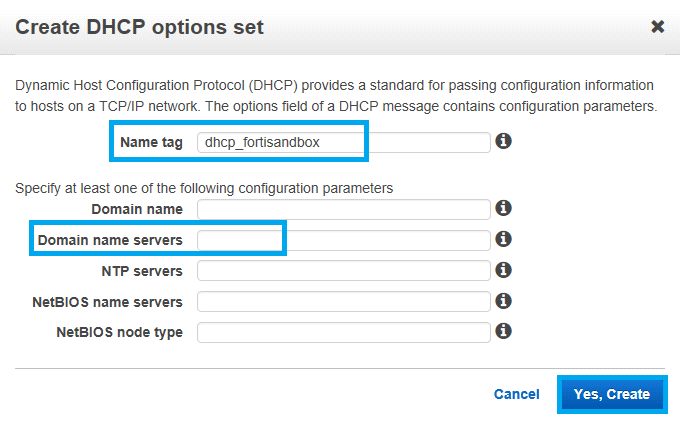
- Click Yes, Create.
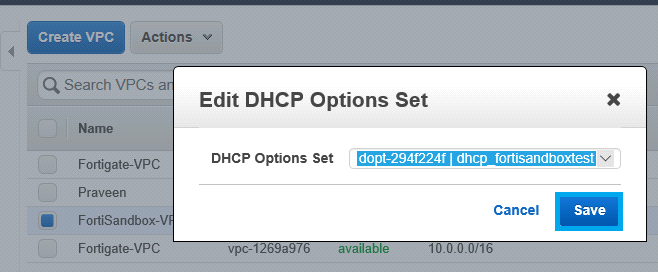
- Go back to Your VPCs. Right click the VPC entry you created and select Edit DHCP Options Set.
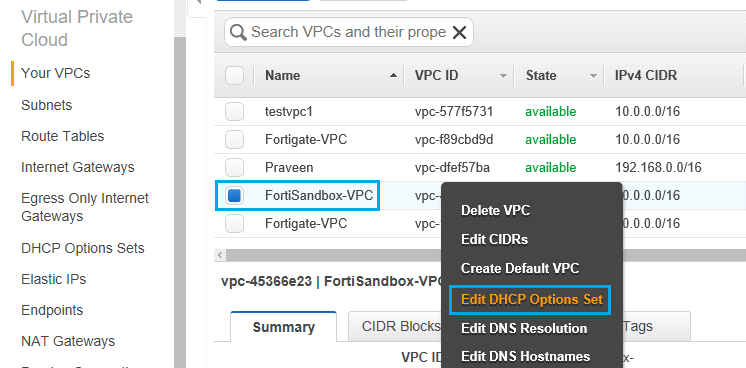
- Choose the created DHCP options set and click Save.