


Configuring native browser isolation in FortiProxy
To configure native browser isolation in the FortiProxy GUI:
-
Configure an HTTP portal for the client to download the isolator image:
-
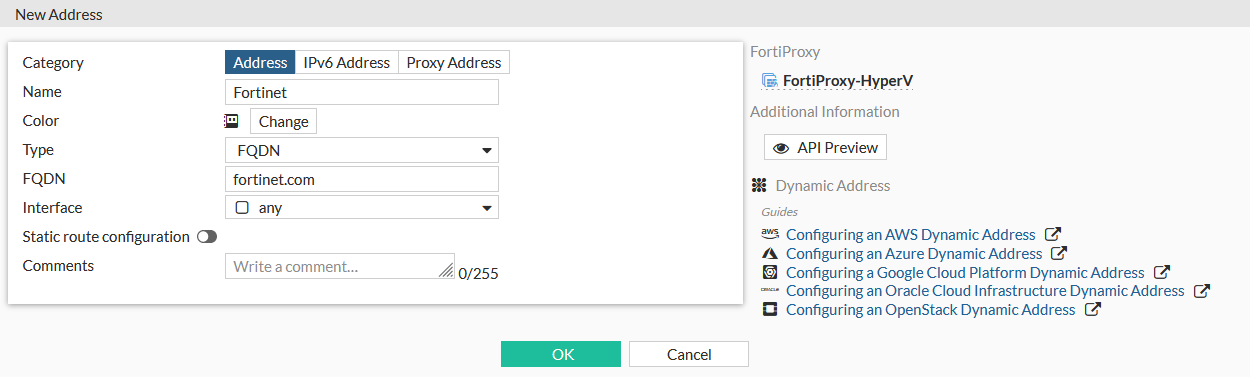
Go to Policy & Objects > Addresses and click Create New > Address.
-
Enter a name for the address.
-
Set Type to FQDN.
-
Enter the FQDN.
-
Click OK.
-
- Enable Captive Portal:
Go to Policy & Objects > Proxy Auth Setting.
Enable Captive Portal and select the just create address.
Set the Captive Portal Port.
Set Captive Portal Type to FQDN.

Click Apply.
-
Enable captive portal on the interface:
-
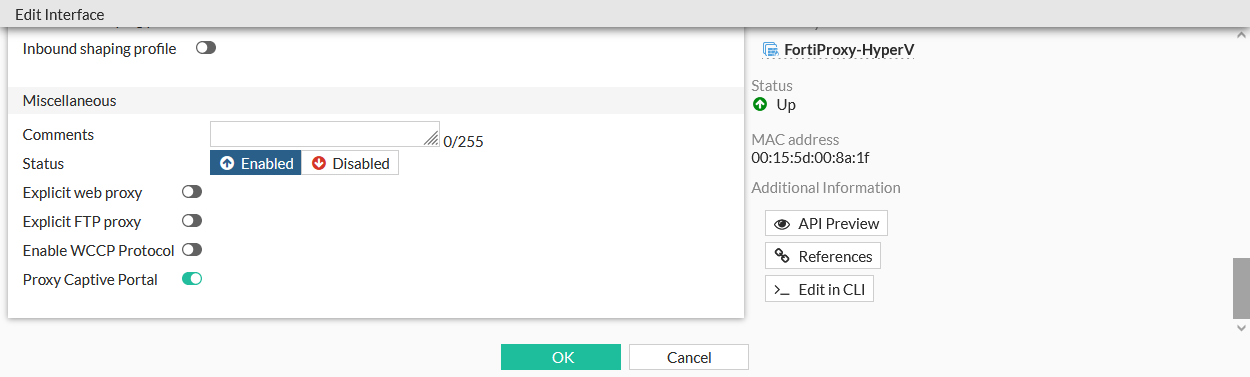
Go to Network > Interfaces and edit the interface.
-
Enable Proxy Captive Portal.
-
Click OK.
-
-
Configure a firewall proxy address:
-
Go to Policy & Objects > Addresses and click Create New > Address.
-
Set Category to Proxy Address.
-
Enter a name for the address, such as 1.
-
Set Host to all and enter the URL Path Regex.

-
Click OK.
-
-
Configure an isolator profile that uses the proxy address:
-
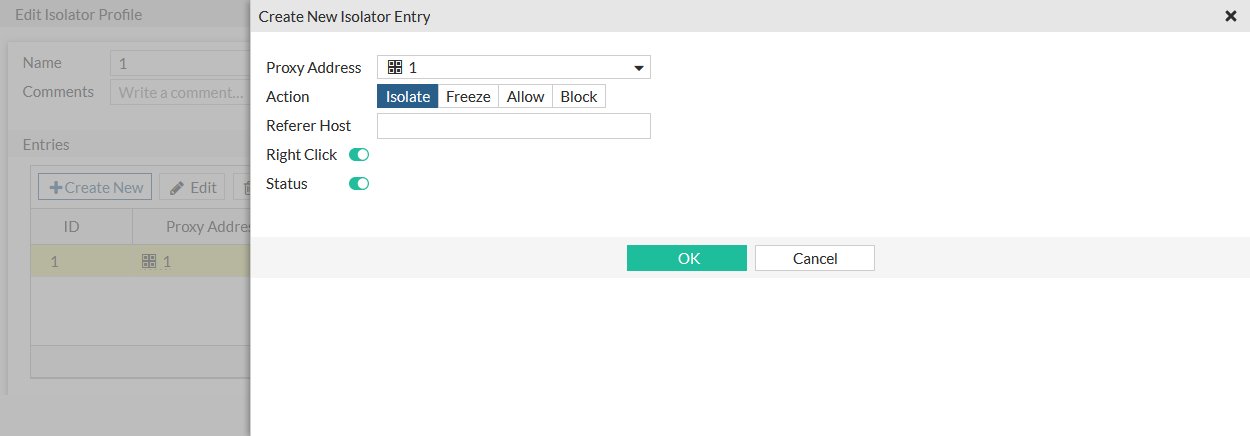
Go to Security Profiles > Isolator Profile and click Create New.
-
Enter a name for the profile.
-
In the Entries table, click Create New.
-
Select the Proxy Address.
-
Set Action to Isolate.
-
Click OK.

-
Click OK.
-
-
Configure an SSL/SSH profile with full ssl inspection:
-
Go to SSL/SSH Inspection and click Create New.
-
Enter a name for the profile, such as test.
-
In Enable SSL inspection of, select Multiple Clients Connecting to Multiple Servers.
- In Inspection method, select Full SSL Inspection.
-
In CA Certificate, select a CA certificate from the drop-down menu.
Later you will need to install the certificate in the browser of each machine that uses Native Browser Isolation to avoid certificate warnings.
-
Configure the other settings as required, then click OK.
See the FortiProxy Administration Guide for more information about the configuration options.
-
-
Configure a firewall policy that uses the isolator and SSL/SSH profiles:
-
Go to Policy & Objects > Policy and click Create New.
-
Configure the following:
Type
Explicit
Explicit Web Proxy
web-proxy
Outgoing Intergave
any
Source
all
Destination
all
Schedule
always
Service
webproxy
Action
Accept
SSL/SSH Inspection
test
Isolator
1
Comments
isolator traffic inspect
-
Click OK.
-
To configure native browser isolation in the CLI:
-
Configure an HTTP portal for the client to download the FortiNBI isolator image:
config firewall address edit "Fortinet" set type fqdn set fqdn "fortinet.com" next end -
In the authentication settings, set the captive portal name:
config authentication setting set captive-portal "Fortinet" end -
Enable captive portal on the interface:
config system interface edit <interface> set proxy-captive-portal enable next end -
Configure a firewall proxy address:
config firewall proxy-address edit "1" set host "all" next end -
Configure an isolator profile that uses the proxy address:
config isolator profile
    edit "1"
        config entries
            edit 1
                set proxy-address "1"
                set action isolate
                set status enable
            next
        end
    next
end
proxy-address <proxy-address>
Choose the proxy-address for this isolator profile entry.
action {block | allow | freeze | isolate}
Choose the action for this isolator entry:
-
isolate: Open the website in an isolated browser (default). -
freeze: Freeze the website. The user is able to unfreeze and get access to the website when they accept the risk. -
block: Block the traffic to the website. -
allow: Bypass the traffic to the website.
status {enable | disable}
Enable/disable this isolator entry (default = enable).
-
-
Configure an SSL/SSH profile with full SSL inspection:
config firewall ssl-ssh-profile edit "test" config https set ports 443 set status deep-inspection end config ftps set ports 990 set status deep-inspection end config imaps set ports 993 set status deep-inspection end config pop3s set ports 995 set status deep-inspection end config smtps set ports 465 set status deep-inspection end config ssh set ports 22 set status disable end config dot set status disable end next end -
Configure a firewall policy that uses the isolator and SSL/SSH profiles:
config firewall policy
    edit 2
        set type explicit-web
        set dstintf "any"
        set srcaddr "all"
        set dstaddr "all"
        set action accept
        set schedule "always"
        set service "webproxy"
        set explicit-web-proxy "web-proxy"
        set utm-status enable
        set comments "isolator traffic inspect"
        set ssl-ssh-profile "test"
        set isolator-profile "1"
    next
end