
IPAM DHCP templates New
DHCP template support allows interfaces to inherit DHCP settings from reusable templates. This introduces a DHCP Template table and extends DHCP server attributes to support template-based configurations. IPAM rules and interfaces can now reference a DHCP template, enabling consistent and scalable DHCP configuration across interfaces.
For example, when the same DHCP server configuration is required on multiple interfaces, templates eliminate the need to configure the DHCP server settings on each interface manually. Instead, the shared template can be applied, ensuring consistency while reducing configuration effort and errors.
This feature works on a standalone FortiGate or in a Security Fabric.
DHCP Templates can be configured in the GUI on the Network > IPAM > DHCP Templates page (IPAM does not need to be enabled), or in the CLI using the config system dhcp template command; see config system dhcp template in the CLI Reference for details.
The config dhcp server and config system ipam commands are also updated:
-
DHCP server:
config system dhcp server
    edit <server>
        set template <string>
        set template-subnet <class_ip&net_netmask>
        set template-subnet-from-interface {enable | disable}
        set dhcp-settings-from-fortiipam {enable | disable}
    next
end
Command
Description
template <string>
DHCP template associated with the server.
template-subnet <class_ip&net_netmask>
Configure template subnet.
template-subnet-from-interface {enable | disable}
Enable/disable using interface subnet as DHCP template subnet.
dhcp-settings-from-fortiipam {enable | disable}
Enable/disable populating of DHCP server settings from FortiIPAM.
-
IPAM rule:
config system ipam
    config rules
        edit <rule>
            set dhcp-template <string>
        next
    end
end
Command
Description
dhcp-template <string>
DHCP template for assigned interface.
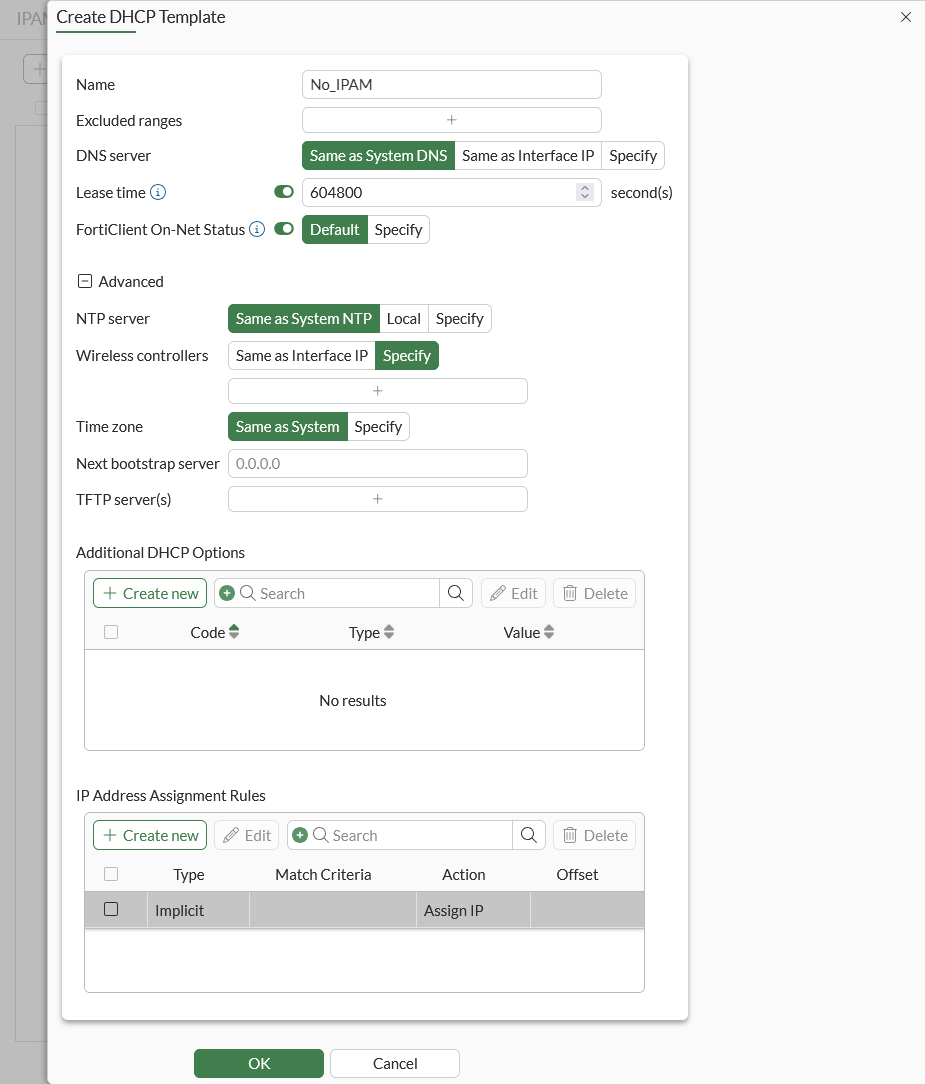
To create a DHCP template in the GUI:
-
Go to Network > IPAM > DHCP Templates and click Create new.
-
Configure the new DHCP template.
-
Click OK.
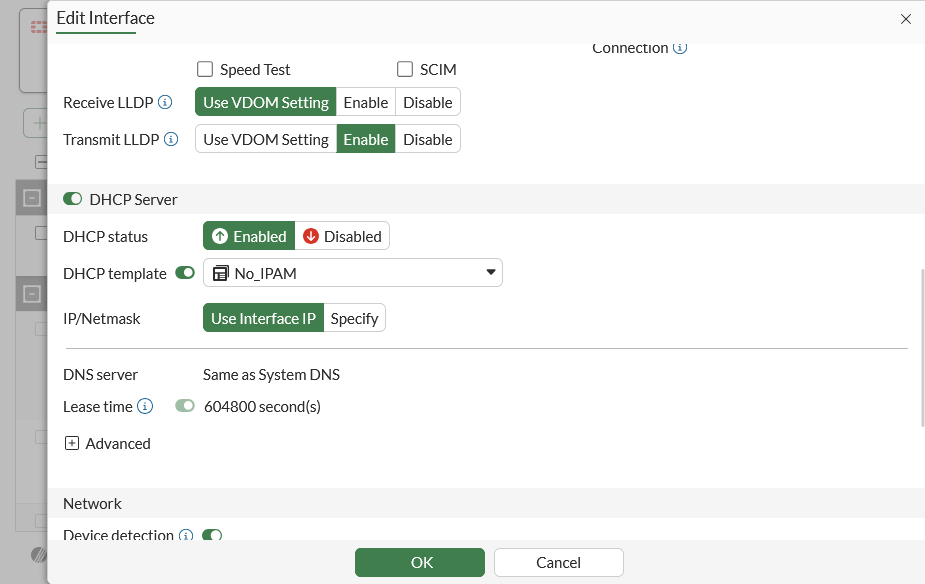
To use the DHCP template as the DHCP server in an interface:
-
Go to Network > Interfaces and edit an interface.
-
Enable DHCP template and select the DHCP template.
-
Click OK.
To use a DHCP template with IPAM:
-
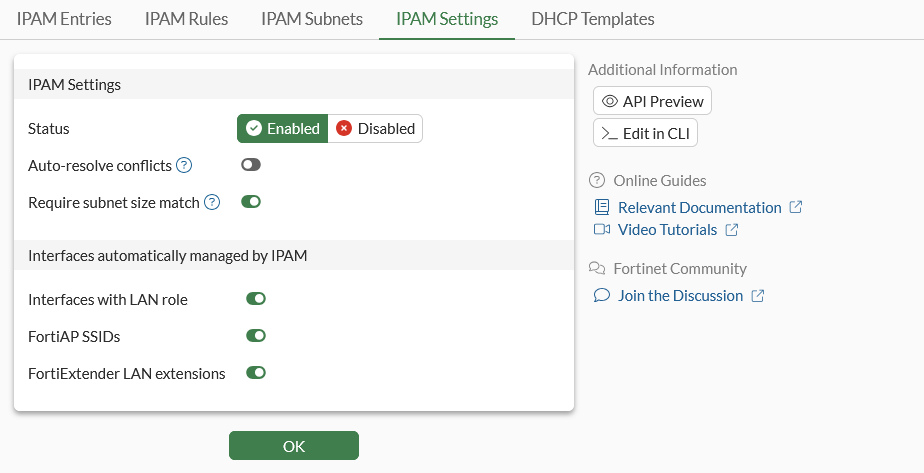
Enable IPAM:
-
Go to Network > IPAM > IPAM Settings.
-
Set Status to Enabled and then click OK.
-
-
Create a DHCP Template and enable Security Fabric global object for it:
config system dhcp template
    edit "with_IPAM"
        set fabric-object enable
    next
end
In a Security Fabric, the downstream FortiGate will inherit the upstream DHCP template when
fabric-objectis enabled. -
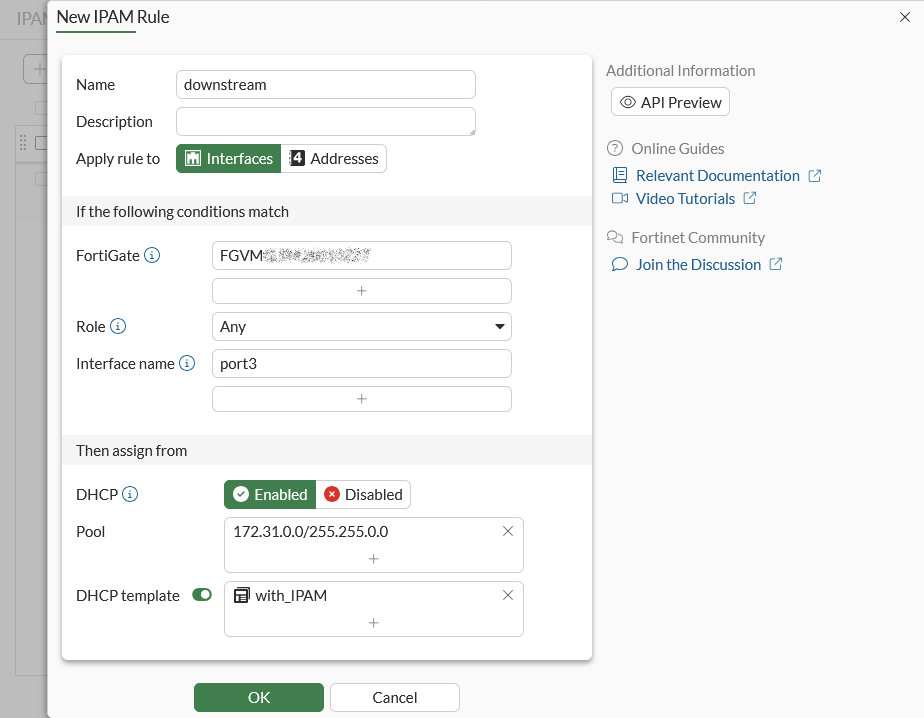
Create an IPAM rule:
-
Go to Network > IPAM > IPAM Rules and click Create new.
-
Set Interface name to port3.
-
Enable DHCP and set Pool to 172.31.0.0/255.255.0.0.
-
Enable DHCP template and then select the DHCP template.
-
Configuring the remaining settings as needed.
-
Click OK.
-
-
Assign an IP address and DHCP template to an interface using the IPAM:
-
Go to Network > Interfaces and edit port3.
-
Set Addressing Mode to IPAM and leave Network size as the default subnet.

-
Click OK.
-
-
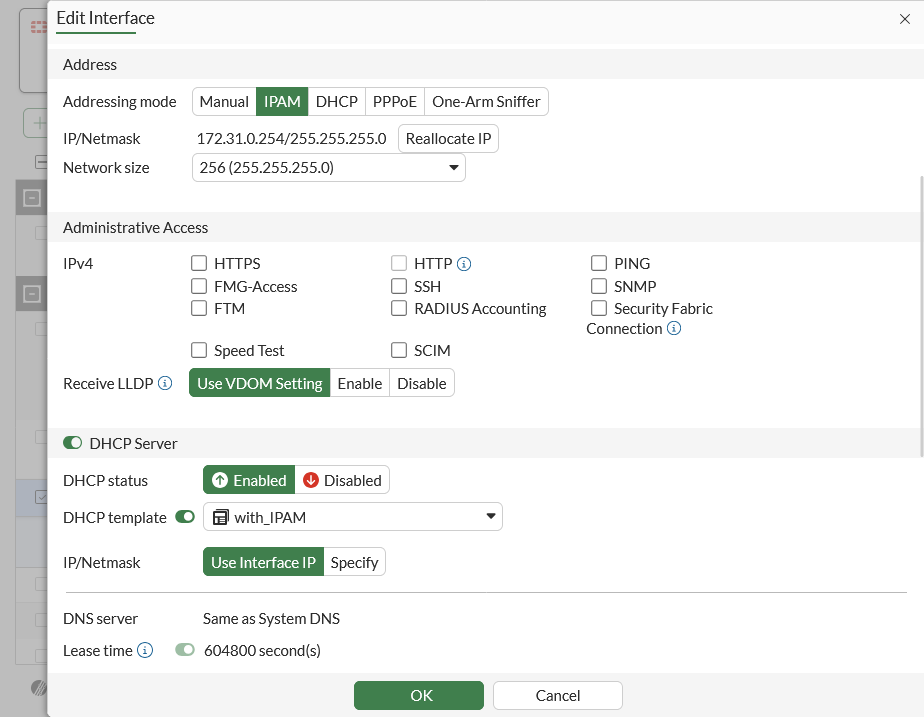
Edit port3 again:
Because IPAM is managing a 172.31.0.0/16 network, the IP/Netmask field is automatically assigned a class C IP by IPAM. The DHCP Server section is also automatically configured by IPAM using the DHCP template.
-
Click OK.