


Attaching a VPC to the TGW
You can attach an existing VPC to the FortiGate Autoscale with Transit Gateway (TGW) environment by manually creating a TGW attachment and adding the necessary routes, propagations, and associations:
- Create a TGW attachment.
- Create a route to the TGW.
- Create a propagation in the inbound route table.
- Create an association in the outbound route table.
|
|
The CIDR block for the VPC you are attaching must differ from that of the FortiGate Autoscale VPC. |
The following instructions attach the VPC transit-gateway-demo-vpc01 with CIDR 10.0.0.0/16 to the FortiGate Autoscale with Transit Gateway environment.

To create a TGW attachment:
- In the left navigation tree, click TRANSIT GATEWAYS > Transit Gateway Attachment.
- Click Create Transit Gateway Attachment.
- Specify information as follows:
- Transit Gateway ID: select the desired TGW ID from the dropdown list.
- Attachment type: select VPC.
- Attachment name tag: enter a desired tag.
- VPC ID: select from the dropdown menu
- Subnet IDs: This option appears once the VPC ID has been selected. Check the Availability Zone check box(es) and choose one subnet per Availability Zone.
- Click Create attachment.
- Wait for the State to change from pending to available.
The Name is what you specified for the Attachment name tag.
- When the State is available, click the Resource ID to go to the VPC.

To create a route to the TGW:
- In the VPC, click the Route table.

- Click the Routes tab and then click Edit routes.

- Click Add route and specify the Destination, for example, 10.1.0.0/16. Under Target, select Transit Gateway.
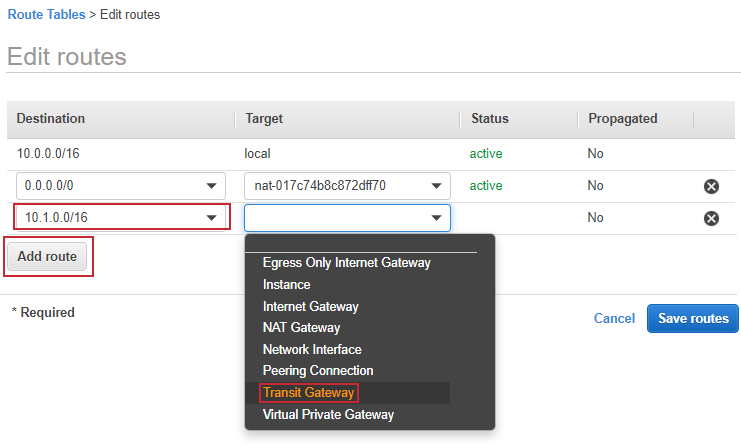
- The dropdown displays available TGWs. Select the one that the deployment stack created and click Save routes.

|
|
If you want to route all traffic to the TGW, add a new route for destination 0.0.0.0/0. If this route already exists, remove the route and add a new one for the same destination with the target set to the TGW that the deployment stack. |
To create a propagation in the inbound route table:
- In the left navigation tree, click Transit Gateways > Transit Gateway Route Tables.
- Select the <ResourceTagPrefix>-transit-gateway-route-table-inbound route table.
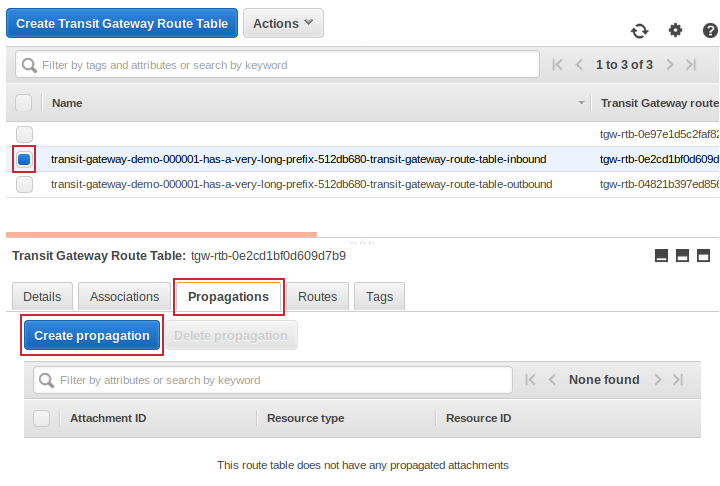
- Click the Propagations tab and then click Create propagation.
- From Choose attachment to propagate, select the attachment created in the section To create a TGW attachment:.
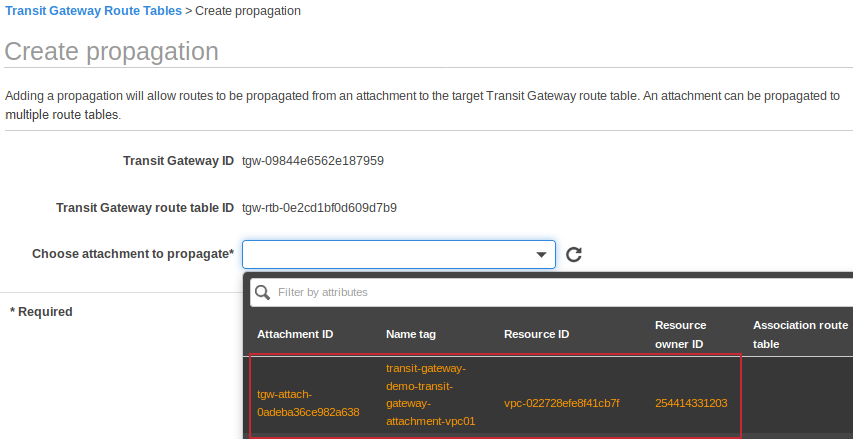
- Click Create propagation and then click Close.
- The new propagation with Resource type VPC is now listed on the Propagations tab.

- Click the Routes tab to see that the route for your VPC has been automatically propagated.

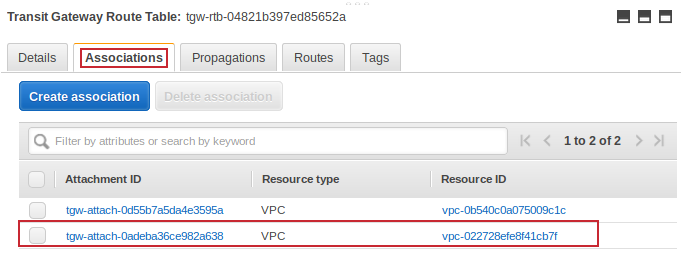
To create an association in the outbound route table:
- In the left navigation tree, click Transit Gateways > Transit Gateway Route Tables.
- Select the <ResourceTagPrefix>-transit-gateway-route-table-outbound route table.

- Click the Associations tab and then click Create association.
- From Choose attachment to associate, select the attachment created in the section To create a TGW attachment:.
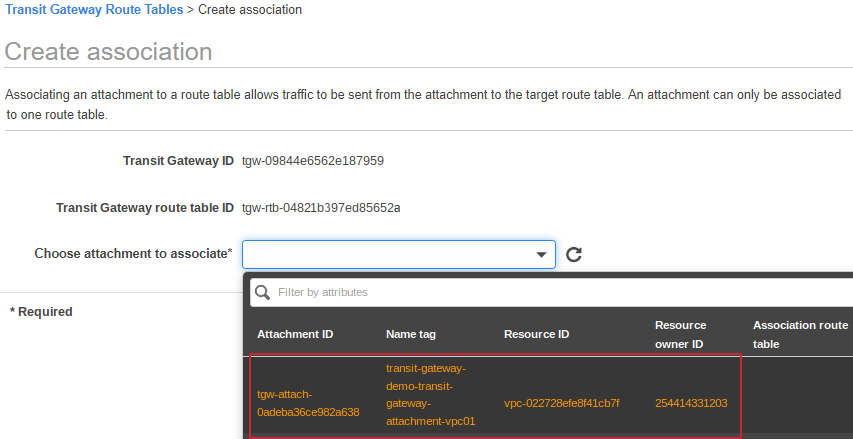
- Click Create association and then click Close.
- The new association with Resource type VPC is now listed on the Associations tab.
The VPC is now connected to the FortiGate Autoscale TGW. For a technical view of attaching VPCs to the FortiGate Autoscale TGW, see the architectural diagram.