Creating certificates in FortiAuthenticator
Creating certificates in FortiAuthenticator
To create certificates in FortiAuthenticator:
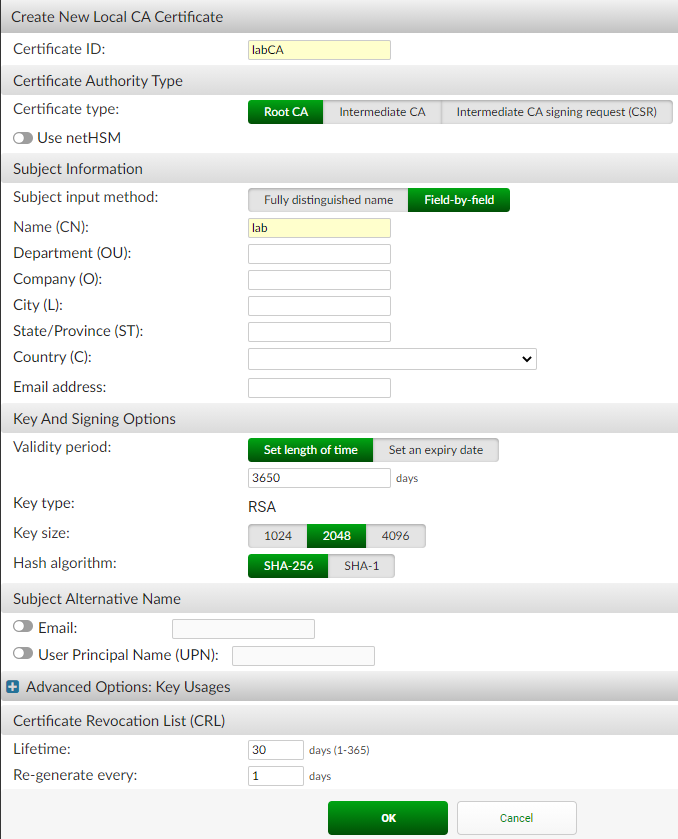
- Configure the CA certificate:
- Go to Certificate Management > Certificate Authorities > Local CAs.
- Click Create New.
- Enter the desired values in the Certificate ID and Name (CN) fields.
- Configure other fields as desired.
- Click OK.

- On the Local CAs pane, select the checkbox for the newly created certificate, then click Export Certificate.
- Save the certificate in a location that you can upload it to FortiOS from.
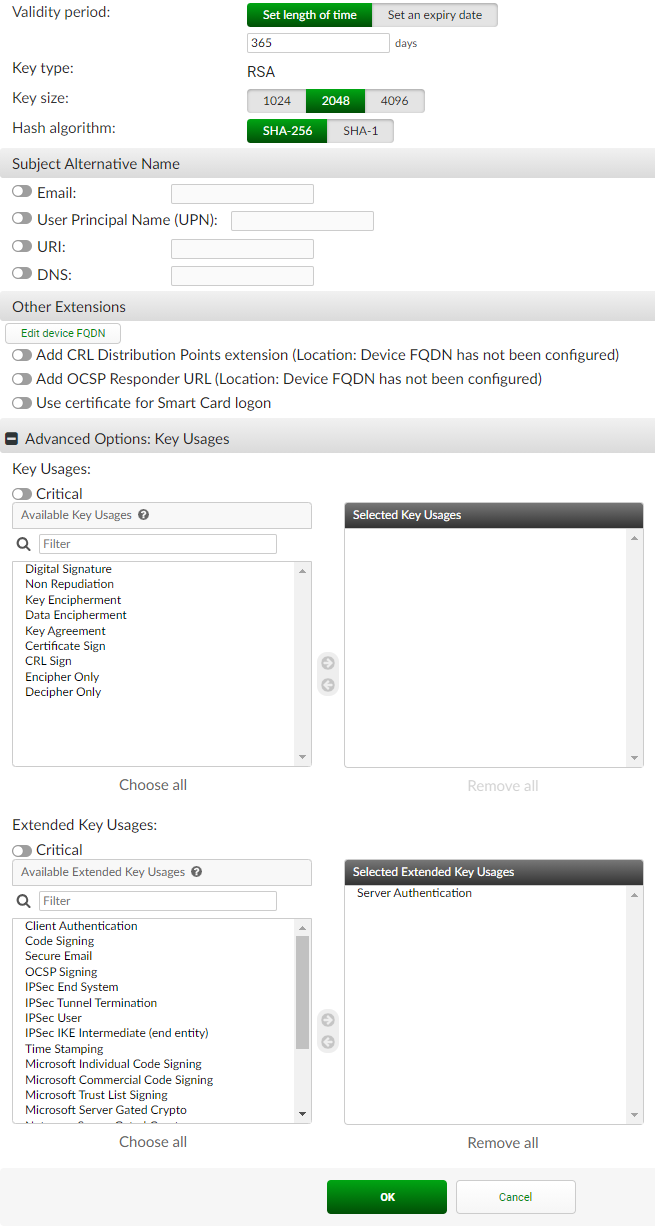
- Configure the server certificate:
- Go to Certificate Management > End Entities > Users.
- Click Create New.
- In the Certificate ID field, enter the desired certificate name.
- By default, the Issuer field is set to Local CA, and if you have only one local CA, it is preselected in the Certificate authority dropdown list. Ensure that the certificate you created in step 1 is selected.
- In the Name (CN) field, enter the desired IP address. You must enter an IP address, as this is what FortiClient uses to connect to the VPN tunnel.
- Under Advanced Options: Key Usages > Extended Key Usages, select Server Authentication and move it from the left to the right pane. Click OK.

- On the Users pane, select the checkbox for the newly created certificate, then click Export Key and Cert.
- Enter a strong password, then click OK.
- FortiAuthenticator warns that the private key is removed from FortiAuthenticator following the download. Save the certificate in a location that you can upload it to FortiOS from.
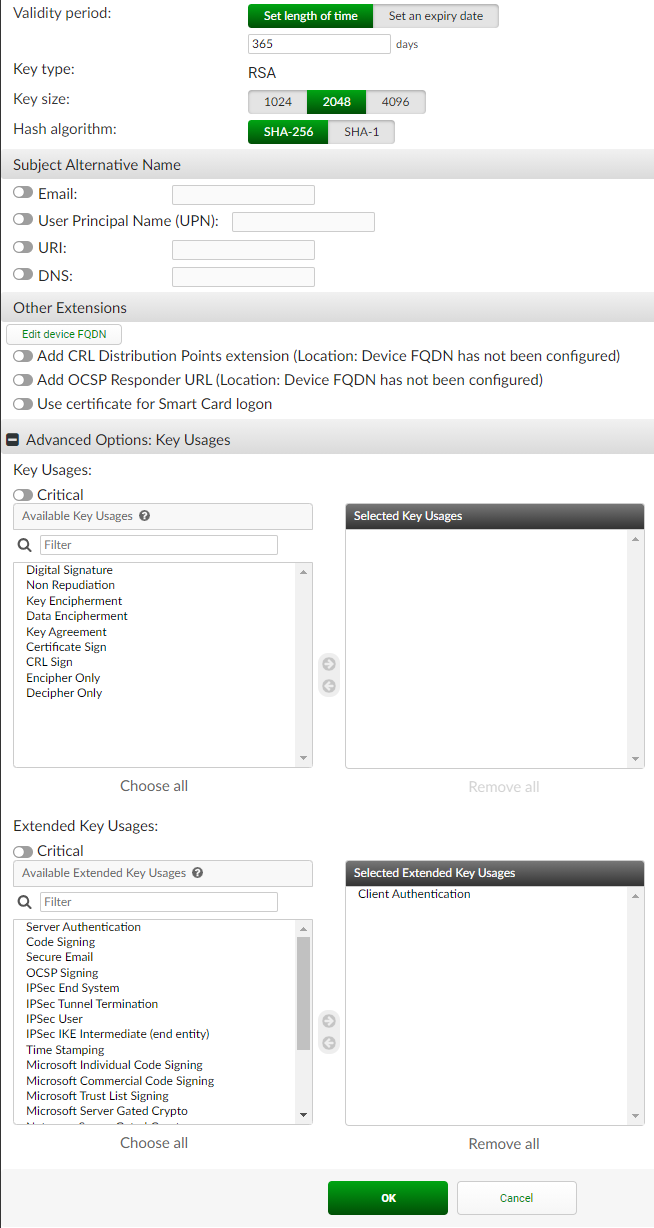
- Configure the client certificate by repeating the instructions in step 2, except for step f. Instead of Server Authentication, select Client Authentication and move it from the left to the right pane.

Creating certificates in FortiAuthenticator
Creating certificates in FortiAuthenticator
To create certificates in FortiAuthenticator:
- Configure the CA certificate:
- Go to Certificate Management > Certificate Authorities > Local CAs.
- Click Create New.
- Enter the desired values in the Certificate ID and Name (CN) fields.
- Configure other fields as desired.
- Click OK.

- On the Local CAs pane, select the checkbox for the newly created certificate, then click Export Certificate.
- Save the certificate in a location that you can upload it to FortiOS from.
- Configure the server certificate:
- Go to Certificate Management > End Entities > Users.
- Click Create New.
- In the Certificate ID field, enter the desired certificate name.
- By default, the Issuer field is set to Local CA, and if you have only one local CA, it is preselected in the Certificate authority dropdown list. Ensure that the certificate you created in step 1 is selected.
- In the Name (CN) field, enter the desired IP address. You must enter an IP address, as this is what FortiClient uses to connect to the VPN tunnel.
- Under Advanced Options: Key Usages > Extended Key Usages, select Server Authentication and move it from the left to the right pane. Click OK.

- On the Users pane, select the checkbox for the newly created certificate, then click Export Key and Cert.
- Enter a strong password, then click OK.
- FortiAuthenticator warns that the private key is removed from FortiAuthenticator following the download. Save the certificate in a location that you can upload it to FortiOS from.
- Configure the client certificate by repeating the instructions in step 2, except for step f. Instead of Server Authentication, select Client Authentication and move it from the left to the right pane.


