


Deploying FortiAuthenticator-VM on Xen
Once you have downloaded the out.xen.zip file and extracted the package contents to a folder
on your management computer, you can deploy the VHD package to your Xen environment.
To deploy and configure the virtual machine:
- Launch Virtual Machine Manager (virt-manager) on your Open Xen host server. The Virtual Machine Manager homepage opens.
- Select Create a new virtual machine from the toolbar.
- Configure the VM:
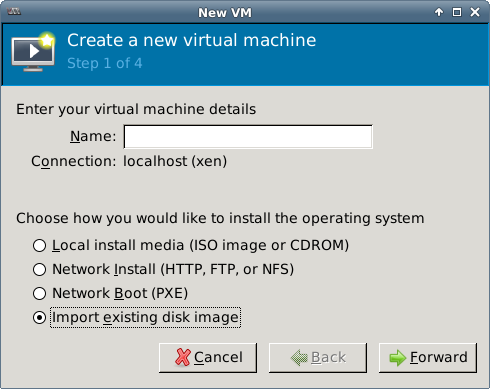
- Enter the VM name, such as FAC-VM.
- Ensure that Connection is localhost, select Import existing disk image, then click Forward to continue.
- In the OS Type field select Linux. In the Version field select Generic 2.6.x kernel.
- Click Browse to open the Locate or create storage volume window.
- Click Browse Local, find the FortiAuthenticator disk image file, then click Choose Volume and then Forward.
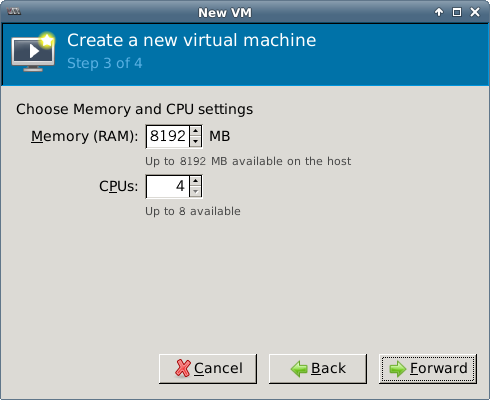
- Specify the amount of memory and the number of CPUs to allocated to this VM. Click Forward.
- Select Customize configuration before install. This enables you to make hardware configuration changes before the VM creation is started.
- Expand the Advanced options section.
- By default, a new VM includes one network adapter.
- Select Specify shared device name, and enter the name of the bridge interface on the Open Xen host.
- Optionally, set a fixed MAC address for the virtual network interface.
- Virt Type and Architecture are set by default and you should not need to change it.
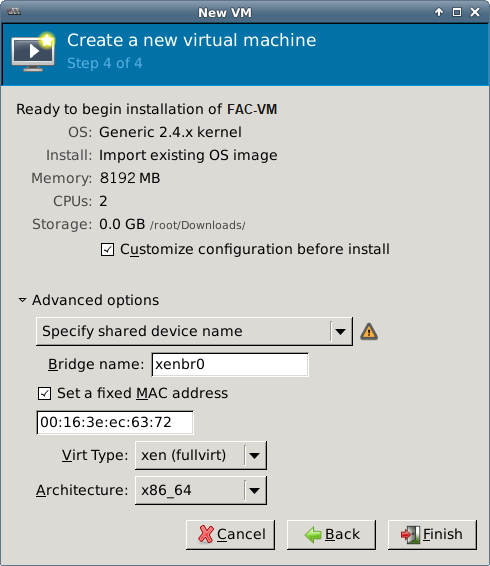
- Click Finish. The VM hardware configuration window opens. You can use it to add hardware such as network interfaces and disk drives. Configure the VM hardware:
- Click Add Hardware to open the Add Hardware window, then click Storage.
- Select Create a disk image on the computer's harddrive, and set the size to an appropriate size.
- Select Network to add more network interfaces. A new VM includes one network adapter by default. You can add more through the Add Hardware window. A FortiAuthenticator-VM requires four network adapters. You can configure network adapters to connect to a virtual switch or to network adapters on the host computer.
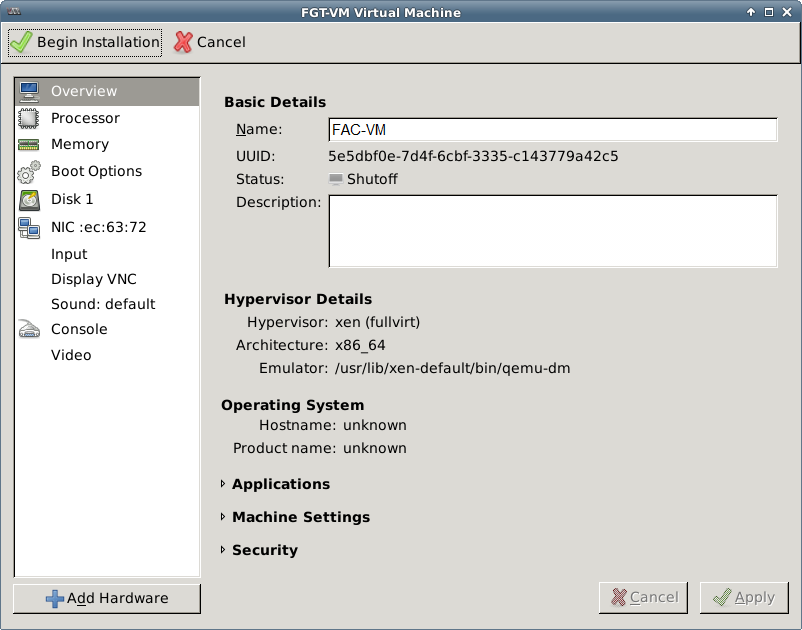
- Click Finish.
- Click Begin Installation.
After the installation completes successfully, the VM starts and the console window opens. You can then proceed with the initial configuration.