
Custom Pages
Customize pages shown to your users on the following tabs:
- Block Pages: Configure pages displayed when server unavailable or an HTTP request triggers the action Deny or Period Block.
- Waiting Room Pages: Configure pages displayed during periods of high visitor traffic to prevent server overload.
- Images: Upload images used in Block Pages and Waiting Room Pages.

Block Pages
Examples of Block Pages include the following:
- Error pages shown when HTTP requests violate a policy, triggering the configured action Deny or Period Block.
- Server Unavailable pages returned to the client when none of the server pool members are available either because their status is Disabled or Maintenance or they have failed the configured health check.
- Captcha enforcement pages that FortiAppSec Cloud uses to differentiate between real users and automated users, such as bots.
Configuring a custom block page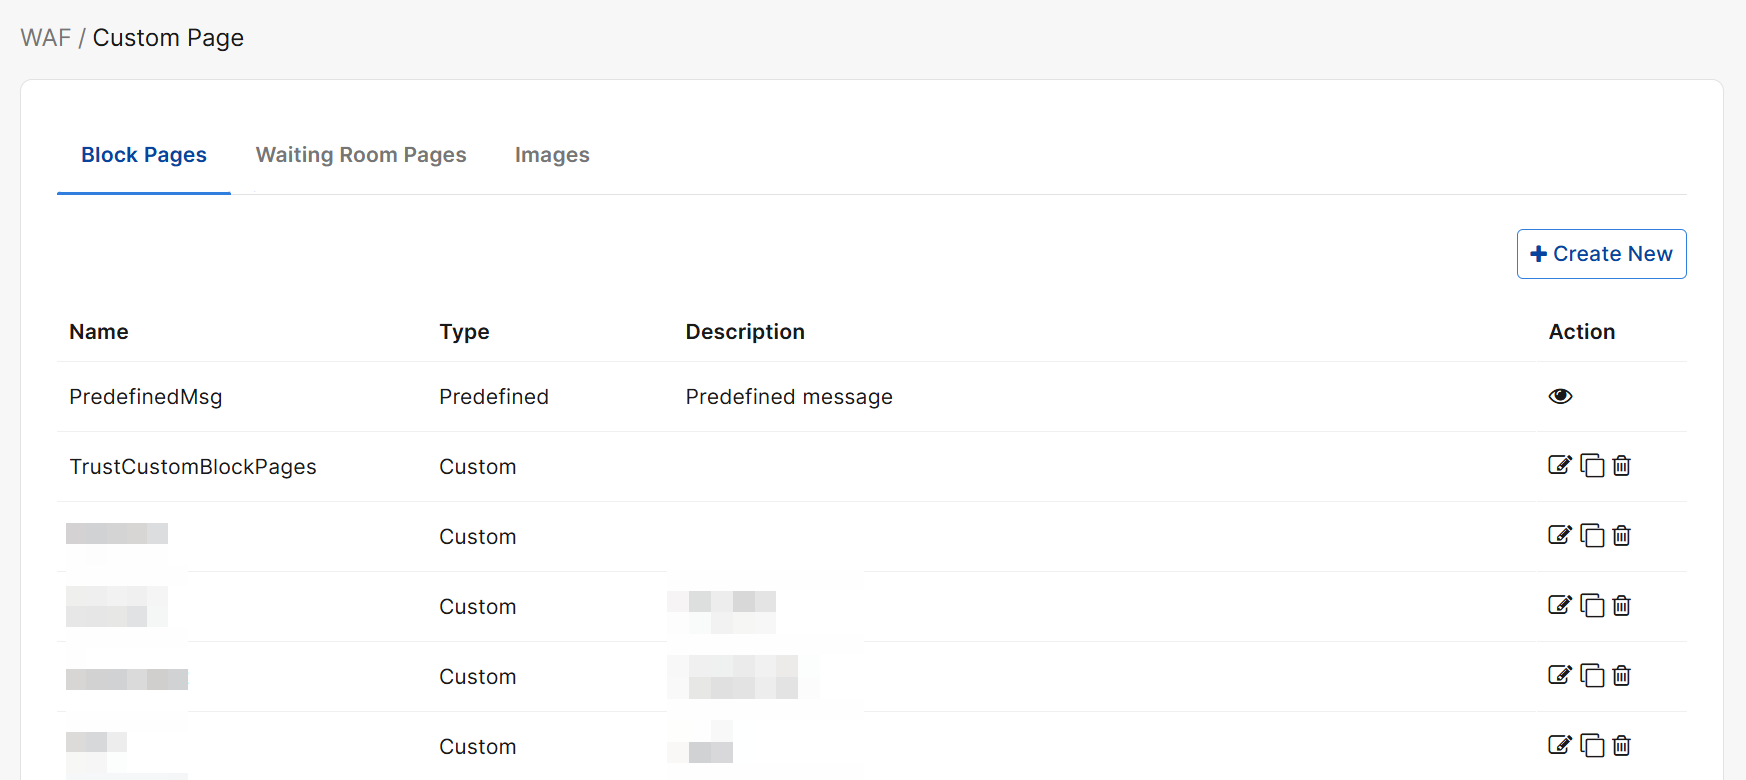
Follow steps below to configure a custom block page:
- Go to WAF > System Settings > Custom Block Pages.
- Click Create New.
- Enter a Name for the block page. The maximum length is 30 characters.
- Enter Description for the block page. The maximum length is 512 characters.
- The default configuration of a block page contains common messages for HTTP Response Codes. The Descriptions for each message indicate the circumstances that trigger them.
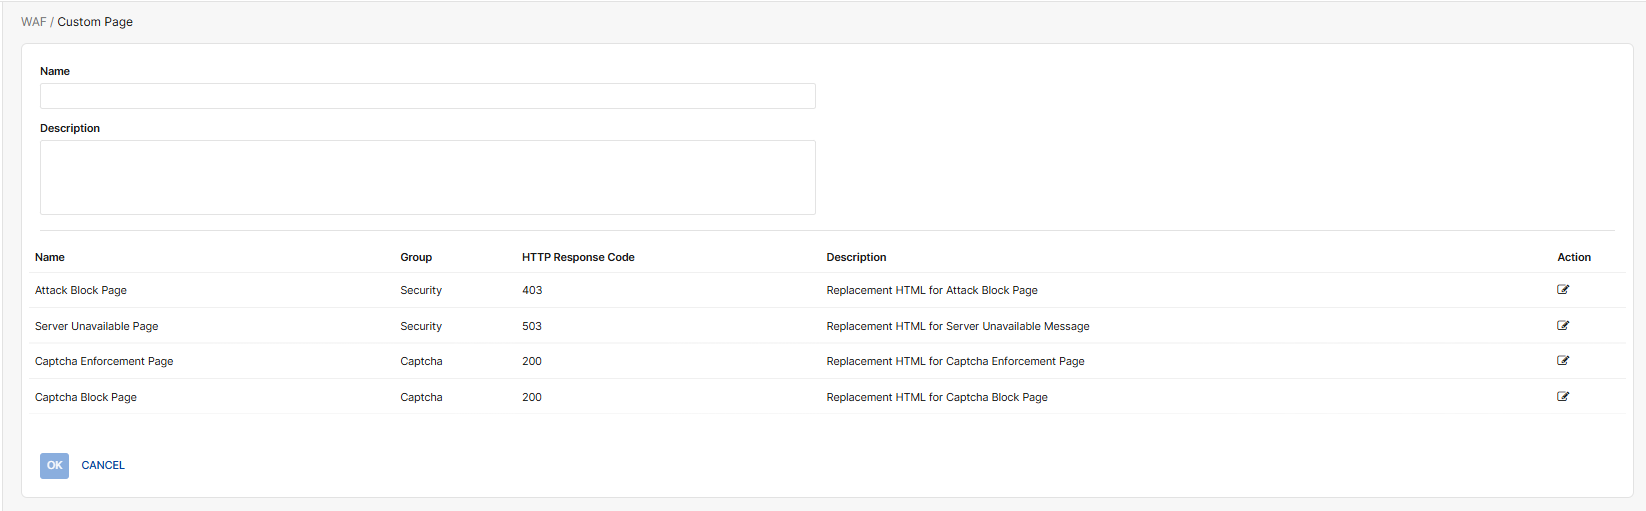
- Click the Edit icon under Action for a message to customize what the users of your application see when the message is triggered.
- In the Edit Message window, the left side pane displays the source code, and the right side is how the message shows in the browser.
For instructions on adding images, see Images.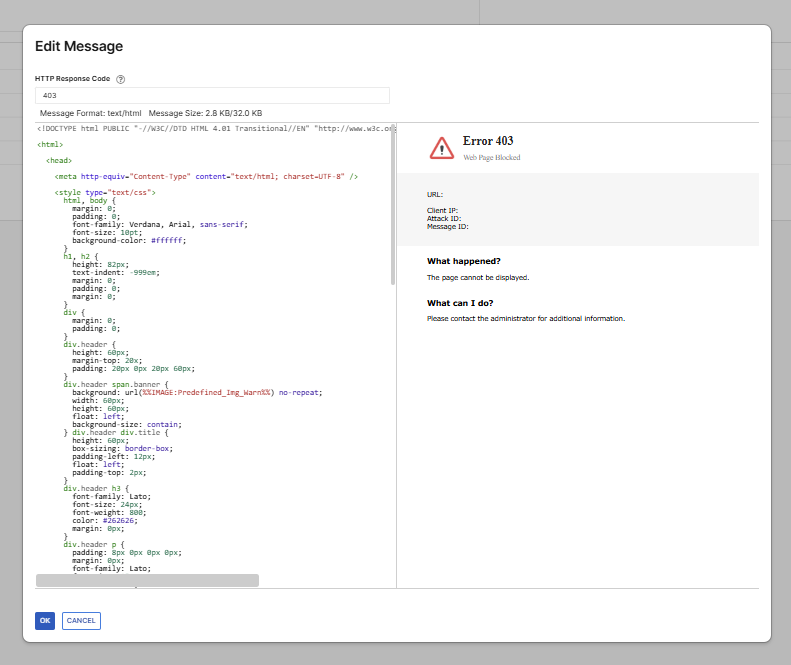
You cannot change macros such as%%SOURCE_IP%%. See Macros in custom block pages. - Click Save to save the changes of the message.
- If you want to edit other messages, click the Edit icon in their rows.
- Click OK to save the block page.
- To apply a block page for an application, select it in the Custom Block Pages list in Application > Network > Endpoints.
FortiAppSec Cloud supports up to 8 custom block pages (including the predefined page).
Macros in custom block pages
All the macros and parameters in the HTML code can't be removed or edited, while the text that shows in the Web UI is allowed to be modified.
For example, in the following code, the macros (e.g. %%CAPTCHA_VCODE_STR%%) and parameters (e.g. req_data) can't be removed or edited, but the text "Security check" can be replaced with any text as you desire.
<input type="hidden" name="vcode" value="%%CAPTCHA_VCODE_STR%%">
<input type="hidden" name="req_data" value="%%CAPTCHA_REQ_DATA%%">
<h2>
Security check
</h2>
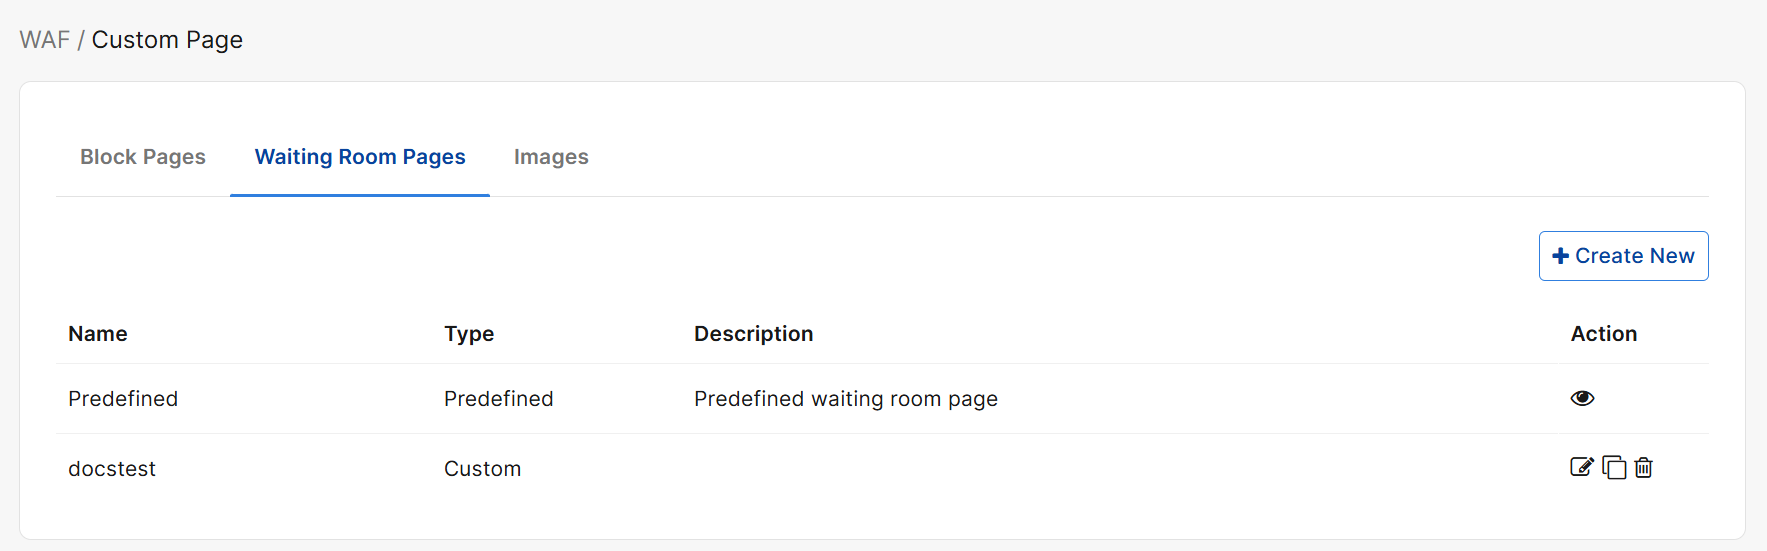
Waiting Room Pages
To manage high visitor traffic and prevent server overload, enable a virtual Waiting Room that queues users and shows them an estimated wait time before they can access your application.
With a custom page, you can tailor the in-queue experience while FortiAppSec Cloud handles traffic flow and protects your origin with a server-side queue.
A custom page is useful when you want to display your own branding, provide clearer messaging about delays, and maintain a consistent look and feel with your application.
|
|
Customizing the Waiting Room Page affects only the user-facing HTML. It does not change the queuing algorithm, capacity thresholds, or enforcement behavior. |
This feature may be configured for your entire website, or specific URL paths.
Prerequisites and Limitations
-
Waiting Room feature enabled: You must enable Waiting Room for the application before configuring a custom page.
-
Supported content type: Only HTML content is supported. Stylesheets can be included via <style> blocks or inline CSS. External script tags are not allowed and may be sanitized for security.
-
Required placeholders and markers: The custom page must keep the following placeholders and markers:
-
%%WR_ETA%%: This placeholder must appear at least once in the HTML. It is used to display the estimated waiting time to the end user. Pages that do not include this placeholder are considered invalid and cannot be saved. -
%%WR_TS%%: This placeholder is also required and must be preserved in the template. It is used internally by FortiAppSec Cloud for waiting-room tracking and validation. Do not remove or modify this placeholder. -
<!-- Fortiweb Mask -->: This HTML comment marks a block that contains system-required code (for example, scripts that FortiWeb / FortiAppSec Cloud needs for the Waiting Room to work correctly). We use this marker so you can easily recognize the part of the template that must be kept, without having to review a large amount of code on every update. You should not remove or modify this comment or the surrounding block; customize the rest of the HTML freely, but keep the masked section exactly as provided to ensure correct behavior and future compatibility.
-
|
|
The Waiting Room module supports only clients using web browsers. Non-browser traffic, such as traffic from mobile applications, cannot be processed by the Waiting Room module. |
Security Considerations
-
Avoid embedding untrusted JavaScript or third-party trackers.
-
Do not attempt to bypass or manipulate queue behavior from the page.
-
FortiAppSec Cloud validates uploaded custom HTML to ensure it does not compromise the security or stability of the FortiAppSec Cloud platform itself. However, it does not guarantee that your customized content (such as redirects, external links, or inline scripts) is safe for your own application or business logic. Carefully review all custom HTML, links, and scripts to ensure they do not introduce additional security risks to your application.
-
FortiAppSec Cloud may sanitize or block dangerous HTML constructs to maintain WAF security guarantees.
Size and Complexity
-
A single FortiAppSec Cloud account can create up to 8 custom pages in total. This quota is shared by all users under the same account.
-
Each custom page HTML file is limited to a maximum size of 32 KB.
-
Images can be referenced either by using external URLs or by uploading images to FortiAppSec Cloud and linking to them from the HTML. For usage patterns and examples, you can refer to the FortiWeb documentation for Custom Waiting Room pages.
Create and edit a custom Waiting Room Page
-
Navigate to WAF > System Settings > Custom Pages> Waiting Room Pages

-
Click Create New.
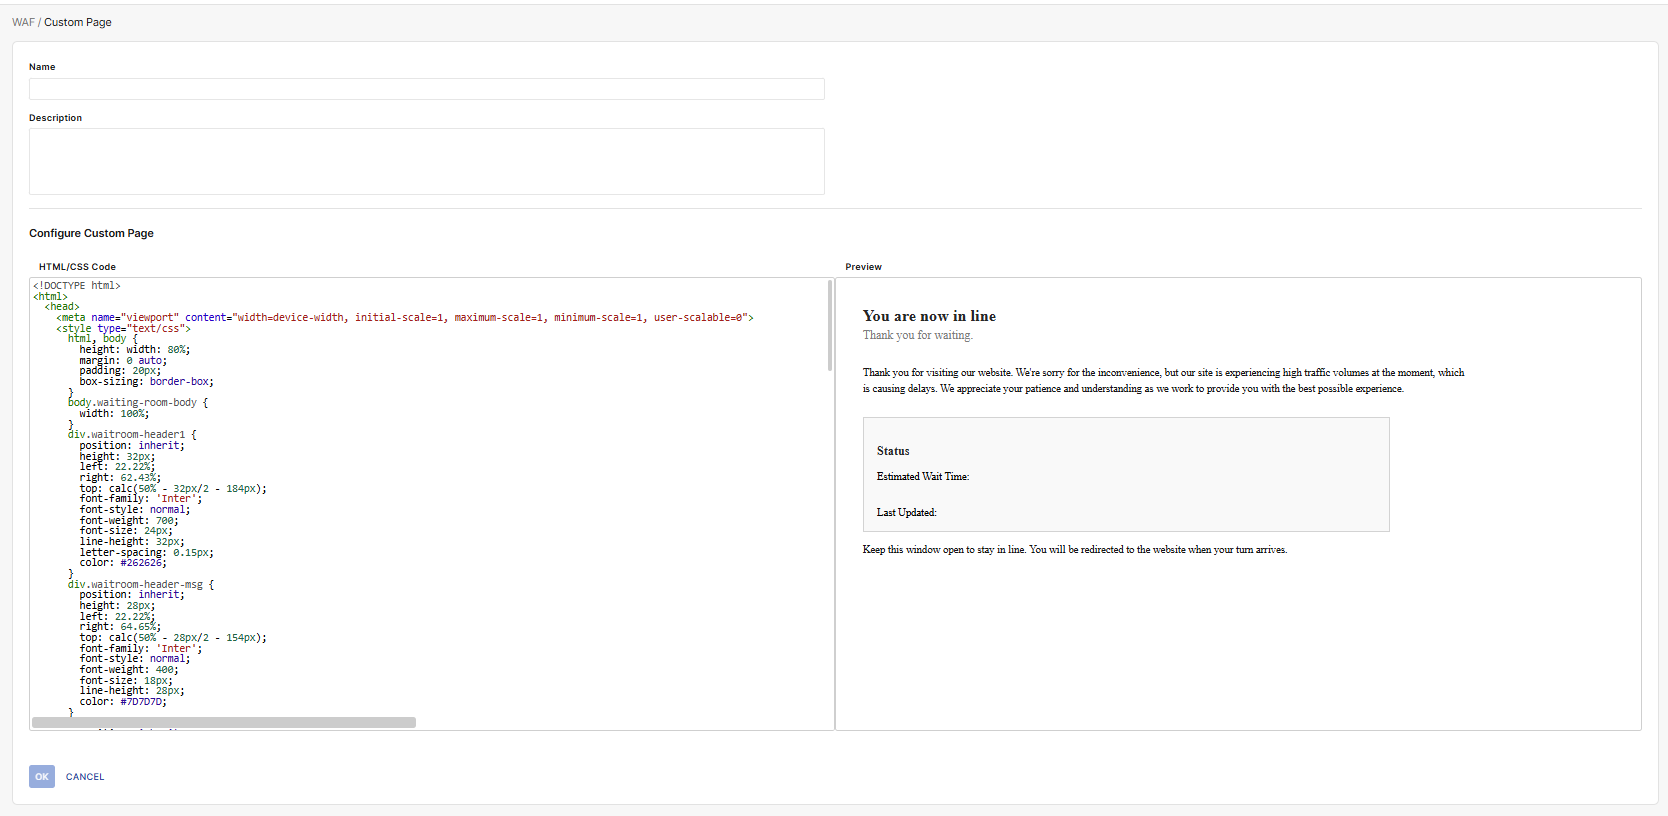
-
Enter a Name and Description.
-
Under Configure Custom Page, replace the default HTML with your custom content, ensuring you include all required placeholders and markers (
%%WR_ETA%%,%%WR_TS%%, and<!-- Fortiweb Mask -->).For instructions on inserting images, see Images.
-
Click OK to save.
Once you have created a Waiting Room Page, you can edit, clone, or delete it under the Action column on the Custom Pages > Waiting Room Pages page.
Apply a Waiting Room Page to a WAF Application
-
Navigate to WAF > Applications.
-
Select the application you want to configure.
-
Navigate to Application Delivery > Waiting Room > Settings.
-
Select the desired page from the Custom Waiting Room Page dropdown.
-
Click Save to apply the changes.
Images
The default block and waiting room pages contain predefined images. To use your own images, upload the desired image file(s), then insert its image macro in the message body.
Uploading image files
- Go to WAF > System Settings > Custom Block Pages.
- Under the Images tab, Click Create New.
- Specify a name for the image file, select its type, and then click Choose File to browse to the file and select it.
Ensure the image is no larger than 24 KB and that its type matches the value you have selected for Type. - Click OK.
Inserting image file to messages
Use the format %%IMAGE:<image_name>%% to add an image macro anywhere in a custom block message,
where <image_name> is the name of the image you have uploaded.
For example, if you want to add the image test to the list of images, use %%IMAGE%%:test%% to add it to the HTML code.
h2.fgd_icon {
background: url(%%IMAGE:test%%)
width: 90px;
height: 92px;
margin: 48px auto;
}