


Deploying FortiAnalyzer on Open Xen
After you download the FAZ_VM64_XEN-vX-buildxxxx-FORTINET.out.OpenXen.zip file and extract the faz.qcow2, you can create the VM in your Open Xen environment.
As of FortiAnalyzer 7.4.1, kernel and rootfs are encrypted. OpenXen in PV mode tries to unzip the kernel and rootfs, but it will fail. Therefore, OpenXen in PV mode cannot be used when deploying or upgrading to FortiAnalyzer 7.4.1. Only HVM (hardware virtual machine) mode is supported for OpenXen in FortiAnalyzer 7.4.1.
To deploy and configure the virtual machine:
- Launch Virtual Machine Manager (virt-manager) on your Open Xen host server. The Virtual Machine Manager homepage opens.
- Select Create a new virtual machine from the toolbar.
- Configure the VM:
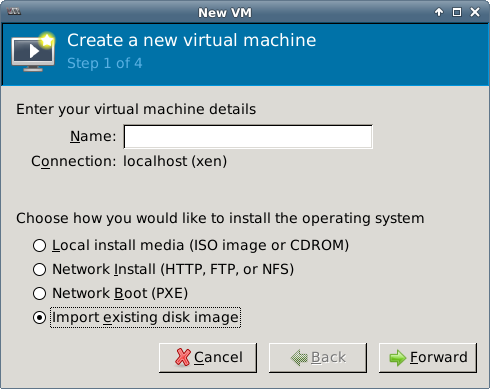
- Enter the VM name, such as FAZ-VM.
- Ensure that Connection is localhost, select Import existing disk image, then click Forward to continue.
- In the OS Type field select Linux. In the Version field select Generic 2.6.x kernel.
- Click Browse to open the Locate or create storage volume window.
- Click Browse Local, find the faz.qcow2 disk image file, then click Choose Volume and then Forward.
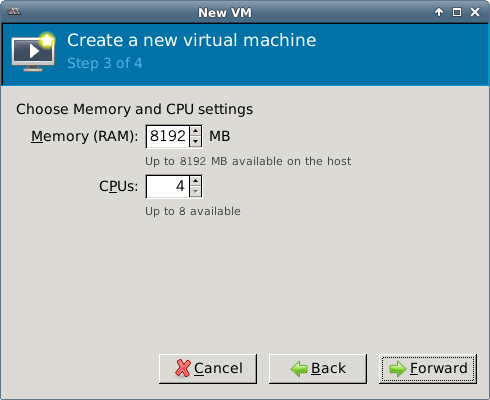
- Specify the amount of memory and the number of CPUs to allocated to this VM. See Minimum system requirements to determine your required memory. Click Forward.
- Select Customize configuration before install. This enables you to make hardware configuration changes before the VM creation is started.
- Expand the Advanced options section.
- By default, a new VM includes one network adapter.
- Select Specify shared device name, and enter the name of the bridge interface on the Open Xen host.
- Optionally, set a fixed MAC address for the virtual network interface.
- Virt Type and Architecture are set by default and you should not need to change it.
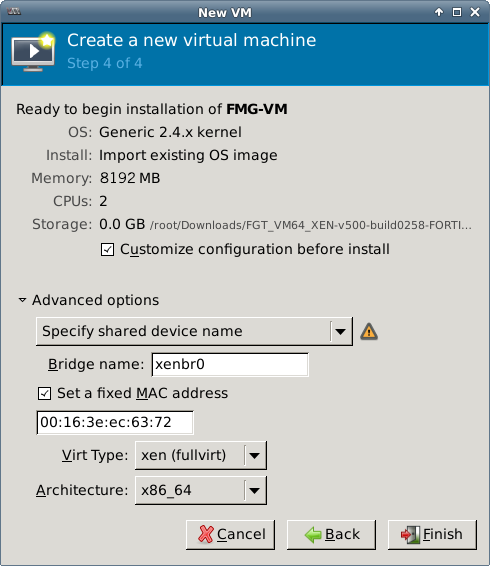
- Click Finish. The VM hardware configuration window opens. You can use it to add hardware such as network interfaces and disk drives.
Configure the VM hardware:
- Click Add Hardware to open the Add Hardware window, then click Storage.
- Select Create a disk image on the computer's harddrive, and set the size to an appropriate size.

If you know your environment will expand in the future, or if you will be using ADOMs, add hard disks larger than 500 GB. This allows your environment to expand as required while not taking up more space than is needed.
See Licensing for more information. 
The FortiAnalyzer-VM allows you to add twelve virtual log disks to a deployed instance. When adding additional hard disks, use the following CLI command to extend the LVM logical volume:
execute lvm extend
For more information, see the FortiAnalyzer CLI Reference.
- Select Network to add more network interfaces.
A new VM includes one network adapter by default. You can add more through the Add Hardware window. A FortiAnalyzer-VM requires four network adapters. You can configure network adapters to connect to a virtual switch or to network adapters on the host computer.

- Click Finish.
- Click Begin Installation.
After the installation completes successfully, the VM starts and the console window opens. You can then proceed with the initial configuration (Configuring initial settings).