


Configuring hardware settings
Before powering on your FortiAnalyzer VM you must configure the virtual processors, memory, network adapters, and hard disk to match your FortiAnalyzer VM license. See Licensing for FortiAnalyzer VM license information.
To open the Settings page, in the Hyper-V Manager, right-click on the name of the virtual machine and select Settings, or select the virtual machine then click Settings from the Actions menu.

To configure virtual memory:
- In the Settings page, select Memory from the Hardware menu. The Memory page is displayed.
- Configure the memory for the VM. See Minimum system requirements to determine your required memory.
- Click Apply to save your settings.
To configure virtual processors:
- In the Settings page, select Processor from the Hardware menu. The Processor page is displayed.

- Configure the number of virtual processors for the VM. Optionally, you can use resource controls to balance resources among VMs.
- Click Apply to save your settings.
To configure network adapters:
- In the Settings page, select Add Hardware from the Hardware menu.
- From the device list, select Network Adapter, then click Add. The Network Adapter page opens.

- Manually configure four network adapters in the settings page. For each network adapter, select a virtual switch from the drop-down list.
- Click Apply to save your settings.
To configure the virtual hard disk:
|
|
The FortiAnalyzer VM requires at least two virtual hard disks. Before powering on the FortiAnalyzer VM, you must add at least one more virtual hard disk. The default hard drive, |
|
|
If you know your environment will expand in the future, it is recommended to add hard disks larger than the 500GB base license requirement. This will allow your environment to be expanded as required while not taking up more space in the Storage Area Network (SAN) than is needed. |
- In the Settings page, select IDE Controller 0 from the Hardware menu.
- Select the type of drive that you want to attach to the controller, then click Add. The Hard Drive page opens.
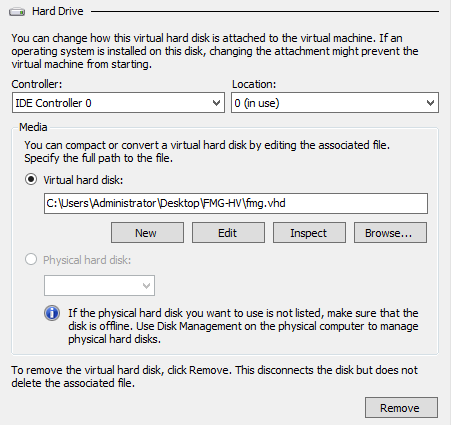
- Click New to create a new virtual hard disk. The New Virtual Hard Disk Wizard opens to help you create a new virtual hard disk.
- Click Next to continue to the Choose Disk Format page.
- Select to use VHDX format virtual hard disks. This format supports virtual disks up to 64TB and is resilient to consistency issues that might occur from power failures. This format is not supported in operating systems earlier that Windows Server 2012.
- Click Next to continue to the Choose Disk Type page.

- Select the type of virtual disk you want to use, one of the following:
- Fixed Size: This type of disk provides better performance and is recommended for servers running applications with high levels of disk activity. The virtual hard disk file that is created initially uses the size of the virtual hard disk and does not change when data is deleted or added.
- Dynamically Expanding: This type of disk provides better use of physical storage space and is recommended for servers running applications that are not disk intensive. The virtual disk file that is created is small initially and changes as data is added.
- Differencing: This type of disk is associated in a parent-child relationship with another disk that you want to leave intact. You can make changes to the data or operating system without affecting the parent disk, so that you can revert the changes easily. All children must have the same virtual hard disk format as the parent (VHD or VHDX).
- Click Next to continue to the Specify Name and Location page.
- Specify the name and location of the virtual hard disk file. Use the Browse button to select a specific file folder on your server.
- Click Next to continue to the Configure Disk page.
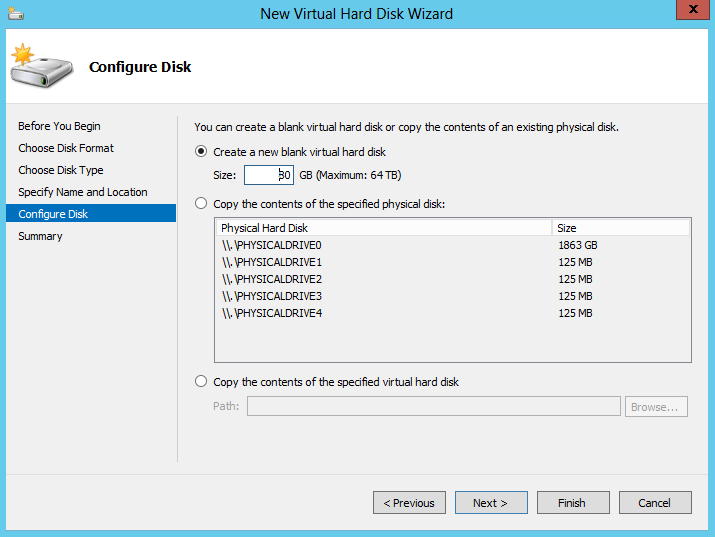
- Select Create a new blank virtual hard disk, then enter the size of the disk in GB. The maximum size is dependent on your server environment.
- Click Next to continue to the Summary page.
The summary page provides details about the virtual hard disk.
- Click Finish to create the virtual hard disk, then click Apply to save the settings, and then click OK to exit the settings page.