
Installing FortiAIOps on Nutanix
Perform the following steps to deploy FortiAIOps on Nutanix.
-
Obtain FAO_VM64_HV-v2.0.1-[build0xxx]-FORTINET.out.hyperv.zip from Fortinet and extract it to obtain the files FAOWHV.vhd and DATADRIVE.vhd.
-
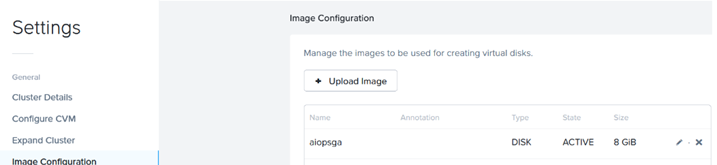
Log in into the Nutanix Prism user interface and click the
icon. Select Image Configuration.
-
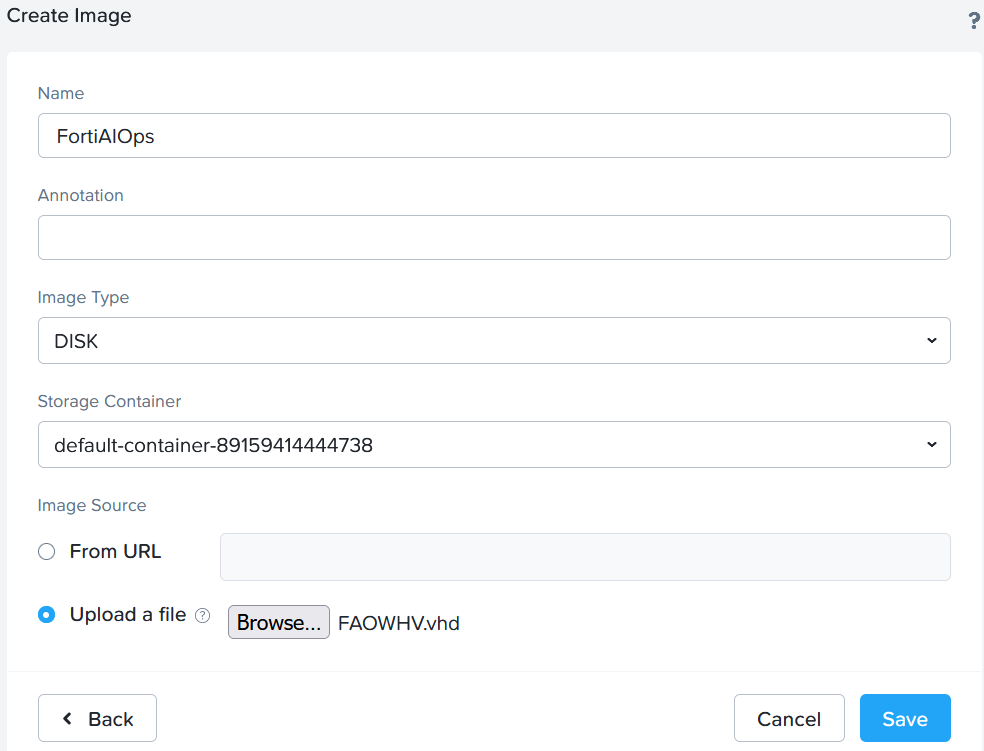
Upload both the FAOWHV.vhd and DATADRIVE.vhd files in the order as mentioned here. To upload FAOWHV.vhd, click Upload Image and update the following fields.
-
Enter a Name for the FortiAIOps image file.
-
Select Disk in as the Image Type.
-
Select the Storage Container.
-
In the Image Source section, click Upload a file and browse to the FortiAIOps image file FAOWHV.vhd.
-
-
Click Save.
-
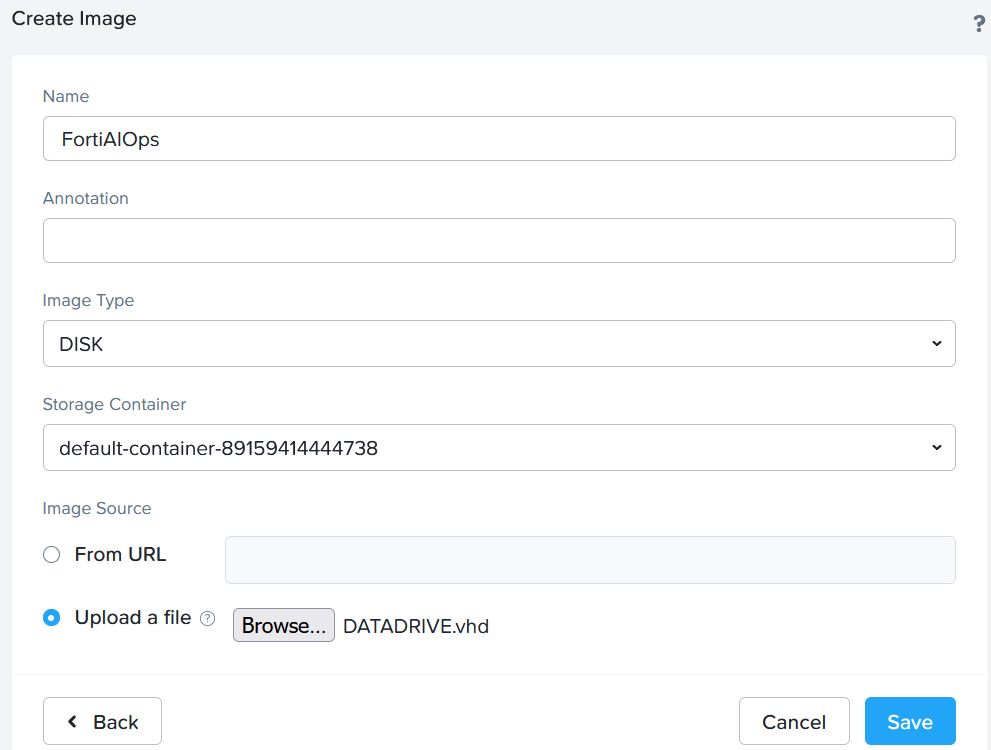
Repeat steps 3 and 4 to upload DATADRIVE.vhd.
-
Refresh the browser after a few seconds and the newly created images are listed in the Image Configuration page.
-
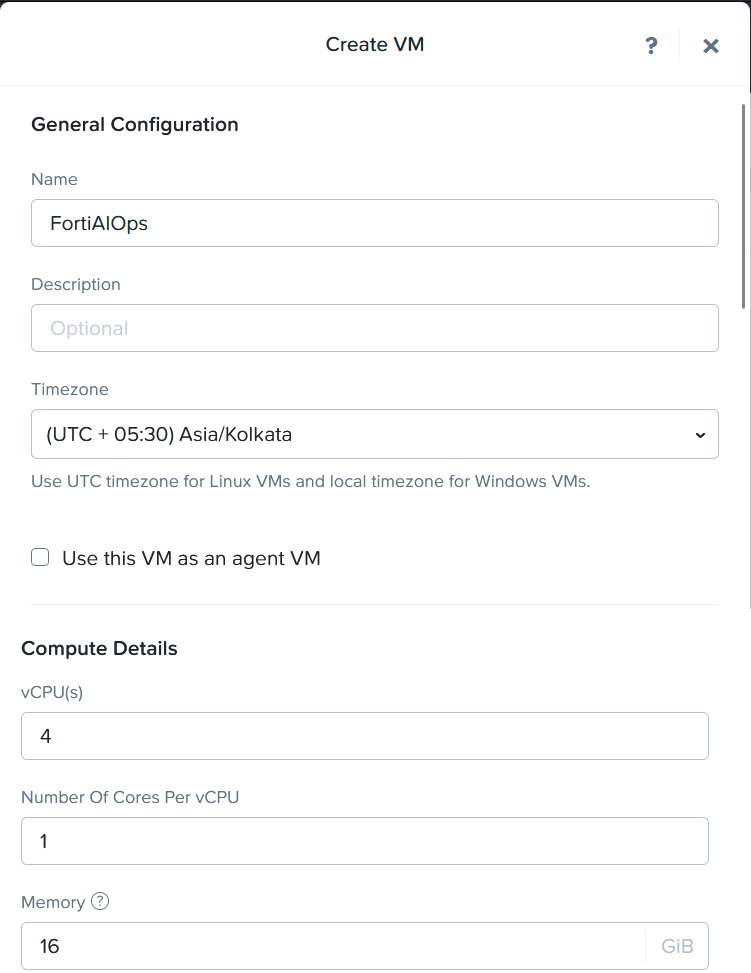
To create a VM, navigate to the VM dashboard and click Create VM and enter the following configuration.

-
Enter a Name for the FortiAIOps VM.
-
Select your Timezone.
-
In the Compute Details section, enter 4 vCPU(s) and 8 GB of Memory.
Note: By default, a CD-ROM is listed under Disks, delete this CD-ROM.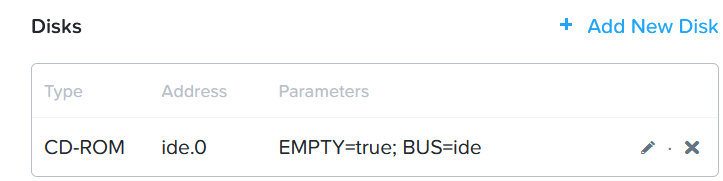
-
-
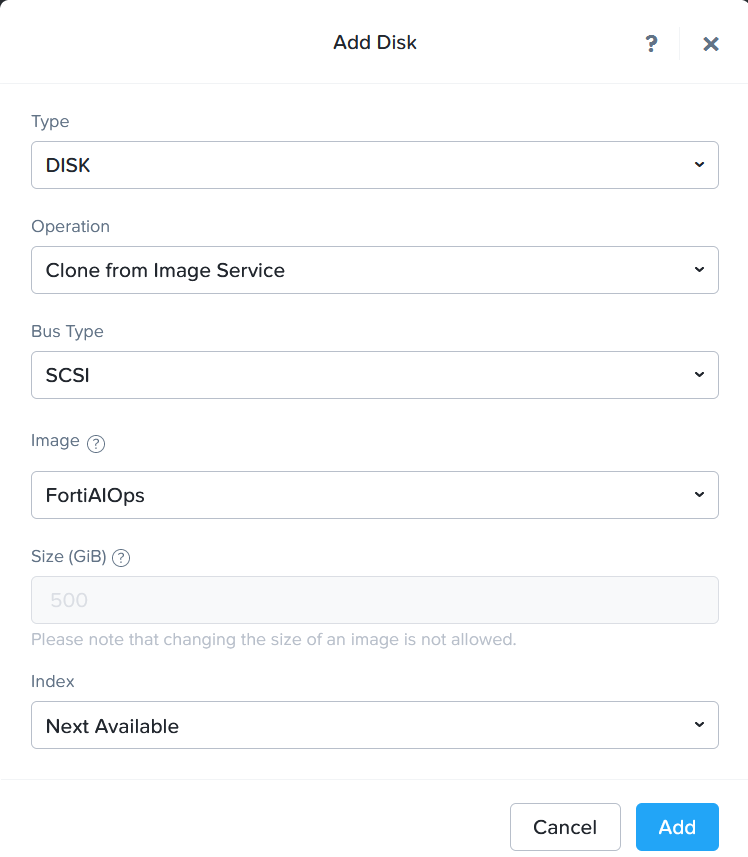
To create a new Boot disk, click Add New Disk and enter the following configuration.
-
Select Clone from Image Service as the Operation and the disk is cloned from the FortiAIOps image files uploaded earlier in this procedure.
-
Select SCSI as the Bus Type.
-
Select the uploaded FortiAIOps disk Image - FAOWHV.vhd.
-
-
Click Add.
-
Add another disk for DATADRIVE.vhd following the previous step.
Note: Ensure to create a new disk for FAOWHV.vhd first and then for DATADRIVE.vhd. -
Add 4 Network Adapters, click Add New NIC.

-
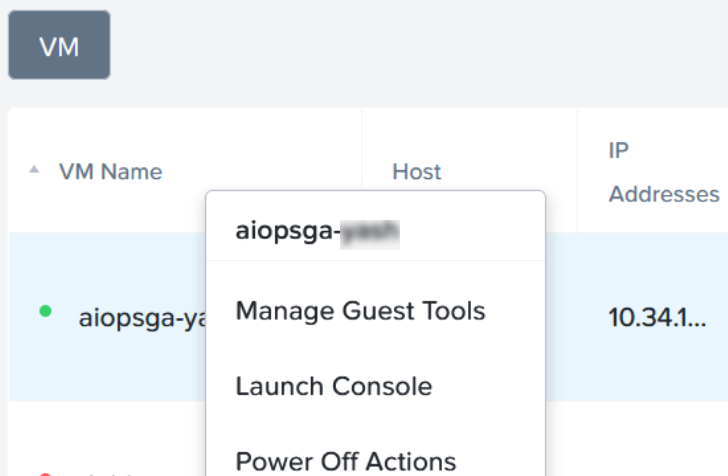
Power on the VM and launch the console.
- Configure the FortiAIOps static IP address on starting the VM. See Post-installation Tasks.