


Deploying the new SD-WAN region using OaaS
The general process of deploying a new SD-WAN region using OaaS is as follows:
-
Access the Overlay-as-a-Service portal. See Accessing the OaaS portal.
-
Choose the hub locations. See Choosing the hub locations.
-
Add a new site. See Adding a new site.
-
Add an ISP for your site. See Adding an ISP for your site.
-
Add a subnet for your site. See Adding a subnet for your site.
-
Apply the changes. See Applying changes and viewing Task Status.
Accessing the OaaS portal
To access the Overlay-as-a-Service portal, go to https://overlay-as-a-service.forticloud.com/ and log in using your FortiCloud account. Upon log in, you will enter the Home view.
Choosing the hub locations
To choose the hub locations:
-
Go to Topoology. The Setup Topology view is displayed.
Right-click the Hub.
-
Click Choose two locations. The Hub Location dialog opens.
-
Use the Primary Location and Secondary Location dropdown lists to select your locations.

-
Click Done.
Adding a new site
Sites are authorized FortiGate SD-WAN devices. Add FortiGate devices to the region.
To add a site:
-
Click the Hub.
-
Select Add Site. The Add Site dialog opens.
-
Enter a Name for the site.
-
Set the site as either a Branch or Data Center.

Branch and Data Center sites affect how the site is displayed on the Home and Topology pages. OaaS configuration and management is not affected.
-
(Optional) Enter a Description.
-
Select the FortiGate device to deploy from the Device dropdown menu.
-
Click Add.

It is critical that the FortiGate device added for deployment appears with the status of Online. If not, you must perform some troubleshooting to check if the device has been powered on, has been activated or logged in to FortiGate Cloud, and is configured and connected to its ISP’s WAN link properly.
-
Click Done. A new site is connected to the hub.

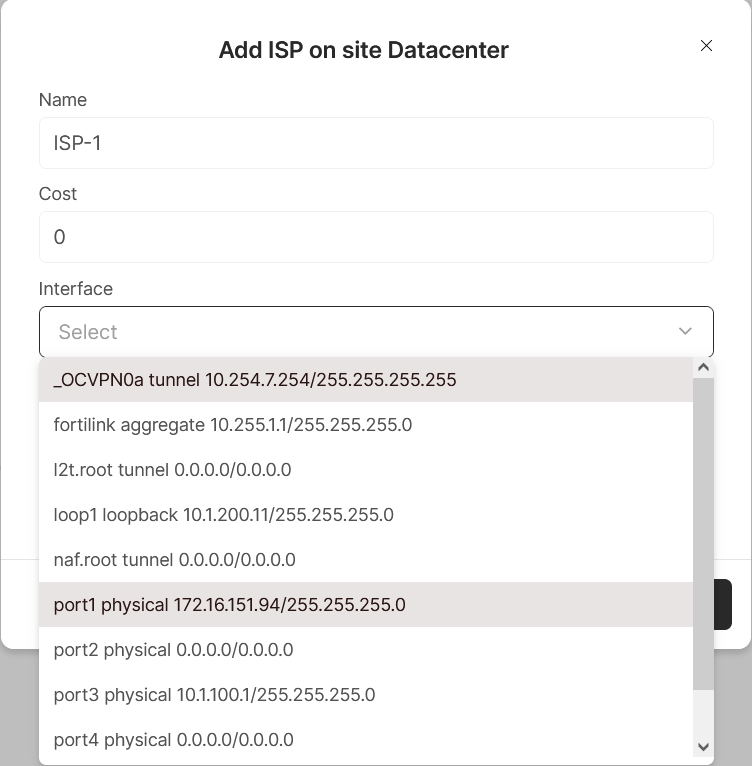
Adding an ISP for your site
Configure how the SD-WAN device connects to the region by selecting the ISP link for external access.
To add an ISP:
-
Click the site.
-
Select Add ISP. The Add ISP on site <Site> dialog opens.
-
Enter a Name for the ISP.
-
Enter the cost assigned to the ISP in the Cost field.
-
Select the interface from the Interface dropdown list.
-
(Optional) Enter a Description.
-
Click Done.
Adding a subnet for your site
Add LAN subnets that will communicate within your SD-WAN region.
To add a subnet:
-
Click the site.
-
Select Add Subnet. The Add subnet on site <Site> dialog opens.
-
Enter a Name.
-
Select Direct or Indirect for the subnet definition.
Direct means that you will directly select the subnet assigned to a FortiGate interface.
Indirect means that you will use a Classless Inter-Domain Routing (CIDR) prefix to select a subset of the interface’s assigned subnet, typically, a smaller subnet (192.168.2.0/30) within the interface’s subnet (192.168.2.0/24). An indirect subnet usually means that there are multiple networks configured behind the interface.
-
Select the interface from the Interface dropdown list.

-
(Optional) Enter a Description.
-
Click Done.
-
Applying changes and viewing Task Status
You may wish to add several sites with their corresponding ISP and subnets in the Topology view. For this deployment example, you will need to add Branch-1 and Branch-2 sites to the topology.
When have completed adding sites and their corresponding configuration, apply the change.
To apply changes:
-
Click Apply. After clicking Apply, the sync process runs in the background.
-
Click the X at top-right to close the Setup Topology page and view the deployment.
-
Next to the FortiCloud username at the top-right of the screen, click the Task Status icon to view the status of each configuration task.

You can view the FortiGate configuration that was installed by the task by clicking on the View Config icon to the right of the task name. A pane with the configuration that was installed by the task will display.
If a task has failed, then you can retry a task by clicking on the Retry icon to the right of the Failed message.