

Use this guide to add Crowdstrike as a secured SaaS application in FortiCASB-SSPM SaaS Security platform.
Navigate to "Roles and Permissions"

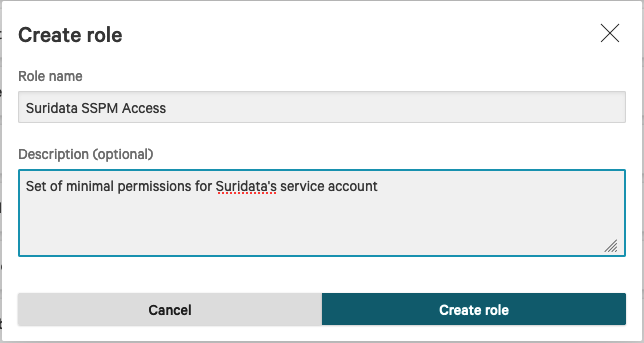
Create Role:

See the following example:
Click on Edit permissions under each group name, mark the relevant permissions and click "Save". Example:
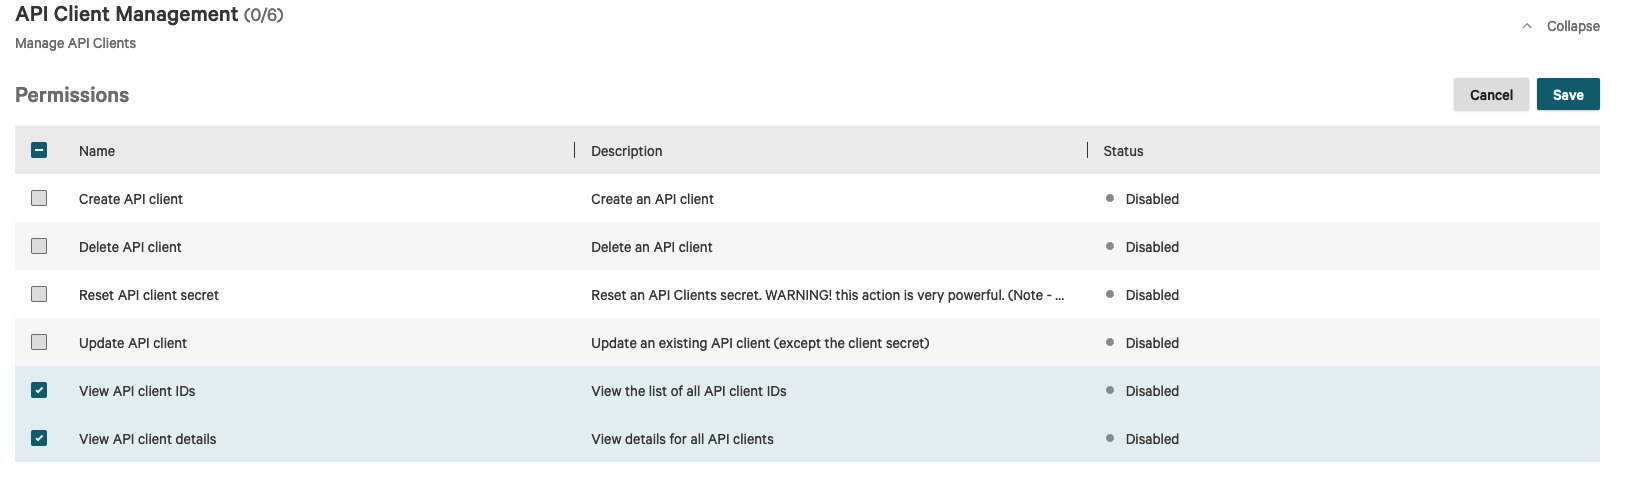
Do the same for the flowing groups:
| Group | Scope |
|---|---|
| API Client Management | View API client IDs |
| API Client Management | View API client details |
| Manage All Users | List assignable roles |
| Manage All Users | List host group assignments |
| Manage All Users | List user roles |
| Manage All Users | View host group assignments |
| Manage All Users | View user activity metadata |
| Manage All Users | View user details |
| Manage All Users | View user details (identities) |
| Manage All Users | View users |
| Manage Current Customer | Read customer access control settings |
| Response Policies and Settings | View Response policies |
| Role Management | Permission - List |
| Role Management | Permission - View |
| Role Management | Permission Group - List |
| Role Management | Permission Group - View |
| Role Management | Role Details |
| Role Management | Role Permission - List |
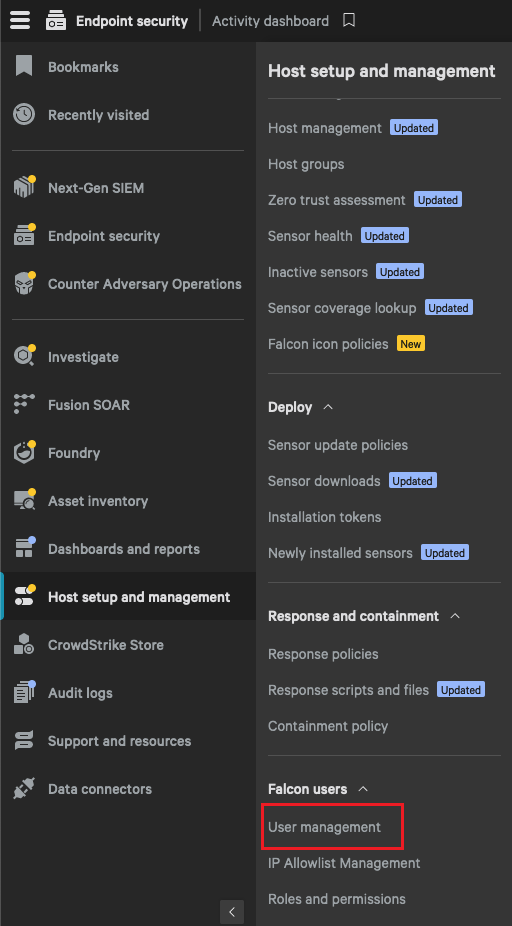
Navigate to User management:
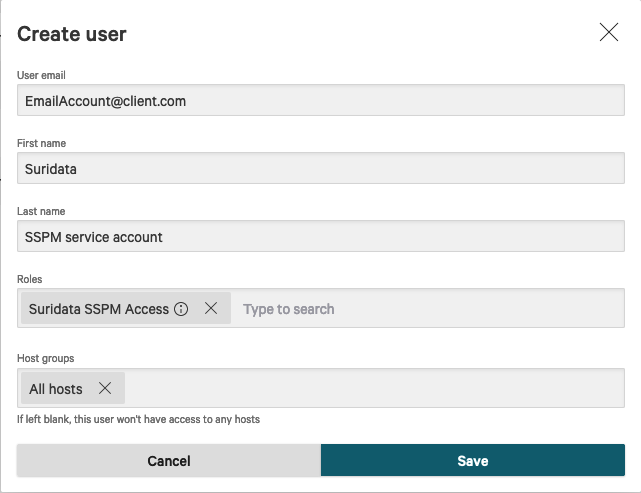
Click on Create User
Fill in the details and in the role, select the one you just created: The email should be an email that is associated with the Crowdstrike interface
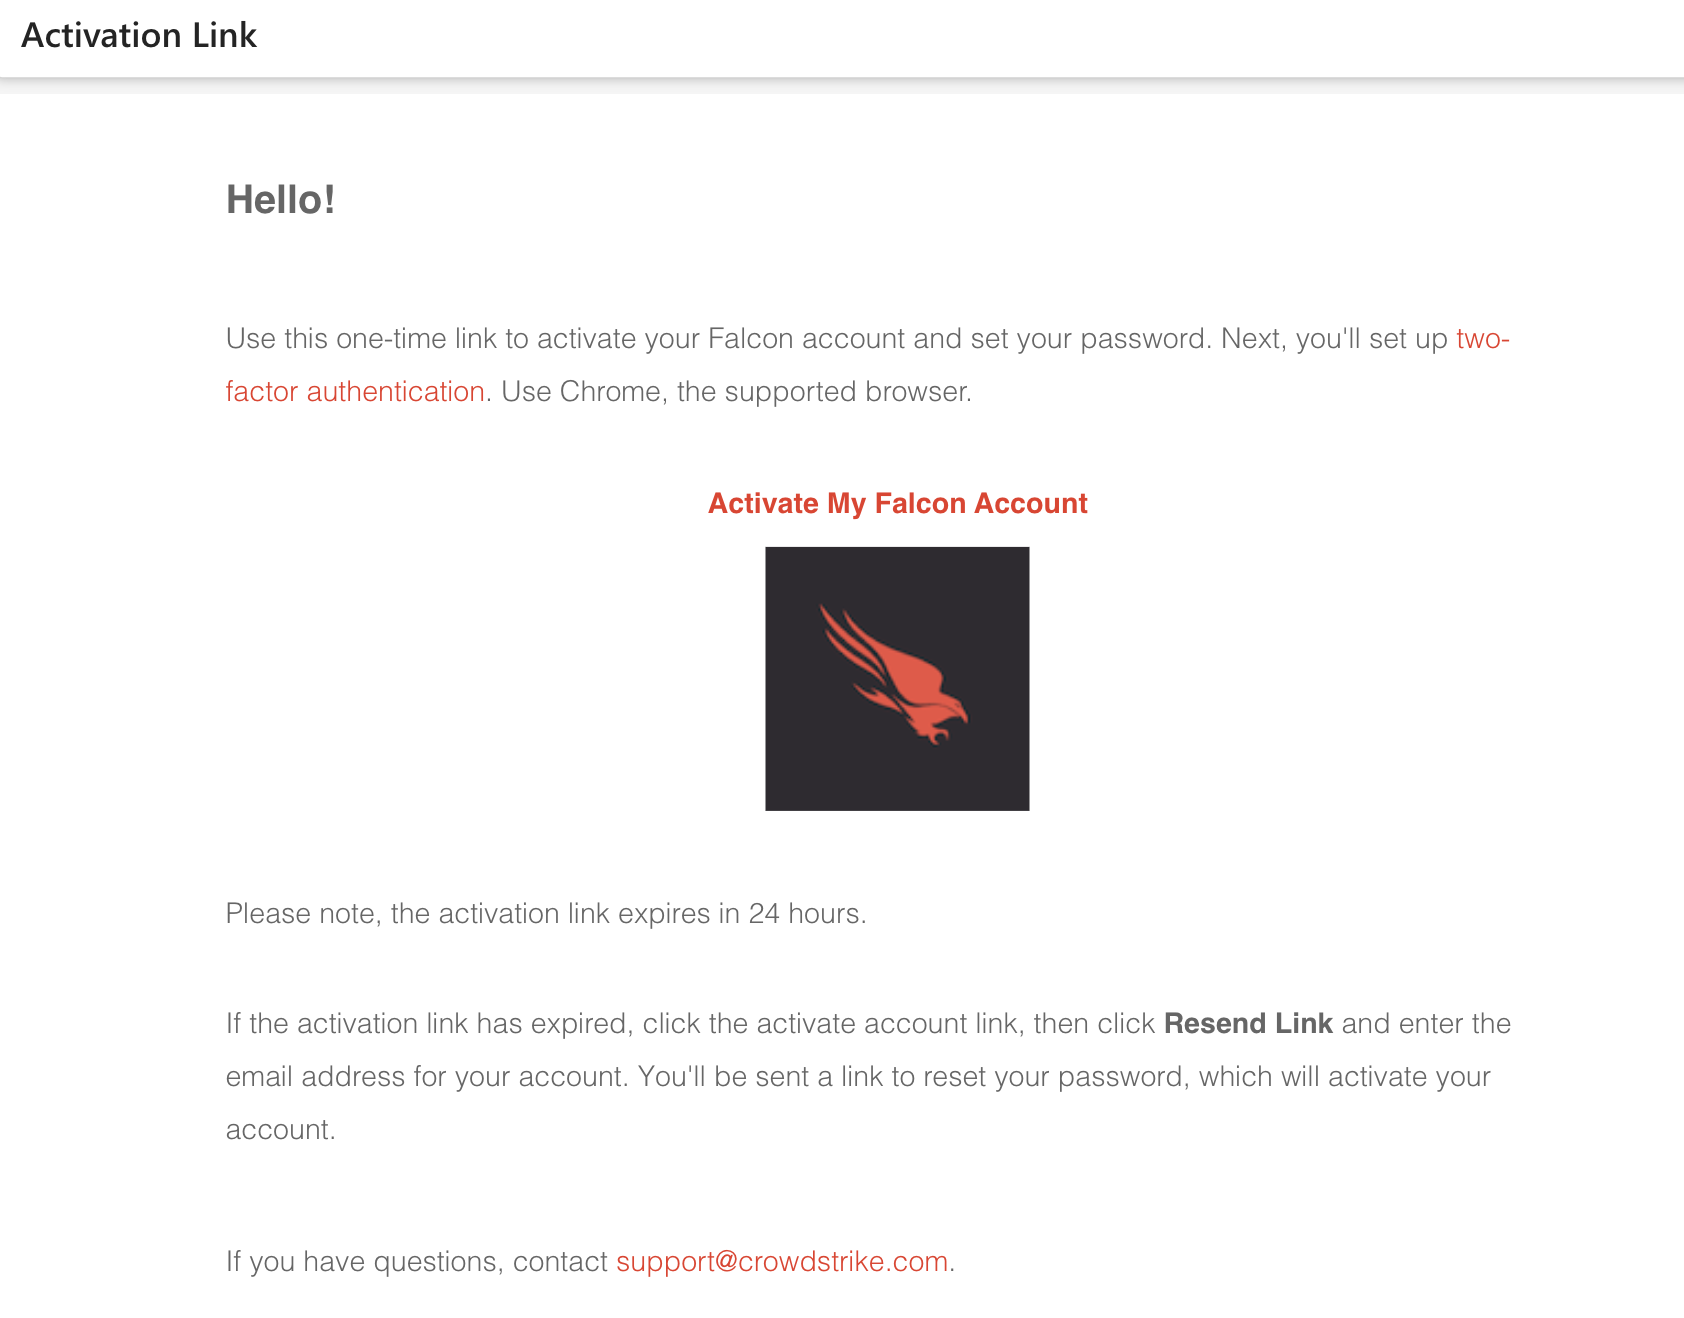
You will get an activation link from Crowdstrike. Click on it and continue the account registration:
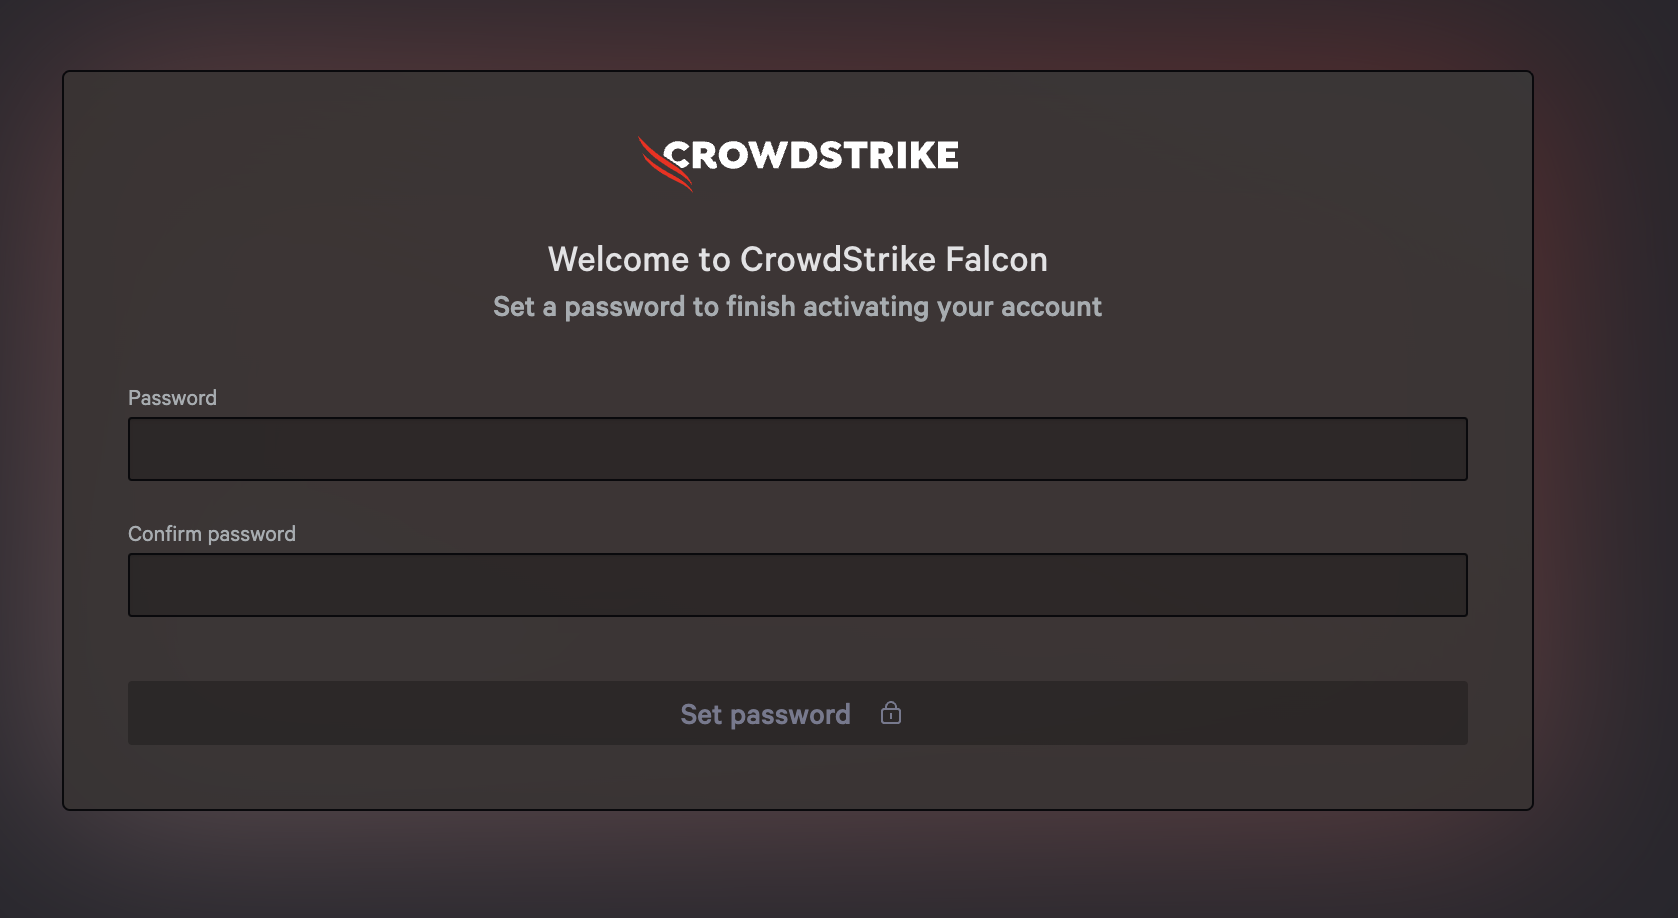
Set a complex password:
When setting the MFA, first copy and save the activation key (this is the TOTP secret)
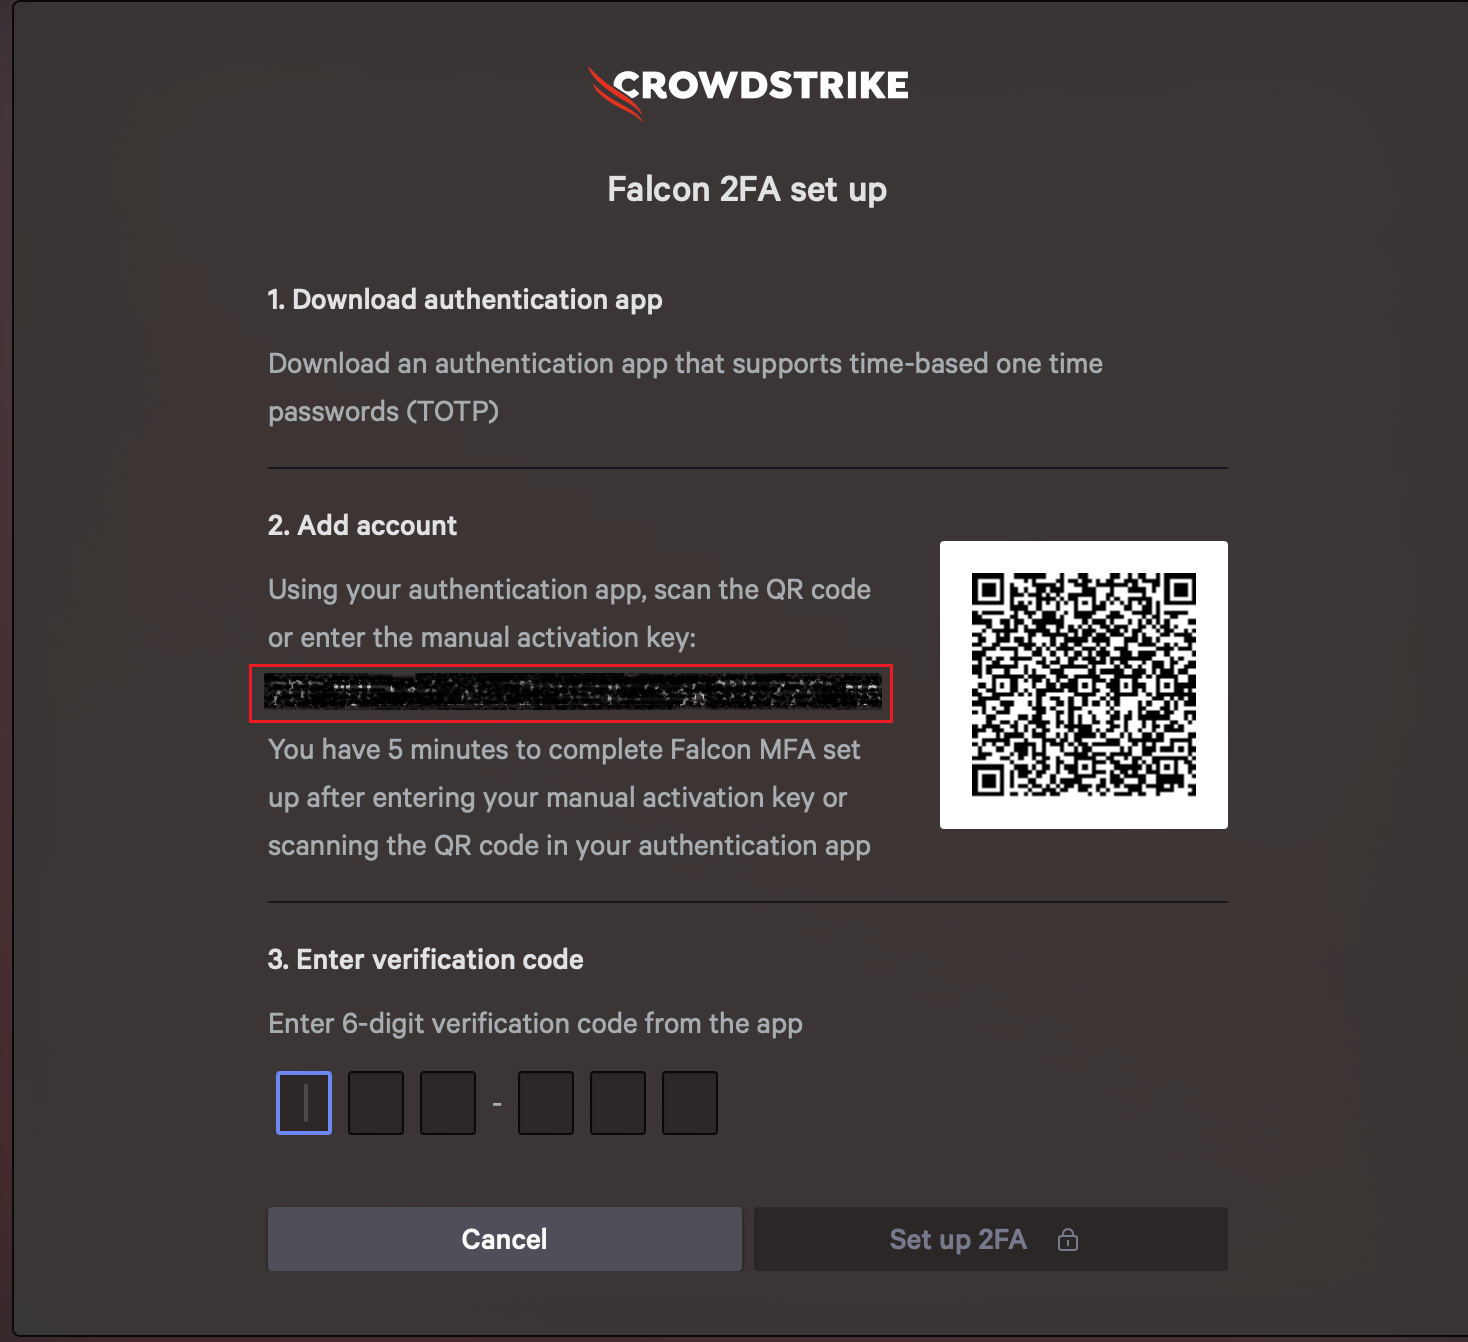
Complete the MFA registration
Sign in to your CrowdStrike account.
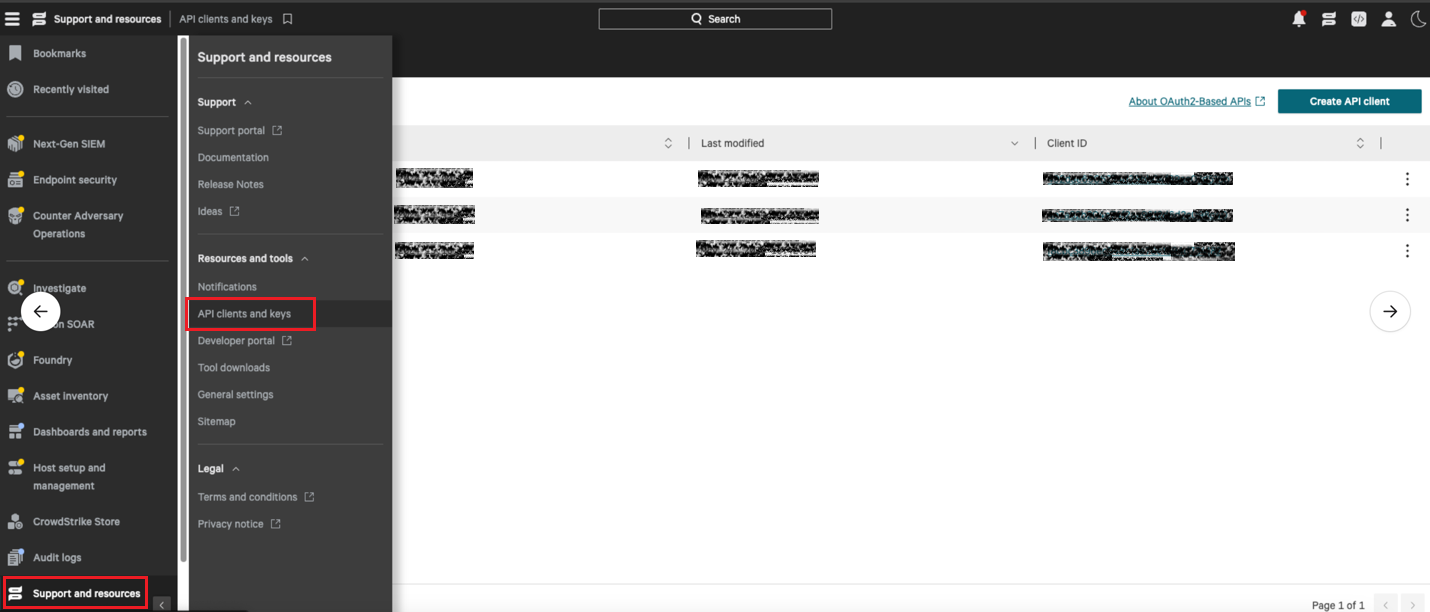
Navigate to Support.
Navigate to API Clients and Keys:
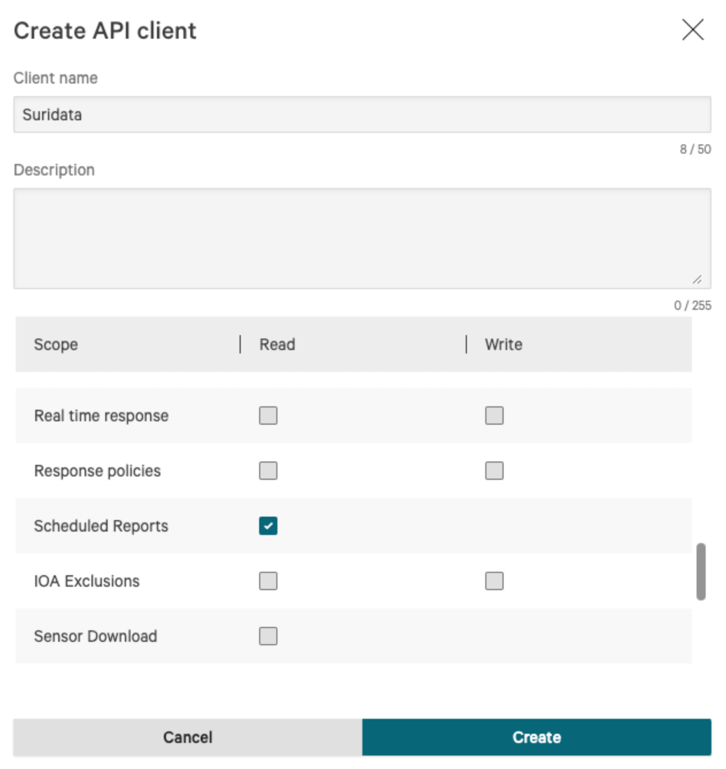
Click on: "Create API client"

A window will open. Fill in the Client Name, Description and grant the following scopes (Read):
Example 1:
Example 2:
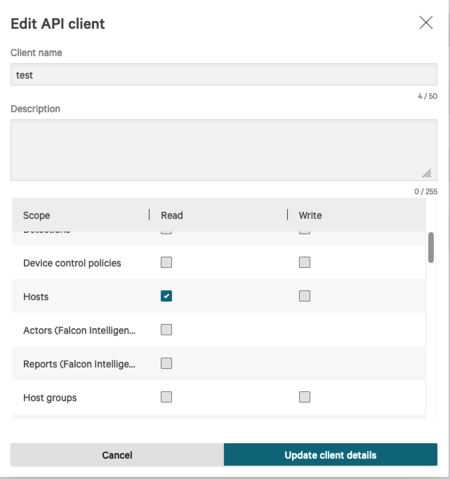
Click 'Create'.
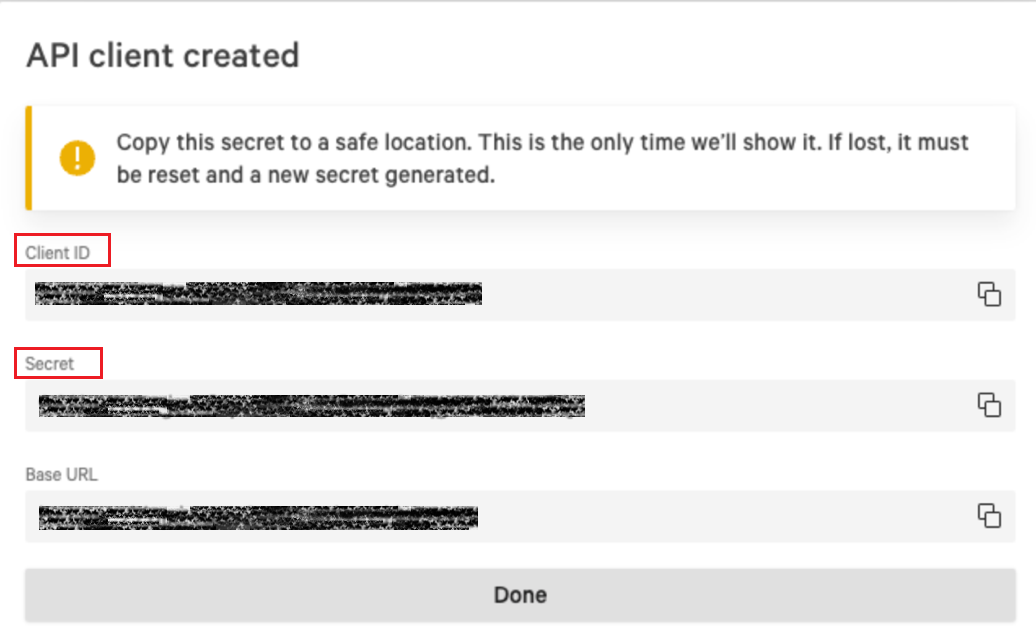
Copy the Client ID and Secret (you will need it for the connection to FortiCASB-SSPM).
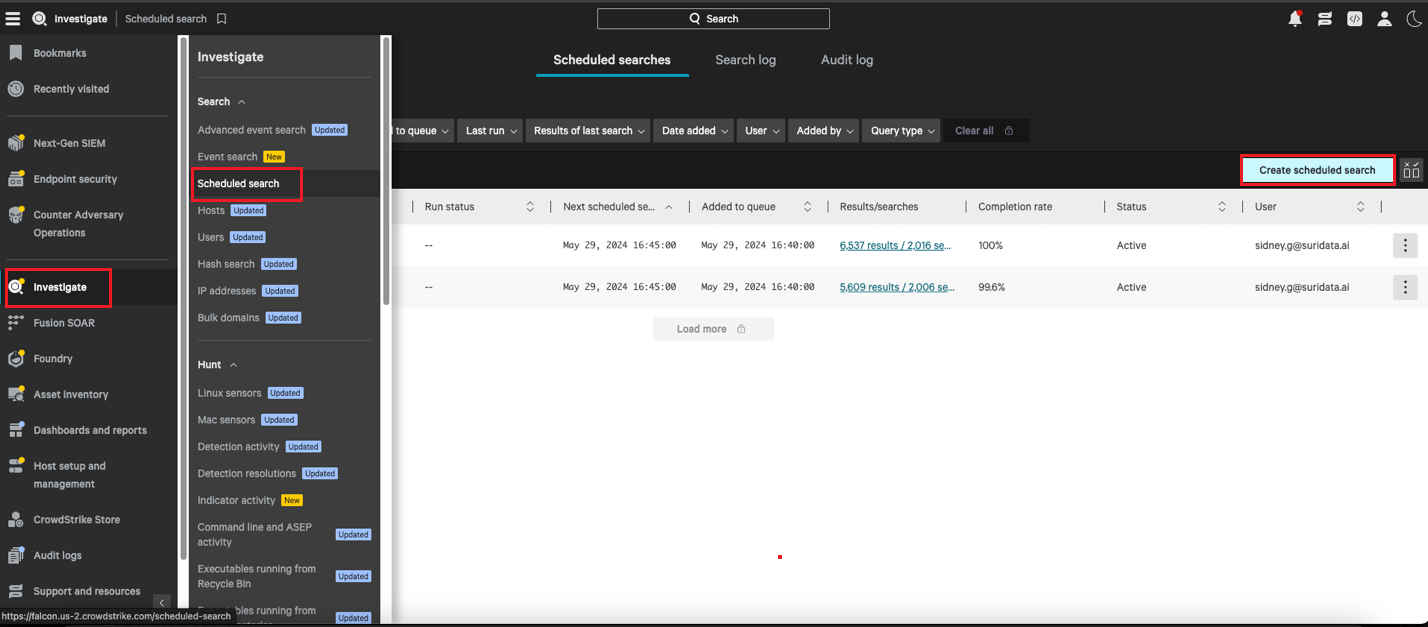
Go to 'Investigate'.
Go to 'Schedule search'.
Click on "Create Scheduled Search".
Choose All and click "Next".
In the search query, write: "DomainName is not empty".
Results file format: JSON and click "Next".
Set the search frequency to 1 Hour and the Search offset to 0 Hours, and click "Next".
Chose 'None' in the Notification type
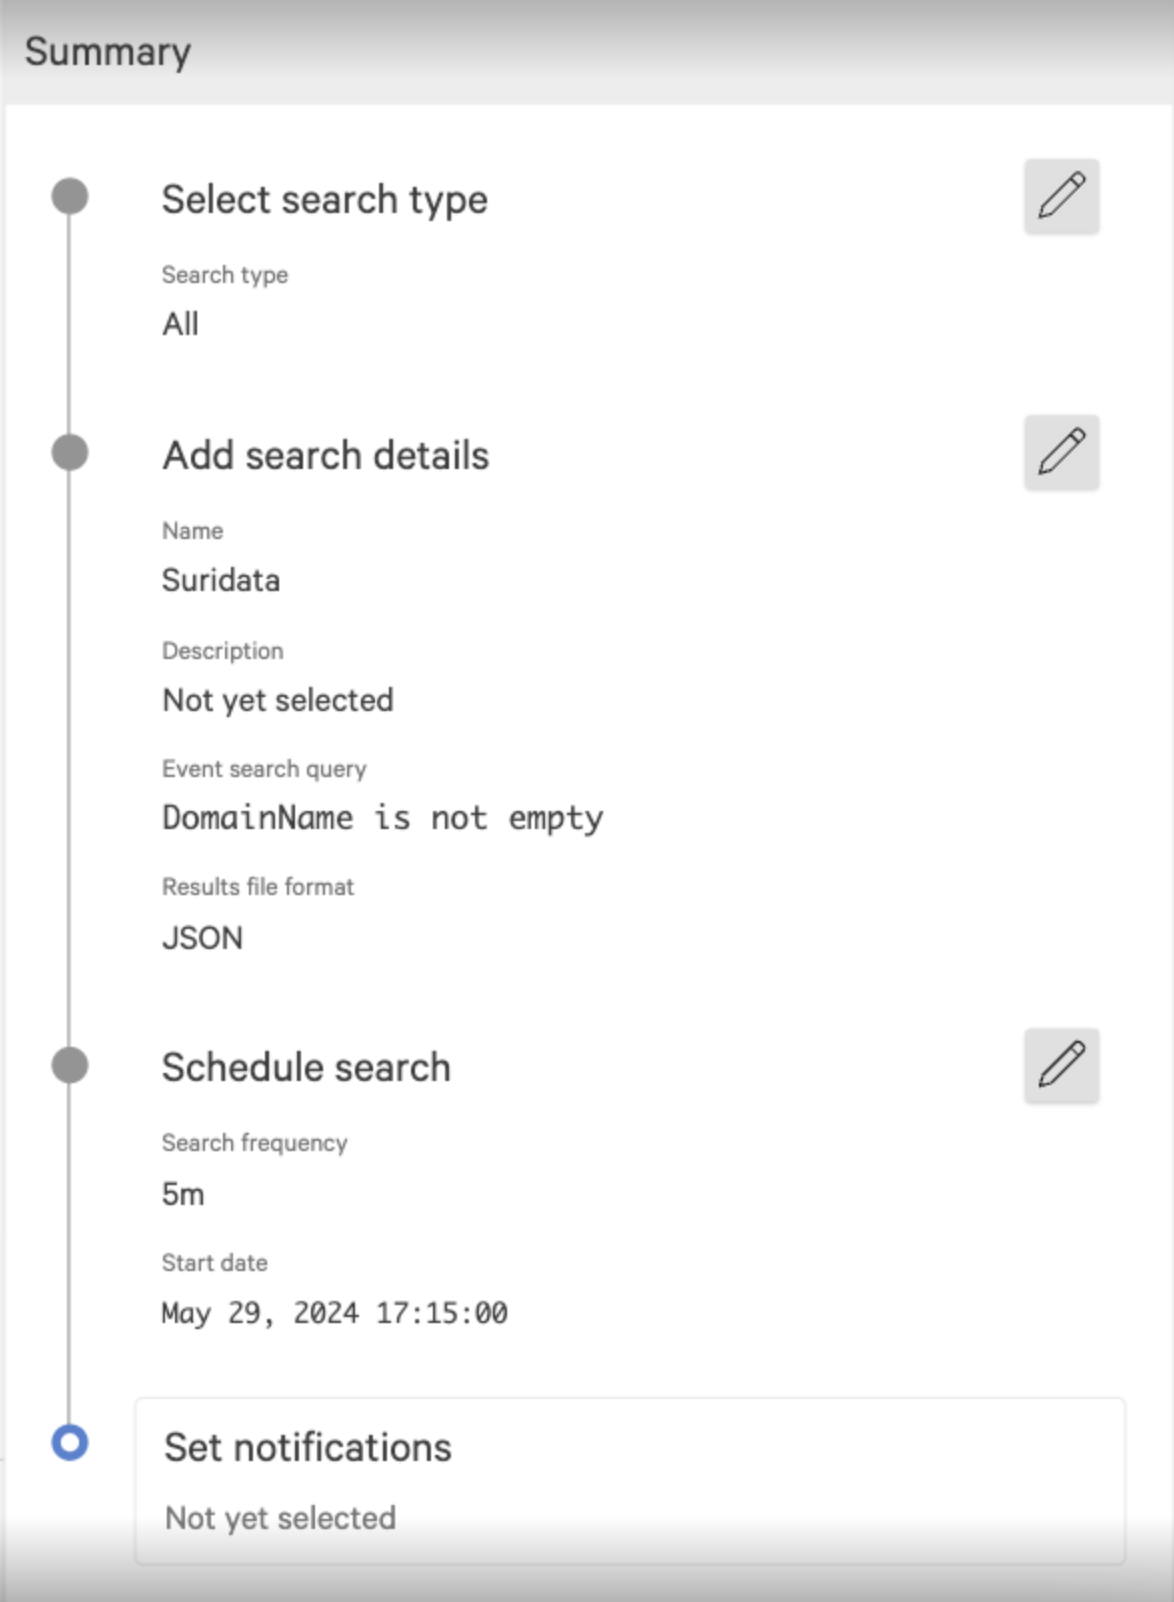
Click on "Schedule search" -your summary should look like this:
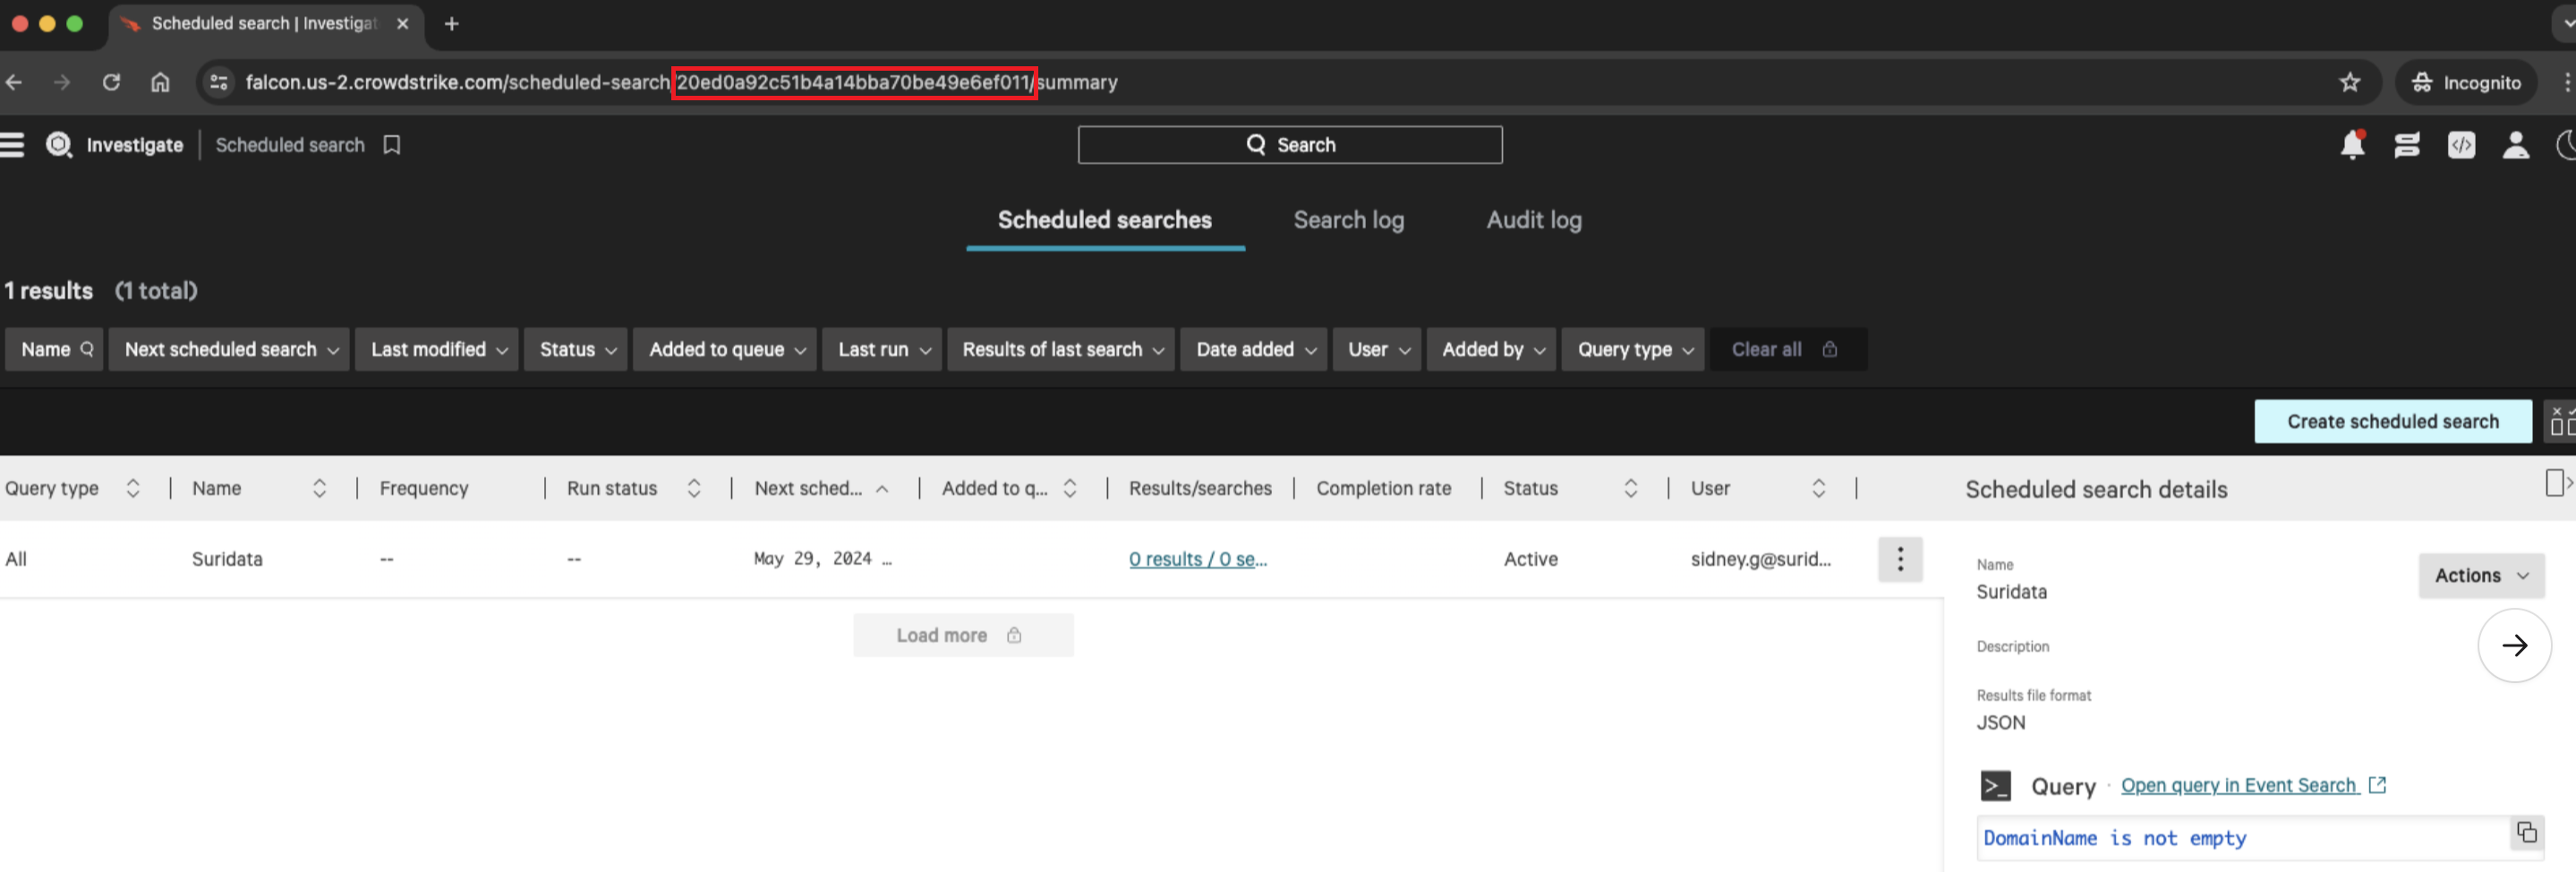
Click on "Created Search".
Copy both the URL itself and the ID (will be referred to as "Scheduled Search ID") from the URL (marked in red), they will also be required in the CrowdStrike settings configuration.
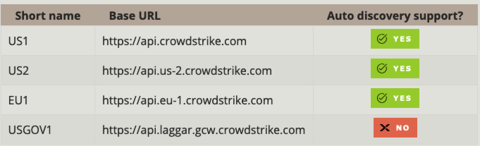
If your Base URL is not supported by Auto discovery (for example USGOV1), Copy your Base URL (if it is auto discovered do not enter the base-url field)
See example:
Login to FortiCASB-SSPM and navigate to the App Store > Click on CrowdStrike
Start by inserting the Client ID and Client Secret (which are mandatory). Insert the API Base Url if necessary
For Shadow-SaaS detection, check the box and fill in the "Scheduled Search ID" (please note that to receive user emails, a device management application must also be connected to FortiCASB-SSPM. Examples include Microsoft Intune or JumpCloud)
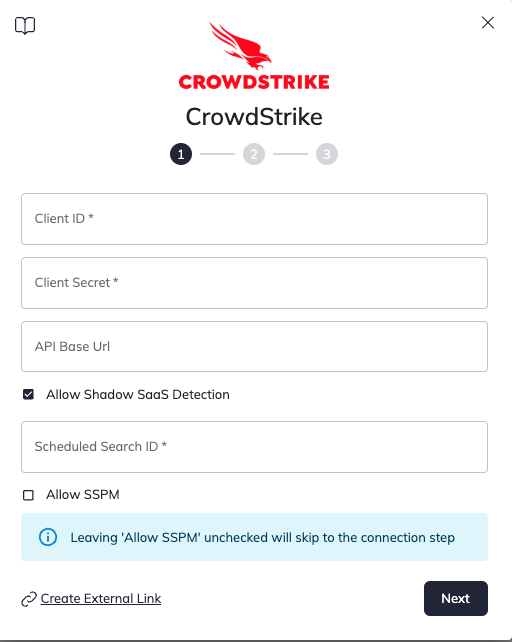
For SSPM capabilities (misconfigurations, users and 3rd parties) check the box and fill in the relevant fields in the next step (Username, Password and Login URL are mandatory)
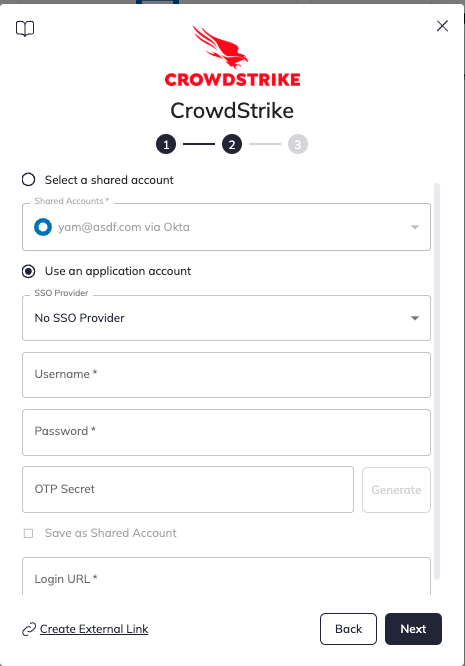
Note
Pay attention - Login URL should be without http:// or https:// and without /login
Example: falcon.crowdstrike.com
Click "Next" and proceed for the connection phase.
That's it! You're all set.
Your SaaS security is our priority!
The FortiCASB-SSPM Team

Use this guide to add Crowdstrike as a secured SaaS application in FortiCASB-SSPM SaaS Security platform.
Navigate to "Roles and Permissions"
Create Role:
See the following example:
Click on Edit permissions under each group name, mark the relevant permissions and click "Save". Example:
Do the same for the flowing groups:
| Group | Scope |
|---|---|
| API Client Management | View API client IDs |
| API Client Management | View API client details |
| Manage All Users | List assignable roles |
| Manage All Users | List host group assignments |
| Manage All Users | List user roles |
| Manage All Users | View host group assignments |
| Manage All Users | View user activity metadata |
| Manage All Users | View user details |
| Manage All Users | View user details (identities) |
| Manage All Users | View users |
| Manage Current Customer | Read customer access control settings |
| Response Policies and Settings | View Response policies |
| Role Management | Permission - List |
| Role Management | Permission - View |
| Role Management | Permission Group - List |
| Role Management | Permission Group - View |
| Role Management | Role Details |
| Role Management | Role Permission - List |
Navigate to User management:
Click on Create User
Fill in the details and in the role, select the one you just created: The email should be an email that is associated with the Crowdstrike interface
You will get an activation link from Crowdstrike. Click on it and continue the account registration:
Set a complex password:
When setting the MFA, first copy and save the activation key (this is the TOTP secret)
Complete the MFA registration
Sign in to your CrowdStrike account.
Navigate to Support.
Navigate to API Clients and Keys:
Click on: "Create API client"
A window will open. Fill in the Client Name, Description and grant the following scopes (Read):
Example 1:
Example 2:
Click 'Create'.
Copy the Client ID and Secret (you will need it for the connection to FortiCASB-SSPM).
Go to 'Investigate'.
Go to 'Schedule search'.
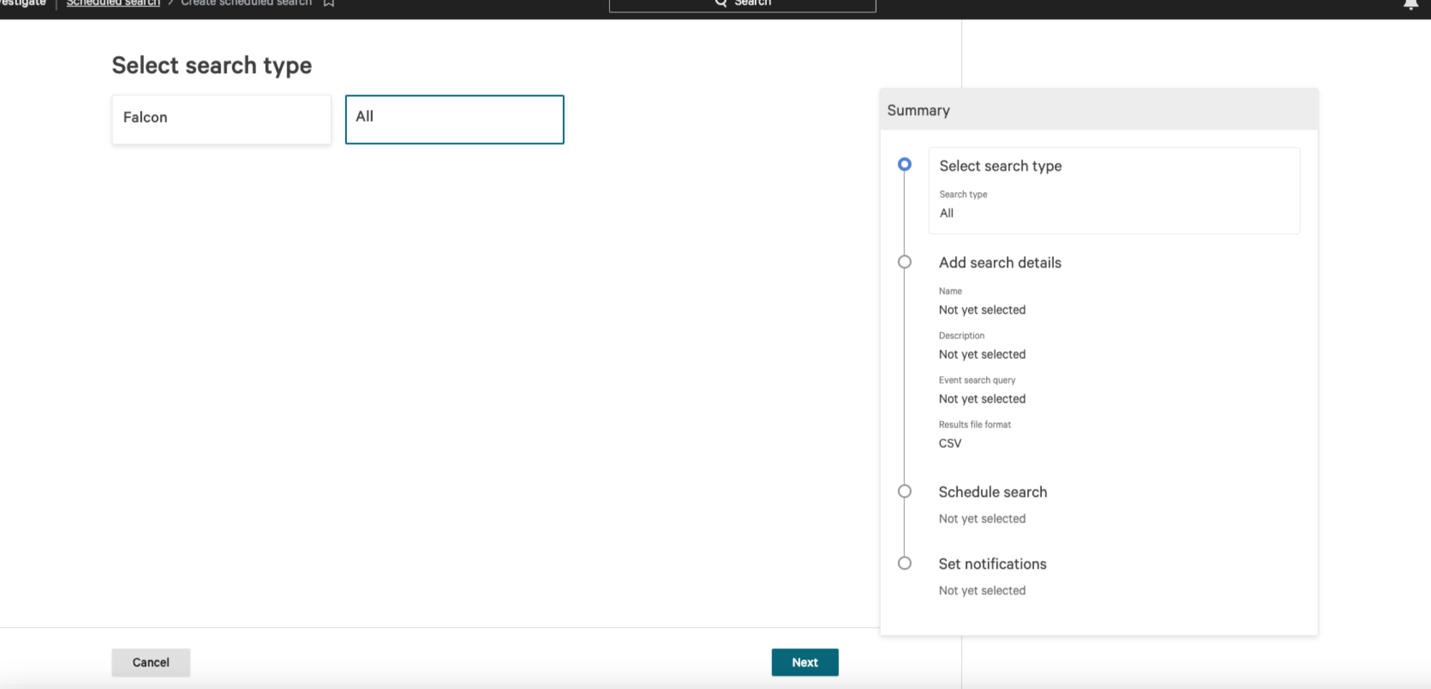
Click on "Create Scheduled Search".
Choose All and click "Next".
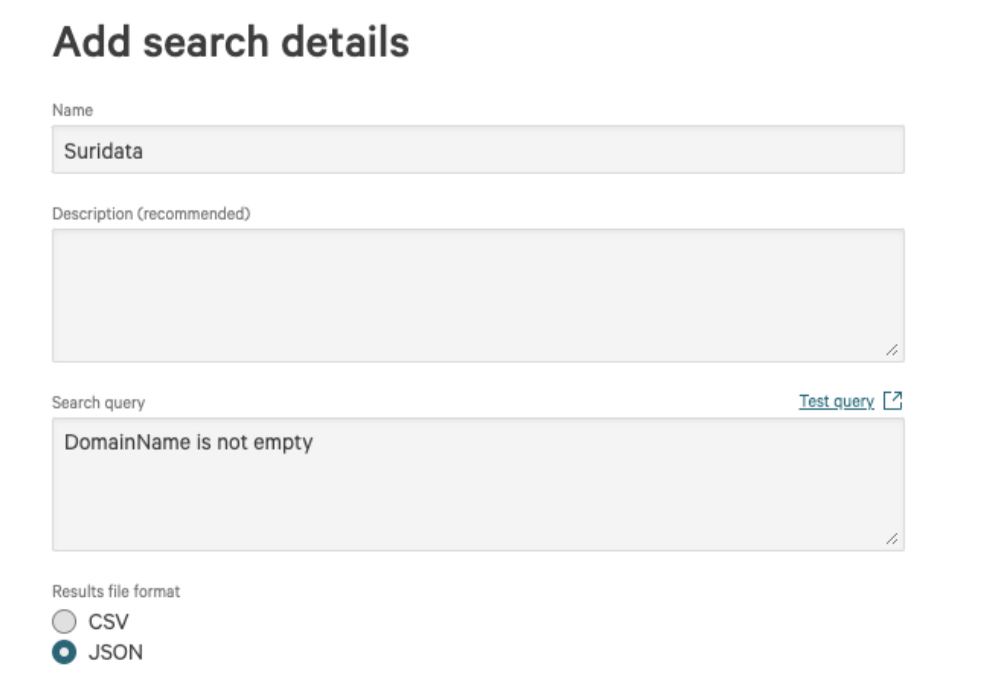
In the search query, write: "DomainName is not empty".
Results file format: JSON and click "Next".
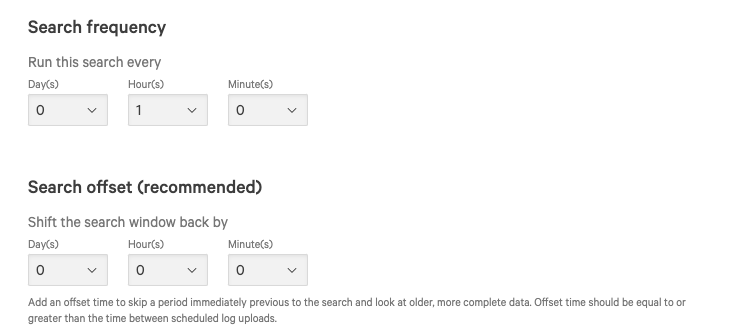
Set the search frequency to 1 Hour and the Search offset to 0 Hours, and click "Next".
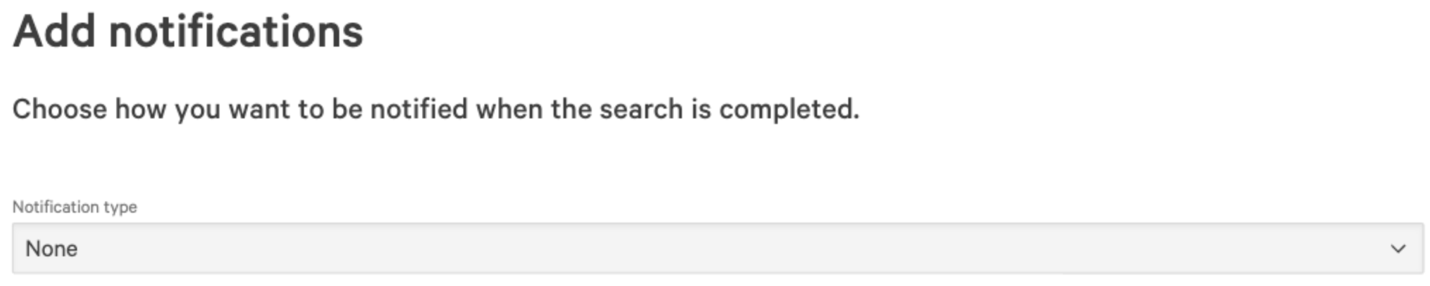
Chose 'None' in the Notification type
Click on "Schedule search" -your summary should look like this:
Click on "Created Search".
Copy both the URL itself and the ID (will be referred to as "Scheduled Search ID") from the URL (marked in red), they will also be required in the CrowdStrike settings configuration.
If your Base URL is not supported by Auto discovery (for example USGOV1), Copy your Base URL (if it is auto discovered do not enter the base-url field)
See example:
Login to FortiCASB-SSPM and navigate to the App Store > Click on CrowdStrike
Start by inserting the Client ID and Client Secret (which are mandatory). Insert the API Base Url if necessary
For Shadow-SaaS detection, check the box and fill in the "Scheduled Search ID" (please note that to receive user emails, a device management application must also be connected to FortiCASB-SSPM. Examples include Microsoft Intune or JumpCloud)
For SSPM capabilities (misconfigurations, users and 3rd parties) check the box and fill in the relevant fields in the next step (Username, Password and Login URL are mandatory)
Note
Pay attention - Login URL should be without http:// or https:// and without /login
Example: falcon.crowdstrike.com
Click "Next" and proceed for the connection phase.
That's it! You're all set.
Your SaaS security is our priority!
The FortiCASB-SSPM Team