


Creating users, user groups, and roles within Organizations
New IAM users, user groups, and IdP roles can be created from the appropriate Identity & Access Management portal pages. When you configure the details, the Choose a Type and Permission Scope features can be used to define Local or Organization type, and the asset folder or OU path, respectively.
To create an IAM user:
- Select Users from the left-hand navigation menu. The Users page opens.
- Click Add New > IAM User. The User Details pane opens.
- (Optional) Click Apply same permissions as existing User, and then select a user from the dropdown. You can configure the permissions later.
- Enter the user's details and click Next.
Username Type the username with no spaces. Full Name Type the user's first and last name. Email Type the user's email address. Phone Select the country code from the dropdown, and type the user's phone number. Description (Optional) Type a description of the user. 
-
(Optional) Add the user to an IAM user group. See User groups.
-
Select Yes from Basic Info.

A dropdown list of user groups is displayed.
-
Select a user group from the dropdown.
-
Click Next, and proceed to Step 10.
-
- Select the Organization user type from Choose A Type dropdown list.

-
Select the scope from the Permission Scope dropdown.

Permission Scope options depend on the type you select in the previous step. For example, if the Organization type is selected, the OU scope will be selected here. The available scope will be applied in this case.

- In the Permissions Profile dropdown, select a profile. The Permission Details assigned to the selected profile are displayed.
- Click Next. The Confirmation page is displayed.
- Review the user information, and click Confirm. The user's details are displayed.
Account credentials must be shared with the user. The user can generate a password reset link and share it with the newly created IAM user.
To create a user group:
- Select User Groups from the left-hand navigation menu. The User Groups page opens.

- Click Add IAM User Group. The IAM User Group Information page is displayed.
- In the Group Name field, enter a name for the group.
- (Optional) In the Description field, describe the group.
- (Optional) Set the Status to Disabled. The status is Active by default.
- Click Next.
- Select the user type from Choose A Type dropdown list.
-
Select the scope from the Permission Scope dropdown.
Permission Scope options depend on the type you select in the previous step. For example, if the Organization type is selected, the OU scope will be selected here. The available scope will be applied in this case.
- In the Permissions Profile dropdown, select a profile. The Permission Details assigned to the selected profile are displayed.
- Click Next. The Add IAM user(s) page is displayed.
- Assign users to the group.
- Click Add User.
- (Optional) Click Filter users by Group, to view users in a group. Selecting a user in a group will remove the user from that group.
- (Optional) Enter a username in the search bar, and enter the user name. As you type, partial results are returned.
- Select the users and click Add.
- Click Next.The Confirmation page is displayed.
- Review the group permissions, and click Confirm.

- (Optional) Click Add Another Group.
To add an external user role:
- Select Users from the left-hand navigation menu. The Users page opens.
- Click Add New > External IDP Role.
The External IdP Role page opens.
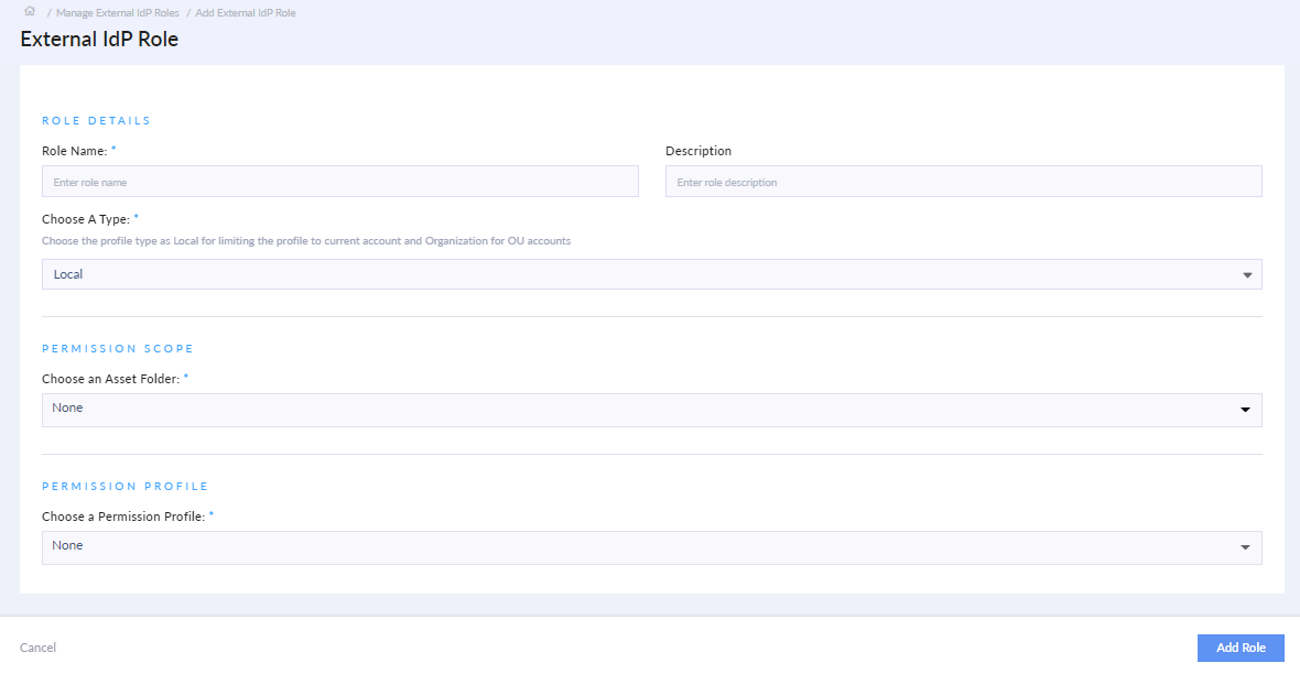
- In the Role Name field, type the name of the role.
- (Optional) In the Description field, enter a description of the role.
- Select the Organization user type from Choose A Type dropdown list.
- From the Permission Scope dropdown, select an asset folder or Organizational Unit.
Permission Scope options depend on the type you select in the previous step. For example, if the Organization type is selected, the OU scope will be selected here. The available scope will be applied in this case.
- In the Permissions Profile dropdown, select a profile. The Permission Details assigned to the selected profile are displayed.
- Click Add Role.