
Notifications
Manage notification settings, including which events trigger notifications and the destinations where they are delivered.
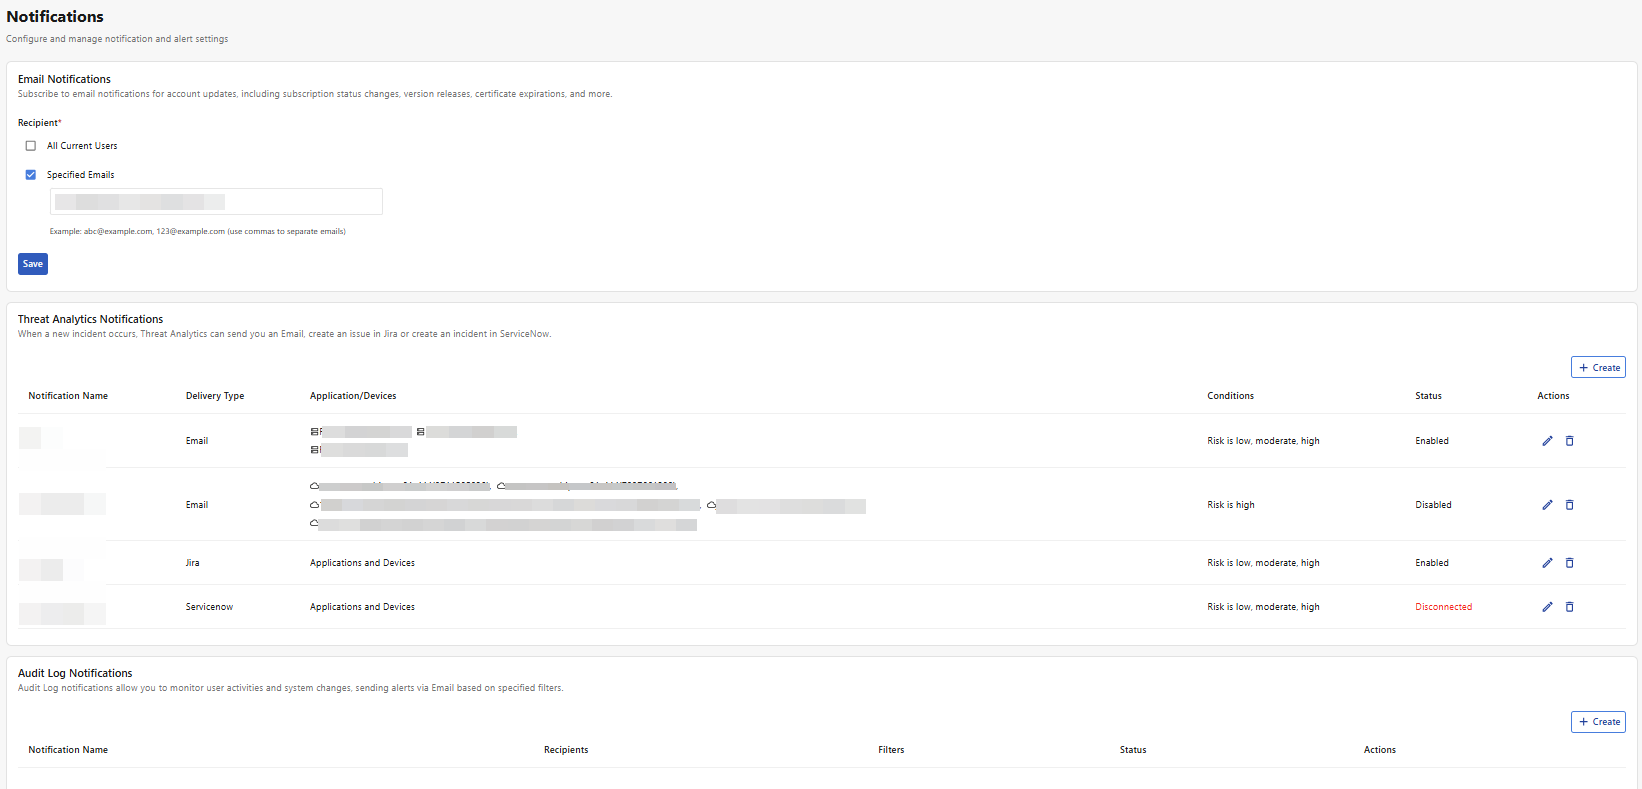
Email Notifications
Configure recipients for account-related email notifications, such as subscription changes, version releases, and certificate expirations.
Note: These recipients receive only general account notifications. Other notification modules manage their own recipient settings separately.
-
Select any of the following options:
Recipient
Description
All Current Users
Select to send email notifications to all users associated with this account.
Specified Emails
Select to input email addresses to receive these notifications. Separate email addresses with commas.
-
Click Save to apply changes.
Threat Analytics Notifications
Receive notifications for selected applications and devices when activity reaches the specified risk level.
-
Click Create.
-
Configure the following:
-
Setting
Description
Notification Name
The internal name by which this set of notification rules is displayed.
Enable Notification
Enable to receive notifications for this configuration set.
You can disable it later to pause notifications without losing your configurations.
Scope
-
All Applications and Devices: Select this option if you want to apply this set of configurations to all applications and devices under your account.
-
Customized: Select this option to move applications and devices to the selected list to receive notifications for them.
-
-
Click Next.
-
Configure the following:
Setting Description
Notify me when Set the lowest risk level you want to receive notifications for.
-
Low: Receive notifications for all threat analytics events.
-
Moderate: Receive notifications for Moderate and High risk events.
-
High: Receive notifications for High risk events.
Type
Select how you would like to receive notifications.
-
Email
-
Jira
-
ServiceNow
-
If you selected Email, configure the following:
Setting
Description
Input Example
Recipient
Enter up to 10 email addresses to receive these notifications, separated by commas.
user@a.com,user@b.com
Subject
Enter the subject line for this email notification.
You can include keywords to help with email filtering.
Use %% to indicate placeholders, such as %%RISK%%, %%DESCRIPTION%%, or %%HOST_DESC%%.
[%%RISK%%] Alert on %%HOST_DESC%% – %%DESCRIPTION%%
-
If you selected Jira, configure the following:
Setting
Description
Jira URL
Enter the URL of the Jira instance to which notifications should be sent.
Account (Email)
Enter the email address of the Jira user account that FortiAppSec Cloud will use to send notifications. This account is used to authenticate with your Jira instance and post issues or comments on your behalf.
Token
Enter the API token associated with the Jira account provided in the Account (Email) field. This token is used to authenticate FortiAppSec Cloud with your Jira instance securely.
To access this token:
-
Generate the token in Jira for the user account you entered.
-
Ensure the token has the required permissions to create or update issues.
-
The token allows FortiAppSec Cloud to send notifications without storing the Jira password.
-
-
If you selected ServiceNow, configure the following:
Setting
Description
ServiceNow URL
The web address of your ServiceNow instance where FortiAppSec Cloud will send notifications.
Client ID
The unique identifier for the OAuth application in ServiceNow. This identifies FortiAppSec Cloud as a trusted client for sending requests.
Client Secret
A confidential key associated with the Client ID. It is used to authenticate FortiAppSec Cloud with ServiceNow. Keep it secure.
Refresh Token
A token used to obtain a new access token when the current one expires, allowing FortiAppSec Cloud to maintain a continuous connection with ServiceNow without requiring repeated authentication.
-
-
Click Save to apply changes.
Audit Log Notifications
Receive email notifications for user activities and system changes based on specified conditions.
-
Click Create.
-
Configure the following basic settings:
Setting
Description
Notification Name
The internal name by which this set of notification rules is displayed.
Recipients
Input email addresses to receive these notifications. Separate email addresses with commas.
Enable Notifications
Enable to receive notifications for this configuration set.
You can disable it later to pause notifications without losing your configurations.
-
Configure Notifications Conditions.
From the dropdown list, select the category of events for which you want to receive notifications:-
Custom
-
WAF Health Check Events
-
WAF DNS Status Events
-
Automatic Certificate Failures
-
WAF Module Updates
If you select any category other than Custom, the system automatically applies the predefined notification settings for that category.
-
-
Add and/or edit Notification Conditions. This is optional if you selected any category other than Custom in the previous step.
Settings
Description
Field
The Field specifies the attribute of an event you want to filter. The available options correspond to the columns in the Audit Logs table. Depending on the selected Field, you can set an Operator and Value to determine which audit log entries trigger notifications.
-
Level: The system's assessment of the urgency level for this logged event.
-
Message: Details regarding the event as gathered from the system.
-
Service: The service that detected this event.
-
User: If the event pertains to a user in your organization, their username will be displayed in this field; otherwise, it will show as None.
-
Action: This field specifies the action recorded in this audit log.
-
Module: This field describes the nature of the log.
For more details, including the meaning of values for each field, please refer to Audit Logs.
Operator
Select how the field value should be matched:
-
Is
-
Is not
Value
Depending on the selected Field, clicking the input box for Value will display a dropdown list of valid options that appear in your Audit Logs. You can:
-
Begin typing to filter the suggestions and select the desired value.
-
Enter a custom value not listed in the dropdown. Note that custom entries may not be effective.
-
-
Click Save to apply changes.