


Deploying FortiADC-VM on Azure Cloud Platform
There are two methods to configure the FortiADC instance on Azure. The first is an automatic method in Marketplace, the second is by using a user uploaded image.
A. Automatically upload the image
Starting from 5.2.4 we suggest configuring the ADC instance from Marketplace.
1. Go to Azure > Marketplace > Search for "FortiADC".
2. Click Create.
You have created a FortiADC instance using a default image, which is automatically of the newest version. Now, in this document, you can skip to 4. Create virtual machine, under "B. Configure the FortiADC Instance using the user uploaded image."
B. Configure the FortiADC Instance using the user uploaded image
1. Upload boot.vhd to blobb
Download FortiADC image from https://support.fortinet.com. Such as:
FAD_AZURE-V500-buildXXXX-FORTINET.out.azure.zip
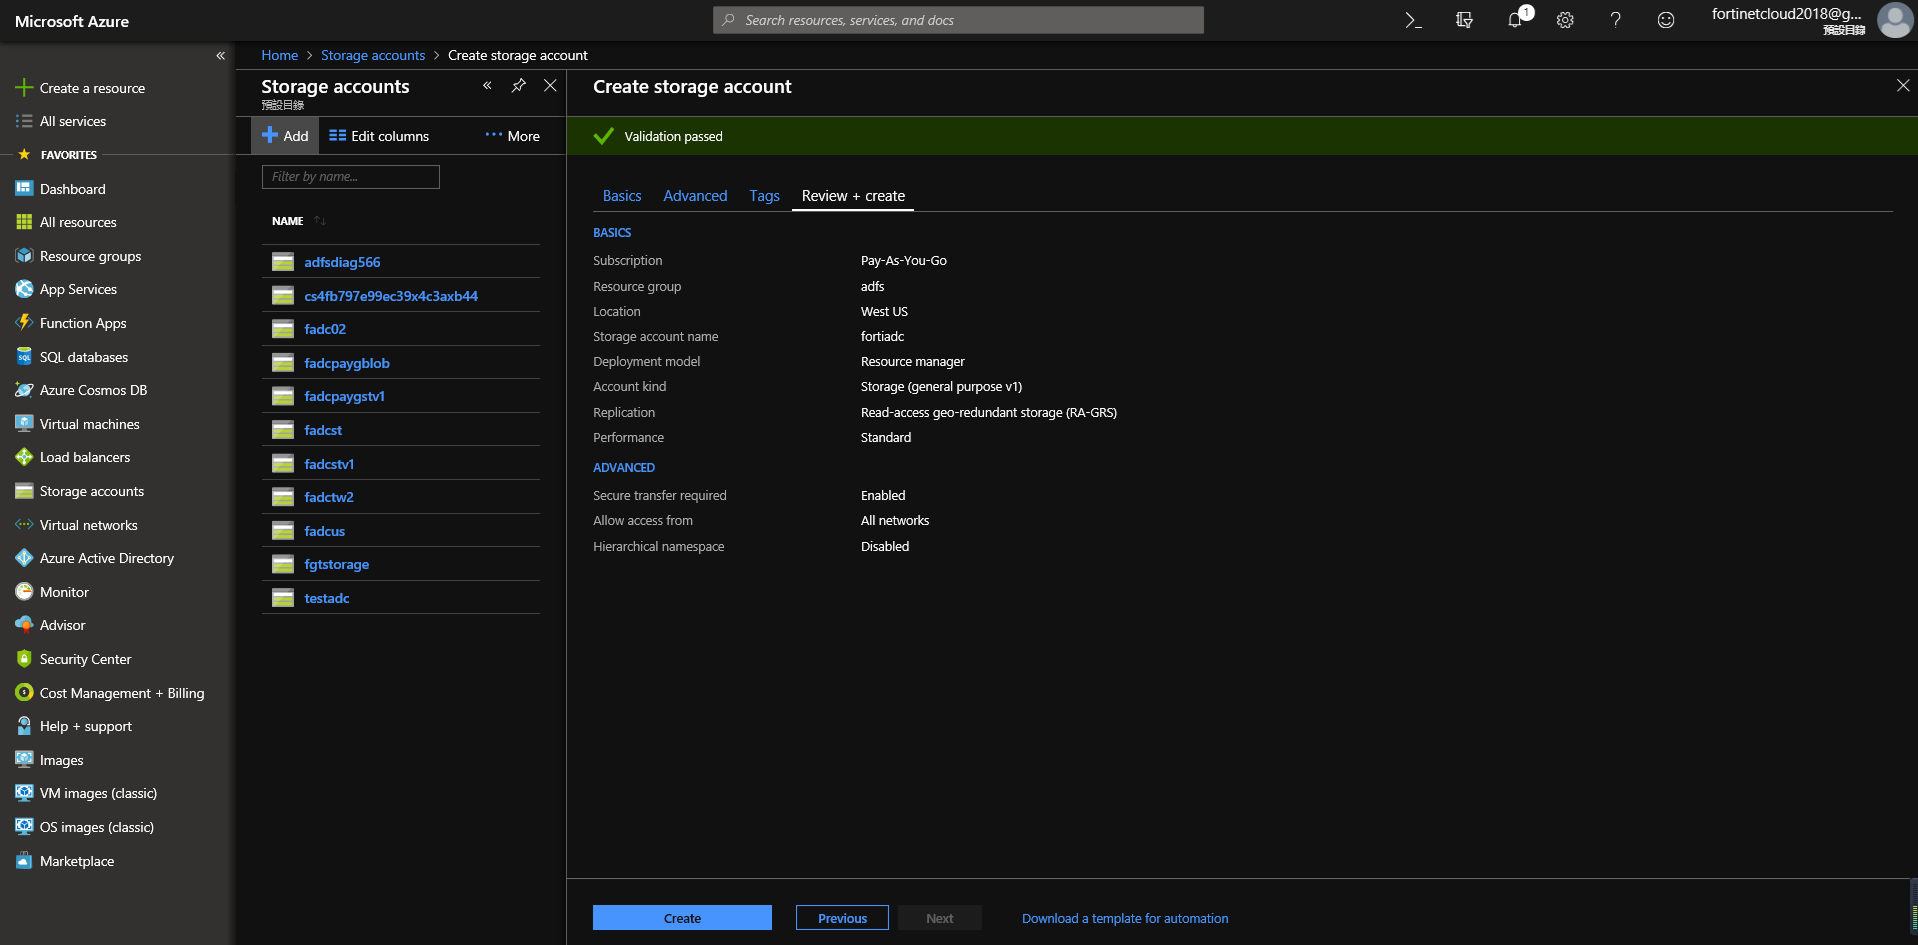
Unzip it. You will find the file boot.vhd. Navigate to Home > Storage accounts. Create a storage account, select “Resource”, write “Storage account name”, select “Location."
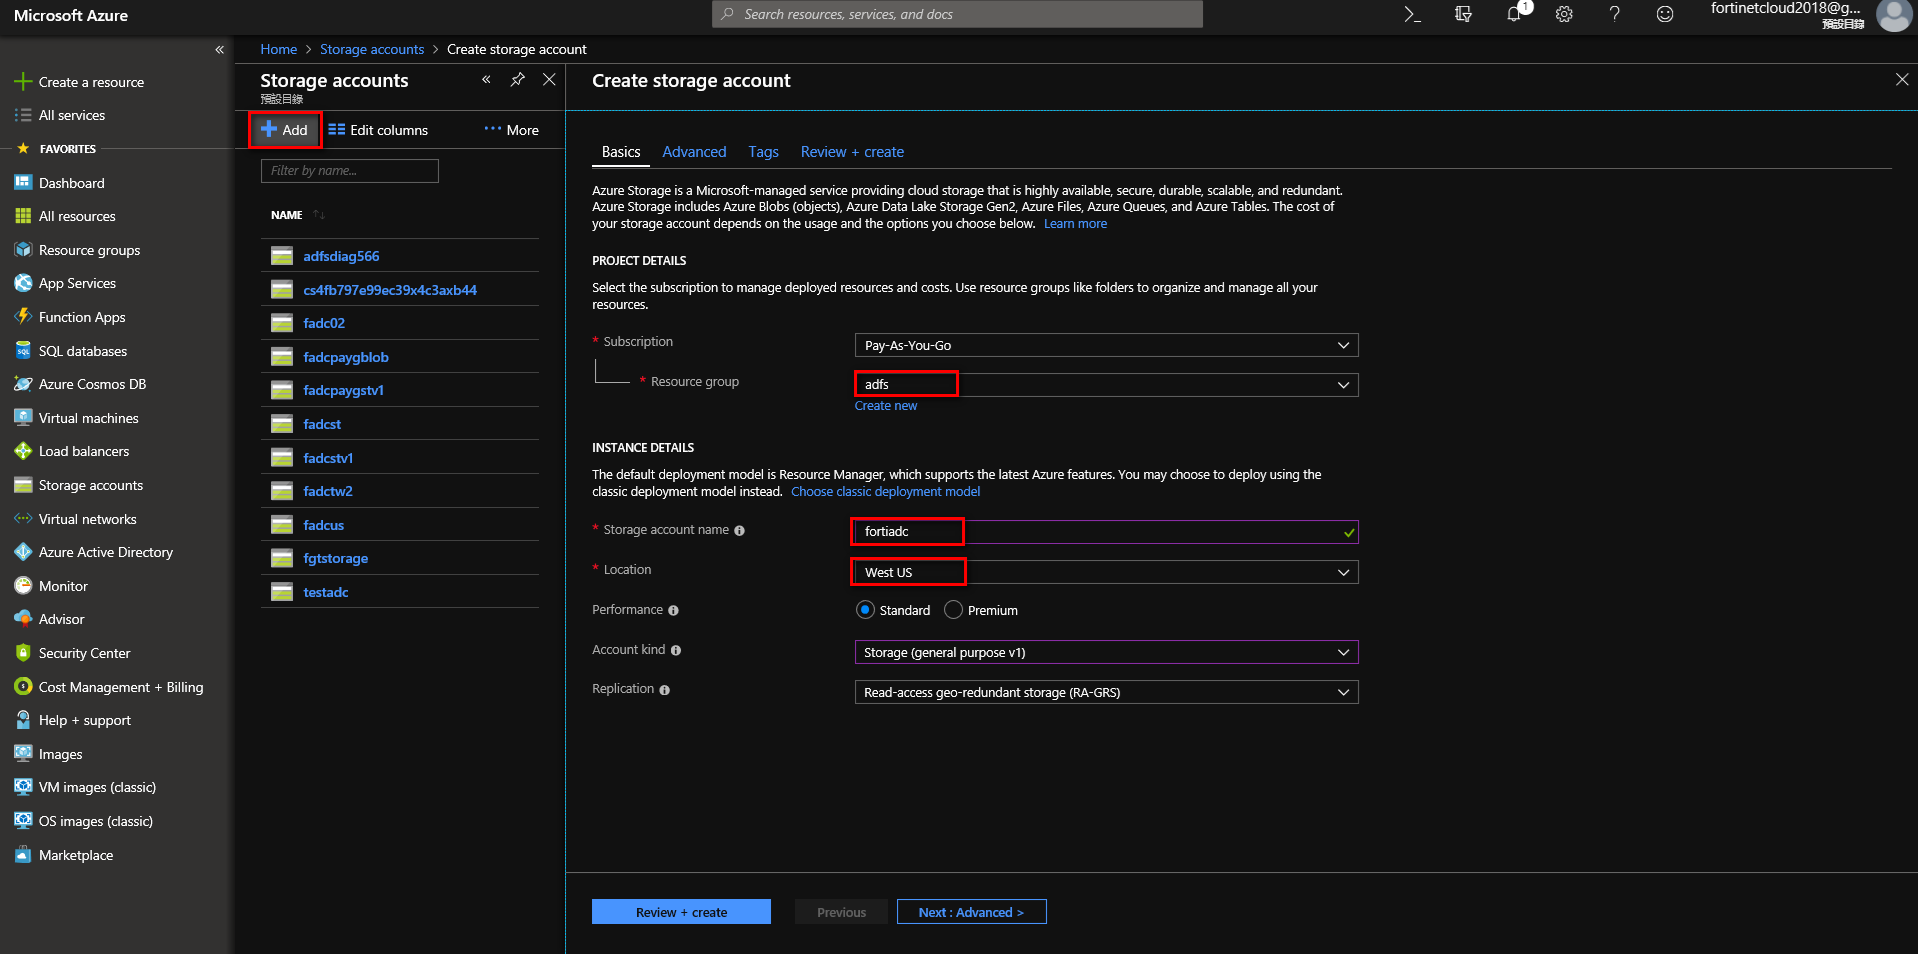
Create storage account
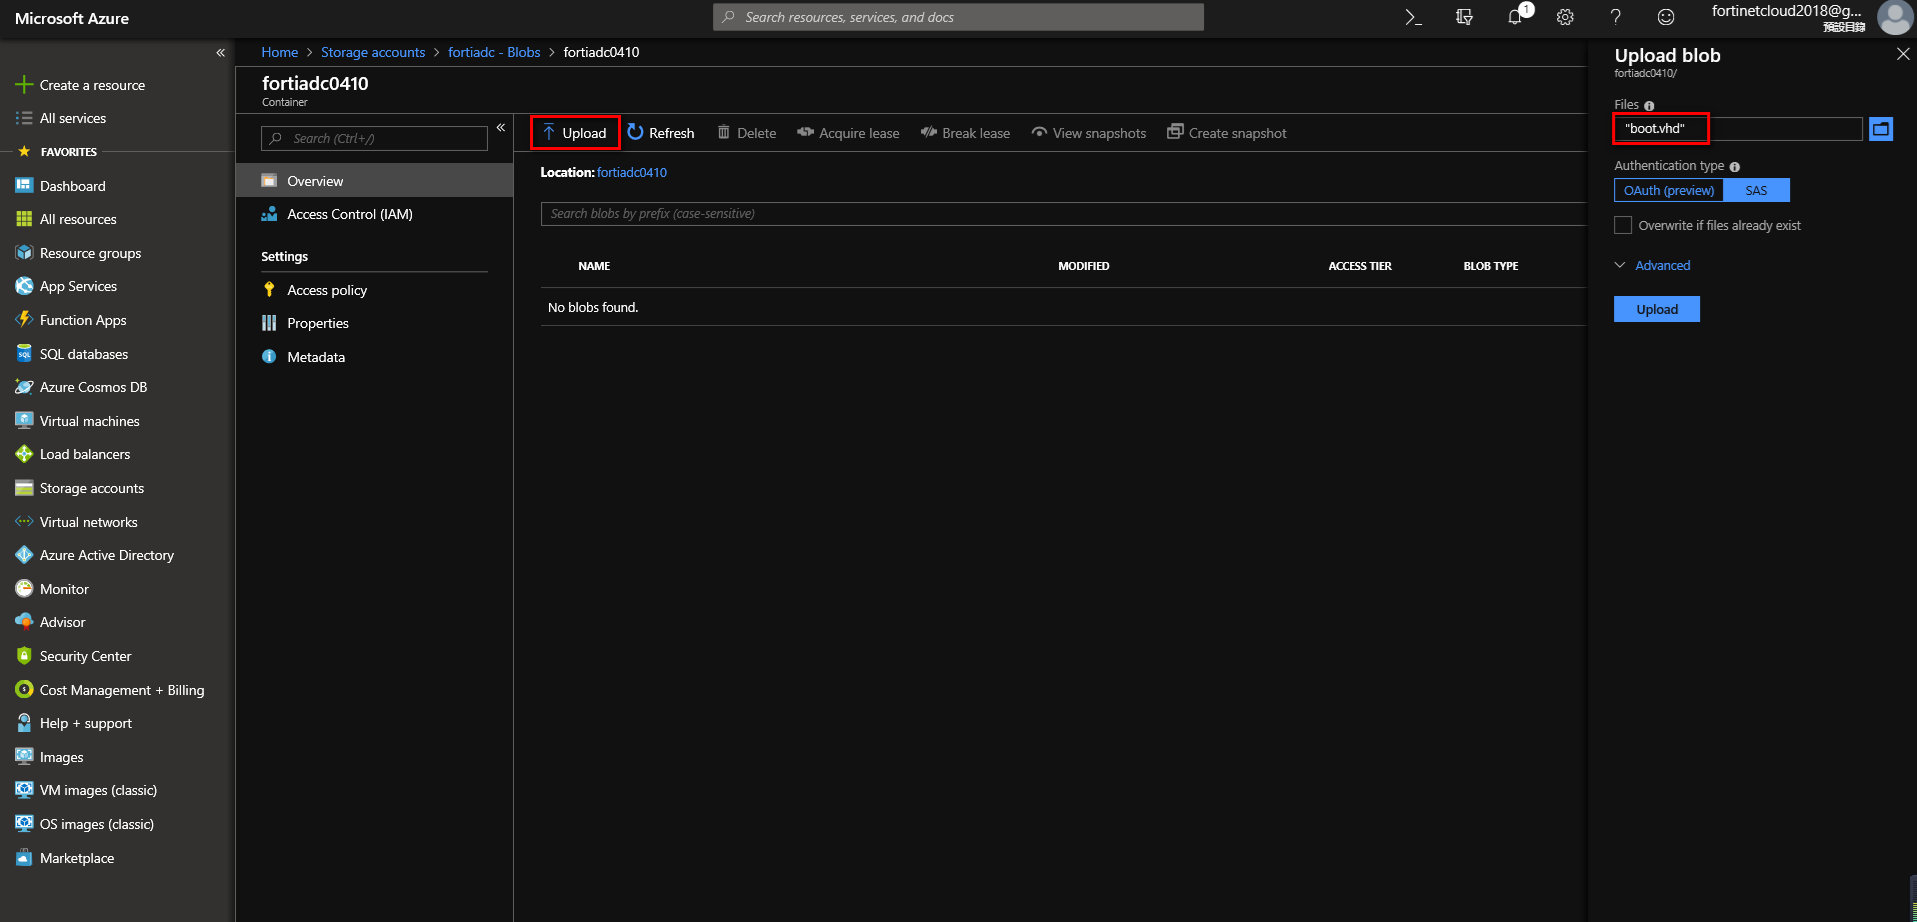
In the newly created storage account, add a new container, then upload the file boot.vhd.

2. Create image from boot.vhd.
Navigate to Home > Images > Create image. Write in a name, select a resource group, choose a location, set the OS type to Linux, select the previous file boot.vhd. Then select account type as Host Caching.

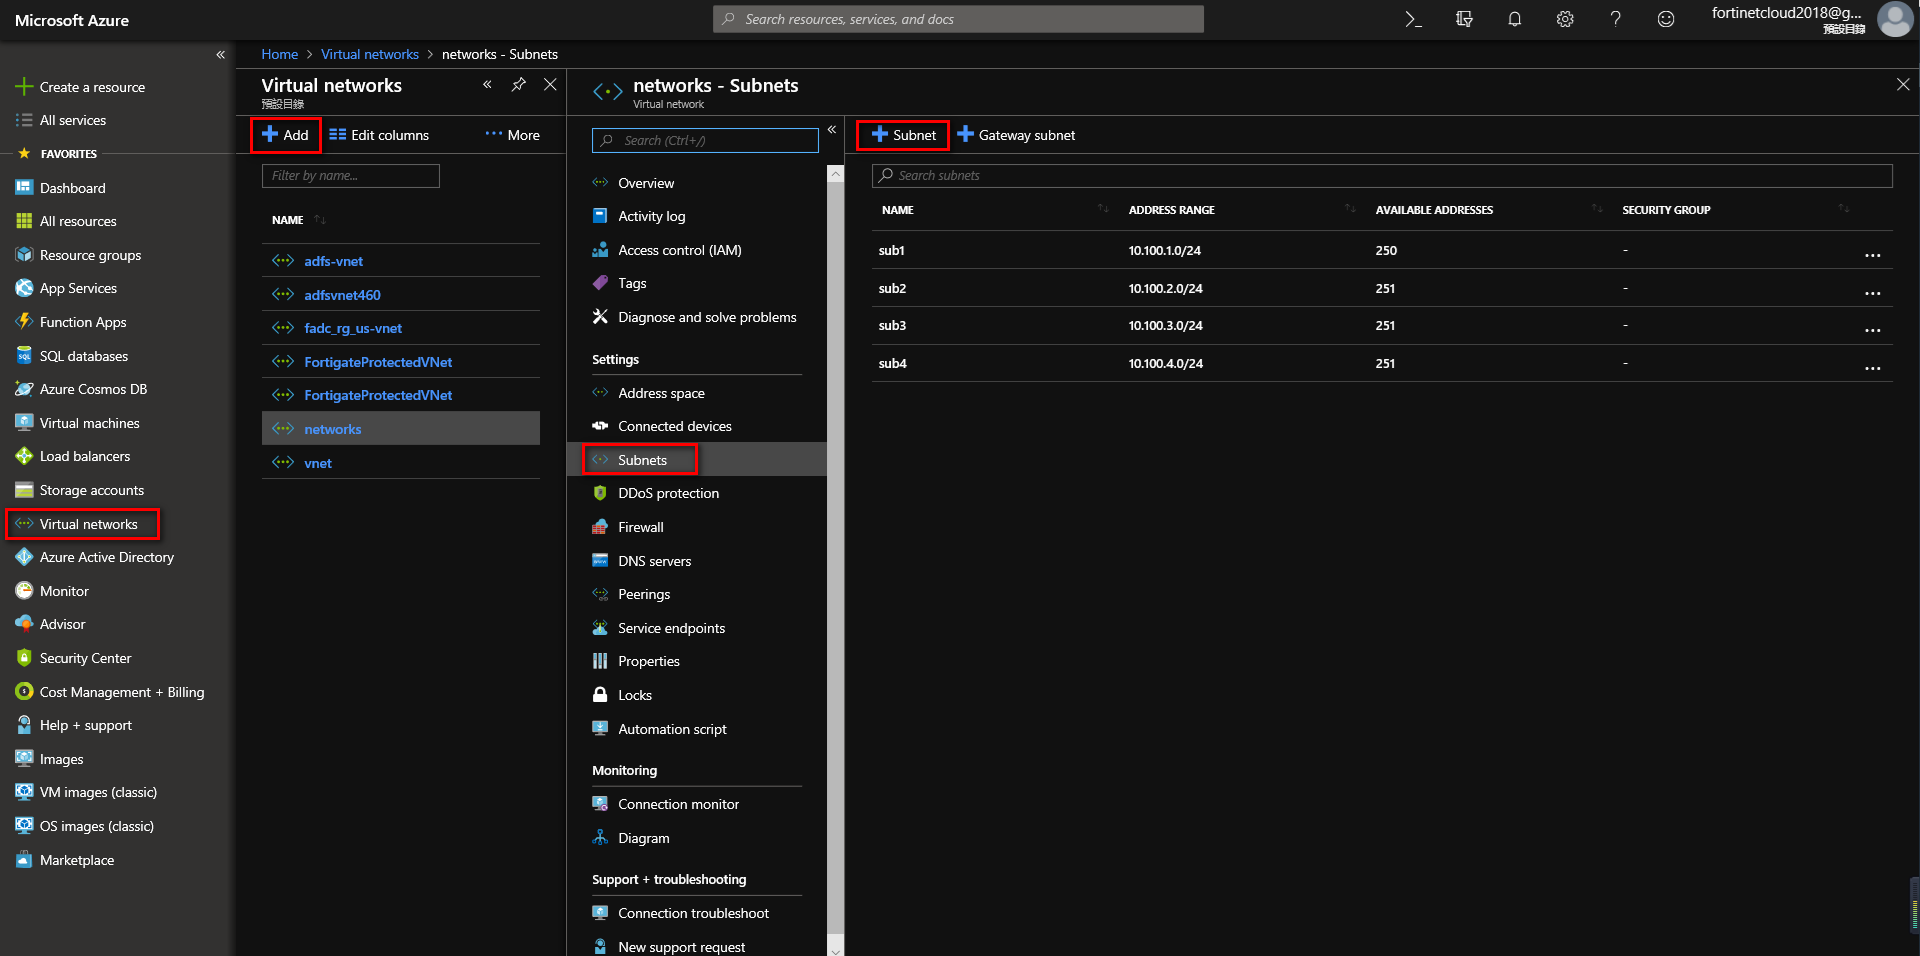
3. Create virtual networks
Navigate to Home > Virtual Networks, click Add to create a virtual network, then add a subnet.
4. Create virtual machine
You can go to the Virtual Machine page to create a VM, though you can also go from the image itself to create a VM. Navigate to the Images page, choose the image you want, then click Create VM.

Choose “Resource group”, write in “Virtual machine name”, choose “Region”, determine the “Image." It's recommended you choose a size that supports at least 2 VCPUs. Also, your memory cannot be lower than 4GB.
For Authentication type, choose “password," determine the Username and Password. For Public inbound ports select Allow select ports. For select inbound ports, choose HTTP, HTTPS, SSH.


Create a log disk for the VM.


Configure Networking, select the network and subnet. After creating the VM, you can also add interfaces according to your needs.

Go to VM Management, enable identity for access token.

Afterwards, click “Review + create” to create the virtual machine.
5. Access the FortiADC
In the FortiADC VM, find the public IP address. In a browser, navigate to http://<public_IP_address>. Use the VM username that you previously created; you cannot use the default username 'admin.' Of course you can also go through SSH or HTTPS to access the public IP of the FortiADC.

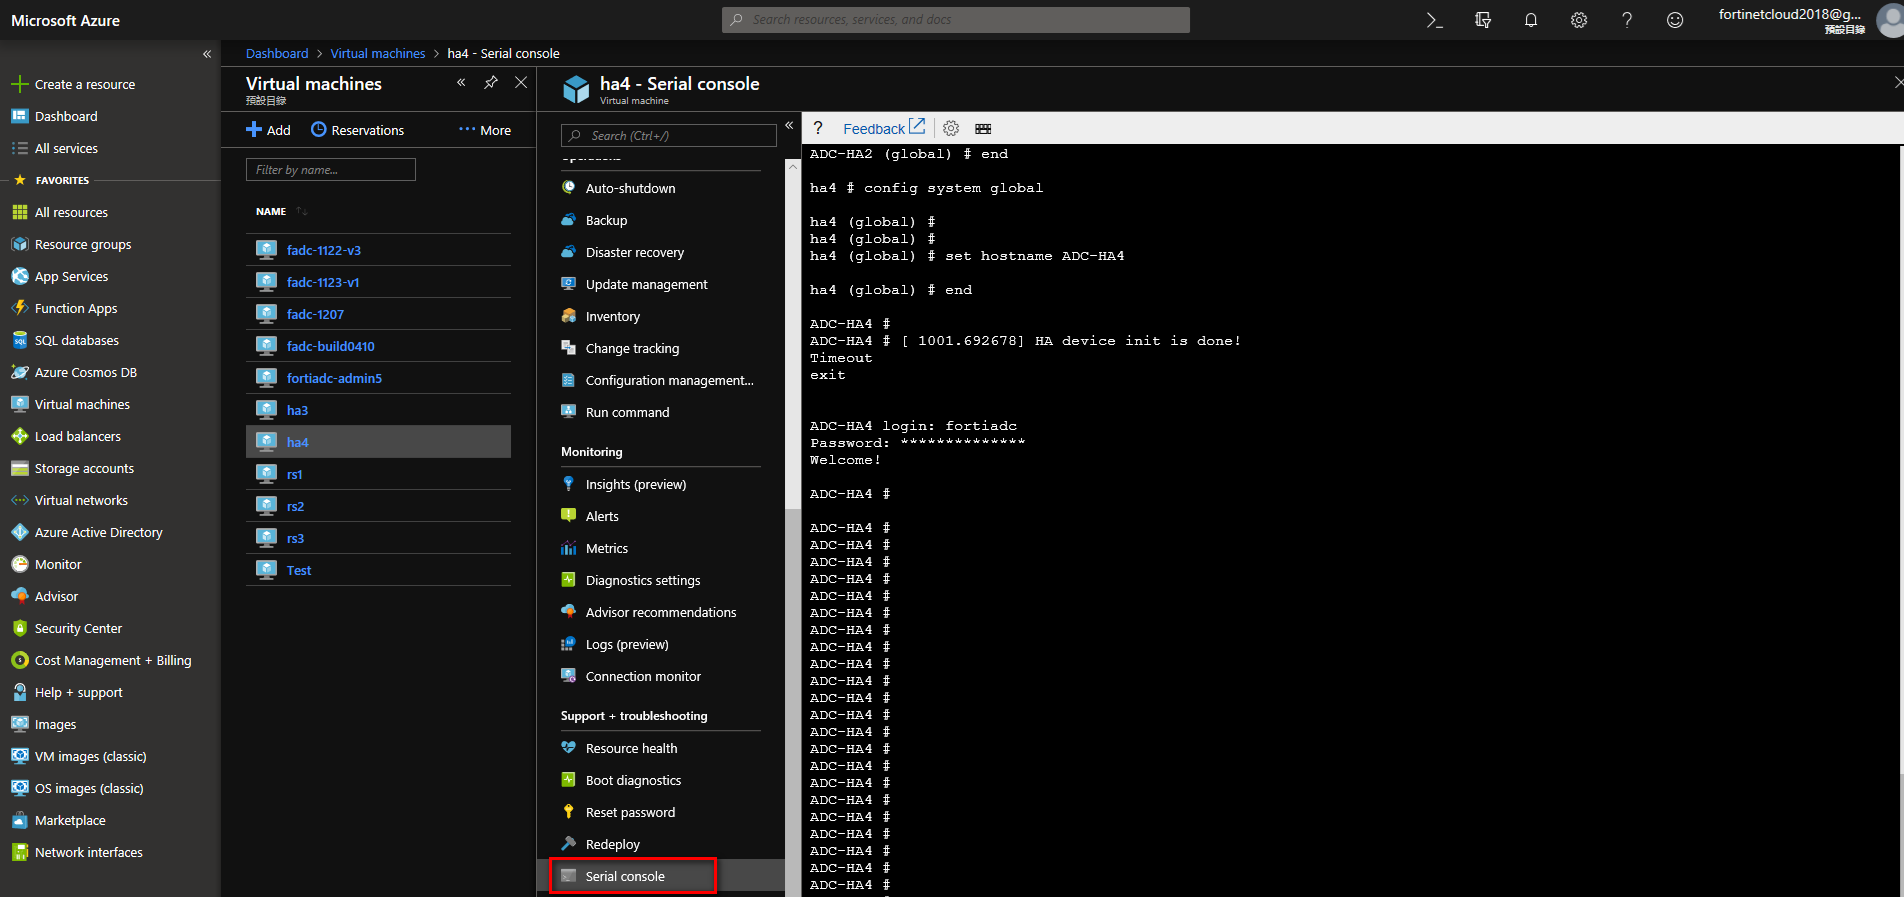
You can also use Connect to serial, to access the FortiADC.
6. Add interface and attach it to the FortiADC VM
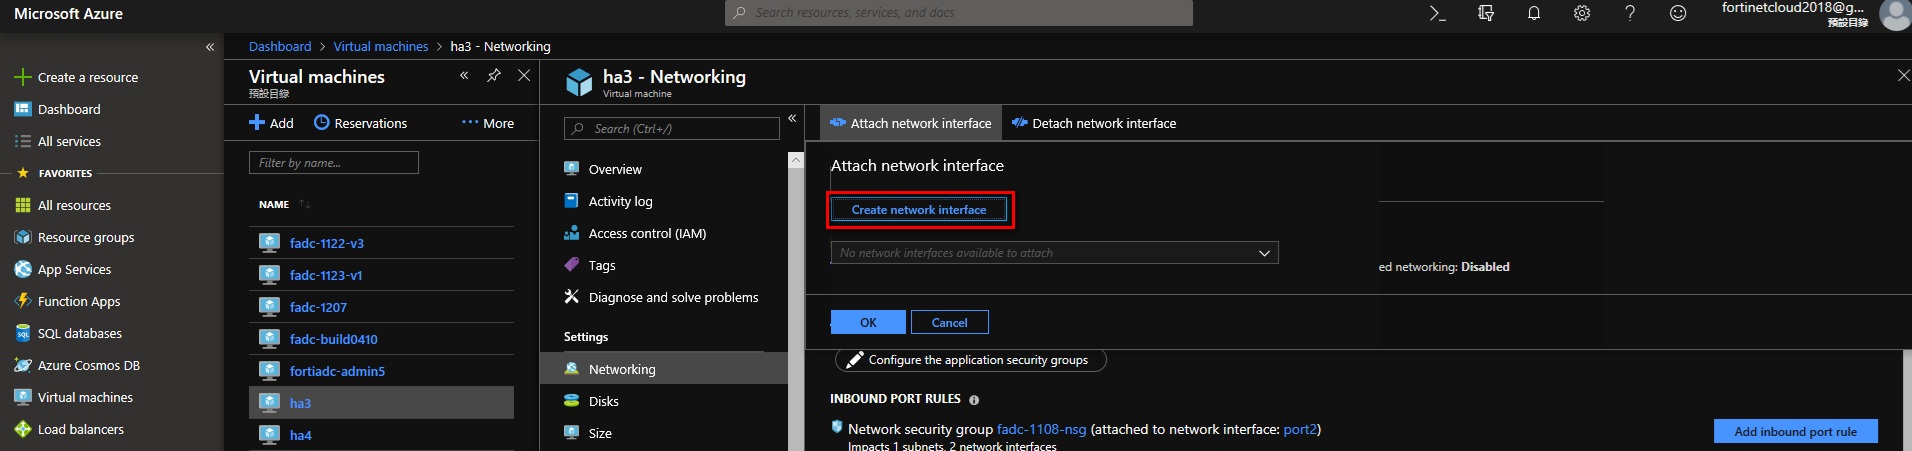
Test > Networking > Attach network interface.
First you need to know how big the VM size is, that way you know how many network interfaces you can create. To create network interface, and then to stop the VM, go to Attach Interface
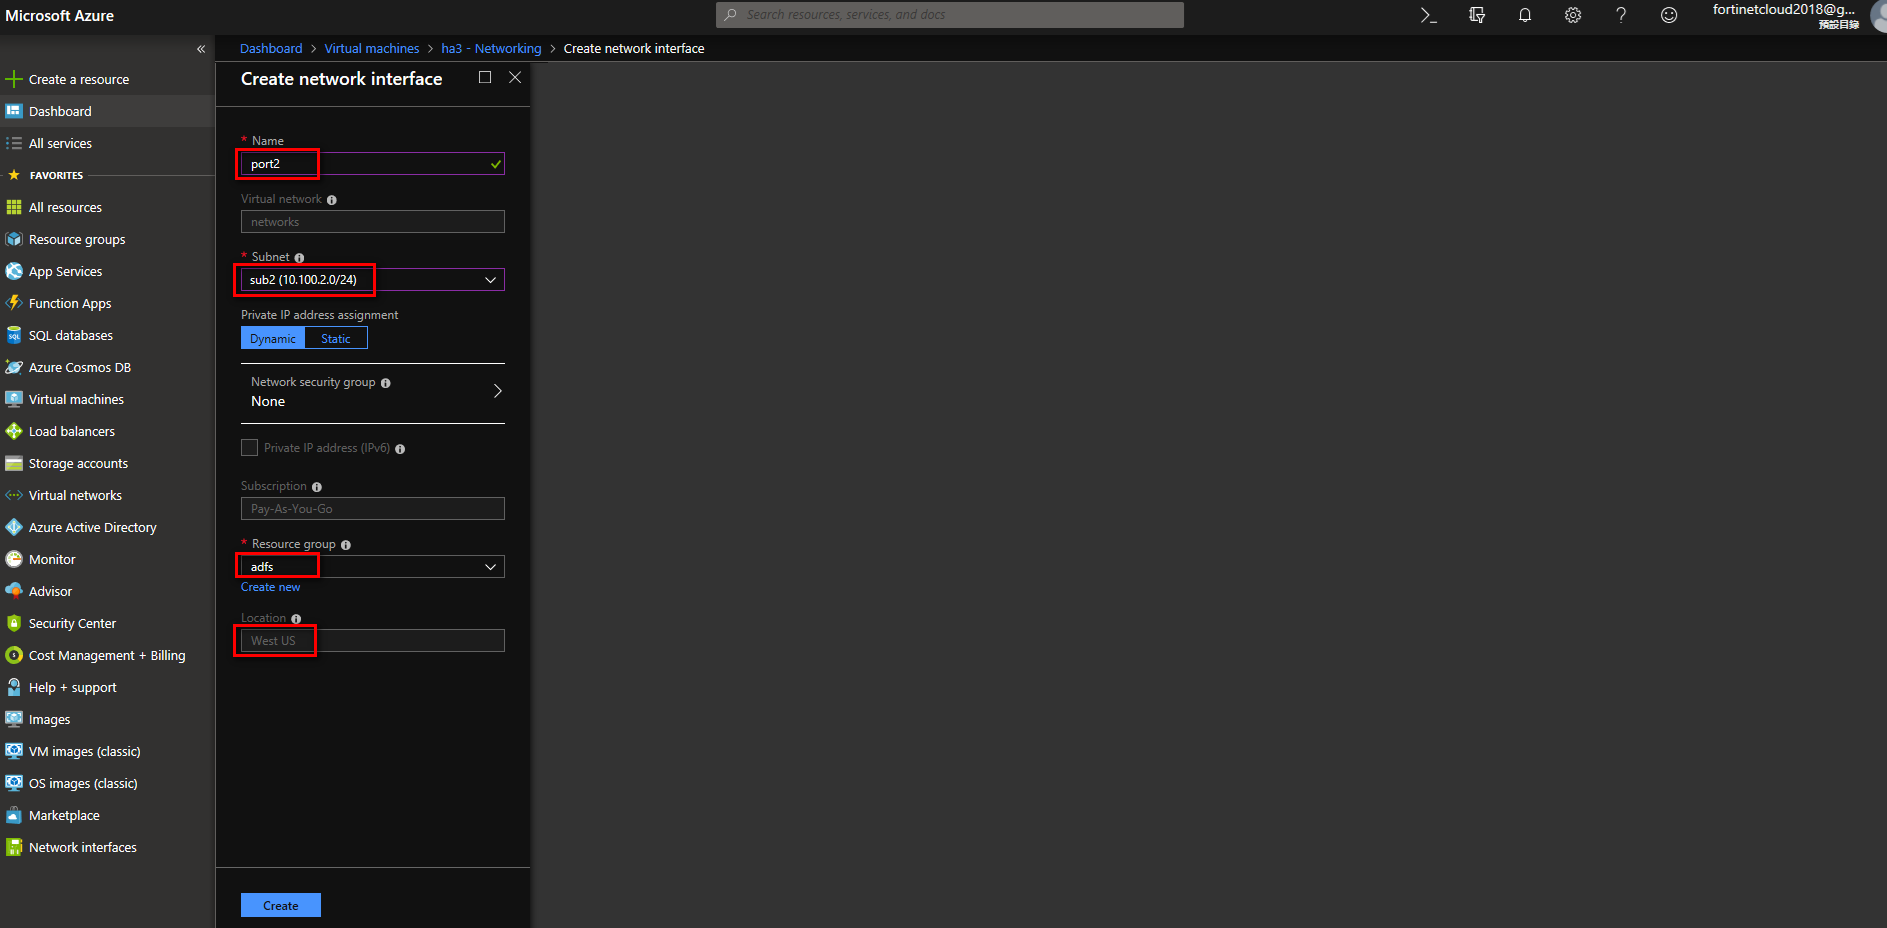
Create network interface
Attach interface
Stop VM, enter the “Networking” tab, click “Attach network interface”, and then click OK on the port you want attached.

7. Making a secondary IP for the FortiADC VS
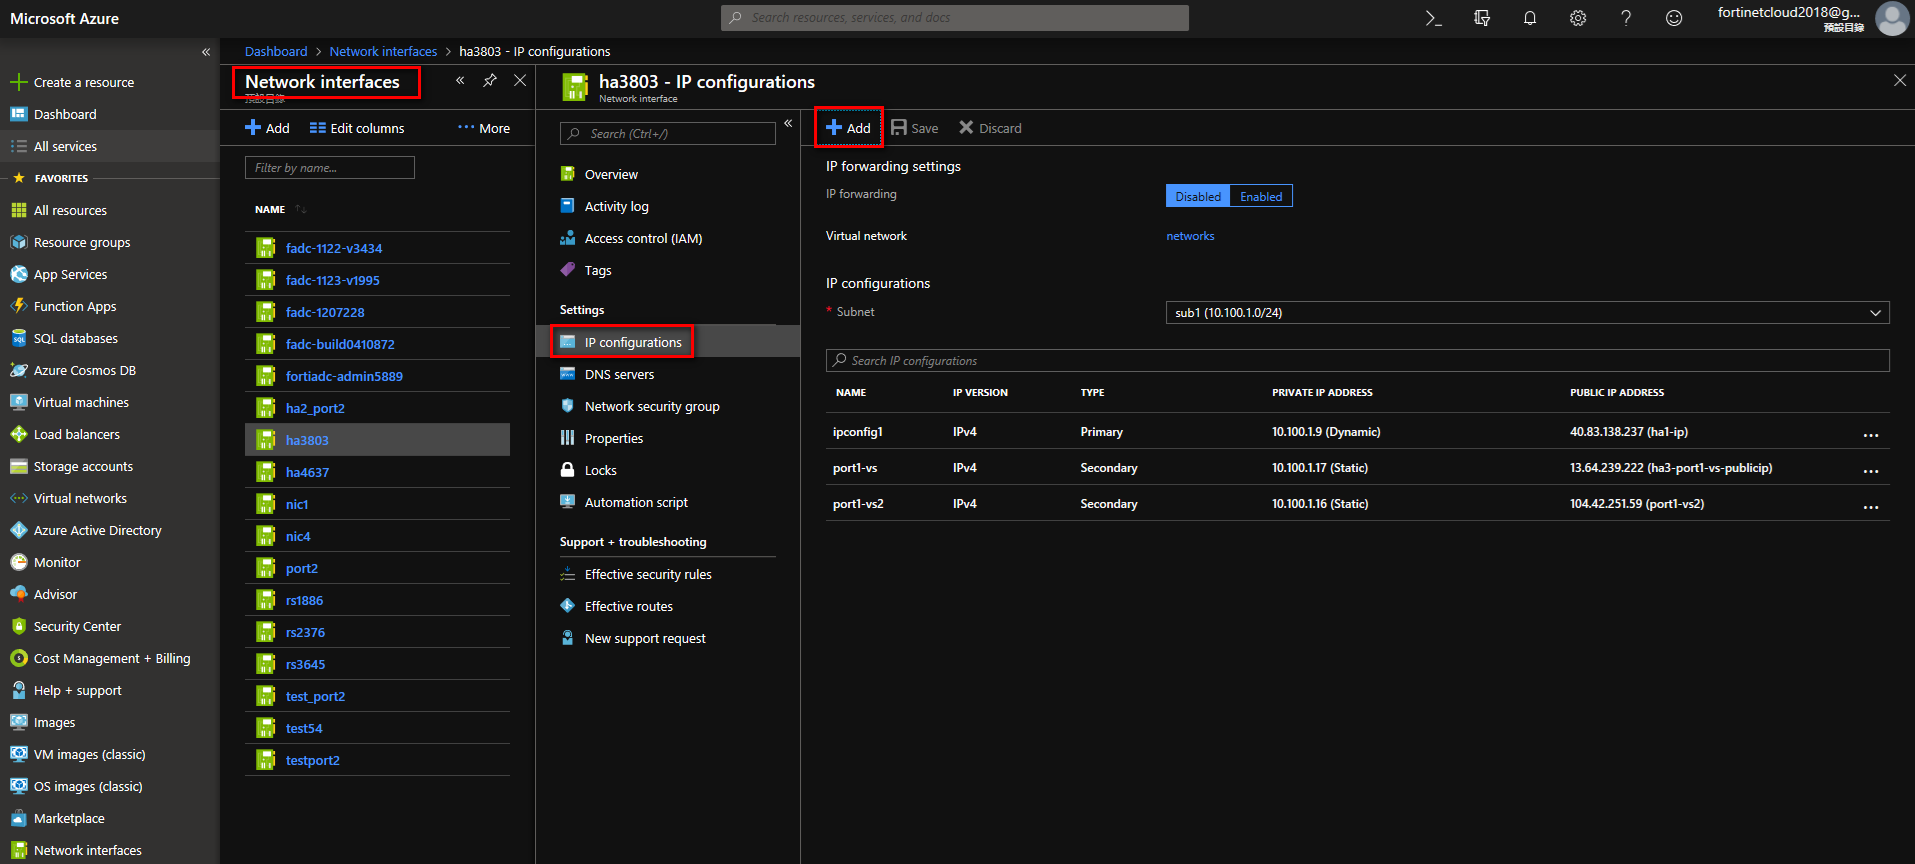
Navigate to Network interface page, choose add Seconday IP, go back to IP configurations, click“add” to add a Seconday IP.
Write Seconday IP Name. For Private IP address it’s suggested you select “Static." Create a Public IP address as needed. If you want the VS to access outside IP’s, you need a public IP. If it’s only for the FortiADC NAT source pool, or if you are using a floating IP, you only need to create private IP addresses.

Example 1
10.100.1.17 is configured on FortiADC VS, 13.64.239.222 is the FortiADC VS's way of accessing the public IP. Client can then use IP 13.64.239.222 to access the VS.
Add 10.100.1.17 to Azure port, and create a public IP.

FortiADC VS IP: 10.100.1.17

Example 2
If the FortiADC has a floating IP, you also need to put the floating IP into Azure’s corresponding port; if the FortiADC is using NAT Source Pool, you also need to put the NAT Pool IP to the corresponding port in Azure.

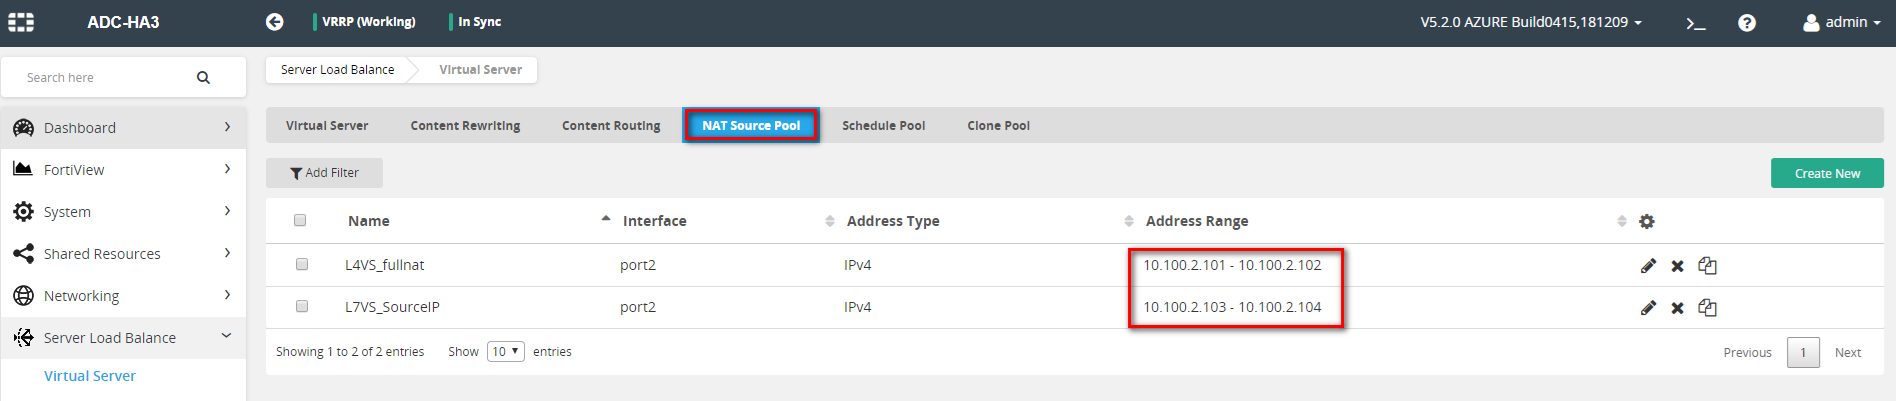
FortiADC NAT Source Pool
FortiADC Floating IP

8. Create a rule for Azure interface
According to the VS’s protocol and port, in Azure’s corresponding port you must create a rule; for example if the port is 8050 (as shown below), you need to create a rule on Azure so that the user can access the VS.


9. Requires access token to use Azure RestAPI
If using FortiADC’s HA-VRRP, FortiADC needs to use the Azure rest API, and then you need to make the following configurations:
9.1 Create Azure App
Write in the Name Application type, choosing “Web app / API”, and write in the Sign-on URL.

Client ID: Application ID is the Client ID

Creating a Client Secret
Click “settings”, enter the “Keys” tab. In "Key description” go to“Client Secret”, selecting “Expires." Then save; it will automatically create "Value." This created "Value" is the Client Secret. Copy the client secret for future use on the FortiADC.

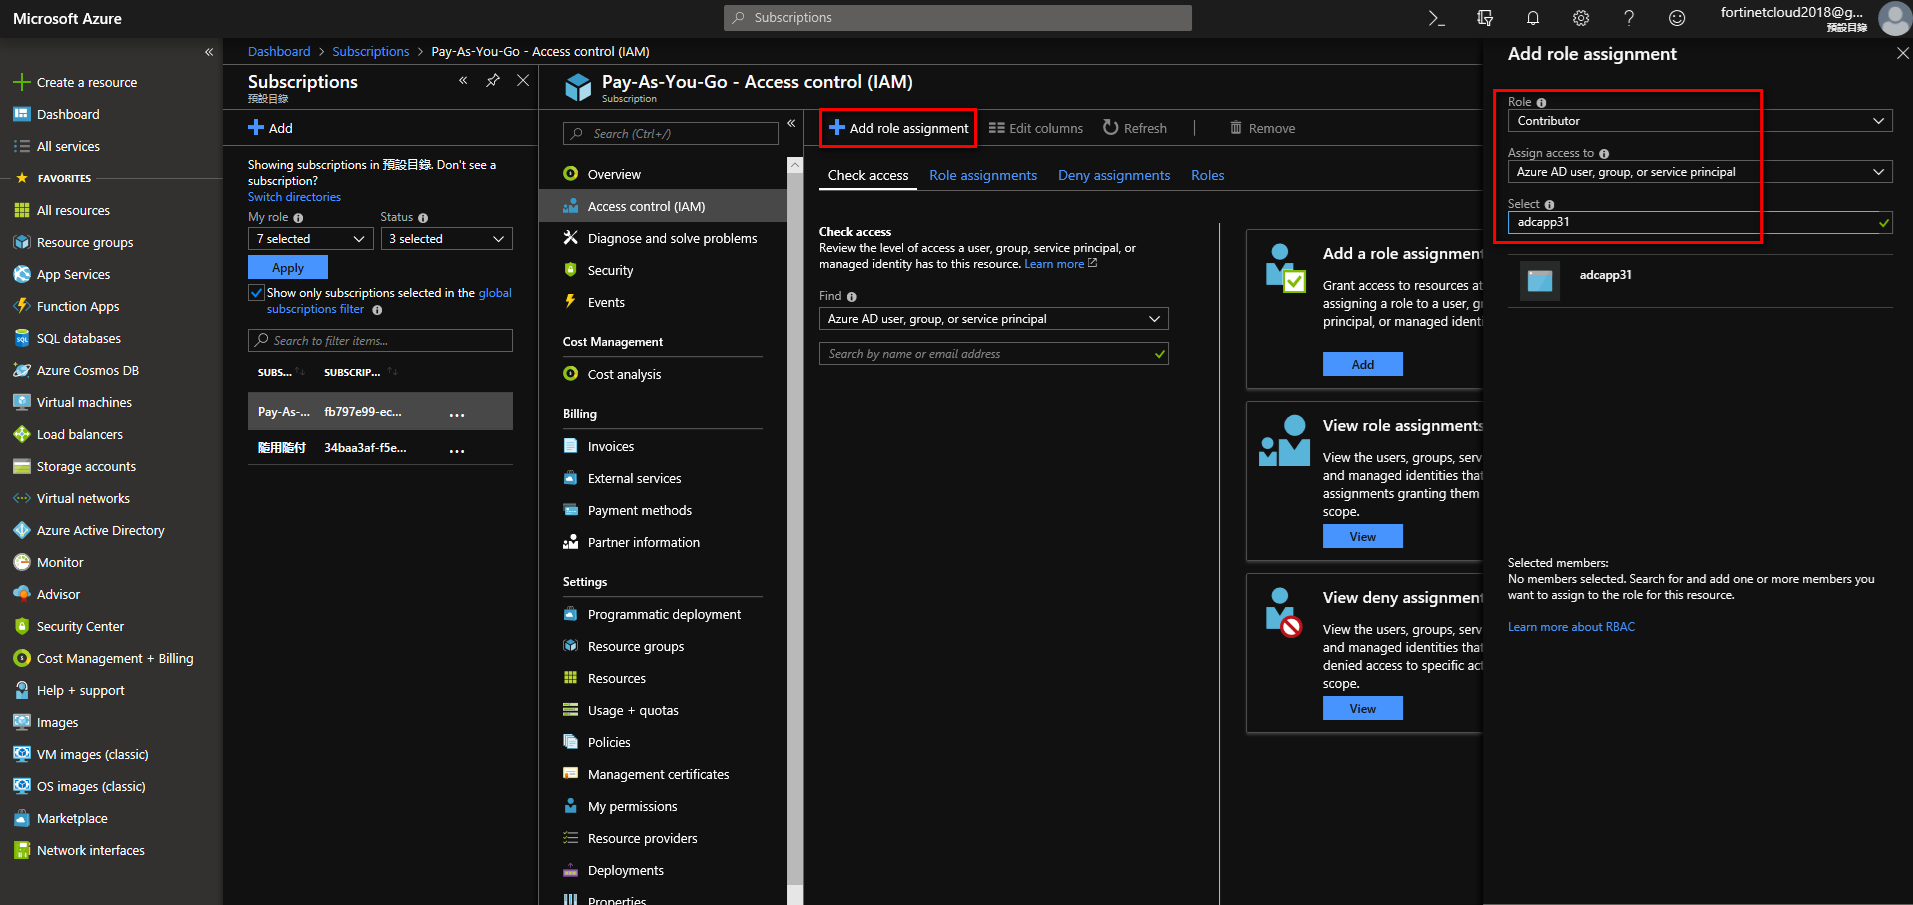
Add role to subscription. Choose Contributor to get R/W access to Azure service.
Navigate to Home > Subscriptions. Choose Subscription, such as Pay-As-You-Go, enter Access control (IAM). Add role assignment, choosing “Contributor." Assign access to choose “Azure AD user,group,or service principal." Use the Azure app you just created.
Tenant ID:
Navigate to Home > Properties, copy the Tenant ID.

Config Client ID, Client Secret and Tenant ID on FortiADC:
config system azure
set tenant-id XXXXXXXXXXXXXXXXXXXXX
unset subscription-id
set client-id XXXXXXXXXXXXXXXXXXXXXXXXXXX
set client-secret XXXXXXXXXXXXXXXXXXXXXXXXXXXX
set azure-region global
unset resource-group
end
9.2 Grant access to the managed identity
Choose the Role as Contributor, and assign access to the Virtual Machine. Then select the FortiADC's that use the Rest API.

Example: Set VS on Azure in HA-VRRP mode

Configure HA on FortiADC1
config system ha
set mode active-active-vrrp
set hbdev port2
set datadev port2
set group-id 31
set local-node-id 1
set group-name azure_group
set config-priority 200
set override enable
set l7-persistence-pickup enable
set l4-persistence-pickup enable
set l4-session-pickup enable
set hb-type unicast
set local-address 10.100.2.4
set peer-address 10.100.2.9
end
Configure HA on FortiADC2
config system ha
set mode active-active-vrrp
set hbdev port2
set datadev port2
set group-id 31
set group-name azure_group
set override enable
set l7-persistence-pickup enable
set l4-persistence-pickup enable
set l4-session-pickup enable
set hb-type unicast
set local-address 10.100.2.9
set peer-address 10.100.2.4
end
Configure Traffic-Group on FortiADC
config system traffic-group
edit "0-1"
set failover-order 0 1
set preempt enable
next
edit "1-0"
set failover-order 1 0
set preempt enable
next
end
Configure tenant-id client-id and client secret on FortiADC
config system azure
set tenant-id 0483fd85-be76-4370-8880-e4ab864c
set client-id 4cdad0f5-4f28-42f8-8f3e-b5561
set client-secret ENC cLzCNMaHqye1rLx0Ys8BPlwz9Oeb9QWyO0CJ70hSwZy7
end
Configure VS on FortiADC
config load-balance real-server
edit "RS1"
set ip 10.100.2.6
next
edit "RS2"
set ip 10.100.3.6
next
end
config load-balance pool
edit "Pool_1"
set real-server-ssl-profile NONE
config pool_member
edit 1
set pool_member_cookie rs1
set real-server RS1
next
end
next
edit "Pool_2"
set real-server-ssl-profile NONE
config pool_member
edit 1
set pool_member_cookie rs1
set real-server RS2
next
end
next
end
config load-balance virtual-server
edit "L7_HTTP_Public"
set type l7-load-balance
set interface port1
set ip 10.100.1.7
set port 8003
set load-balance-profile HTTP
set load-balance-method LB_METHOD_ROUND_ROBIN
set load-balance-pool Pool_1
set traffic-log enable
set traffic-group 0-1
set fortiview enable
next
edit "L7_HTTP_Public_Secondary"
set type l7-load-balance
set interface port1
set ip 10.100.1.17
set port 8003
set load-balance-profile HTTP
set load-balance-method LB_METHOD_ROUND_ROBIN
set load-balance-pool Pool_2
set traffic-log enable
set traffic-group 1-0
set fortiview enable
next
end