


Creating the FortiADC-VM instance
Create the FortiADC-VM instance from the Marketplace to automatically deploy the latest FortiADC version. To use earlier FortiADC versions, you can manually downgrade to the specified version in the FortiADC GUI after deploying the VM.
- Go to Alibaba Cloud > Marketplace, and search for FortiADC.
The search will return the Fortinet FortiADC (BYOL) Application Delivery Controller.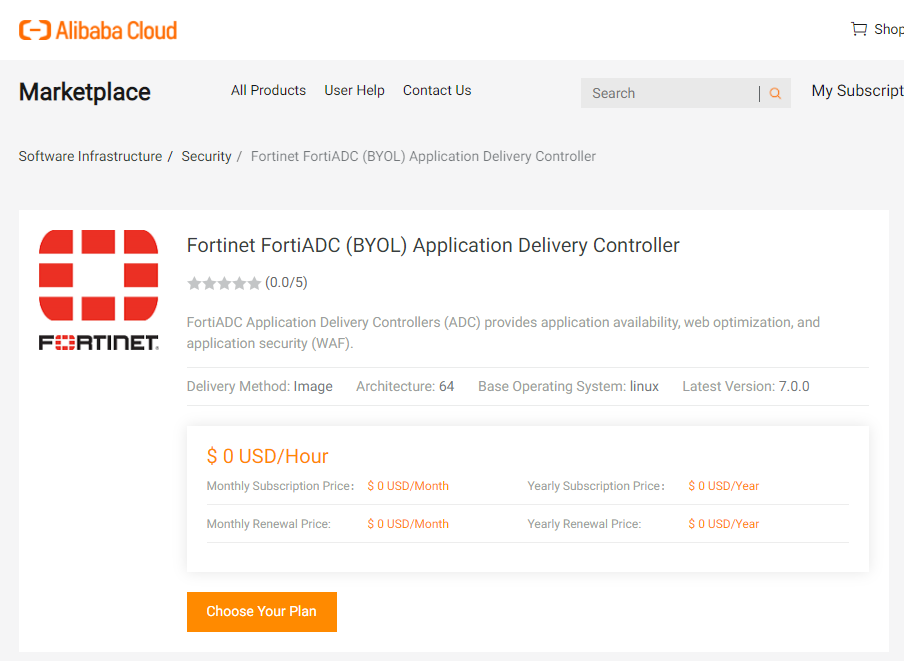
- Click Choose Your Plan.
This creates a FortiADC instance using a default image of the latest version. - Navigate to Elastic Compute Service > Instances. Click Create Instance.
- Go to the Custom Launch tab.
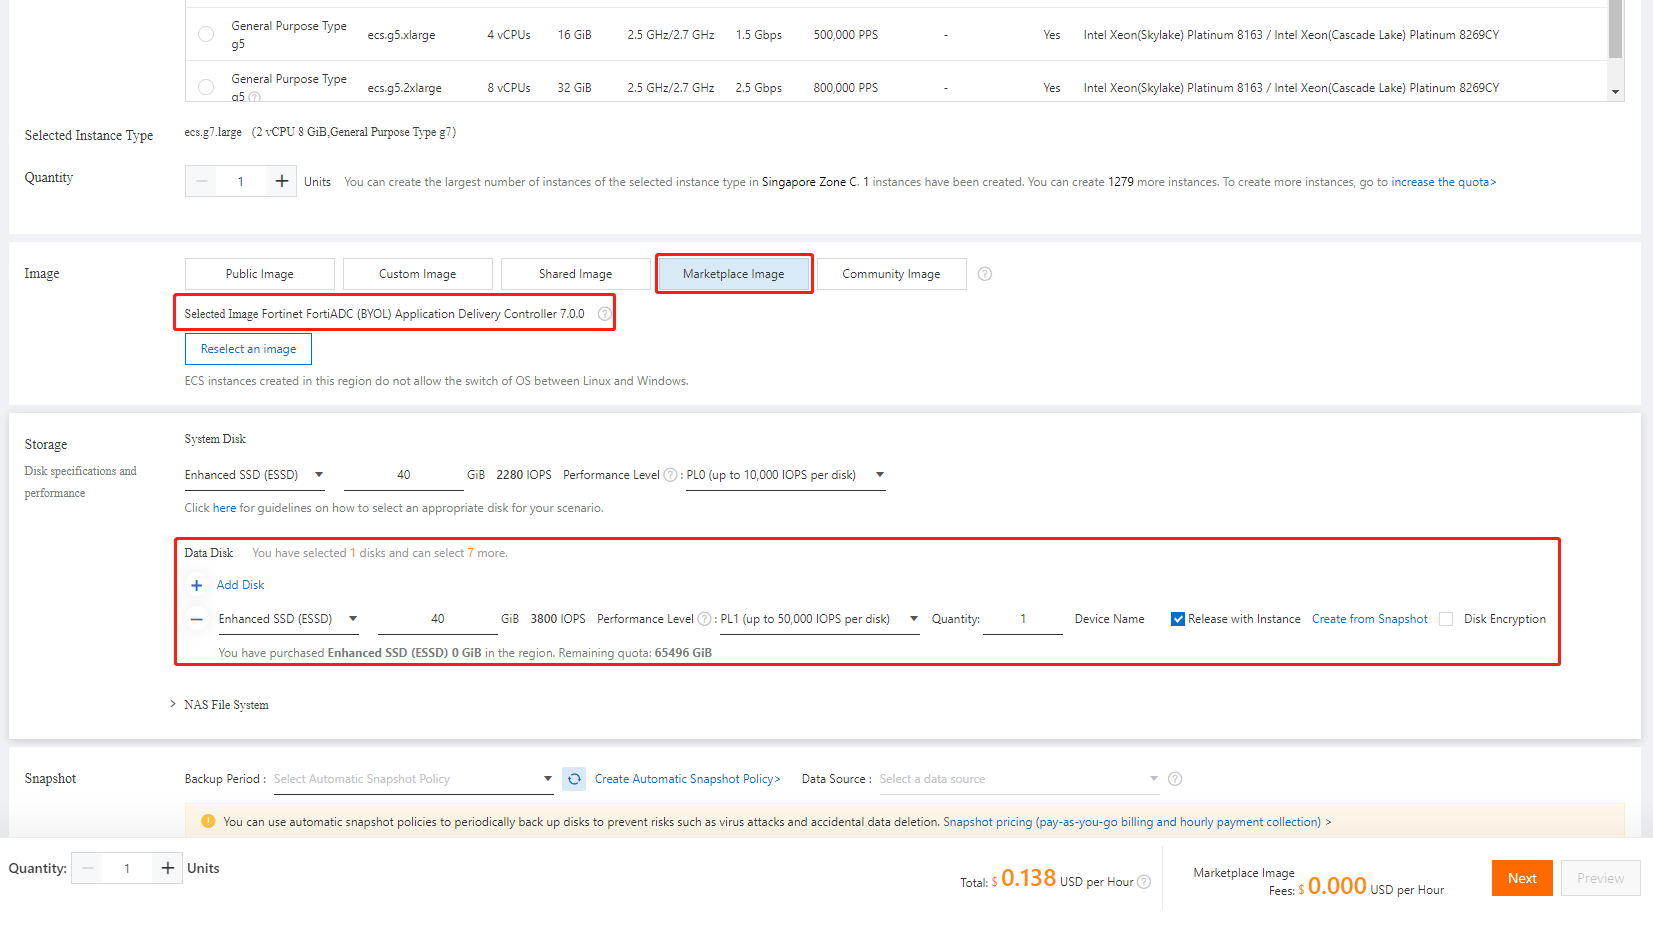
- Complete the following Basic Configuration settings.
Setting
Description
Billing method Select a billing method:
Subscription — Pay for resources before you use them.
Pay-As-You-Go — Use resources first and pay for them afterward. The billing cycles of pay-as-you-go instances are accurate to the second. You can purchase and release instances on demand.
Preemptive Instance — Use resources first and pay for them afterward. You place a bid for available instance resources to create preemptible instances at a discount compared with pay-as-you-go instance pricing. Preemptible instances may be automatically released due to fluctuations in market price or insufficient resources of instance types.
Region and zone Select a region that is close to your geographical location to reduce latency. After an instance is created, the region and the zone of the instance cannot be changed. Instance type Select the instance type.
We suggest to select an instance type that has a minimum of 4 GB of memory.Image Select the Marketplace Image.
Storage Add a Data Disk for the FortiADC log Disk.
We suggest to select a disk with a minimum of 30 GB.
- Click Next to move forward to Networking and configure the following settings:
Setting
Description
Network Type Select the VPC and vSwitch that was previously configured in the VPC you created. Public IP Address Select Assign Public IPv4 Address if you want to have the internet access the FortiADC. Security Group Select HTTP and HTTPS.
Take note of the Security Group ID/Name. It will be used in later steps.
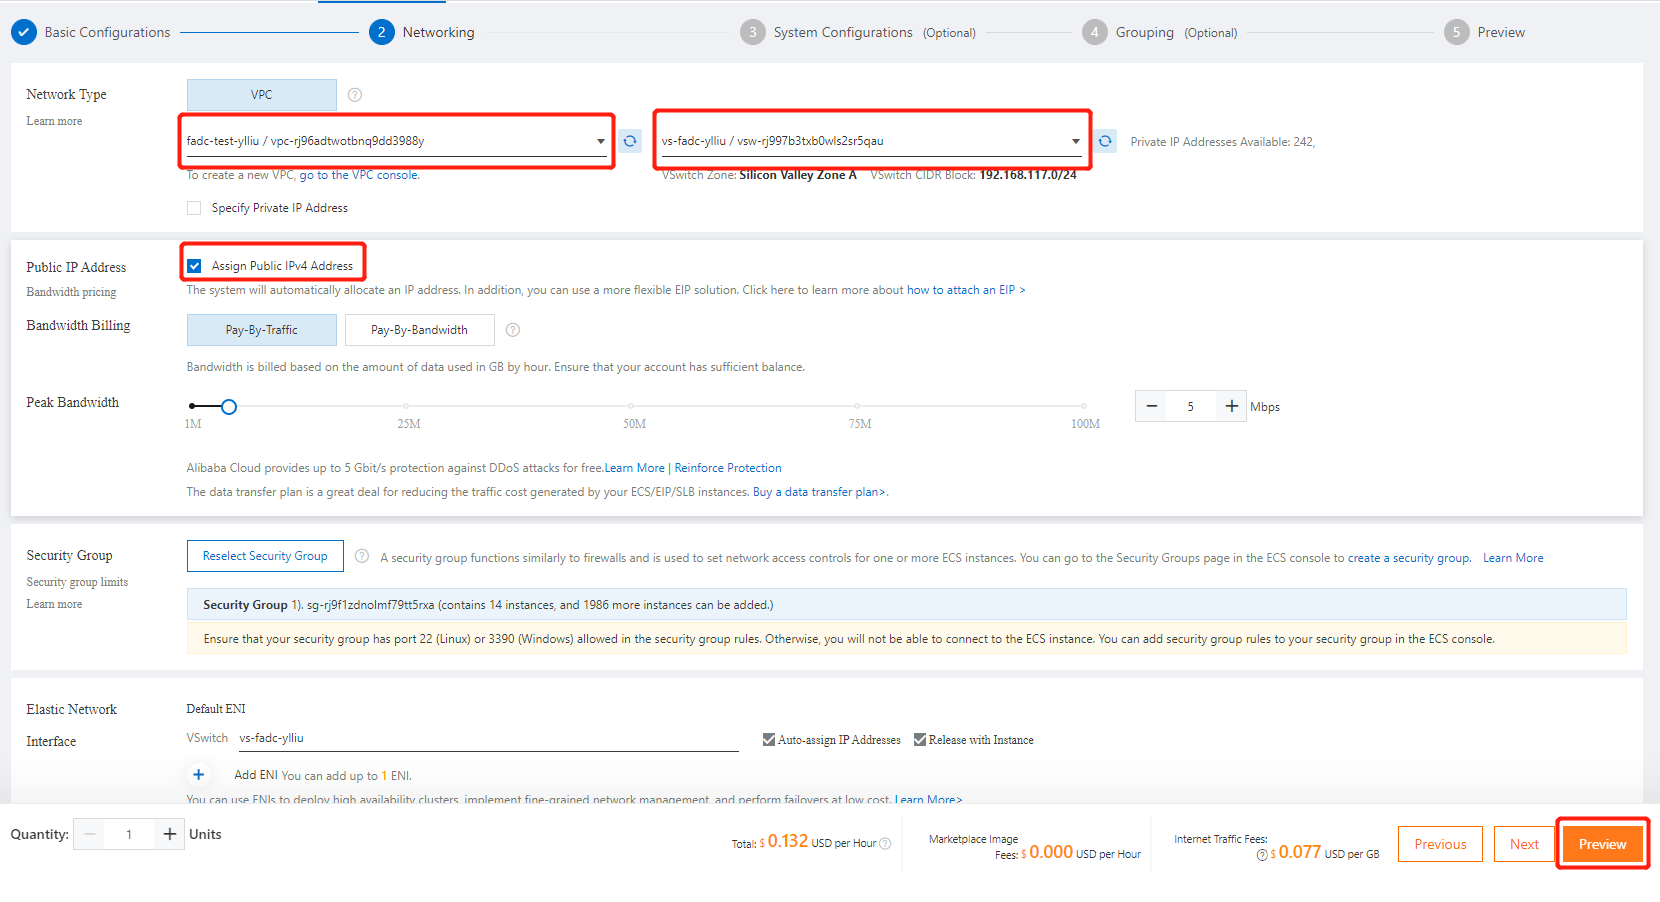
- Click Preview. Agree to the ECS Terms of Service then click Create Instance.
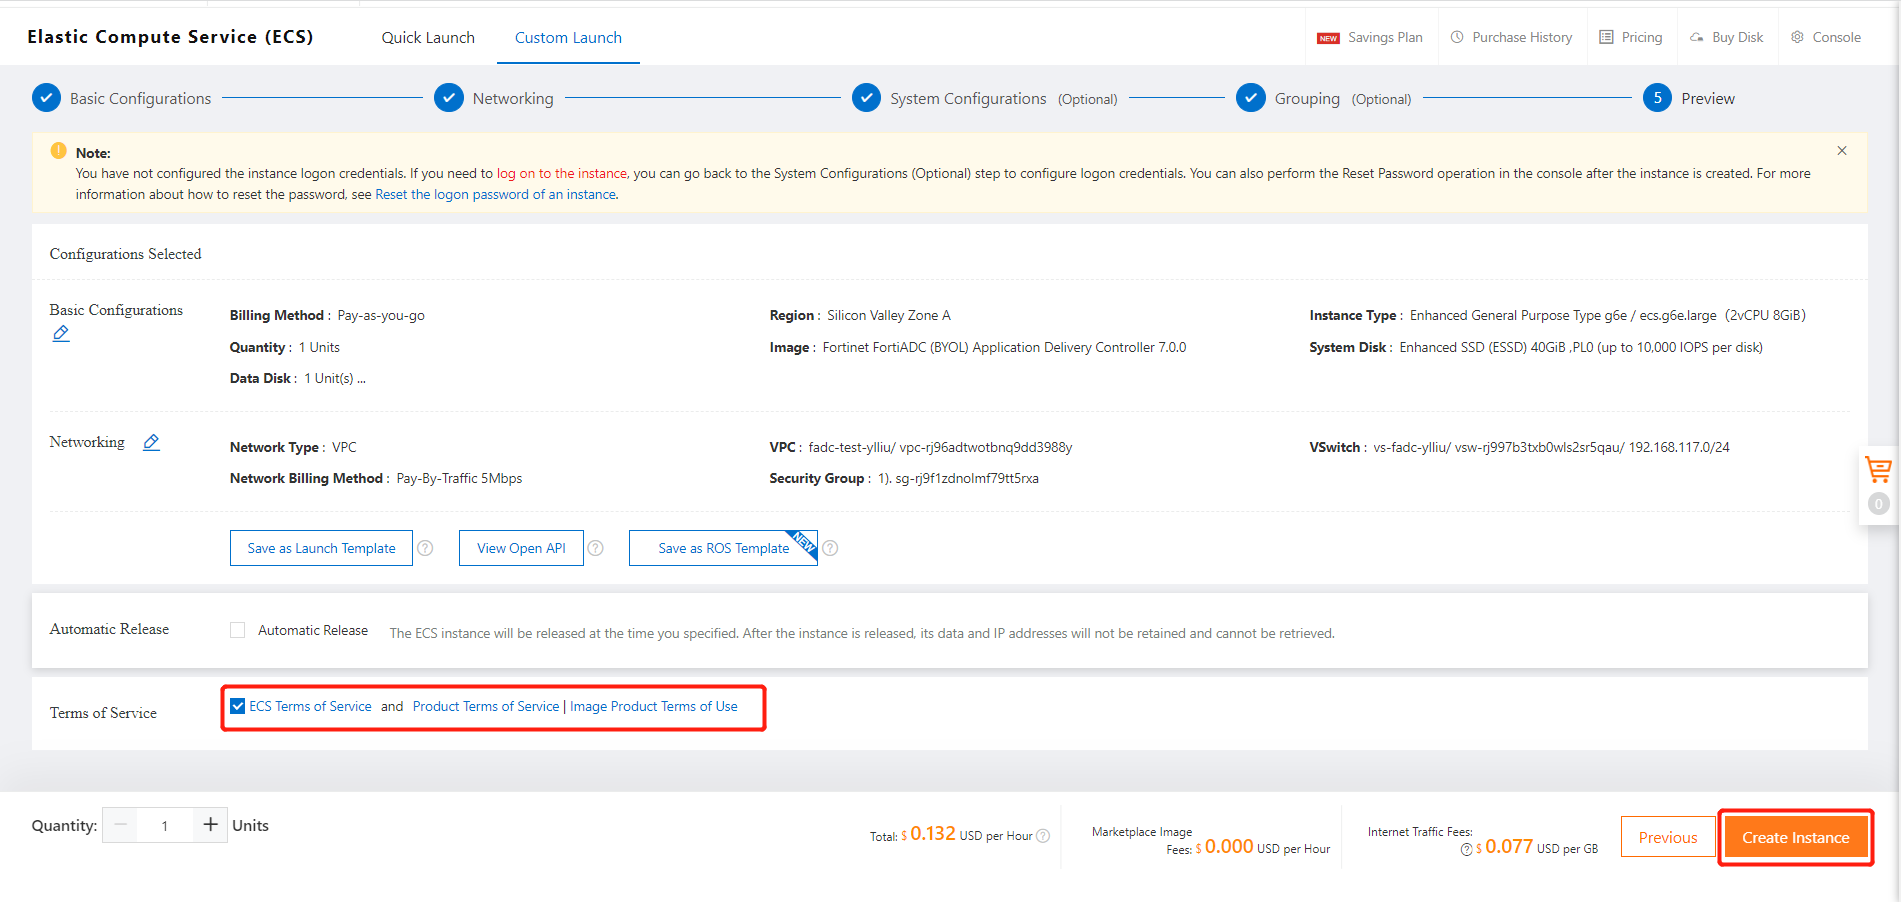
The newly created instance will appear on the Instances page (it may take between 1 to 5 minutes for the instance to generate). The instance is ready when the status changes from Stopped to Running.