


IPSec VPN
UI: VPN > IPsec Wizard
For instructions, refer to the following document:
https://docs.fortinet.com/document/fortigate/6.0.0/cookbook/786021/configuring-the-ipsec-vpn
-
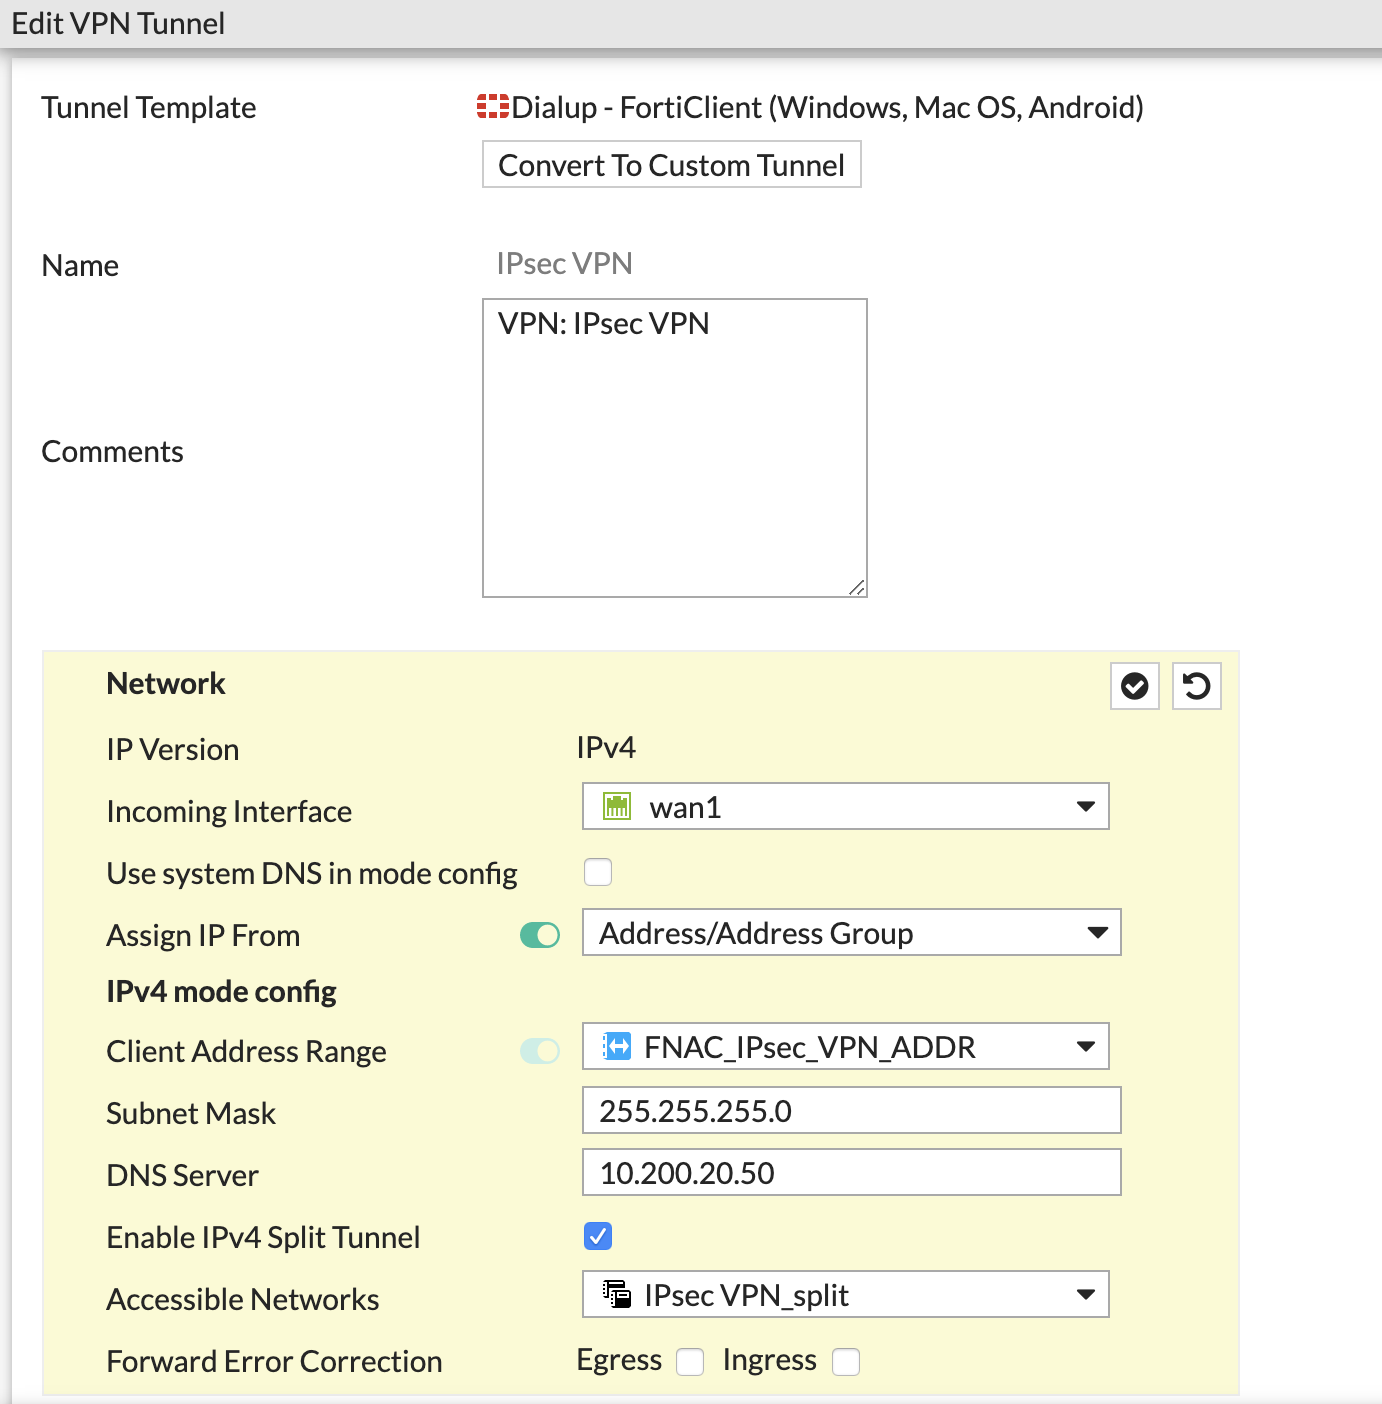
Use the VPN IP address objects previously configured
-
Enter your production DNS server IP address for ipv4-dns-server1
Note: CLI access may be required for additional tunnel customization as desired.
Login to the FortiGate CLI to complete configuration.
CLI:
Ensure the following is configured on the IP/Sec phase1 interface.
-
DNS server IP’s (primary= production server, secondary = FortiNAC VPN interface)
-
Domain Name for agent communication. This must match the domain configured in the VPN scope in FortiNAC. In order for the FortiNAC agent installed on the remote endpoint to be able to locate the FortiNAC to talk to, the FortiGate must be configured with the domain used by the agent to look up FortiNAC. NOTE: If FortiNAC is managing multiple VPN scopes, they must all use the same domain.
-
IP range to be managed by FortiNAC
NOTE: DHCP relay is not supported
See commands (in bold) below.
IPsec CLI Example:
config vpn ipsec phase1-interface
edit "IPsec VPN"
set mode-cfg enable >> In custom mode this is disabled by default
set ipv4-dns-server1 10.200.20.50 >> Production DNS
set ipv4-dns-server2 10.200.5.22 >> FortiNAC ETH1_VPN Interface IP
set assign-ip-from name >> Use IP range based on Address Object name
set ipv4-name "FNAC_IPsec_VPN_ADDR" >> Address Object name
set domain "Internal-Lab.info" >> Set Domain Name as DNS-Suffix
next
end
Proceed to Configure FortiNAC.