


FortiMail Security Fabric integration 6.4.2
FortiMail can be authorized into the Security Fabric using either the gutter on the Fabric Connectors page, or by pre-authorizing using the FortiMail serial number or certificate.
As part of the Security Fabric, FortiMail appears in the Fabric navigation, topologies, widgets, and in the Security Posture report in FortiOS.
To join the Security Fabric from FortiMail:
- Go to System > Customization and click the Corporate Security Fabric tab (or the Corporate Security Fabric tab in FortiMail 6.4.2 and earlier).
- Click the toggle to enable the Fabric.
- Enter the Upstream IP Address (root FortiGate) and the Management IP of the FortiMail.
- Click Apply.
Authorizing using FortiOS
If the FortiMail was added to the Security Fabric but not pre-authorized, you can authorize it in FortiOS on the Fabric Connectors page.
To authorize FortiMail:
- Go to Security Fabric > Fabric Connectors.
- In the topology tree, hover over the FortiMail and click Authorize.

- Verify the certificate is correct, then click Accept.
Pre-authorizing using the FortiMail certificate
FortiMail can be pre-authorized using its serial number or certificate. When you pre-authorize, the FortiMail can join at any time, and you will not need to authorize it FortiOS. In this example, FortiMail is pre-authorized using a certificate.
To pre-authorize FortiMail using a third-party or default certificate:
- Log in to FortiMail.
- Download the certificate. For example, in Chrome:
- In the left side of the address bar, click the icon to view the site information.
- Click Certificate.
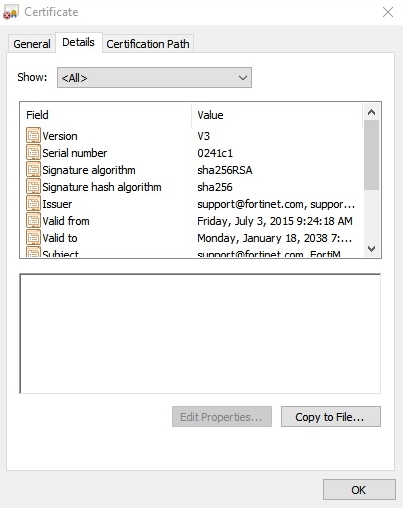
- Click the Details tab, then click Copy to File.
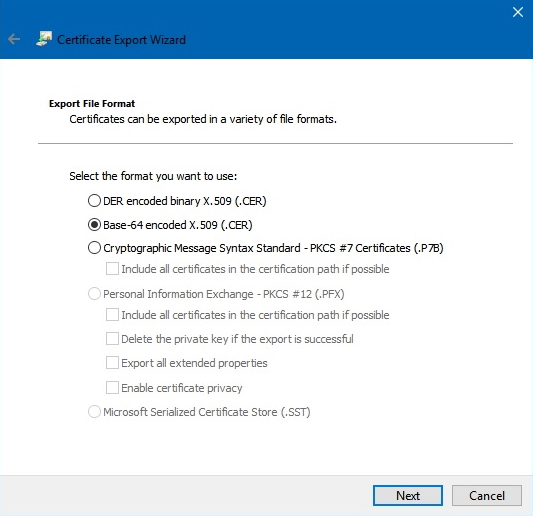
- The Certificate Export Wizard opens. Click Next to continue.
- For the file format, select Base-64 encoded X.509 (.CER), then click Next.
- Browse to the folder location and enter a file name, then click Next.
- Click Finish, then click OK to close the dialog box.
- In FortiOS, go to Security Fabric > Fabric Connectors and double-click the Security Fabric Setup card.
- Beside Device authorization, click Edit and configure the following:
- Enter the FortiMail serial number.
- For Authorization type, select Serial Number.
- For Certificate, upload the .CER file you saved previously.
- Click OK.

Security Fabric integration
Once authorized, you can navigate and log in to the FortiMail from the topology tree, or within the topology views in FortiOS:

The Security Posture report can detect whether unsecure protocols, such as HTTP and Telnet, are used on the FortiMail:

FortiMail widgets can be added to the dashboard.
To add a FortiMail widget:
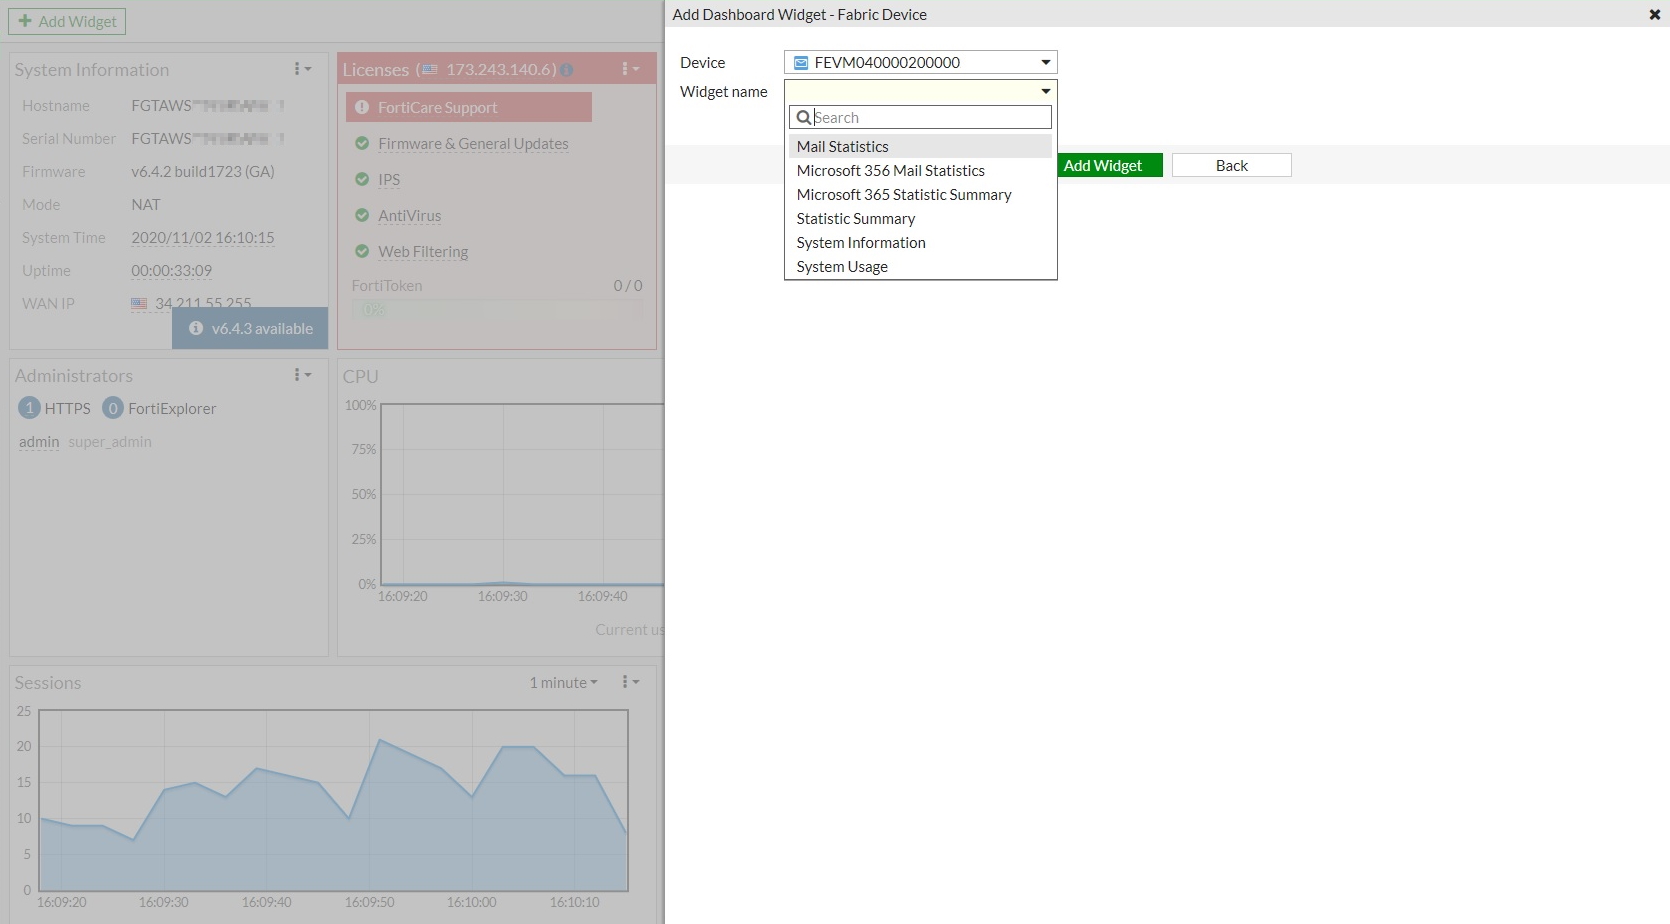
- Go to Dashboard > Status and click Add Widget. The Add Dashboard Widget pane opens.
- Under Security Fabric, click Fabric Device.
- From the Device dropdown, select the FortiMail.
- From the Widget name dropdown, select a widget.
- Click Add Widget.
- Repeat these steps to add more widgets if needed.
The widgets are displayed in the dashboard:
