


Assets
You see the Assets page when you first open the FortiGate Cloud interface. From the Assets page, you can add a FortiGate as To deploy a FortiGate/FortiWifi to FortiGate Cloud using the FortiCloud key: describes. A user with an admin role can also go to the Inventory pages or the device-specific Analysis, Management, SandBox pages. A user with a regular role or subaccount admin role (multitenancy) can only go to the Analysis and SandBox pages. You can view the device CPU and memory usage under the Status column.

The Assets page provides the following information about devices. You can select a device's serial number or name to access analysis tools for that device. Assets displays the following device information in both list and map views. To configure which information to be visible in list view, click Customize Columns.
- Model/serial number
- Fortinet product type
- Firmware version
- Status (If the device is connected through a management tunnel)
- SD-WAN status
- Last compiled report and last log uploaded
- Subscription expiry date
- DHCP clients
- In/out traffic
- Indicators of compromise
- Configuration status
- Public IP address
- Subaccount
- Last time a configuraiton backup was created
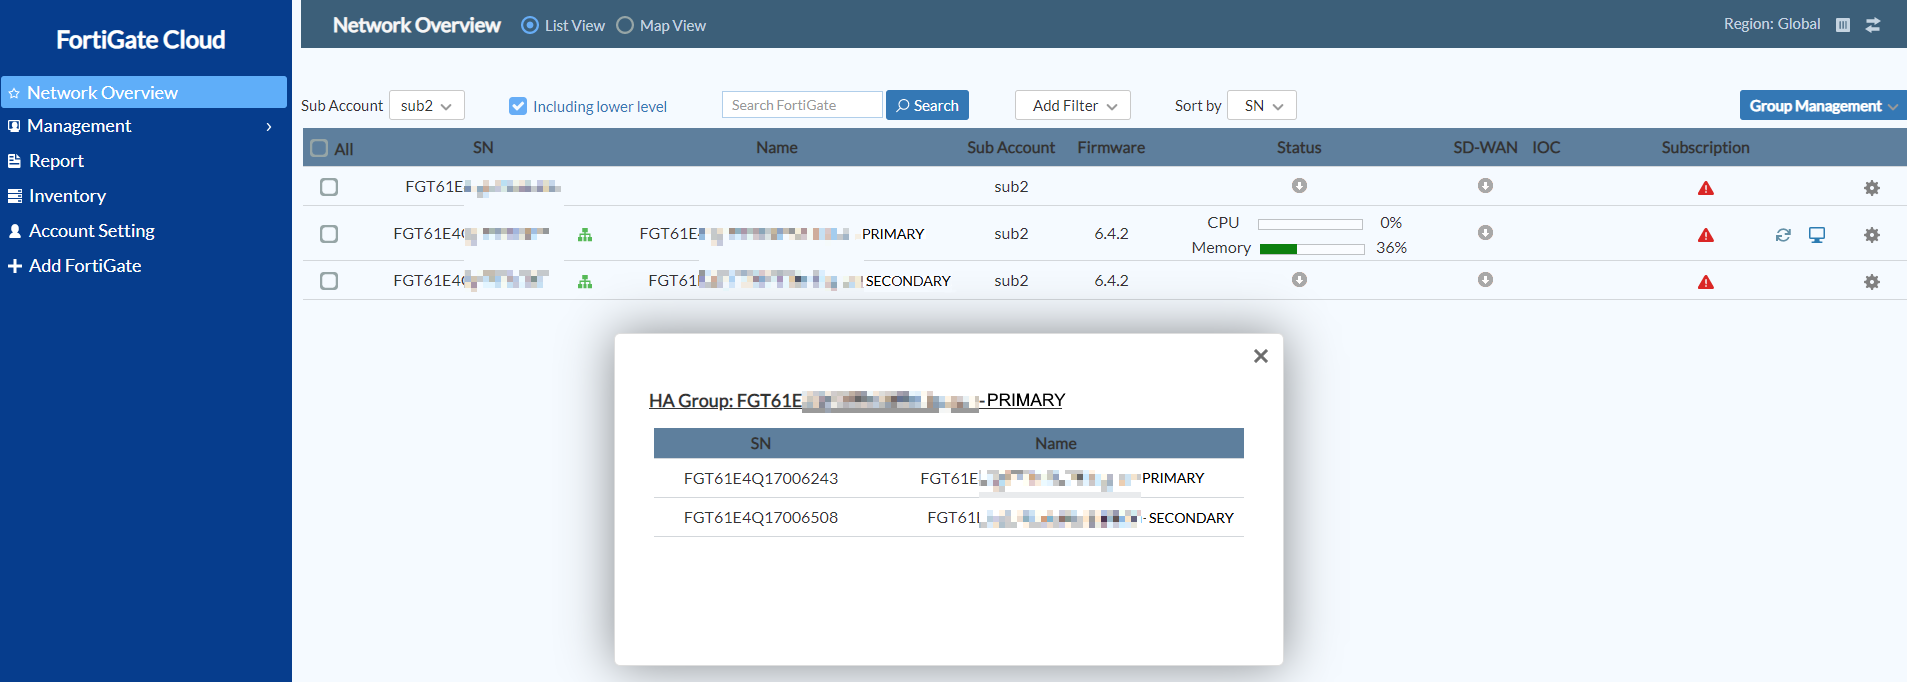
- For devices that are paired in a high availability configuration, a peer icon appears beside the serial number. You can click the icon to view the HA information.
You can download a .csv file of device information by clicking the Export button.
You can select Map View to view the device list as a map. This allows you to see the geographic location of the deployed devices. You can also place a device at a desired location on the map that does not need to correspond to the device's actual geographic location. You can also view the map in satellite view.

You can toggle on Show FortiManager Deployed to view devices deployed to FortiManager. You can then click on a displayed device to access its Sandbox page.
To access devices deployed to another region, click the Devices in Other Regions icon in the upper right corner. FortiGate Cloud displays a dialog with a list of devices deployed in other regions.

You can use the gear icon to access additional functions:

To undeploy the FortiGate:
- Go to Assets.
- Click the Config icon for the desired device.
- Click Undeploy.
- In the confirmation dialog, click YES.
- You have the option to place a unit where the FortiGate was deployed. The unit contains historical data and a serial number that starts with U.
An admin user can undeploy a device from one service, then deploy it from another service. For example, an admin user can undeploy a device from the global service, then deploy the same device to the Europe service.
The device may automatically join back to the account due to the autojoin feature. See FortiCloud and FortiDeploy keys.
To authorize a new account to access the FortiGate's historical data:
You can use this function to transfer historical data to an authorized new account when moving the device to that account.
- Click the Config icon for the desired device.
- Click Migrate Existing Data.
- In the Account ID field, enter the desired account ID.
- Click Submit.
To set the display timezone for the FortiGate:
The display timezone only affects log data view for the FortiGate and does not affect the FortiGate's configured timezone. You can modify the FortiGate's display timezone after it has already been set.
- Go to Assets.
- Click the Config icon beside the desired device, then click Display Timezone.
- From the Display Timezone for Device dropdown list, select the desired timezone. Click Submit. The FortiGate Cloud GUI shows the FortiGate's display timezone in the upper right corner.

To rename the FortiGate:
- Go to Assets.
- Click the Config icon for the desired device, then click Rename.
- In the Device Name field, enter the desired name. Click Submit.
To move a FortiGate from the global service to the Europe service:
You can move a FortiGate from the global service to the Europe service, or vice-versa. The example illustrates moving a FortiGate Cloud from the global service to the Europe service.
- Log in to the FortiGate Cloud global service.
- Undeploy the FortiGate:
- Click the Config icon for the desired device.
- Click Undeploy.
- In the confirmation dialog, click YES.
- You have the option to place a unit where the FortiGate was deployed. The unit contains historical data and a serial number that starts with U.
An admin user can undeploy a device from one service, then deploy it from another service. For example, an admin user can undeploy a device from the global service, then deploy the same device to the Europe service.
After a device under a non-multitenancy account is undeployed, the device cannot automatically join back to any account due to the autojoin feature being disabled, even after an admin user deploys the device to another service. You must reactivate FortiGate Cloud on the device GUI using your account email address and password.
- Go to Inventory and confirm that the FortiGate is now listed under inventory.
- Log in to the FortiGate Cloud Europe service.
- Go to Inventory. Select the desired FortiGate, then click Deploy to FortiGate Cloud.
- Log in to the FortiOS GUI. Reactivate FortiGate Cloud by following To deploy a FortiGate/FortiWifi to FortiGate Cloud in the FortiOS GUI:.