


Deploying two load-balanced FortiWeb-VMs
This section introduces how to deploy two FortiWeb-VMs with a load balancer.
- In the Microsoft Azure Dashboard, select Marketplace.
- Search for FortiWeb, then select Fortinet FortiWeb Web Application Firewall (WAF) in the results. Select Active-Active Loadbalanced with ELB/ILB.

- Click Create.
- Complete the basic settings. Select FortiWeb BYOL or PAYG according to your own needs. It's recommended to deploy the latest version of FortiWeb.
Take note of the FortiWeb administrative username and password you have set. You will use it to access FortiWeb GUI and CLI in the following steps. - Under Instance Type, select the virtual machine size that is appropriate for your license. To ensure high performance, it's recommended to choose the VM type with at least two vCPUs, and memory size larger than 8 GB. For more information, see Licensing. There will be two VMs deployed.
- Under Network Settings and Instance Type, select a virtual network or create a new one. Then, configure the subnets.
If you select an existing virtual network, ensure that it has at least two subnets for FortiWeb to route between: an "outside" or public subnet that provides access to the Internet and a private subnet where one or more servers that FortiWeb protects are located.
In a typical deployment, because the “outside” or public subnet simply connects the FortiWeb outgoing interface to the Azure Public Load Balancer, the subnet can be small. - Configure Public IP settings. The public IP will be attached to the load balancer. FortiWeb's GUI can be accessed through port 40030 and 40031 of this public IP.
- Click Review + Create to review your deployment configuration.
- Click Create.
- Wait for Azure to complete the deployment.
In most cases, deployment takes about 20 minutes, but the amount of time varies depending on your location and the number of resources you requested. - Go to the resource group, you will find the following resources being created.

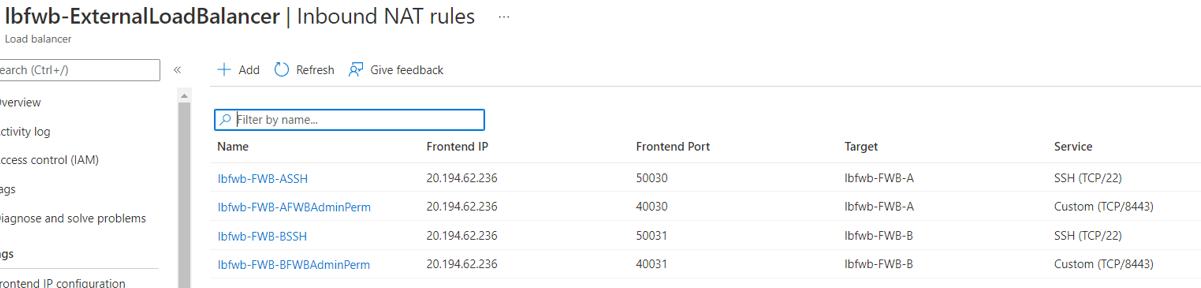
- Click on the external load balancer. Take note of the DNS name of public IP address, and use it to access the web UI in a web browser or the CLI using an SSH connection. See Connecting to FortiWeb’s web UI & CLI.
- Select Inbound NAT rules. As it shows, port 50030, 40030, 50031, and 40031 are for the SSH and GUI access of FortiWeb-VM A and B.
|
|
When you deploy the FortiWeb-VM package, network adapters are created automatically. If you want to delete network adapters, do it during the deployment process. It's not recommended to delete network adapters once the FortiWeb is deployed, otherwise unexpected error will occur. |
|
|
According to Azure, it's recommended to set the MTU to 1,400. Run the following command in FortiWeb: config system interface edit interface <index> set mtu 1400 end end For more information, see https://learn.microsoft.com/en-us/azure/virtual-network/virtual-network-tcpip-performance-tuning. |