


Resizing the virtual disk (vDisk)
The FortiWeb instance is preconfigured with 30 GB data disk size, which is not large enough for most deployments. Perform the steps introduced in this topic to resize the virtual disk. You can skip this step if you have deployed the FortiWeb-VM without embedded template and have already attached a data disk larger than 32 GB.
To resize the vDisk
|
|
If you are resizing the disk for an existing deployment of FortiWeb-VM, back up the logs and other non-configuration data before beginning this procedure. Formatting the disk will delete all data on that disk. For backup instructions, see the FortiWeb Administration Guide. |
|
|
While resizing the vDisk, the FortiWeb-VM must be powered off. |
- In the Microsoft Azure Dashboard, select Virtual Machines. Find the FortiWeb-VM you created.
- Right click the status, then select Stop. It's status will turn into Stopped (deallocated).

- Click the name of the VM to enter into its details page.
- Click Disks under Settings.
- Click the disk name under Data disks.
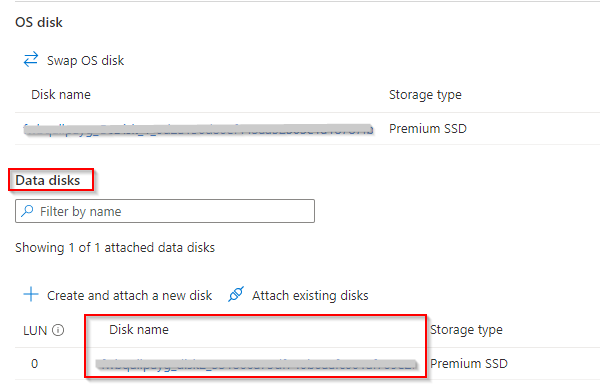
- Click Size + performance under Settings.
- Type the desired disk size and performance.
- Click Resize.
- Go to Virtual Machines, then find the FortiWeb VM.
- Right click the status, then select Start. Wait until its status turns into Running.
- Log in to FortiWeb-VM's CLI interface.
- Run
execute formatlogdiskto clear the logs from the FortiWeb-VM's data disk and reformat the disk. FortiWeb will restart. The expanded space will not be recognized until the disk is reformatted. - Log in to FortiWeb-VM's CLI interface.
- Run
diagnose system mount listto verify if the disk is successfully resized.