


Deploying FortiWeb-VM on OpenStack
The examples shown in this procedure create a FortiWeb-VM instance with the following properties:
- A direct connection to the public network
- A 30 GB log disk (an OpenStack volume)
- 2 vCPUs with 8 GB RAM and a 40 GB root disk (specified by the OpenStack flavor)
- Fully licensed
- To set up your OpenStack environment, create an
openrc.sh(OpenStack rc) file that specifies the admin credentials and admin endpoint. - Using the shell you use to run OpenStack commands, source the OpenStack rc file. For example:
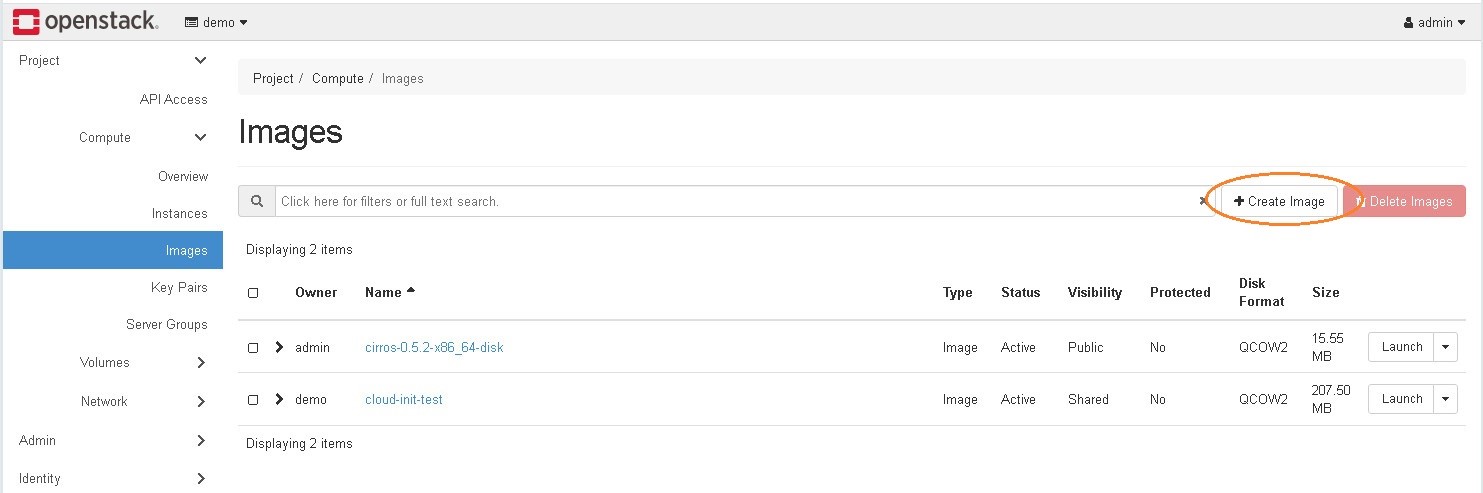
- Log in to the OpenStack dashboard, under Compute, navigate to the list of images, and then click Create Image.
- Complete the image settings.
For Image Source, select Image File. Use the Image File options to navigate to and select theboot.qcow2file you extracted from the FortiWeb-VM KVM software package. For Format, select QCOW2-QEMU Emulator.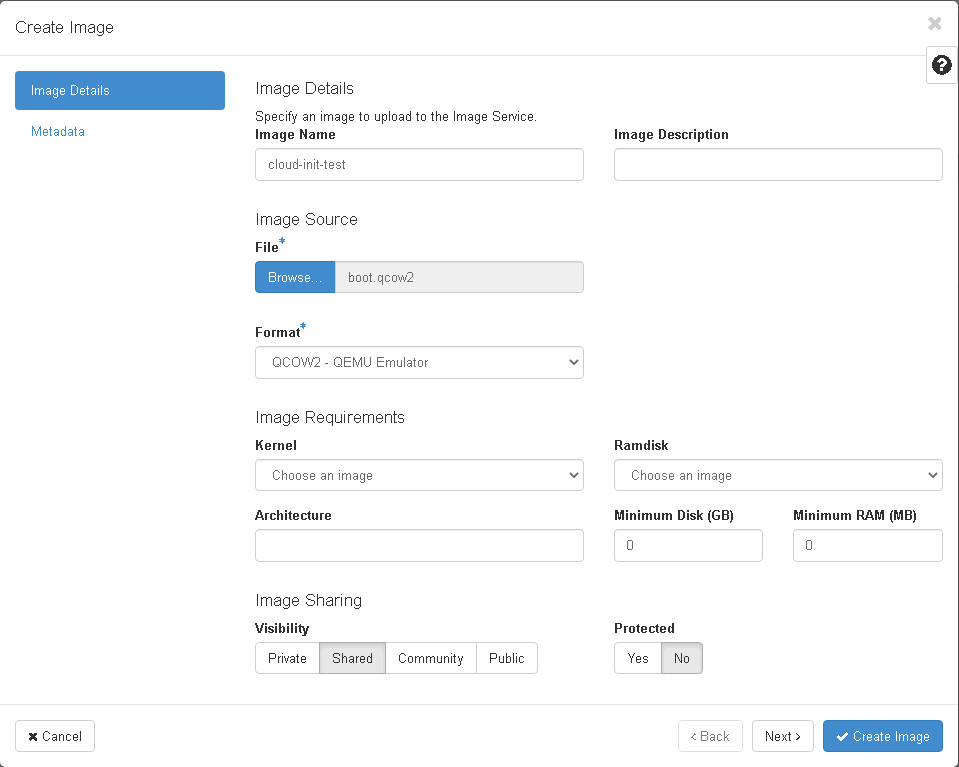
- Click Create Image, and then use the dashboard to verify that OpenStack added the image.

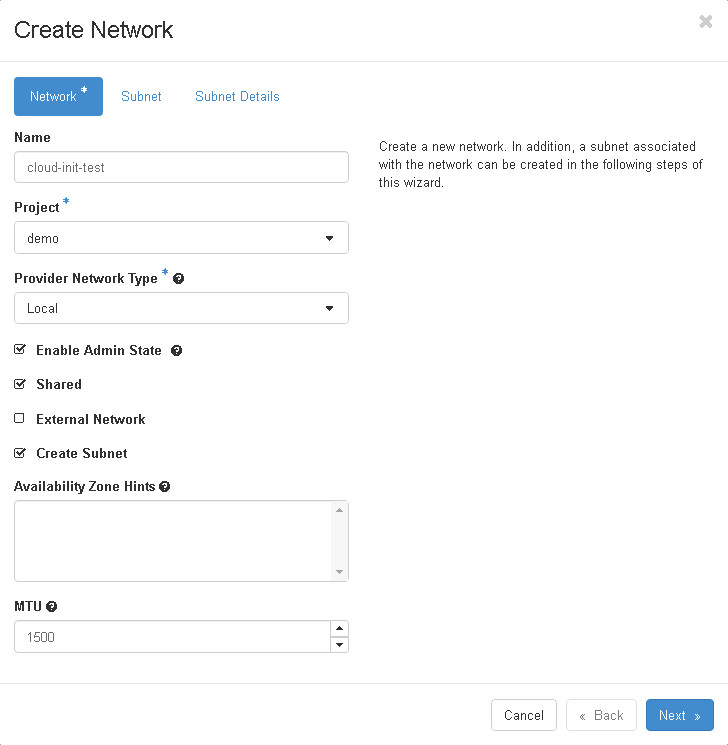
- In the OpenStack dashboard, go to Admin > Network, navigate to the Network options and click Create Network.

- In the network creation wizard, configure MTU to 1500 and complete the network and subnet settings.
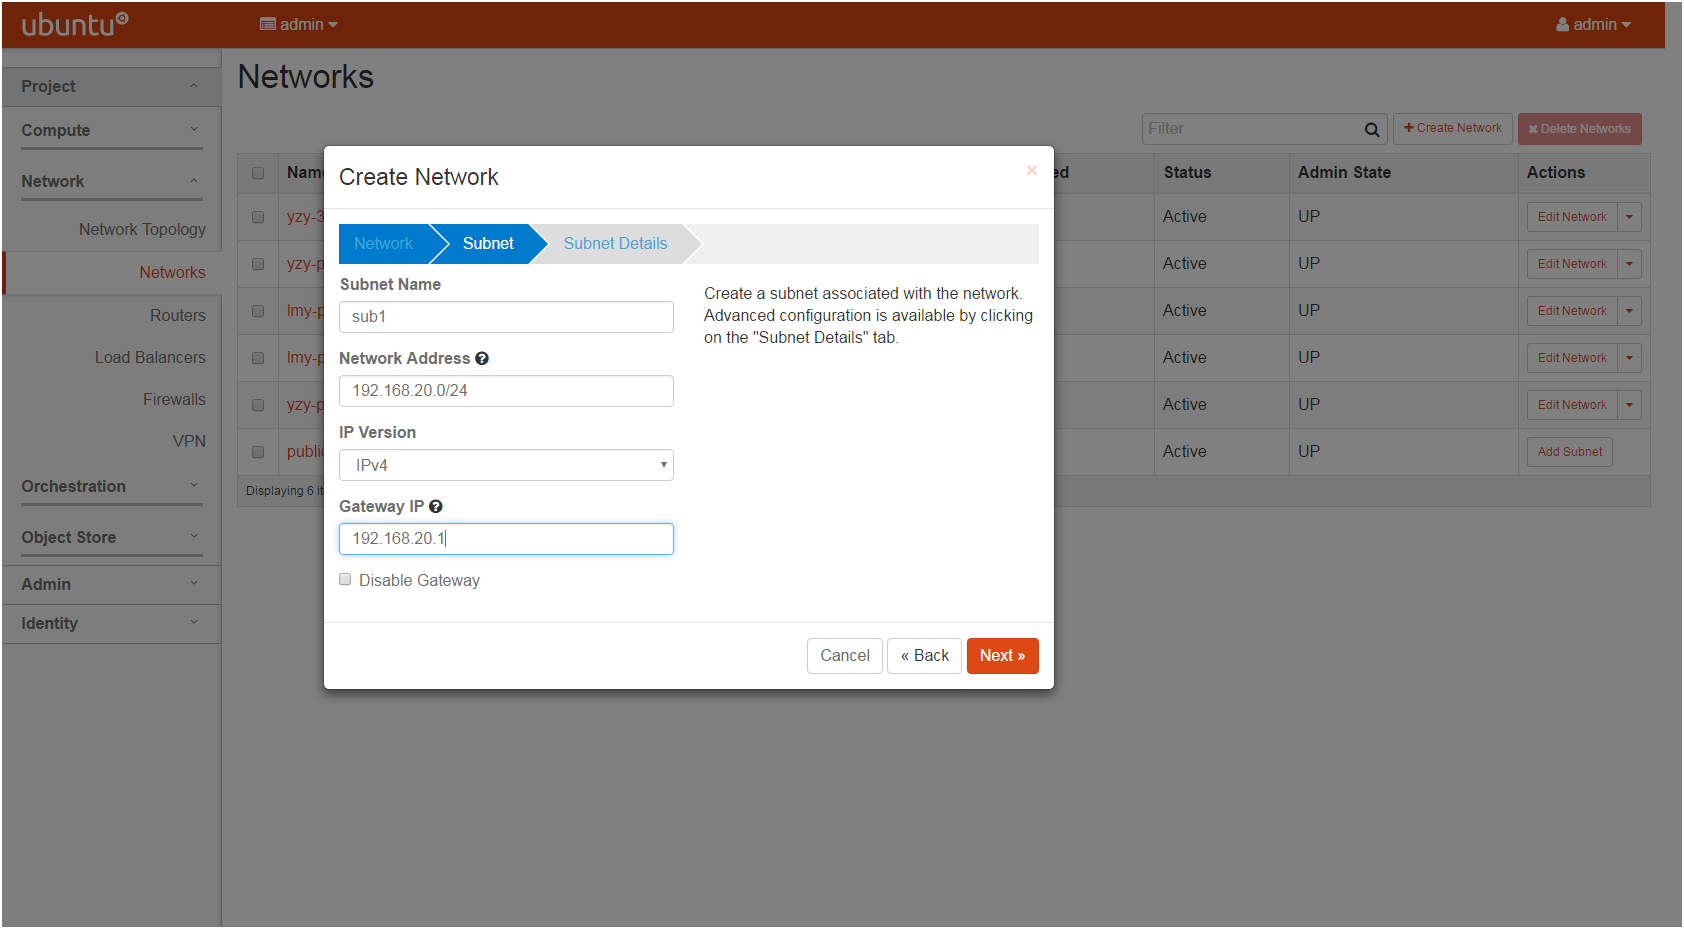
- In the wizard, complete the subnet details. You can use a pool to assign the network's IP address range.
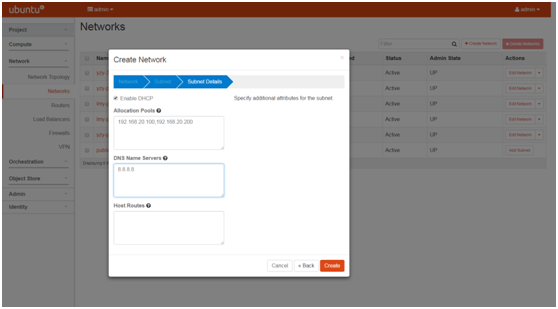
- Click Create, and then use the dashboard to verify that OpenStack added the network.
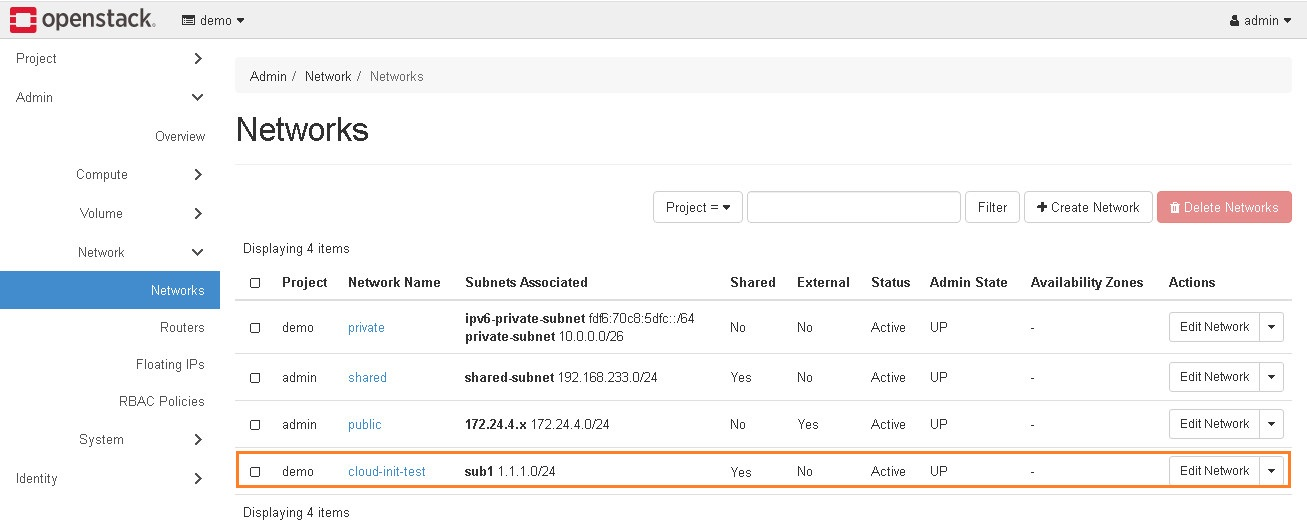
Alternatively, use the CLI commandopenstack network listto verify the image.
- To create the volume FortiWeb-VM uses for its log disk, in the OpenStack dashboard, under Volumes, navigate to the Volumes options and click Create Volume.
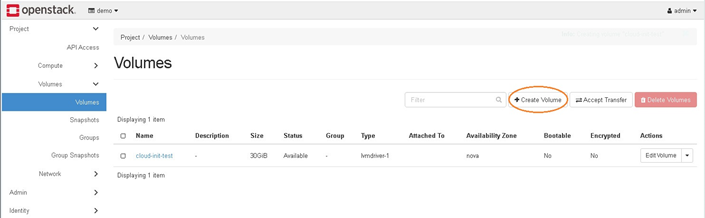
- Complete the volume settings.

- Click Create Volume, and then use the dashboard to verify that OpenStack added the volume.

Alternatively, use the CLI commandopenstack volume listto verify the volume.
- To specify the size of the instance, in the OpenStack dashboard, under System, navigate to the Flavors options and click Create Flavor.
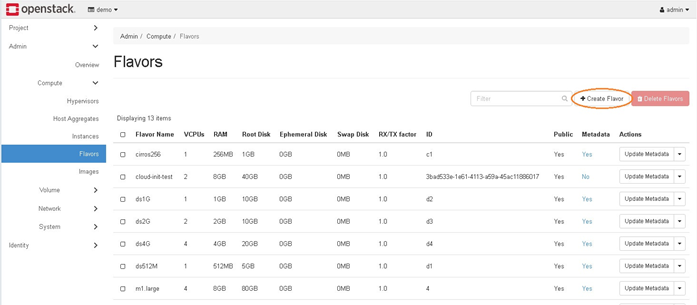
- Complete the flavor settings.
For VCPUs, type the maximum number of vCPUs to allocate. Valid values range from 1 to 8.
- Click Create Flavor, and then use the dashboard to verify that OpenStack added the flavor.

- Confirm the location of the initial FortiWeb configuration file you created earlier and the FortiWeb-VM license file.
- . Use the utility 'write-mime-multipart' in Ubuntu system to convert the initial FortiWeb configuration file and FortiWeb-VM license file to a user data file for deployment.
write-mime-multipart -o <user_data_file> <config_file>:text/cloud-config
<fweb_license>:text/cloud-config
where:<fweb_license>is the name and path of the FortiWeb license file<config_file>is the name and path of the initial configuration file you created earlier. It is the booting CLI configuration that FortiWeb uses. You can use this file for some public initialization configuration that scales the deployment.<user_data_file>is the name and path of the combined file which contains information of the initial configuration file and the FortiWeb license file.
For example:write-mime-multipart -o user_data.txt lmy/config.txt:text/cloud-config lmy/FVVM08TM21000623.lic:text/cloud-config - Use the following command to boot the instance:
- OpenStack returns a table that allows you to confirm the instance configuration.

- Use the CLI command
nova listto display the status of the instance and the IP address it was assigned.
- Use OpenStack Instance Console or SSH to connect to the instance to confirm the initial configuration and that the license file has been uploaded to the FortiWeb.
- Continue with the appliance configuration using the CLI or access the web UI using the assigned IP address. For complete configuration information, see the FortiWeb Administration Guide.
For example, the OpenStack rc file admin-openrc.sh has the following: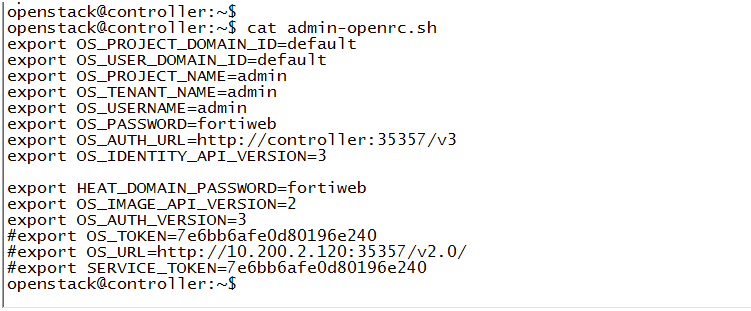
$ source admin-openrc.sh
Alternatively, use the CLI command openstack image list to verify the image.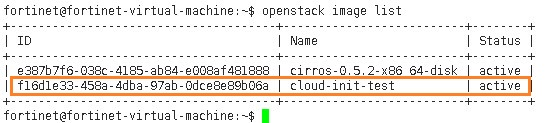
See Preparing to deploy on OpenStack.
This example uploads the license as part of the boot process. Alternatively, you can omit the license file and upload it later. See Uploading the license.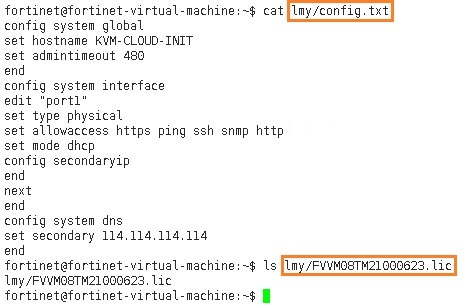
nova boot --config-drive true --image <image_name> --flavor <flavor_name> --user-data <user_data_file> --nic net-id=<network_id> --block-device-mapping vdb=<volume_id> <instance_name>
where:
--config-drive true enables OpenStack to write metadata to a special configuration drive that it attaches to the instance when it boots
<image_name> is the name of the FortiWeb-VM KVM image you uploaded earlier
<flavor_name> is the OpenStack flavor you configured earlier that specifies the size of the instance
<user_data_file> is the name and path of the combined file which contains information of the initial configuration file and the FortiWeb license file
<network_id> is the ID of public network you created earlier for the instance to use
<volume_id> is the ID of the volume you created earlier to use as the FortiWeb log disk
<instance_name> is the name for the instance
For example (the image and the instance are both named cloud-init-test):
nova boot --config-drive true --image cloud-init-test --flavor cloud-init-test --user-data user_data --nic net-id=703fb27e-37e4-4dbe-8bfb-c65f948648a4 --block-device-mapping vdb=5a15be2d-2b99-4a93-8da7-47794bd10bd7 cloud-init-test
|
|
When you deploy the FortiWeb-VM package, network adapters are created automatically. If you want to delete network adapters, do it during the deployment process. It's not recommended to delete network adapters once the FortiWeb is deployed, otherwise unexpected error will occur. |