


Managing phone audio settings
The Phone System > Audio > Prompt menu lets you upload, record, and play phone sound files such as voicemail greetings, announcements, and music on hold. The following default sound files are available and ready to use:
-
callback_prompt_default: Includes an announcement about a callback and asks the user to wait for the next available representative.
-
greeting_default: Includes a generic greeting asking the user to press an extension or the number sign (#) to reach the directory.
-
musicOnHold: Includes recorded instrumental music that can play for on-hold calls, conference calls, and auto attendants.
-
welcome_default: Congratulates the user for successfully completing the set up of the FortiVoice phone system.
The Phone System > Audio > Music On Hold menu lets you select a sound file and settings. The sound file can be used when configuring music on hold for conference calls, call queues, and call parking. See Configuring music on hold.
The Phone System > Audio > Prompt Language menu is used to set for FortiVoice unit’s voice greetings, such as auto attendant and voicemail. The FortiVoice phone system includes eight prompt languages. The default prompt language is English. For more information about setting the default prompt language, see Setting PBX location and contact information.
This section includes the following topics:
Uploading or recording sound files
- Go to Phone System > Audio > Prompt.
- Click New.
- Enter a File name
- You can leave the File ID empty or enter a number with a maximum of 6 digits.
- Select a file Type (Prompt Sound File or Music on Hold).
- Optionally, enter a Description for the file.
- For Voice language, you have two options (Upload or Record).
- To upload a sound file:
- Make sure that the file you want to upload is a WAVE file (.wav) in PCM format.
- For a prompt sound file, the maximum size is 10 MB.
- For a music on hold file, the maximum size is 50 MB.
- Click Upload.
- Select a file.
- Click Open.
- Make sure that the file you want to upload is a WAVE file (.wav) in PCM format.
- To record a sound file:
- Click Record.
- On the Send Voice Recording Call dialog box, enter the extension that you will use to record the file, and click Send to dial the extension. You can edit the extension or add a new one. For details, see Configuring IP extensions.
- When the extension rings, record the sound file and hang up.
- On the FortiVoice GUI, click Yes on the Voice recording request sent to specified extension dialog box.
- Click Create.
Configuring music on hold
- Go to Phone System > Audio > Music on Hold.
- Click New.
- Configure the following:
GUI field
Description
Name
Enter a name for the music on hold entry.
Mode
Files
If you select to use existing sound files, do the following:
- For Sound files, click + and select the sound files. For details about adding a sound file, see Uploading or recording sound files.
- For Play mode, if you want to play the selected sound files randomly, select Random. If you want to play the files according to the order in the Sound files field, select Sequential.
Stream
Before deciding to use streaming files, make sure to only use legal stream sources.
If you select to use streaming files, in the Stream URL field, enter the URL where the streaming music is, such as a radio station. This way, the music is delivered to the FortiVoice unit and played virtually straight away. You can click Test stream to see if the URL is added successfully.
Volume
Set the music sound volume.
Description
Optionally, enter a description for the entry.
- Click Create.
Uploading a prompt language file
The Phone System > Audio > Prompt Language menu includes 8 languages (English, Spanish, French, Italian, Polish, Brazil Portuguese, Russian, Chinese). It's possible to add other prompt languages (Polish, Cantonese, Japanese, Korean).
- Contact Fortinet Support to obtain the FortiVoice language package format (.fvl) file for the language that you want to add.
- Save the .fvl file to your management computer.
- Go to Phone System > Audio > Prompt Language.
- Click New.
- Click Upload and locate the .fvl file.
- Click Create.
Recording sound files using an audio software
You can use an audio software and a microphone to record a sound file. This section uses the Audacity software as an example to help you choose the correct settings.
If you prefer to place a call to an extension to record a sound file, see Uploading or recording sound files.
To record a sound file
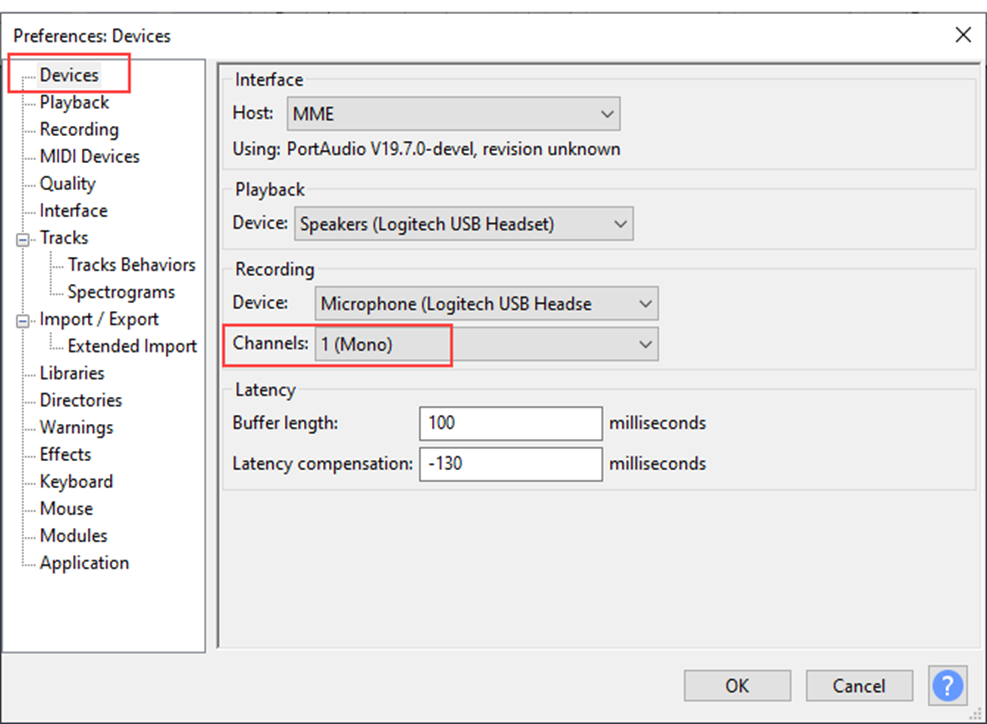
- On Audacity, go to Edit > Preferences.
- Click the Devices menu.
- In Channels, select 1(Mono).
- Click the Quality menu.
- In Default Sample Rate, select 44100 Hz.
- In Default Sample Format, select 16 bit.

- Click OK.
- When you are ready, record your message.
- Save the file in a format that works with the FortiVoice unit.
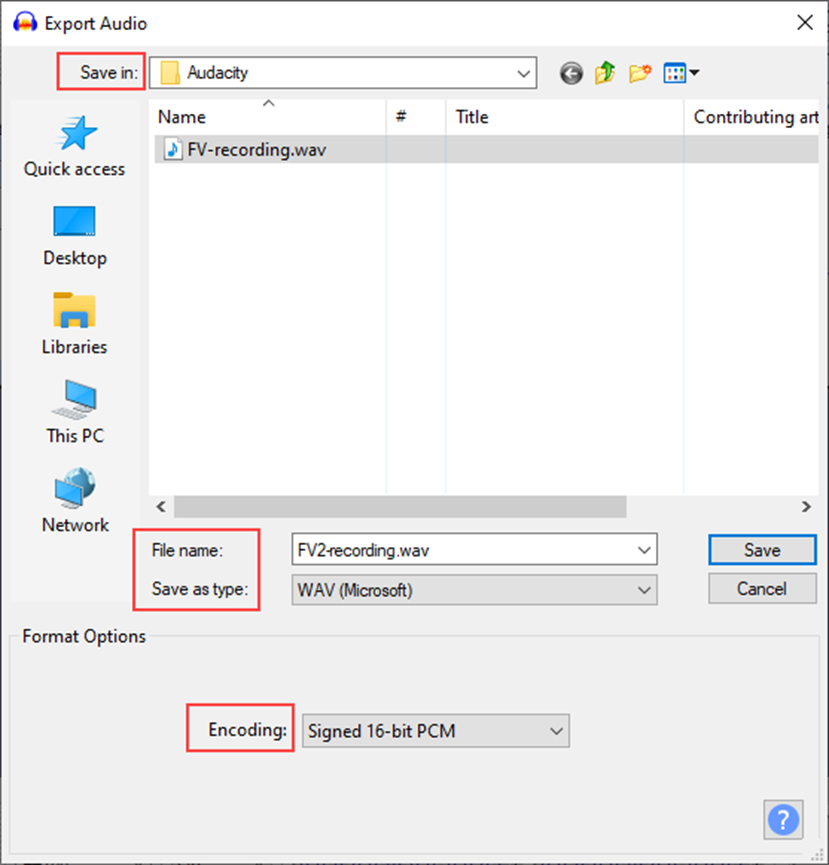
- Go to File > Export > Export Audio.
- In Save in, select the directory where you want to save the file.
- In File name, enter the required file name. The correct file extension is automatically added at the end of the file name according to the format that you select in Save as type.
- In Save as type, select WAV (Microsoft).
- In Encoding, select Signed 16-bit PCM.
- Click Save.
- If the Edit Metadata Tags dialog appears, you can add tags and click OK.
The recording is in a format that you can upload onto the FortiVoice unit (see Uploading or recording sound files).