


Configuring an account code and user privilege for branch paging
Use this procedure to create an account code to restrict the access to a paging system at the branch office. Assign this account code to a user privilege and then apply this user privilege to a user extension. To engage the paging system, extension users must dial the configured paging number and then validate their access to the paging system by entering the access code (PIN) when prompted.
Prerequisite
In Configuring branch paging settings of a survivability branch, enable the Reject paging by default option.
Procedure steps
-
Create a paging account code:
- Connect to the web-based manager of the primary FortiVoice phone system at the main office.
- Go to Security > User Privilege, and then click the Account Code tab.
- Click New.
- In Name, enter a name to identify this account code. For example, PagingAccCode.
- In Description, add any notes for this account code by clicking Edit
 .
. - Do not select Shared.
- In Represented in CDR, decide how you want to display the account code in the call detail record (CDR) by selecting By Code or By Name.
- Under Access Code Set, click New.
-
In Code, enter an access code. When the FortiVoice phone system prompts for a PIN (access code) after a user has engaged the paging system, the user enters this code.

Make sure that the access code has the following format:
- Numbers from 0 to 9. Other characters are not allowed.
- Minimum of 3 digits.
- Maximum of 10 digits.
Example: 8012
- In Display name, enter a name for the access code. For example, PagingAccessCode.
- In Comments, add any notes for the access code by clicking Edit .
- To create the access code, click Create.
- To create the account code, click Create.
-
Create a paging user privilege:
- Go to Security > User Privilege, and then click the User Privilege tab.
- Click New.
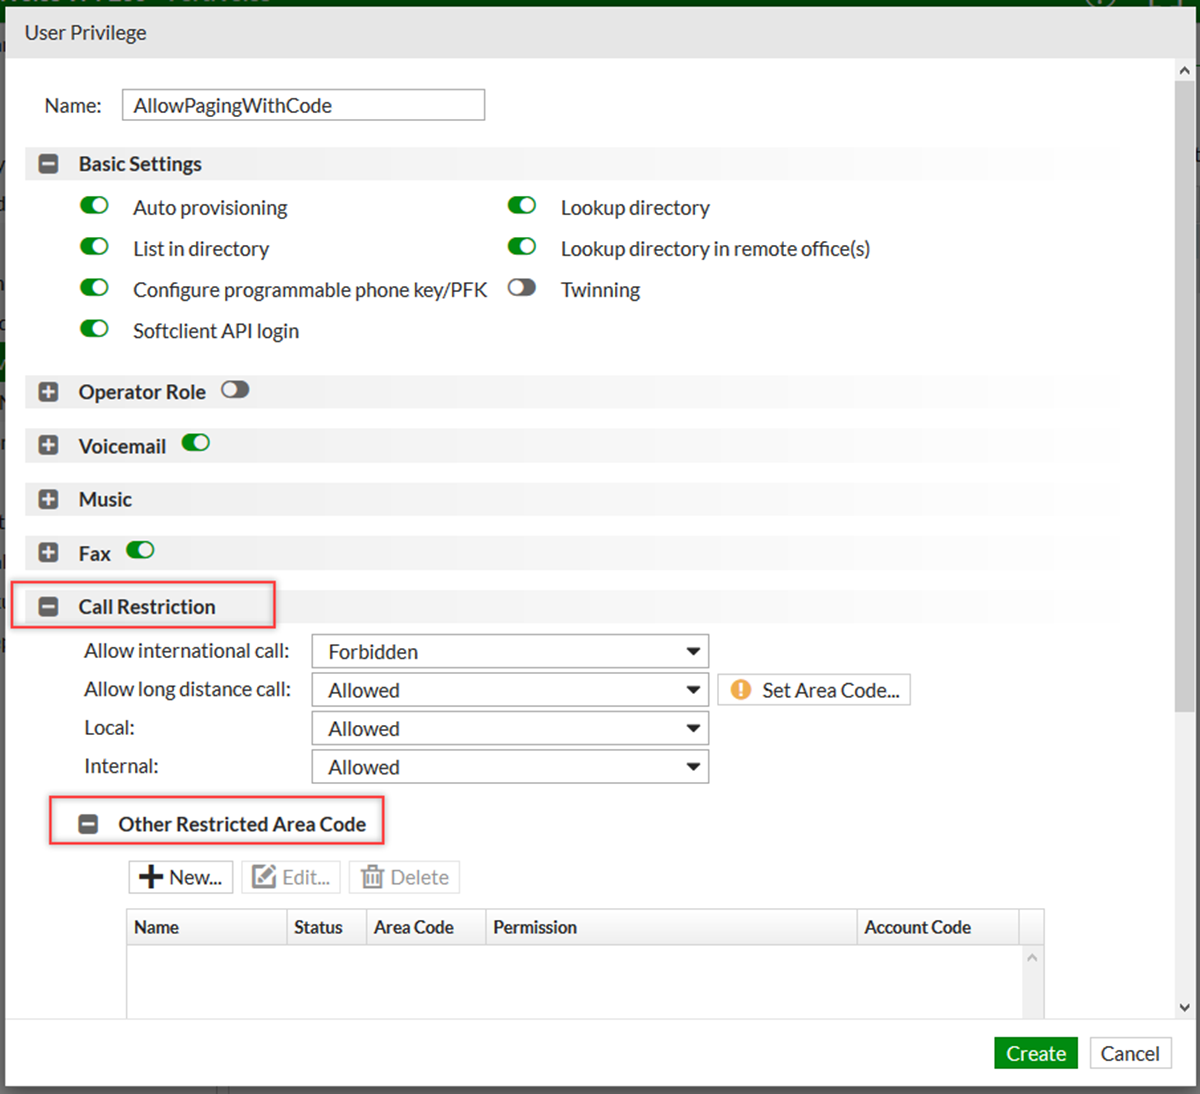
- In Name, enter a name to identify this user privilege. For example, AllowPagingWithCode.
- Click Call Restriction and then click Other Restricted Area Code.
- Click New.
- In Name, enter a name to identify this paging call restriction. For example, Paging.
- Select Enable to activate this restriction.
-
In Area code, enter the paging number to be configured to engage the paging system. For example, 0110.
Make sure to use the same number as in the Number field (see Configuring branch paging settings of a survivability branch).
- In Permission, select Allowed with Account Code.
- In Account code, click + and then select the account code that you created in step 1. In this example, you would select PagingAccCode.
- To create the call restriction, click Create.
- To create the user privilege, click Create.
- Apply the paging user privilege to one or more extensions:
- Go to Extension > Extension, and then click the IP Extension tab.
- Double-click the extension that you want to edit.
- Go to User Setting.
- In User privilege, select the paging user privilege that you created in step 2. In this example, you would select AllowPagingWithCode.

- Click OK.
You have completed this procedure.
- If you want your deployment to use paging zones, then go to Configuring a speed dial pattern and rule for branch paging.
If your deployment does not require paging zones, go to Applying the branch paging configuration.