


Managed FortiSwitch display
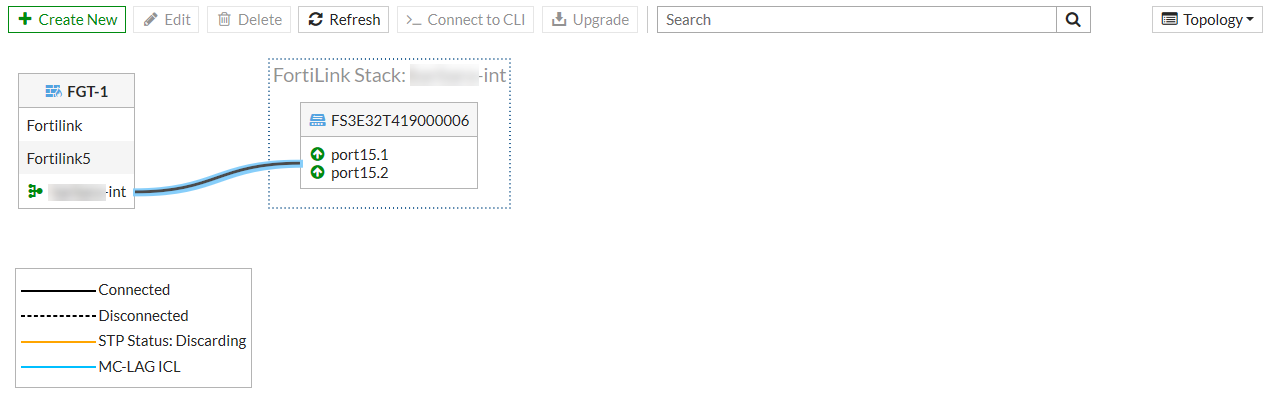
Go to WiFi & Switch Controller > Managed FortiSwitch to see all of the switches being managed by your FortiGate. Select Topology from the drop-down menu in the upper right corner to see which devices are connected.
When the FortiLink is established successfully, the status is green (next to the FortiGate interface name and on the FortiSwitch faceplate), and the link between the ports is a solid line.
If the link has gone down for some reason, the line will be dashed, and a broken link icon will appear. You can still edit the FortiSwitch unit though and find more information about the status of the switch. The link to the FortiSwitch unit might be down for a number of reasons; for example, a problem with the cable linking the two devices, firmware versions being out of synch, and so on. You need to make sure the firmware running on the FortiSwitch unit is compatible with the firmware running on the FortiGate unit.
From the Managed FortiSwitch page, you can edit any of the managed FortiSwitch units, remove a FortiSwitch unit from the configuration, refresh the display, connect to the CLI of a FortiSwitch unit, or deauthorize a FortiSwitch unit.
Cloud icon indicates that the FortiSwitch unit is managed over layer 3
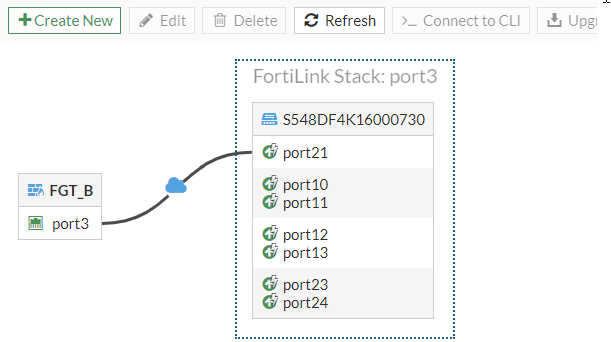
A new cloud icon indicates when the FortiSwitch unit is being managed over layer 3. The cloud icon is displayed in two places in the GUI.
Go to WiFi Controller > Managed FortiSwitch and select Topology. In the following figure, the cloud icon over the connection line indicates that S548DF4K16000730 is being managed over layer 3.
Go to Security Fabric > Physical Topology. In the following figure, the cloud icon over the connection line indicates that S548DF4K16000730 is being managed over layer 3.

Re-ordering FortiSwitch units in the Topology view
Starting in FortiOS 7.0.1, you can change the order in which FortiSwitch units are displayed in the Topology view.
To rearrange the FortiSwitch units in the GUI:
- Go to WiFi & Switch Controller > Managed FortiSwitches.
- In the View dropdown list, select Topology.
- Click Reorder or the double-arrow button next to the FortiSwitch serial number.

- In the Change FortiSwitch Order window, drag-and-drop each FortiSwitch unit to change the order.
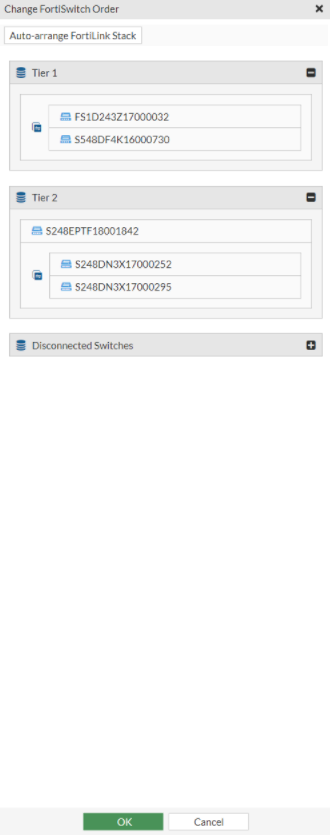
- If you want FortiOS to determine the arrangement with the fewest edge crossings, click Auto-arrange FortiLink Stack in the Change FortiSwitch Order window and then click OK in the Confirm window.

To rearrange the FortiSwitch units in the FortiOS CLI:
config switch-controller managed-switch
edit <FortiSwitch_serial_number>
move <FortiSwitch_serial_number1> before <FortiSwitch_serial_number2>
next
end
FortiSwitch_serial_number1 is now listed above FortiSwitch_serial_number2.