


Building your own connector
You can write a custom connector that can retrieve data from custom sources. You can then use the connector either standalone or within FortiSOAR playbooks and perform automated operations. From version 7.0.0, you can create your own connector using the Connector Wizard. You can also write a custom connector manually, or you can use the FortiSOAR Connector SDK to develop your custom connector.
The process of installing, configuring, and using FortiSOAR-provided connectors is defined in the respective connector-specific documentation.
For permissions required to build a connector, see the Introduction to Connectors chapter.
Building a connector using the Connector Wizard
Use the Connector wizard to create a new connector. You can also edit an existing connector according to your requirements by clicking Edit on a connector card in the Manage tab.
To create a new connector, do the following:
- Log on to FortiSOAR.
- On the left navigation pane, click Content Hub > Create or Automation > Connectors > Create.
- To create a new connector, click Create > New Connector:

This opens the "Connector Wizard":
Click the Lets's start by defining a connector button to start building your connector. - In the Connector Wizard, in the About Connector screen, you need to provide the basic details such as name, description, etc. of the connector that you want to create, as well as, upload a logo for the connector, and choose a suitable template for the connector:

You need to add the following details on this screen:- Click the Upload icons buttons to upload large, medium, or small logos for your connector. Clicking the upload button opens the Upload Connector Logo dialog, where you can drag-and-drop your logo, or browse to the logo on your disk and import the logo.
- In the Connector Name field, add the name of the connector that you want to create.
It is a good practice to include both the name of the organization and the name of the product in the connector name, for example, Fortinet FortiSOAR. - In the API Identifier field, enter a name that would be used as a variable in the connector code to reference this connector. The variable that you use here can be alphanumeric; however, it should not contain any special characters and it must not start with a number.
Also, note that the value that you enter in this field must not match the name of any other connector that is available in the Connector Store or Content Hub. For example, you cannot enter 'virustotal' in this field, since the VirusTotal connector is available in Content Hub.
Note: You cannot change the 'name' and 'version' of a connector once it is set. - In the Connector Version field, enter the version of the connector in the x.y.z format. For example, 1.0.0.
Note: It is recommended that you increase the version number if you are making any changes to an installed connector. - (Optional) In the Publisher field, enter the name of your organization as the publisher of this connector. The publisher of the connector is responsible for maintaining and supporting the connector.
If you want to keep the connector anonymous, then you can add the "Community" keyword. If this field is left blank, again the connector's publisher is automatically set to "Community".
Note: Do not enter "Fortinet" in this field. - In the Description field, you can optionally enter information for the connector that you are creating. The Description is displayed on the Connector card on the Connector Store or Content Hub's listing page and enables users to understand more about the Connector.
- From the Select Template drop-down list, select the template that you want to apply to the connector that you want to create.
Templates are based on the broader category of connectors, for example, Threat Intelligence connectors, Ticketing connectors, etc. Templates automatically add suggestive actions, configuration details, and other connector details based on the type of connector you want to create, which helps to speed up the development process. - Once you have completed entering all the details, click Save & Continue, to go to the
Configurationscreen.
- Use the Configuration screen to set up the connector configuration page. If you have specified a template in the About Connector screen, then you will see that some suggestive configuration fields are added based on the selected template, else you will not see any configuration fields and you require to add all the required configuration fields.
If, for example, in the About Connector screen, the Threat Intel is selected from the Select Template drop-down list, then you will see the followingConfigurationscreen:
To add fields to the connector configuration, click + button alongside Fields or click the Add Field link and can easily add properties to that field, like selecting the type of field you want to add such as Text, Integer, Email, etc., and even a sub-type ofTextfields such as URL, Filehash, etc., all of which help you in ensuring that the user enters appropriate values in the field. You can also set other properties such as visibility and a default value of the field, whether it is required or not, etc.
Important: You cannot add fields that are named 'name' and 'default' to the connector configuration since 'name' and 'default' are reserved keywords.
To edit existing fields and change their properties, select the field to change the properties and click Apply.
Once you have completed entering all the details, click Save & Continue, to go to theActionsscreen. - Use the Actions screen to set up the connector actions. From version 7.0.2 onwards, you can define the actions that the connector should perform in the form view, instead of having to edit a raw JSON file. If you have specified a template in the About Connector screen, then you will see that some suggestive actions are added based on the selected template, else you will not see any actions and you require to add all the required actions to the connector.
If, for example, in the About Connector screen, the Threat Intel is selected from the Select Template drop-down list, then you will see the followingActionsscreen:
To add actions, click the + Action button, to edit an action click the down (v) arrow to display the metadata and parameters for the action, and click the Delete icon to remove the action. You can also type a keyword in the Filter Actions field to filter the actions of the connector.
To add a new operation to the connector, click + Action, and enter the following details for the action:- In the
Action Metadatasection, enter the following metadata details for the action:- In the Title field, enter a suitable name for the action that would explain the purpose of the action. For example, if you want to perform a lookup for a specific domain, then you can enter Lookup Domain in the Title field.
- From the Select Category drop-down list, select a suitable category for the action from options such as Investigation, Remediation, Utilities, etc. For example, select Investigation.
- In the Description field, enter a description that explains the action and the utility of the action.
- In the
Action Parameterssection, define the parameters associated with the action. If your action does not need any input parameters to work, you do not need to add any parameters in this section. To add parameters, click the Add Field link and define its properties.
You need to specify the type of field, its field name and title, and other properties such as visibility and required field or not, a default value of the field, etc.
Once you have completed editing the connector configuration and adding the actions to the connector, click Save & Create Connector, which displays the Summary screen.
- In the
- On the Summary screen and you can click Open in Code Explorer to edit and test the connector.

The created connector also gets saved in the Create tab, from where you also edit the connector. For more information, see the Editing a connector section.
Editing a connector
You can use the connector's code editor interface to edit existing connectors and build new connectors for custom use cases.
To edit an existing connector that is installed on your system, open the Manage tab and click the connector card to open the connector popup, and click Edit. However, before you can make any changes to an installed connector, you are required to create a local copy of that connector. For example, clicking Edit on the VirusTotal connector. This displays a Confirm dialog that requires you to clone the connector before making any changes, click Confirm to open the Clone dialog, where you should update the connector name, version, and also ensure that you have specified a unique API Identifier and then click Create:
Clicking Create opens the code editor interface where you can make the required changes to the connector. 
It also saves the cloned connector in the Create tab, with the name that is specified in the API Identifier field, i.e., 'VirusTotal v2.2.1_dev'.
|
|
You cannot change the connector name and API identifier for a connector once it is set. |
If you want to edit a custom connector that has been created using the Connector Wizard and not installed from Content Hub, and which has been published (installed), you are not required to clone the connector. Instead, you can choose to either edit, save, and publish the same version of the connector, or choose to add a new version to the connector. For example, if you click Edit on the 'Demo' connector (created using the Connector Wizard), the Edit Connector dialog displays the Edit and the Add Version options:
|
|
If a connector is published and is being used by other users, it is recommended that you add a version to the connector before editing the connector code, so that the changes you make do not cause any issues to existing operations done using the connector. |
Once you create a connector using the "Connector Wizard", or if you are editing an installed connector, then those connectors are saved in the Manage tab from where you can edit the connector.
To edit a connector, do the following:
- Open the Manage tab:

In the Manage tab, you will see connector cards with their details such as the connector version, the created and the last modified dates, whether the connector is installed or not, etc.
You might see more than one version of the connector if you are working on multiple versions of the connector, and also when you publish a connector a working copy of that version of that installed connector is maintained in the Manage tab.
To add a version for the connector, click Add Version, which will again display theClone Connectordialog. - To edit a connector, click Edit Connector, which displays the code editor interface:

The files and folders that are present are similar to what is described in the Writing a custom connector manually section. A brief description of these files and folders follows:- The
info.jsonfile contains information about the name and version of the connector, logo image file names, the configuration parameters, the set of functions supported by the connector, and their input parameters. The name of all the fields in theinfo.jsonfile must be unique.
From version 7.0.2 onwards, you can choose to edit theinfo.jsonfile in the Form view, instead of editing the file in the raw JSON format, by clicking the Form View button:
The Form View of the info.json file, contains Metadata, Configuration, and Actions information for the connector. Click the down (v) in the respective row to add or edit the information for each of these items.- Metadata: Contains information about the connector, including the name, version, logo, etc. of the connector.
- Configuration: Contains the configuration parameters for the connector that is used to set up the connector configuration page.
- Actions: Contains the actions that the connector can perform and its associated Metadata and parameters.
For more information on editing these items in the Form View, see the Building a connector using the Connector Wizard section.
- From version 7.0.2 onwards, you can use the connector wizard to add actions to the connector or you can also use the Form View of the
info.jsonfile. In case you want to manually add an action to a connector, i.e., edit the raw JSON file, then you must add the operation parameters in theinfo.jsonfile, and this in turn, creates a.pyfile per operation. Each operation.pyfile contains the default template format for the operation. Once theinfo.jsonis updated with the operation it is mapped in thebuiltins.py. - The
connector.pyfile extends the base connector class and implements thecheck_healthandexecutefunctions.
Note: Theconnector.pytemplate file provides an additional function calleddev_executethat can be used during the development phase of the connector. Code changes do not always reflect without a service restart; thereforedev_executereloads the function definition at every 'execute' call to ensure that the changes made at every save in the code get immediately reflected. You can change theexecutefunction inconnector.pyas follows to call thedev_executefunction instead:def execute(self, config, operations, params, *args, **kwargs):
return self.dev_execute(config, operation, params)
However, note that reloading the function at every function call is slow and performance-intensive. So, once the development is complete and the connector is ready to use, you must revert the code to the original. For more information onconnector.py, see the connector.py section. - The images directory contains the connector logo files.
- The playbook directory contains the
playbook.jsonfile, which contains the playbook collection that you want to include with your connector. - The
requirements.txtfile lists the additional python libraries that are required by the connector. However, the connector dependencies are not installed by default when the connector is created. If you want to test the connector that is being developed, you must manually install the connector dependencies. - The
release_notes.mdfile (present for connectors that have released versions) contains information such as what's new and what's fixed, in a particular release of a connector.
- The
- Apart from the above files, it is recommended that you maintain a file (
utils.py) that contains common functions such as DateTime conversion, str to list, etc., which can be used by multiple actions in the connector. - Edit the existing connector as required, and click Save Changes.
The connector is saved in the "Draft" state.
The left-pane of the code editor interface contains the name of the connector along with various icons using which you can perform actions such as creating new files and folders, and also uploading or deleting selected files or folders:
You can also rename connector files and folders or copy its path, by right-clicking the selected file or folder row and selecting Rename or Copy Path.
You can also perform the following operations on the code editor interface:- Code Formatting: To lint your code automatically and make the code more human-readable and error-free (programming and programming errors), select the entire code in the editor and click the Format button.
- Full Screen: To get a better working view and make the editor go full-screen, click the Fullscreen button. To exit the full screen, press
ESC. - Export: To export the connector as a
.tgzfile, click the Export button. You might want to import the exported connectors'.tgzfile into another system. - Testing the configuration: While developing a connector, you can perform a health check operation on the connector. Clicking the Test Configuration button opens a dialog containing the specified configuration parameters, where you can input the values, save the configuration, and perform the health check. If the configuration is valid, i.e., the configuration parameters and values specified are correct, then the health check will appear as "Available", else it will appear as "Disconnected".

- Testing the actions: You can use the saved configuration for testing connector actions for their output/errors. Clicking the Test Actions button displays a list of actions for that connector. Click the action that you want to test to display a dialog containing the input parameters for that action. Enter the values for the input parameters and click Execute Action to view the output for that action.

Once the connector action is executed, you can see the formatted output of the action, in a tabular format, as shown in the following image:
- Deleting the Connector: To delete the connector, click the Delete Connector. button.
- Once you have completed making the changes, click Publish Connector to display the
Publish Connectordialog: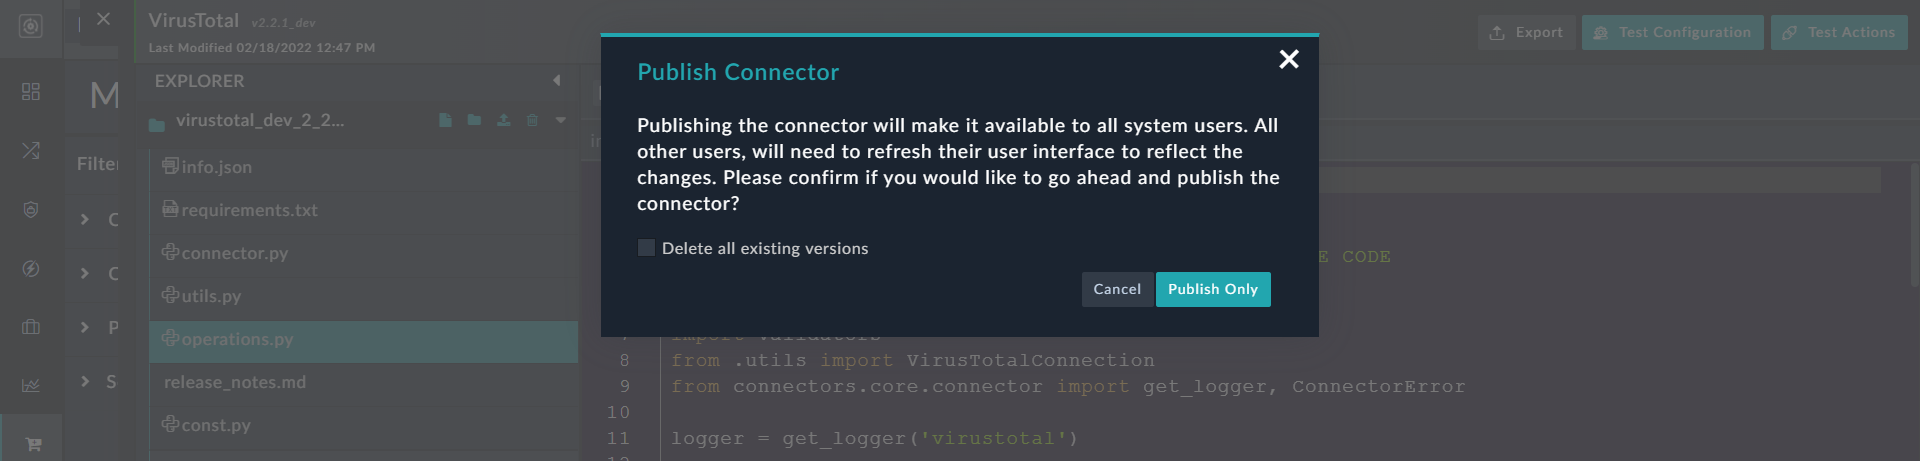
Click Publish Only to publish the connector and make it available on the Discover tab for all the users of the system and use it in playbooks or run directly on records. However, a working copy for the same is also maintained in the Create tab.
To delete all existing versions of the connector from your system, select the Delete all existing versions checkbox.
Removing images of a connector installed from the Content Hub
If you are editing a connector that is part of the Content Hub, for example 'VirusTotal' and you want to remove the images of such a connector, do the following:
- Open the connector in the code editor interface, and click the images folder.
- Select the image that you want to delete and then click the Delete icon, then click Delete on the confirmation dialog.
- In the code editor interface, click info.json and edit the
info.jsonfile to remove the file references of the deleted image. For example, if you have deleted the large logo for the connector (large.png), then in theinfo.jsonfile, remove its reference:"icon_large_name": "large.png" - To save your changes, click Save Changes.
Debugging connectors
-
You can add logger statements to test your connector's code paths. Use the
get_loggerutility function to initialize the logger. You can importget_loggerfromconnectors.core.connector, and then declare the logger aslogger = get_logger('<connector name>'). Then you can addlogger.error('<logger_message>')to theoperation.pyfile that you want to debug. -
If your connector's configuration or action fails, you can check the connector logs. All the connector logs are written to the
/var/log/cyops/cyops-integrations/connectors.logfile and follow the format:%(asctime)s %(levelname)s %(name)s %(module)s %(funcName)s(): %(message)s
The default log level isWARN, however, you can change it toINFOorDEBUG.
For example, to change the log level toINFO:
Open the/opt/cyops-integrations/integrations/configs/config.inifile and setconnector_logger_level = 'INFO', and then restart theuwsgiservice.
Writing a custom connector manually
Perform the following steps to write a custom connector manually:
- Create a Connector Template Directory Structure with the required files.
- Import the connector into FortiSOAR.
- Check the health of the connector.
- Add a connector operation to a playbook.
Connector Template Directory Structure
Create the following folder structure, with a folder with the connector name at the top and files within it:
connectorname folder--+ playbooks---+ __init__.py---+ playbooks.json--+ connector.py--+ info.json--+ images--+ requirements.txt--+ packages---+ <package_name>
|
|
Python 3 is required for developing your connectors. |
info.json
The info.json file contains information about the name and version of the connector, logo image file names, the configuration parameters, the set of functions supported by the connector, and their input parameters. The name of all the fields in the info.json file must be unique.
|
|
Ensure that the name of the connector in the |
You can configure the following parameters, fields, and operations while writing connectors: description of connector and actions, tooltip, placeholder, conditional fields, backward compatibility (using visible_onchange parameter), validation using regex, label, apioperations, and grouping of fields. These parameters are explained in the Notes following the sample info.json file.
Following is an example of an info.json file:
{
 "name": "sampleConnector",
 "label": "sampleConnector",
 "description": "sampleConnector connector description",
 "publisher": "publisherName",
 "cs_approved": true/false,
 "cs_compatible": true/false,
 "version": "1.0.0",
 "category": "categoryType",
 "help_online": "link to online documentation",
 "icon_small_name":"small_icon.jpeg",
 "icon_large_name":"large_icon.jpeg",
 "configuration": {
   "fields": [
     {
       "title": "fieldname",
       "required": true/false,
       "editable": true/false,
       "visible": true/false,
       "type": "text",
       "description": "text",
       "name": "user",
       "tooltip": "text for the tooltip",
       "placeholder": "placeholder text",
       "validation":{
            "pattern":"regex pattern for validation",
            "patternError":"text for the error message if validation fails"
          }
     }]
 },
 "operations": [
   {
     "operation": "function_template",
     "title": "Sample Function",
     "description": "description of the operation",
     "category": "categoryType",
     "annotation": "sample_annotation",
     "parameters": [{
       "title": "Sample Input1",
       "required": true/false,
       "editable": true/false,
       "visible": true/false,
       "type": "text",
       "name": "input1",
       "description": "text",
       "value": "default value1"
       "tooltip": "text",
     },
     {
       "title": "Sample Input2",
       "required": true/false,
       "editable": true/false,
       "visible": true/false,
       "type": "text",
       "name": "input2",
       "description": "text",
       "tooltip": "text",
       "value": "",
       "options": ["A", "B"],
       "onchange": {
            "A": [{
              "title": "User2",
              "required": true/false,
              "editable": true/false,
              "visible": true/false,
              "visible_onchange":false,
              "type": "text",
              "name": "user2",
              "description": "text",
			  "tooltip": "text",
              "value": "admin1"
            }],
            "B": [{
              "title": "User2",
              "required": true/false,
              "editable": true/false,
              "visible": true/false,
              "type": "integer",
              "name": "user2",
              "description": "text",
			  "tooltip": "text",
              "value": 12345
            },{
              "title": "Comment1",
              "required": true/false,
              "editable": true/false,
              "visible": true/false,
              "type": "text",
              "name": "comment1",
              "description": "text",
			  "tooltip": "text",
              "placeholder": "Add comment1",
              "value": "",
              "onchange": {
                "placeholder attribute": [{
                  "title": "placehoder attribute title",
                  "required": true/false,
                  "editable": true/false,
                  "visible": true/false,
                  "type": "checkbox",
                  "name": "placehoder attribute name",
                  "description": "text",
			      "tooltip": "text",
                  "value": false
                }
              ]}
            }]
       }
     }],
     "enabled": true,
     "output_schema": {"key1": "", "key2": []}
   },
   {
            "operation": "Sample Operation 2",
            "category": "containment",
            "annotation": "sample_op",
            "title": "title of the operation",
            "description": "description of the operation",
            "is_config_required": true/false,
            "parameters": [
                {
                    "title": "title of list",
                    "type": "text",
                    "name": "sample_list",
                    "required": true/false,
                    "editable": true/false,
                    "visible": true/false,
                    "description": "description of the operation",
                    "tooltip": "text"
       },
                {

                    "type": "label",
                    "label": "label text",
                    "visible": true
       },
                {
                    "title": "title of list",
                    "type": "text",
                    "name": "sample_list",
                    "description": "description of the operation",
                    "required": true/false,
                    "editable": true/false,
                    "visible": true/false,
                    "class": "group-element",
                    "tooltip": "text"
       },
                {
                    "title": "title of list",
                    "type": "text",
                    "name": "sample_list",
                    "description": "description of the operation",
                    "required": true/false,
                    "editable": true/false,
                    "visible": true/false,
                    "class": "group-element last",
                    "tooltip": "text"
       }
      ],
            "enabled": true,
            "output_schema": {}
    }
 ]
}
Notes:
- The version of the connector must be in the x.y.z format, for example, 1.0.0. The version must consist of valid integers, for example, "1.15.125" is a valid version.
-
The
output_schemadefines the keys that are present in the output json on the execution of an operation. The info.json contains some common keys. However, the output json can have additional keys based on the input parameters. You can use these json keys to set the input for subsequent Playbook Steps, using the Dynamic Values. For more information, see the Dynamic Values section in "Playbooks." -
If you want to add online and/or offline documentation for your connector, add the following to your info.json:
help_file: "name of pdf file in the connector folder"help_online: "link to the online documentation for the connector" -
Input types supported: text, password, checkbox, integer, decimal, datetime, phone, email, file, richtext, json, textarea, image, select, and multiselect.
Forselectandmultiselect, you can provide the list of inputs using theoptionskey.
For example,{ "title": "Sample Field", "name": "sample", "required": "true", "editable": "true", "visible": "true", "type": "select", "options": ["A","B","C"] } categoryandannotationwithin operations: The category defines the category for the connector that you are adding, and it must be one of the following: investigation, remediation, containment, and miscellaneous.
The annotation defines the operation or function that will be performed. An annotation is unique and belongs to only one category, i.e., you must not add an annotation to multiple categories.
If you do not define any category in theinfo.jsonfile, then by default, the annotation is added to the miscellaneous category.
The category name must contain only lower-case alphabets. The annotation name must contain only lower-case alphabets, underscores, and numbers.
Category and annotations must always come together.
Multiple operations within a connector can use the same annotation.description: You can add a description for the connector, which will be visible on the connector page in FortiSOAR and you can also add a description for the action or operation, which will be visible on the connector step page in the Playbook Designer.is_config_required: By default, theis_config_requiredkey is set totrue(default), which means that the connector uses the configuration specified in the connector configuration to execute an action. If you set theis_config_requiredkey tofalse, then configurations are not required to execute an action and in this case, you can use dynamic fields to specify the configurations.
Note: This key is applicable at the action level, i.e., limited to a single action.tooltip: You can add the tooltip parameter to any field to display information about that particular field. Note that if you do not want a tooltip against any field, then you must remove the tooltip parameter from that field in theinfo.json. You must not pass""ornullas values to the tooltip parameter.placeholder: You can add the placeholder parameter for text and select fields, which will display placeholders for those fields on the connector step page in the Playbook Designer.-
conditional fields (
onchange): You can add theonchangeparameter to fields, which you can use to display other fields or subfields conditionally based on the user input for that field. For example:{ "options": ["Now", "Yesterday"], "onchange": { "Now": [{ "title": "Comment3", "required": true, "editable": true, "visible": true, "type": "text", "name": "comment3", "value": "" }], "Yesterday": [{ "title": "Comment4", "required": true, "editable": true, "visible": true, "type": "text", "name": "comment4", "value": "" }] } } visible_onchange: For backward compatibility of the connector you can use thevisible_onchangeparameter for conditional fields (onchangeparameter).
If you setvisible_onchangetofalse, then this field will be hidden in FortiSOAR UI, and if you setvisible_onchangetotrue, or if it is not present for any field, then this field is visible in FortiSOAR UI.validation: You can add regex validation totextandtextareafields. You can also add the error that will be displayed in case the validation fails. For example:{ "validation":{ "pattern":"\\d+", "patternError":"this is not a number" } }label: You can add the label field to display text on the connector UI. For example:{ "type": "label", "label": "this is my label", "visible": true }grouping: You can group fields based on your categorization using"class": "group-element". For the last field in the group, use"class": "group-element last".
For example:{ "operation": "block_applications", "parameters": [ { "type": "label", "label": "this is my label", "visible": true }, { "title": "Applications Names(List Format)", "type": "text", "name": "app_list", "required": true, "editable": true, "visible": true, "class": "group-element", "tooltip": "Block Applications Names (List Format)" }, { "title": "Applications Names(List Format)", "type": "text", "name": "app_list", "required": true, "editable": true, "visible": true, "class": "group-element last", "tooltip": "Block Applications Names (List Format)" } ] }apiOperations: You can fetch options for theselectandmultiselectfields from the API that you have defined in your operation. The parameters to this operation will be what users have entered in the configuration of this operation and the target field. apiOperations is not supported for the connector configuration.
Note: To hide this operation in the from the Actions drop-down list in the Playbook Designer set"visible": falsefor this operation.supports_remote: Some connector actions cannot work when run on agents in a segmented network. Therefore, parameters of those actions must be marked as"supports_remote": False. For example:"title": "Enable abc service", "name": "abc_service", "supports_remote": Falseconditional_output_schema: Support for multi-option or dynamic output schema in connectors. In every operation that requires the dynamic output schema, you must addconditional_output_schemaas a key in an array of objects. Each object will contain the condition, which you should add within{{ }}and then you must add the corresponding output schema for each condition. It is recommended that you add a default schema, using"condition": "{{true}}", at the end of the defined conditions. The default schema will be used if none of the defined conditions are met.
Notes:- If you are using multiple conditions for evaluation such as a combination of
&&and||, then you must wrap the whole condition within().
For example,{{(command === 'ls' || command === 'ssh' )}}{{(command === 'ls' && port === 5895 )}} - If you are using the condition with the checkbox field, add the condition as:
{{ checkbox === true}} - If you are using the condition with the multi-select field, add the condition as:
{{multsel.toString() === (['option1','option2']).toString()}} - If you are using the condition with the
jsonfield, add the condition as:{{jsonfieldname === '{\"key\":\"value\"}'}}
For example,{{jsonfieldname === '{\"name\":\"fortinet\"}'}}
Important: To support versions earlier than the 4.12.0 release,output_schemawill also always be present.
Example of aconditional_output_schemadefinition:{ "conditional_output_schema": [ { "condition": "{{command === 'ls'}}", "output_schema": { "op_result": "", "op_status": "" } }, { "condition": "{{command === 'ssh'}}", "output_schema": { "result": "", "status": "" } }, { "condition": "{{true}}", "output_schema": { "result_default": "", "status": "" } } ] }
- If you are using multiple conditions for evaluation such as a combination of
connector.py
The connector.py class extends the base connector class and implements the check_health and execute functions. Following is a skeleton of this class:
from connectors.core.connector import Connector, get_logger
logger = get_logger('<connector_name>')

class Template(Connector):
   def execute(self, config, operation, params, **kwargs):
   	supported_operations = {'operation_1': function_template}
   	return supported_operations[operation](config, params)

   def check_health(self, input):
       return True
Notes:
- All imports for the connector files should be relative. For example, if your
util.pyis parallel toconnector.pyand you want to importutil.pythen you must import it as:import .util. get_loggeris a utility function to initialize the logger. You can importget_loggerfromconnectors.core.connector, and then declare the logger aslogger = get_logger('<connector name>'). All the connector logs are written to the/var/log/cyops/cyops-integrations/connectors.logfile and follow the format:%(asctime)s %(levelname)s %(name)s %(module)s %(funcName)s(): %(message)s.- In addition to the
executeandcheck_healthfunctions, the following optional and additional functions are also available:on_add_config(self, config): Invoked when a new configuration is added to the connector. This is an optional function that can be overridden while setting up a new configuration.on_update_config(selfself, old_config, new_config): Invoked when a configuration is updated for the connector. This is an optional function that can be overridden while setting up a configuration edit function.on_delete_config(self, config): Invoked when a configuration is deleted from the connector. This is an optional function that can be overridden while setting up a configuration teardown function.on_activate(self, config): Invoked when a configuration is activated.on_deactivate(self, config): Invoked when a configuration is deactivated.on_teardown(self): Invoked when a configuration is deleted. This is an optional function that can be overridden for dismantling a connector.
You can use these functions to perform specific operations such as starting or stopping services at the relevant events. For example, you can use theon_add_config()function to start and stop a service when a configuration is added.
playbooks.json
The playbook.json file contains any playbook collection that you want to include with your connector. This could be a set of playbooks that demonstrate the usage of your connector.
images
The images directory must have the connector icon files. The 'icon_small_name' and 'icon_large_name' keys in the info.json must match the names of these icon files inside the images folder. Icon files can be in the .jpg or .png formats.
Once you have created all the files, bundle them into a .tgz file. For example, tar -czvf sampleConnector.tgz sampleConnector/.
requirements.txt and packages
If a connector requires additional python libraries, specify the libraries in the requirements.txt file.
If there is a dependency on any custom packages or if your instance does not have internet access to download packages from the internet, you can add the packages to the packages directory in the connector folder.
During a connector import, the framework first runs pip install -r requirements.txt followed by pip install <package> for every package in the packages directory. The commands are run in a separate thread and import is marked successful even when the dependency installation is still in progress.
The dependency install logs are available at /var/log/cyops/cyops-integrations/pipinstall_<timestamp>.log on the FortiSOAR instance. If more than five dependency install log files get accumulated, the log files that are older than a day get deleted.
If the installation of a dependency, then you can install them again by invoking the REST APIs directly. Contact FortiSOAR Support for more details on the APIs.
Importing a connector into FortiSOAR
Use the "Content Hub" or "Connector Store" to install and configure connectors in FortiSOAR 5.0.0 and later. To install a connector, you must be assigned a role that has a minimum of Create access to the Connectors module. To configure connectors into FortiSOAR, you must be assigned a role that has a minimum of Update access to the Connectors module. For more information about the Content Hub, Connector Store, and the process of importing connectors into FortiSOAR, see the Introduction to connectors chapter.
Importing a connector into FortiSOAR prior to release 5.0.0
- Log on to FortiSOAR.
- On the left navigation pane, click Automation > Connectors and click Add Connector.

- Drag-and-drop the connector package file or click Browse File to import the connector.tgz file.
FortiSOAR will prompt you to enter the configuration inputs that you have defined in theinfo.jsonfile.
Note: You can install different versions of a connector, enabling you to reference a specific version of a connector from a playbook. If you want to replace all previous versions of the connector, ensure that you click the Delete all existing versions checkbox while importing the new version of the connector. If you do not click the Delete all existing versions checkbox, then a new version of the connector is added. You must ensure that your playbooks reference a correct and existing version of the connector.
Following is a sample image:
FortiSOAR displays theUploading Connectormessage and then displays the Connector Configuration popup. - To configure the connector, enter the required configuration details in the
Connector Configurationpopup.
The configuration details and the details of the connector specified in theinfo.jsonfile are stored in the FortiSOAR database.
Note: You can add multiple configurations for your connector if you have more than one instance of your third-party server in your environment. You must, therefore, add a uniqueNamefor each configuration.
If you have previous versions of a connector and you are configuring a newer version of that connector, with the same configuration parameters, then FortiSOAR fetches the configuration and input parameters of the latest available version of that connector. For example, if you have 1.0.0, 2.0.0, and 2.3.0 versions of the Fortinet FortiSIEM connector and you are configuring the 2.3.0 version of the Fortinet FortiSIEM connector, then while configuring the 2.3.0 version, FortiSOAR will fetch the configuration and input parameters from the 2.0.0 version of the Fortinet FortiSIEM connector. You can review the configuration and input parameters, and then decide to change them or leave them unchanged.
You can activate or deactivate a configured connector by clicking on the Activate Connector or Deactivate Connector Link.
You can check the Mark As Default Configuration option to make the selected configuration, the default configuration of this connector, on the particular FortiSOAR instance.
Thepasswordtype fields in FortiSOAR include encryption and decryption. Passwords are encrypted before saving them into the database and decrypted when they are used in actions. In case of an upgrade, connectors that are already installed will work with stored passwords. - To save your configuration, click Save.
To view the list of actions that can be performed by the connector, click the Actions tab.
To view the playbook file that is bundled with the connector, click the Playbooks tab.
You can optionally perform a Health Check by clicking the Refresh icon that is present in theHealth Checkbar. The Health Check checks if the configuration parameters you have specified are correct and if connectivity can be established to the specified server, endpoint, or API.
If all the details are correct and the connectivity to the server can be established, then on the Connectors page, Available is displayed in the health check dialog.
If any or all the details are incorrect or if the connectivity to the server cannot be established then on the Connectors page, Disconnected is displayed in the health check dialog.
You can also click the Refresh icon that is present in theHealth Checkbar to perform the health check at any time.
Reimporting a connector
After importing a connector, any changes done in the python files of the connector automatically get reflected the next time you run a command on the connector. However, if changes are made in the info.json, then you need to reimport the connector, using the following command, for the updates to take effect:/opt/cyops-integrations/.env/bin/python /opt/cyops-integrations/integrations/manage.py reimport_connector -n <connector_name> -cv <connector_version> -migrate
If you only want to update the info.json changes and not retain the previous connector configuration, then you can omit the -migrate attribute as follows:/opt/cyops-integrations/.env/bin/python /opt/cyops-integrations/integrations/manage.py reimport_connector -n <connector_name> -cv <connector_version>
You can also reimport all connectors at a single time using the following command by omitting the -n <connector_name> and -cv <connector_version> attributes as follows:/opt/cyops-integrations/.env/bin/python /opt/cyops-integrations/integrations/manage.py reimport_connector -migrate
Check_Health function
The check_health function of the connector is invoked when you click the Refresh icon. This function takes the dictionary of the configuration parameters as the input. For example: {‘url’: ‘https://xyz.com’, 'user': 'admin', 'password': 'password'}.
You must throw the ConnectorError from the function if you want the check_health function to fail in a given scenario, such as issues with connectivity or with the provided credentials. To throw the ConnectorError, you must import it from the connectors.core.connector module as follows:
from connectors.core.connector import ConnectorError
Add connector operation to a playbook
Once you have completed configuring and deploying your connector, you can add a connector operation to a playbook, by adding the connector as a step in the playbook, as shown in the following image:

You can install different versions of a connector, and while adding a connector operation, you specify a specific version of a connector within a Playbook. In case you have installed multiple connectors, and if the version of the connector specified in the playbook is not found, then the playbook by default uses the latest version. FortiSOAR checks for the latest version of the connector in the format "major version.minor version.patch version". For example, version 2.0.2 is a later version than 1.2.0.
The execute function of connector.py is called when an operation on the connector is invoked. This function takes the dictionary containing the config, operation and params fields. For example:
{'config': {'password': password, 'server_url': 'https://xyz.com', 'user': 'admin'},
'params': {'input1': 'value1', 'input2': 'value2'},
'operation': 'function_template'}
The return from the execute function is set in the results.data variable of the playbook step. A sample execute function is present in the connector.py section.
The info.json contains output_schema, which defines the keys that are present in the output json on the execution of an operation. The info.json contains some common keys. However, the output json can have additional keys based on the input parameters. You can use these json keys to set the input for subsequent Playbook Steps, using Dynamic Values. For more information, see the Dynamic Values section in the "Playbooks Guide."
Configuring a connector to return a response
If you want to return a response from any action of a connector, then you can import the Result class from the connectors framework to your connector.py, and then you can set message attributes such as status, message, etc.
Following is the python snippet for the same:

Updating a connector configuration using the update_connnector_config() function
The update_connnector_config() function can be internally called from any connector to update the configuration of any connector by providing the name and version of that connector. Steps to be followed for updating a connector configuration:
- Import the
update_connnector_config()function from/opt/cyops-integrations/integrations/connectors/core/utils.py. - Call the
update_connnector_configfunction with the following parameters:<connector_name>,<connector_version>,<update_config>, and<config_id>.update_connnector_config(<connector_name>,<connector_version>,<update_config>,<config_id>)
For example,update_connnector_config("imap","3.2.0",{"username":"csdamin","password":"csadminpwd"},"5785130913212321")
Notes:
If you do not provide the<config_id>, then the connector configuration that you have marked as default configuration will be updated.
If you have not marked any connector configuration as the default configuration, and you have also not provided the<config_id>, then the following error is raised:No configuration found to update. Please add a config_id or mark a configuration as the default.in the/var/log/cyops/cyops-integrations/connectors.log. To resolve this error, either mark a connector configuration as the default configuration or provide the<config_id>.
Configuring a custom connector to support data ingestion
If your custom connector also supports data ingestion, you require to make the following updates so that your connector works with the ingestion wizard in the FortiSOAR:
- Update the
info.jsonfile to contain the following:"ingestion_supported": true
Also, specify the ingestion method(s) that is supported by your custom connector. FortiSOAR supports the following ingestion methods:"ingestion_modes": ["scheduled", "notification", "app_push"] - You must include sample ingestion playbooks with your custom connector. You can refer to the sample collection of ingestion-enabled connectors, such as FortiAnalyzer and FortiSIEM, which are included with FortiSOAR. Your sample ingestion playbooks must be created keeping the following points in mind:
- Each playbook that contributes to data ingestion must contain the following tags:
<connector_name>,dataingestion - Fetch Playbook: This playbook fetches sample data and is also used for the actual fetch operation once ingestion is configured. This playbook must be created considering the following:
Contains an additional tag:fetch
Contains aSet Variablestep named "Configuration" that defines all user inputs needed for the playbook
Returns results in "data" keys.{{vars.result.data}}of this playbook is what is presented to users as source data on the Field Mapping screen in the data ingestion wizard. - Ingest Playbook: This is a wrapper playbook that is scheduled or called from the notification service. This playbook generally calls the fetch playbook as a reference and then loops over the result creating "alert" records in FortiSOAR.
The step that creates records should be named "Create Record". The ingestion wizard reads this step and displays the default mappings from the source data to the record created in FortiSOAR. If the step uses a 'bulk' Create Record step, the mappings are shown using theitemvariable. This playbook must have the following additional tags:fetch,create. - Create Record Playbook: If record creation is a multi-step process and cannot use the single "Create Record" step in bulk, then you can move record creation to a separate playbook that is invoked in a loop after fetch. If this is the case, then the "Create Record" playbook must have the
createtag and this tag must not be present in the "Ingest" playbook. This playbook must be created considering the following:
Defines an input parameter "sourcedata"
Contain only one Create Record and the step name must also be named "Create Record"
"Create Record" step works on the "sourcedata" input
Note: Multiple tags can be applied to the same playbook. However, you need to ensure that the "fetch" playbook does not also create records, since otherwise it will also be called for fetching sample data.
- Each playbook that contributes to data ingestion must contain the following tags:
Building your own Pluggable Enrichment Playbook
The SOAR Framework Solution Pack (SP) version 2.0.0 introduces the 'Pluggable Enrichment' framework, using which you easily design pluggable enrichment playbooks for any integration and use them in the enrichment process without modifying the existing playbooks in '03-Enrich' collection. For detailed information about the SOAR Framework SP, see the SOAR Framework SP documentation in the Content Hub portal. Some threat intelligence connectors already contain pluggable enrichment playbooks; more information of which is available here.
The following steps describe how to design your pluggable enrichment playbooks for 'IP Enrichment' using the 'API Void' integration:
- Install and configure the API Void v1.0.1 connector.
- Navigate to Automation > Playbooks, and search for API Void.
- Select the 'Sample - APIVoid - 1.0.1' playbook collection.
- Click Add Playbook to create a new pluggable enrichment playbook.
- Specify the name of the new playbook, such as, "IP Address > API Void > Enrichment".
- Choose Referenced as the 'Trigger' step, and click Save to save the playbook.
- Add appropriate tags to your pluggable enrichment playbook. Since this example is for designing this pluggable enrichment playbook for 'IP Address', add the “
IP_Enrichment” tag to the playbook.
You can add the following tags to the pluggable enrichment playbook for different types of indicators:- Domain :
Domain_Enrichment - Email Address :
Email_Enrichment - File :
File_Enrichment - FileHash-MD5, FileHash-SHA1, FileHash-SHA256:
FileHash_Enrichment - IP Address :
IP_Enrichment - URL :
URL_Enrichment - User :
User_Enrichment
- Domain :
- The “Enrich Indicators (Type All)” parent playbook that is part of the "03 – Enrich" playbook collection calls the "IP Address > API Void > Enrichment" child pluggable enrichment playbook by passing the following parameters:
- “
indicator_value” : Value of the IP address that needs to be enriched. - “
style_colors” : Value of default enrichment colors assigned to the indicator based on its reputation.
For further details, see the Extending Default Indicator Enrichment Process topic.
- “
- Open the “IP Address > API Void > Enrichment” playbook in the playbook designer, and click Tools > Edit Parameters.
In the Parameters popup, add theindicator_valueandstyle_colorsparameters. - Edit the “IP Address > API Void > Enrichment” playbook as follows:
- Add the Set Variable step” with the name as “
Configuration”, and specify the following variables and their values:useMockOutput:{{globalVars.Demo_mode}}
To execute the playbook using mock output, set the global variableDemo_modetotrue.indicator_value:{{vars.input.params['indicator_value']}}
The value of the indicator that you want to enrich. This value comes from the parent playbook.good_score:0suspicious_score:89-1malicious_score:100-90
After enrichment, the API returns a high-reliability value called “verdict,” which is used to predict the reputation of indicators.
“good_score” is the range of good verdicts.
“suspicious_score” is the range of suspicious verdicts.
“malicious_score” is the range of malicious verdicts.
You can update the values of these parameters based on your requirements.
- Add the Connector step, and search for the
APIVoid v1.0.1connector. Specify the following values for this step:- In the Step Name field, specify
Get IP Reputation. - From the Action drop-down list, select Get IP Reputation.
- In the IP Address field, specify
{{vars.indicator_value}}.
- In the Step Name field, specify
- Add the Decision step for checking whether or not the reputation is found:
- In the Step Name field, specify
Is Reputation Found. - Click Add Condition:
- Define 'Condition 1' as follows:
(vars.steps.Get_IP_Reputation.status == "Success" or vars.useMockOutput) - From the Select A Step To Execute drop-down list, select Compute API Void Summary.
- In the Branch Tooltip field, specify
Yes.
- Define 'Condition 1' as follows:
- Click Add Default Condition to define the default step as follows:
- From the Select A Step To Execute drop-down list, select No Operation.
- In the Branch Tooltip field, specify
No.
- In the Step Name field, specify
- Add the Utilities step and edit it as follows:
- In the Step Name field, specify
Compute API Void Summary. - From the Action drop-down list, select Utils: Format as RichText (Markdown).
- In the Inputs field, specify the code that you want to render as the 'Enrichment Summary' in the Description field of the indicator. You can refer to samples of the code from any pluggable enrichment playbook, for example, pluggable enrichment playbooks in the API Void sample playbook collection, "IP Address > API Void > Enrichment".
- In the Step Name field, specify
- Add another Utilities step and edit it as follows:
- In the Step Name field, specify
No operation. - From the Action drop-down list, select Utils: No Operation.
- In the Step Name field, specify
- Add the Set Variable step” with the name “
Return Output Data”, and set the return values to the parent playbook, 'Enrich Indicators (Type All)', present in the '03 – Enrich' playbook collection. See the apivoid connector document for the return values that can be sent to the parent playbook.
- Add the Set Variable step” with the name as “
Sample "IP Address > API Void > Enrichment" pluggable enrichment playbook:
FortiSOAR Connector SDK
The FortiSOAR Connector SDK consists of a simulator for writing and testing your connector. You can use this CLI to help you develop your custom connector, without having a ForiSOAR™ instance.
For information on how to set up and use the FortiSOAR Connector SDK, see Fortinet Developer Network (FNDN). You can also download the Connector SDK from FNDN and use it to develop a custom connector. You must log into FNDN to access the Connector SDK.