


Overview
Use the administration guide to understand how to customize and administer FortiSOAR, including system, security and user management, and configuring templates.
|
|
When you log on to FortiSOAR for the first time as a csadmin user, you will be mandated to change your password. This enhances the security of your csadmin account and prevents unauthorized parties from accessing the administration account for FortiSOAR. New passwords that are set must contain at least 8 characters, one lower-case alphabet, one upper-case alphabet, one digit, and any one of the following special characters |
 ) to open the
 Also, note that from version 7.0.0 onwards, if you want to move any file from and to a FortiSOAR system, then you must install SCP (yum install openssh-clients -y) or any SCP client. This is required since the openssh-clients package has been removed from FortiSOAR for security compliance.
|
|
From release 7.2.0 onwards, the Incident Response modules have been removed from the FortiSOAR platform and moved to the SOAR Framework Solution Pack (SP). The SOAR Framework Solution Pack (SP) is the Foundational Solution Pack that creates the framework, including modules, dashboard, roles, widgets, etc., required for effective day-to-day operations of any SOC. As the Incident Response modules, i.e., Alerts, Incidents, Indicators, and War Rooms are not part of the FortiSOAR platform, it becomes essential for users to install the SOAR Framework SP to optimally use and experience FortiSOAR’s incident response. For detailed information about the SOAR Framework SP, see the SOAR Framework SP documentation. |
Common Tasks
Some of the common task that an administrator can perform are:
- License management
- System configuration
- Security management
- User management
- Appliance management
- Password Vault management
- Playbook configuration
- Application management
You can perform administration tasks using the Settings ( ) icon in the upper right-hand corner near the User Profile icon.
Tasks and Permissions
To manage different modules, appropriate rights must be assigned to users. In FortiSOAR, modules are applied to roles, for example, the Security module is applied to the Security Administrator role. Role permissions are based on the Create, Read, Update, and Delete model (CRUD). Each module within FortiSOAR has explicit CRUD permissions that you can modify and save within a single Role.
For example, to perform all tasks for system configuration, you must be assigned a role that has CRUD permissions on the Application module, or to be able to add and manage users, you must be assigned a role that at the minimum has Create and Update permissions on the People module.
By default, FortiSOAR has at least one role in place after installation, the Security Administrator.
| Task | Permissions required on the module |
|---|---|
| System configuration: Customizing FortiSOAR and configure several default options used throughout the system, including setting up authentication mechanisms and configuring dashboards and templates. | Create, Read, Update, and Delete (CRUD) permissions on Application module. Default Role - Application Administrator. |
| Security management: Managing teams and roles. | CRUD permissions on Security module. Default Role - Security Administrator. The security administrator role also has CRUD permissions on the Secure Message Exchange and Tenants modules, so that this role can configure multi-tenant systems. |
| User management: Adding and removing users and editing their permissions. | CRUD permissions on People module. |
| Appliances management: Configuring data models, including picklist values and system navigation. | CRUD permissions on Appliances module. |
| Password Vault management: Integrating with third-party external vaults to manage sensitive data | CRUD permissions on Connectors module and Read permission on Application module. |
| Playbook management: Configuring playbook collections and playbooks | CRUD permissions on Playbook module. Default Role - Playbook Administrator. |
Guide to Onboarding
FortiSOAR release 7.2.0 introduces an onboarding/Setup guide that helps first-time or recurrent administrators of FortiSOAR to optimally set up FortiSOAR based on best practices. It helps administrators perform various important configurations and install those solution packs that are vital for the smooth working of their FortiSOAR environment such as, setting up network proxy, enabling purging of audit and playbook logs, configuring enrichment and mitigation playbooks, etc.
FortiSOAR displays the Setup guide notification immediately when an administrator logs into FortiSOAR: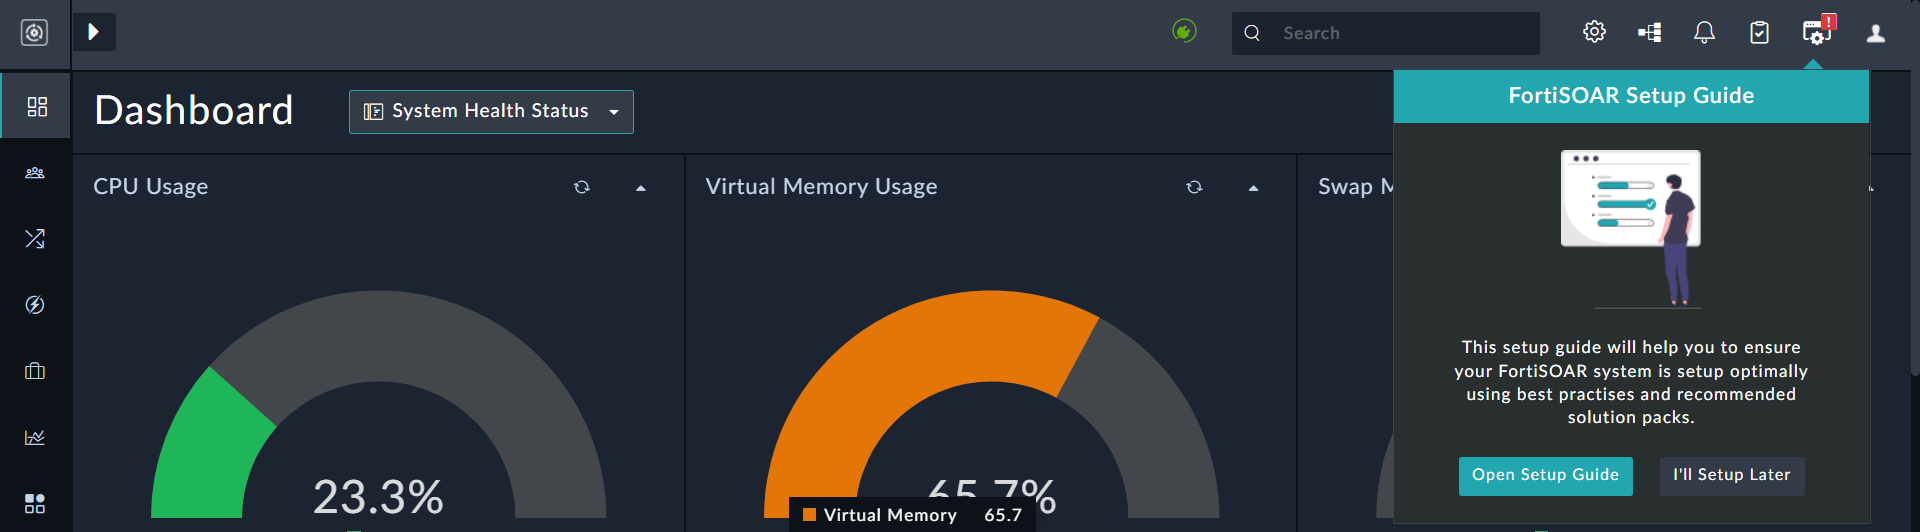
|
|
Users must have a minimum of |
To dismiss this notification, click I'll Setup Later. To reopen the notification, click the Setup Guide icon.
To view the details of the Setup Guide, click Open Setup Guide:
The Setup Guide comes in two flavors:
-
Quick Start: To quickly set up FortiSOAR with the minimum required settings for optimal functioning, click Quick Start. The Quick Start contains important system configurations that FortiSOAR highly recommends you to set up.
-
Production: To set up FortiSOAR with all the required settings for optimal functioning in a production environment, click Production. Production tasks can contain those tasks that are dependent on the user and/or environment preferences.
The setup guide is divided into sections for each phase of getting FortiSOAR ready:
- Deploy: For tasks related to setting up the server with appropriate hardware configurations, network and security tunings, data protection, etc.
- Streamline: For tasks related to setting up the incident response platform, which is augmented with automation of common tasks such as enrichment and mitigation.
- Accelerate: For tasks related to accelerating your response time by leveraging various pre-defined playbooks to respond to specific types of threats, and installing solution packs targeted towards management of specific SOAR scenarios, such as Threat Intel management, Vulnerability Management, etc.
- Maintain: For tasks related to enabling monitoring and sustenance so that the server performs optimally and remains highly available throughout your usage.
Once you click Open Setup Guide, the Setup Guide opens in the Quick Start mode, which contains limited items that require to be set up. To view the complete list of tasks, click Production, and then click the side arrow (>) in the row of the section whose tasks you want to view. For example, click > in the Deploy section:
Each task contains a brief description of the task, as well as, either a link to the documentation that contains detailed information for the same or opens the FortiSOAR page or section where you can set up that particular task. For example, if you click the sizing guide link in Review the Sizing and Configuration row, FortiSOAR will open the Sizing Guide, where you check the configuration for your anticipated workload. However, if you click Review in the Define Notification Rules task, FortiSOAR will open the Notifications page, where you can set up rules and notifications channels for how users and teams get notified about various tasks they need to complete or view, for example, when a user is mentioned in a comment, or when an alert is assigned to a team, etc.
For each task you have three options:
-
Mark as Done: Once you complete a task, you can mark the task as done. Clicking Mark as Done displays the Mark as Done icon (green circular tick) in the row of that task and a Reset Task Options button gets added to that row. The Reset Task Options button is added so that you can view the options again in case you clicked Marked as Done in error.
- I will complete later: To skip a task or to complete that particular task at a later time. Clicking I will complete later, collapses the row of that particular task.
- Not Applicable: If a task does not apply to your FortiSOAR environment, you can select Not Applicable. Clicking Not Applicable displays the Not Applicable icon (white strikeout tick) in the row of that task and the Reset Task Options button gets added to that row. The Reset Task Options button is added so that you can view the options again in case you clicked Not Applicable in error.
The Setup Guide icon continues to display notifications, with a red exclamation mark till all the tasks in the mode you have chosen to set up FortiSOAR are completed, and then the Setup Guide icon appears with a green exclamation mark. For example, if you have chosen the Quick Start mode, then the Setup Guide icon will continue to display notifications till all the tasks in the Quick Start mode are marked as done or as not applicable.