About the connector
The Malwr connector provides an interface to connect with the malware analysis service. You can submit files to the malware analysis service and receive the results of a complete dynamic analysis back using this connector.
This document provides information about the Malwr connector, which facilitates automated interactions, with a Malwr server using FortiSOAR™ playbooks. Add the Malwr connector as a step in FortiSOAR™ playbooks and perform automated operations, such as uploading files to the Malwr server and retrieving reports from Malwr.
Version information
Connector Version: 1.0.0
Compatibility with FortiSOAR™ Versions: 4.9.0.0-708 and later
Installing the connector
For the procedure to install a connector, click here.
Prerequisites to configuring the connector
- You must have the URL of the Malwr server to which you will connect and perform the automated operations and API key to access that server.
- You must install the bs4==0.0.1 python module.
- You must open port 443 on the firewall to allow communication between FortiSOAR™ and the Malwr server.
Importing the Malwr module
Note: This procedure is optional, and you require to perform this procedure, only if want to view the result of the "Get report from malwr" playbook in html formatted tables. The "Get report from malwr" playbook is one of the playbooks that comes bundled with the Malwr connector. Also, the procedures mentioned in this document assume that you are using FortiSOAR™ version 4.9, if you are using FortiSOAR™ version 4.10 or later, then the FortiSOAR™ UI navigation has changed. Refer to the FortiSOAR™ documentation for the updated navigation.
- Log on to FortiSOAR™ as an administrator.
- Click Administration > Application Editor > Configuration Manager > Import Configuration to import the
Malwr custom module located in the malwr_1_0_0 -> malwr -> playbooks -> modules->malwr.json. Browse to the malwr.json file and click Install to import the Malwr module.
You must create the following fields to see the output of the report in the Table view:
Description: Field type is Rich Text.
Network Report: Field type is Rich Text.
Behavioral Report: Field type is Rich Text.
Comments: Field type is Rich Text.
- Add the
Malwr module as follows:
Click Administration > Application Editor.
On the Modules page, from the Select a module to edit or create a new module drop-down list, select Attachments.
Click the Fields Editor tab.
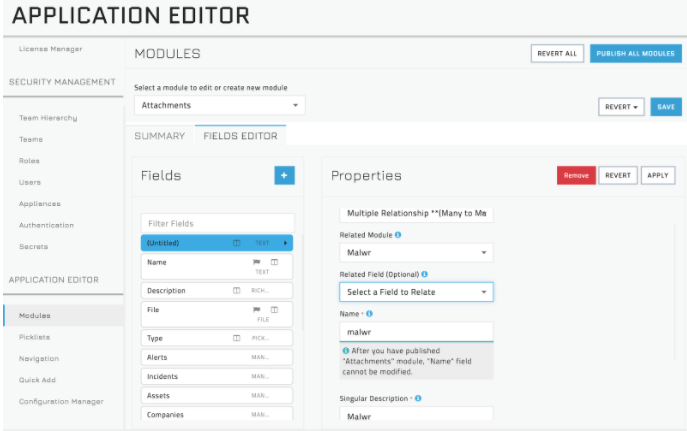
Click + or the Add Field link in the Fields section and add the Malwr module as shown in the following image:
Click Apply and Save.
Click the Malwr field and from the Related Field drop-down list, select attachments.
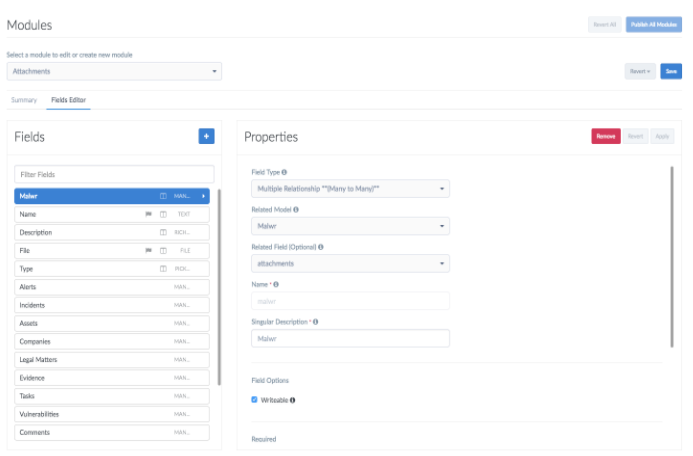
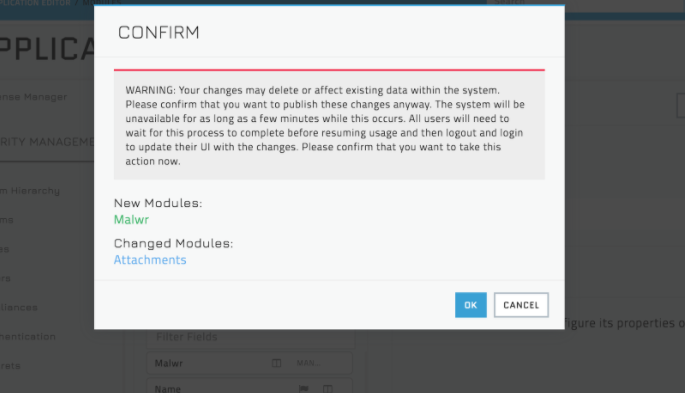
Click Apply, Save, and Publish All Modules.
- Once the
Malwr module is published, then you must update the role of the users who require to run the Get report from malwr playbook to include access to the Malwr module as follows:
Click Security Management > Roles.
On the Roles page, click the role to which who you want to provide access to the Malwr module.
On the Edit Role page, in the Set Role Permissions grid, in the Malwr row, click the combination of permissions you want to assign to the role. The Create, Read, Update, and Delete columns have checkboxes that allow you to assign specific permissions for each module.
Click Save.
Now, you can run the Get report from malwr playbook to retrieve the report from the Malwr server.
- (Optional) To add the Malwr module to the left-navigation menu items, click Administration > Application Editor > Navigation. Add Malwr to the left menu as required. For example, in the following image, Malwr is added to the Threat Management menu:

Click Save.
Configuring the connector
For the procedure to configure a connector, click here.
Configuration parameters
In FortiSOAR™, on the Connectors page, select the Malwr connector and click Configure to configure the following parameters:
| Parameter |
Description |
| URL |
URL of the Malwr server to which you will connect and perform the automated operations. |
| Verify SSL |
Specifies whether a SSL certificate will be required for the connection between the Malwr connector and Malwr server.
By default, this option is set as true. |
Actions supported by the connector
The following automated operations can be included in playbooks and you can also use the annotations to access operations from FortiSOAR™ release 4.10.0 onwards:
| Function |
Description |
Annotation and Category |
| Submit Sample |
Submits a sample file to the Malwr server for analysis. |
submit_sample
Investigation |
| Get Report |
Retrieves a report from the Malwr server for the samples that you had submitted to the Malwr server for analysis. Reports are retrieved based on the task_id of the sample. |
get_report
Investigation |
operation: Submit Sample
Input parameters
Note: Using this operation, you submit files that are available in the FortiSOAR™ Attachments module to the Malwr server.
| Parameter |
Description |
| FileIRI |
Use the FortiSOAR™ File IRI to submit files directly from the FortiSOAR™ Attachments module to the Malwr server.
In the playbook, this defaults to the {{vars.file_iri}} value. |
| Private |
Specifies whether the file is private or not.
By default, this option is set as false. |
Output
A customized JSON output that is formatted for easy reference is the output for all the operations.
The JSON output contains the task_id for the submitted sample. You can use this task_id in subsequent queries to retrieve reports from the Malwr server for the submitted file.
Following image displays a sample output:

operation: Get Report
Input parameters
| Parameter |
Description |
| task_id |
task_id for a previously submitted file for which you want to retrieve a report from the Malwr server. |
Output
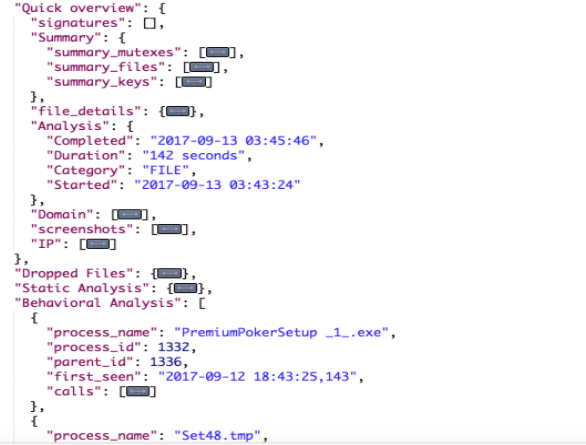
The JSON output contains the report retrieved from the Malwr server for the previously submitted files.
Following image displays a sample output:
Included playbooks
The Sample - Malwr - 1.0.0 playbook collection comes bundled with the Malwr connector. This playbook contains steps using which you can perform all supported actions. You can see the bundled playbooks in the Automation > Playbooks section in FortiSOAR™ after importing the Whois RDAP connector.
- Upload file to malwr
- Get report from malwr
Note: To see the result of this playbook in html formatted tables, you must import the Malwr custom module, which is defined in the Importing the Malwr module procedure.
Note: If you are planning to use any of the sample playbooks in your environment, ensure that you clone those playbooks and move them to a different collection since the sample playbook collection gets deleted during connector upgrade and delete.


