Configuring a connector
Use the Content Hub to install and configure connectors in FortiSOAR™. The Content Hub enables you to easily view, search, install, upgrade, and uninstall connectors that are part of the FortiSOAR™ repository.
Note: The Connector Store is filtered to display only connectors, whereas the Content Hub displays all the add-ons. In this article the screenshots included are from the Content Hub page; similar screens are displayed on the Connector Store page.
For the procedure to install a connector, click here.
To configure connectors into FortiSOAR™, you must be assigned a role that has a minimum of Update access to the Connectors module.
Prerequisites to configuring a connector
- Before you can configure a connector, you must know the details of how the connector will connect to the third-party tool. You must have configuration details such as the IP address or Hostname, or server address/URL of the server or website of the third-party tool to which you will connect and perform the automated operations and credentials, either username-password pair or API key, to access that server.
Details of the prerequisites required for each connector are present in the Prerequisites to configuring the connector section of the respective connector documentation.
- The FortiSOAR™ server should have outbound connectivity to port 443 on the third-party server.
- If your FortiSOAR instance is in an air gapped environment, then ensure that you add the URL or IP address of the connector to the allowlist of your Firewall or Proxy servers. Some examples:
For VirusTotal: https://www.virustotal.com
For Have I Been Pwned: https://haveibeenpwned.com
For Alien Vault OTX: https://otx.alienvault.com
For Recorded Future: https://api.recordedfuture.com
For Cisco AMP For Endpoint: https://api.amp.cisco.com
For Microsoft Sentinel: https://management.azure.com
For Active Directory: Your Active Directory Product Server URL or IP Address
Connectors that do not require configurations
Some connectors, such as Spamhaus and PDF Reader do not require any configurations. In the case of Spamhaus, the connector looks up freely-accessible Spamhaus blocklists.
Configuring a connector in FortiSOAR™
Use the Content Hub to install and configure connectors in FortiSOAR™.
-
Log on to FortiSOAR™.
-
On the left navigation pane, click Content Hub.
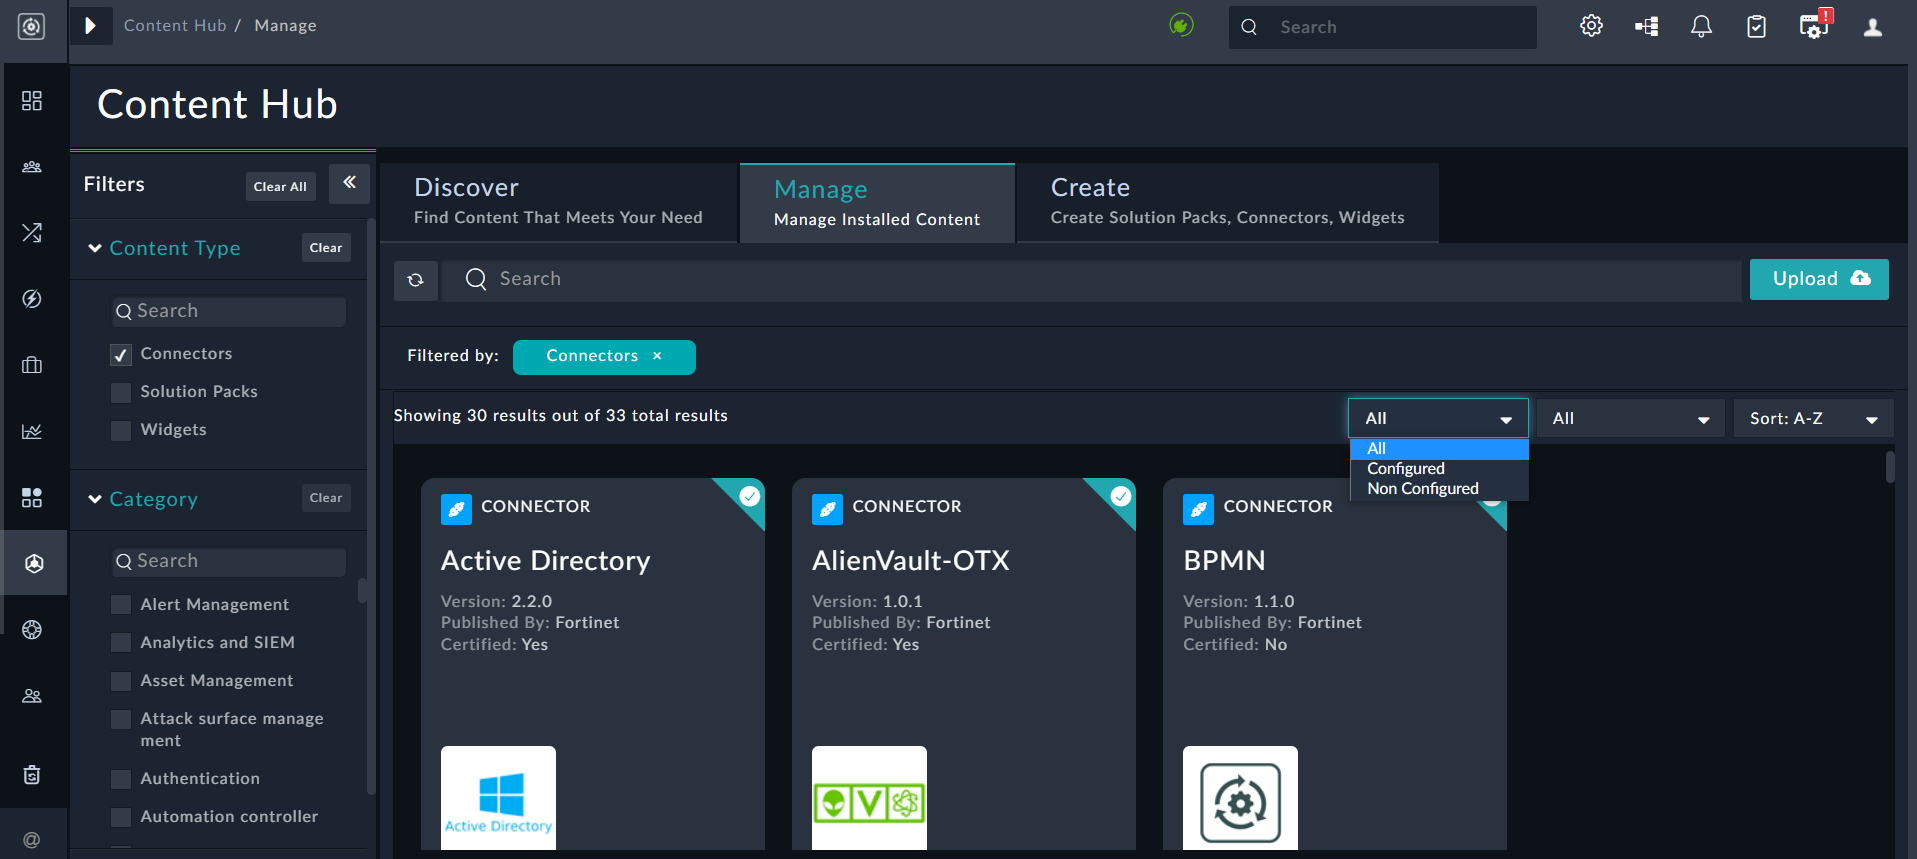
The Discover tab displays all the add-ons, i.e., Connectors, Widgets, and Solution Packs, available in the Content Hub. Use the Filter panel to filter the connectors by clicking the > arrow in the Content Type list and then selecting Connectors:

You can search for a connector by its name in the Search field and sort the content alphabetically (A-Z) or by date. Using the Filters panel, you can filter the connectors displayed in all the tabs based on varied criteria. For more information on Content Hub, see the Content Hub chapter in the "User Guide.'
Connectors that are installed appear with a tick on their card. For example, the Active Directory connector in the above image.
- To configure a connector, click the Manage tab. On the
Manage page, you will see the list of installed connectors in the card view. You can search for a connector by its name in the Search box and sort the connectors either alphabetically or by date. Also, when you select Connectors as the Content Type by default, Non Configured connectors are displayed in the Manage tab. You can select Configured from the drop-down to view the configured connectors:
Note: You can add multiple configurations for your connector if you have more than one instance of your third-party server in your environment. You must, therefore, add a unique Name for each configuration in the Configuration Name field.
If you have previous versions of a connector and you are configuring a newer version of that connector, with the same configuration parameters, then FortiSOAR™ fetches the configuration and input parameters of the latest available version of that connector. For example, If you have 1.0.0 and 2.0.0 versions of the Database connector and you are configuring the 2.0.0 version of the Database connector, then while configuring the 2.0.0 version, FortiSOAR™ will fetch the configuration and input parameters from the 1.0.0 version of the Database connector. You can review the configuration and input parameters, and then decide to change them or leave them unchanged.
To add a new configuration, click the +Add New Configuration button, and then add the name of the configuration and specify the configuration parameters. You can click the < Back to Configuration Selection button to go back to the Configuration page:
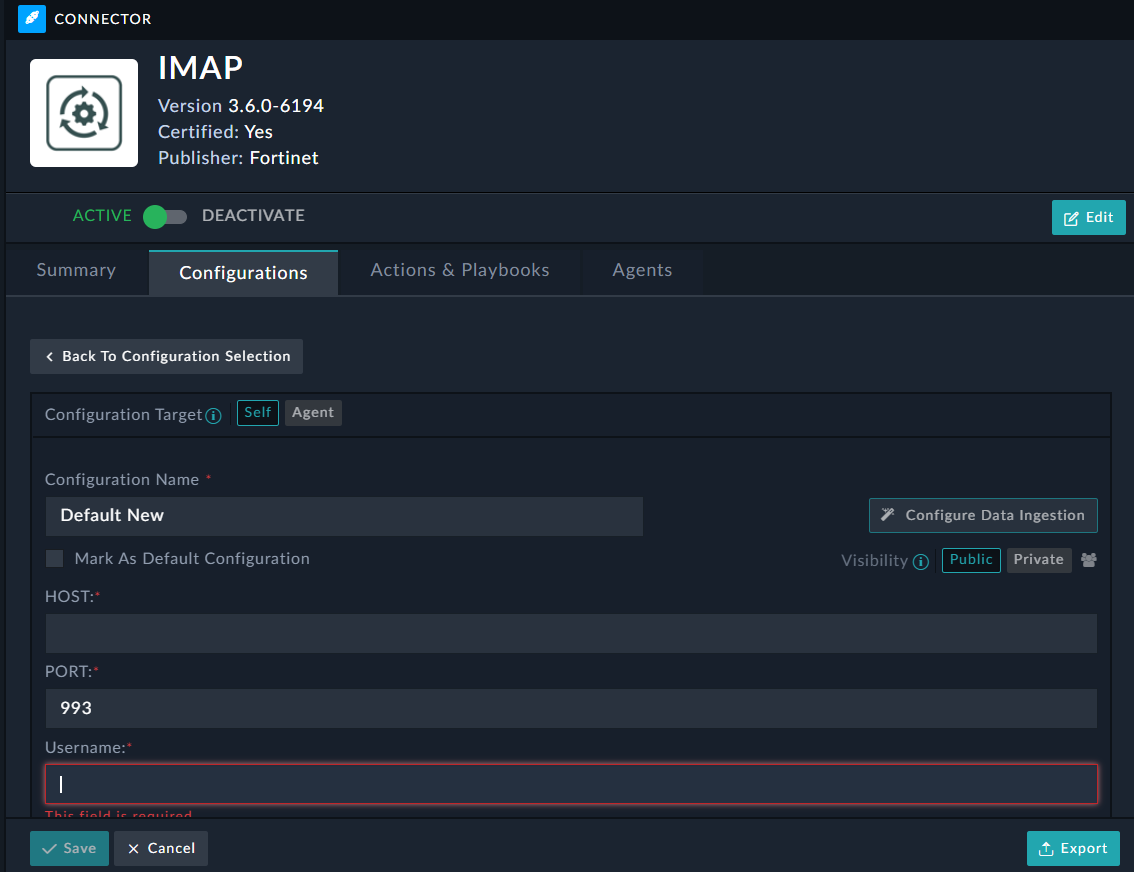
You can also check the Mark As Default Configuration option to make the selected configuration, the default configuration of this connector, on the particular FortiSOAR™ instance. This connector will point to this configuration by default.
Important: In the case of the SMTP connector, you must ensure that this option is selected for the configuration that is to be used for sending system notifications.
The password type fields in FortiSOAR™ include encryption and decryption. Passwords are encrypted before saving them to the database and decrypted when they are used in actions. In case of an upgrade, connectors that are already installed will work with stored passwords.
Connectors also include a Verify SSL field, that specifies whether the SSL certificate for the server is to be verified or not. By default, this option is set as True.
To view the documentation associated with a connector, click the Documentation link on the top-right corner of the connector configuration pane.
-
To save your configuration, click Save.
To view the list of actions that can be performed by the connector and the playbook file that is bundled with the connector, click the Actions & Playbooks tab.
-
(Optional) You can optionally perform a Health Check by clicking the Refresh icon that is present in the Health Check bar. The Health Check checks if the configuration parameters you have specified are correct and if connectivity can be established to the specified server, endpoint, or API.
If all the details are correct and the connectivity to the server can be established, then on the Connectors page, Available is displayed in the health check dialog.
If any or all the details are incorrect or if the connectivity to the server cannot be established then on the Connectors page, Disconnected is displayed in the health check dialog.
Points to be considered for connector configurations while upgrading to a newer version of the connector
If you are upgrading a connector to a newer version, you must be assigned a role that has a minimum of Upgrade access to the Connectors module. For example, if you are upgrading the Symantec Security Analytics connector version from v1.0.0 to v2.0.0, then keep a note of the following points:
-
Existing (older) connector configuration fields retain their value, i.e., the value from the older configuration will be displayed in the configuration pane of the newer connector version. New connector configuration field(s), if any, will be added to the connector configuration pane.
-
If the newly added configuration field is mandatory, and FortiSOAR™ has specified its default value (in the info.json file of the connector), then the configuration pane of the newer version of the connector will contain the default value for this configuration field. For more information on the connector framework and the info.json file, see the Building a custom connector chapter. For information on common connector framework issues, see the Common connector framework errors section in the Debugging common playbook and connector issues article present in the Fortinet Knowledge Base.
-
If the newly added configuration field is mandatory, and FortiSOAR™ has not specified its default value (in the info.json file of the connector), then the configuration pane of the newer version of the connector will contain a blank value for this configuration field. If you also do not specify a value for this mandatory configuration field, then the connector configuration pane will display Partially Configured, and an error will also be displayed in the Playbook Execution Log. For more information on the Playbook Execution Log, see the Debugging and Optimizing Playbooks chapter in the "Playbooks Guide."
-
If the field type of a mandatory configuration field is changed from the older version to the newer version, for example from a text field to a drop-down list, then the value of that field will not be retrieved from the older version. However, if FortiSOAR™ has specified its default value (in the info.json file of the connector), then that value will be displayed for this configuration field in the configuration pane of the newer version of the connector. If however FortiSOAR™ has not defined the default value and you also do not specify a value for this mandatory configuration field, then the configuration pane of the newer version of the connector will contain a blank value for this configuration field, and the connector configuration pane will display Partially Configured. An error will also be displayed in the Playbook Execution Log. For more information on the Playbook Execution Log, see the Debugging and Optimizing Playbooks chapter in the "Playbooks Guide."
-
If the newly added configuration field is optional, and FortiSOAR™ has specified its default value (in the info.json file of the connector), then the configuration pane of the newer version of the connector will contain the default value for this configuration field. If there is no default value set, then its value is set as blank.


