


Migrating from FortiSIEM 5.3.x or 5.4.0
Migration limitations: If migrating from 5.3.3 or 5.4.0 to 6.1.1, please be aware that the following features will not be available after migration.
-
Pre-compute feature
-
Elastic Cloud support
If any of these features are critical to your organization, then please wait for a later version where these features are available after migration.
This section describes how upgrade from FortiSIEM
Pre-Migration Checklist
To perform the migration, the following prerequisites must be met
- Ensure that your system can connect to the network. You will be asked to provide a DNS Server and a host that can be resolved by the DNS Server and responds to ping. The host can either be an internal host or a public domain host like google.com.
- Make sure you are running FortiSIEM
5.3.x or 5.4.0 . - Take a SnapShot of the running FortiSIEM instance.
- Delete the Worker from Super GUI.
- Stop/Shutdown the Worker.
- Make sure the
rootdirectory (/) has at least 1 GB of available space before proceeding. - Shut down the Supervisor VM.
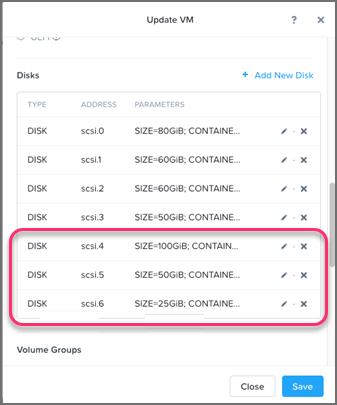
WARNING: Your supervisor license will become invalid after migration because the system UUID will change when you boot up a new OS disk. You will need to get the new UUID after migration and talk to Forticare to reset your license. - Right-click the 5.3.x or 5.4.0 FortiSIEM Supervisor VM in the Nutanix AHV Prism Console, click Update, and scroll down to the Disks section.
- Add three extra hard disks and apply the changes:
Hd5/100G - scsi.4Hd6/50G/ - scsi.5Hd7/25G - scsi.6
- Log in to the console as user
root, with passwordProspectHills. - In the console, run
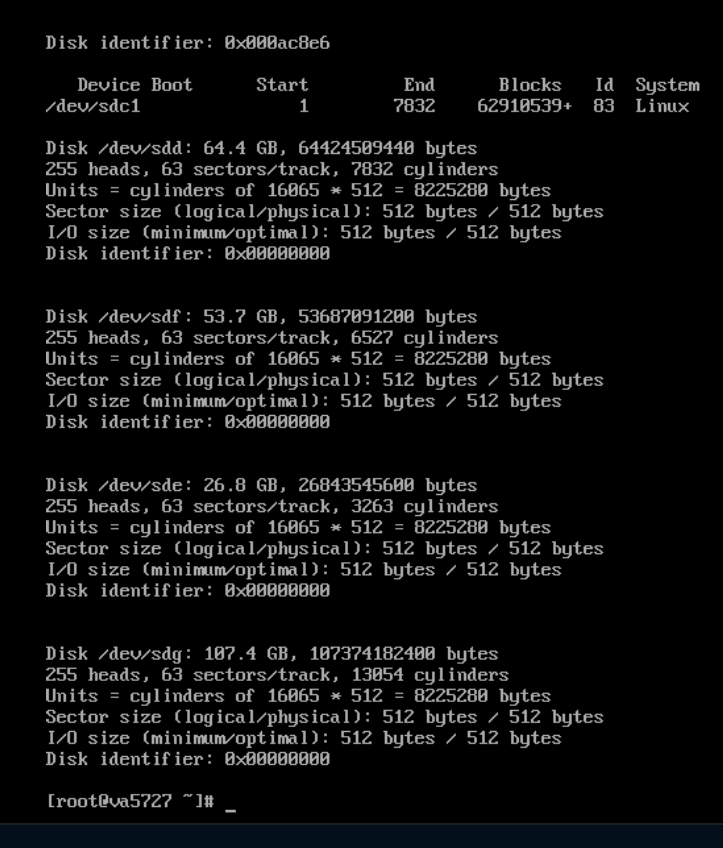
fisk -l, for example:# fisk -l -

Note the list of the partition tables, the disk names, and their approximate sizes. You will need this information for a later step.
- Mount the ~50GB disk to the
/imagesdirectory. In the console, enter these commands and options:- Enter
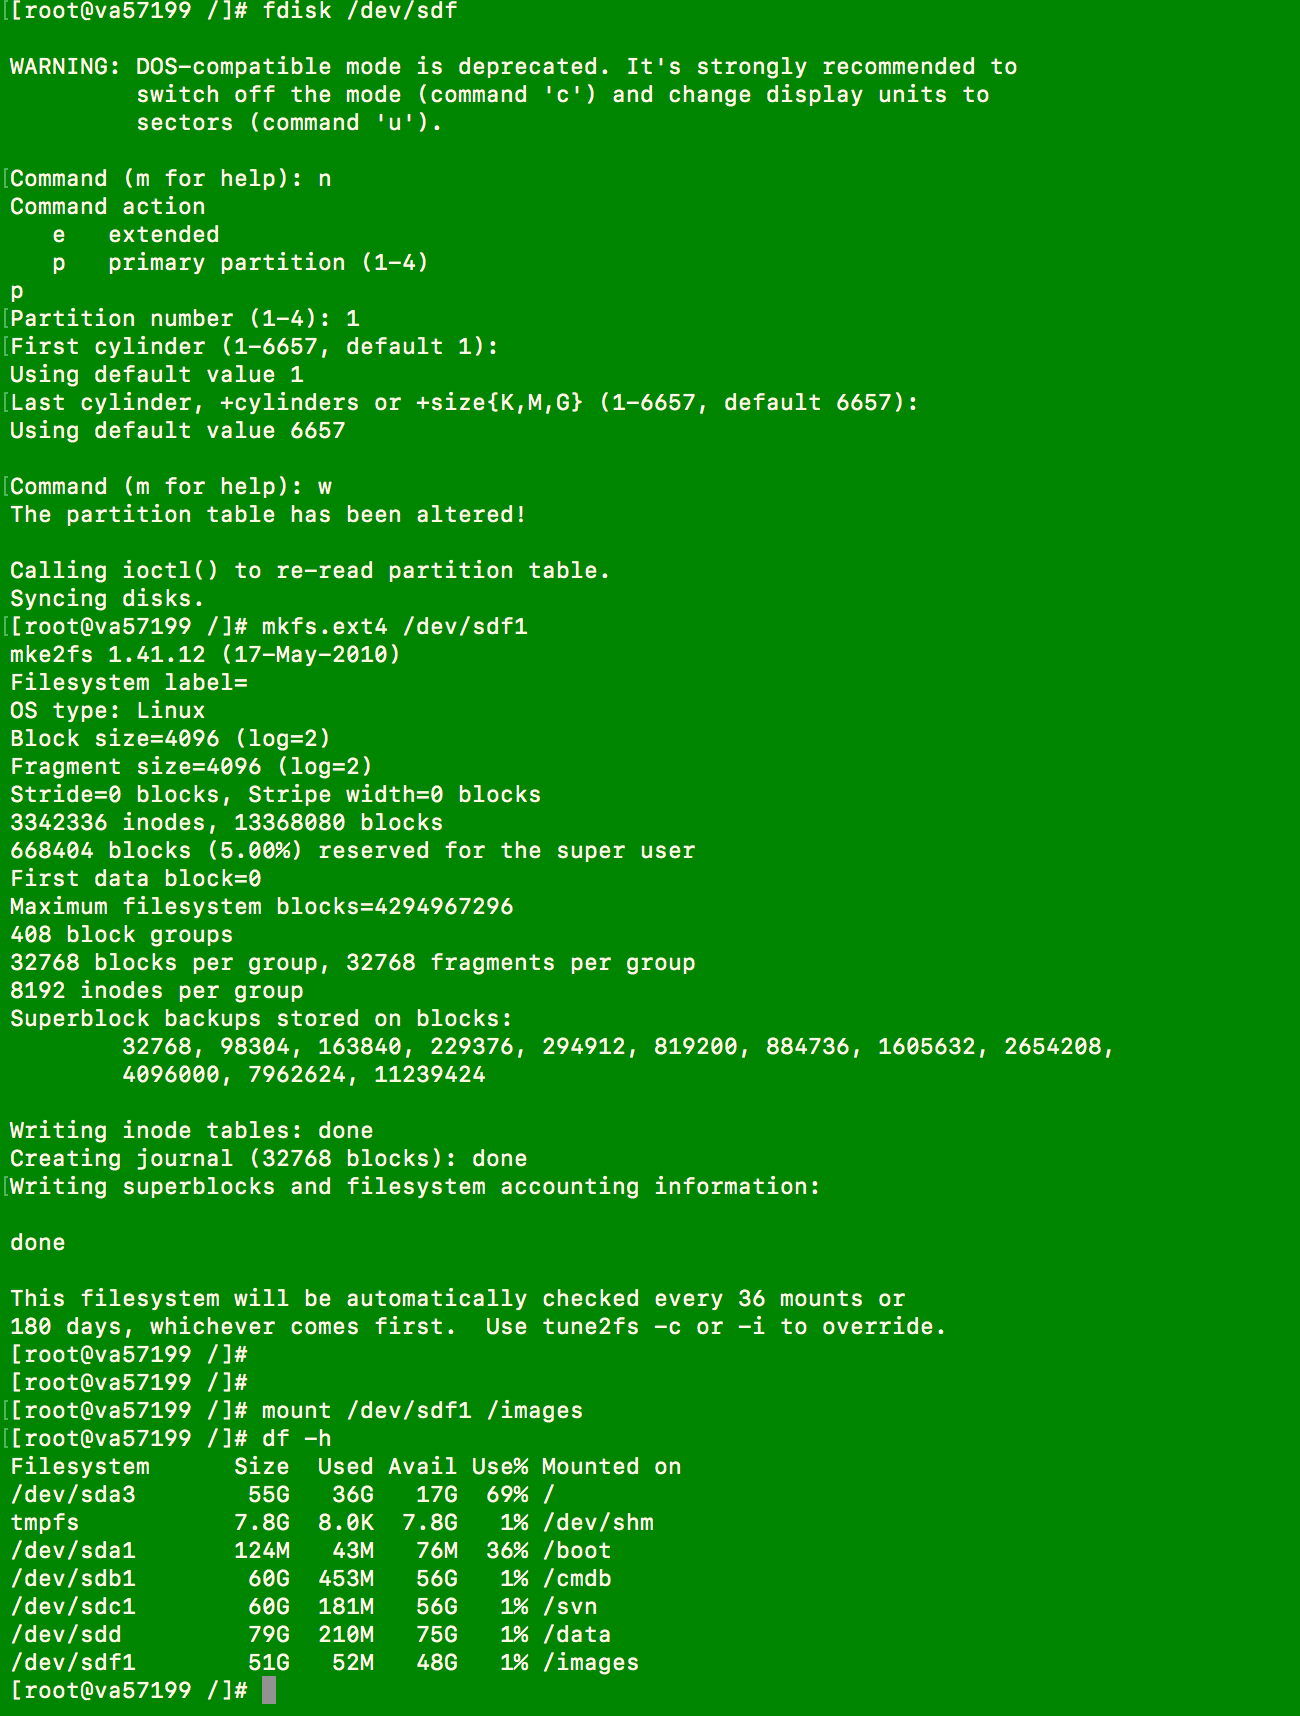
# fdisk /dev/<your_50GB_disk>Press Return. - Enter
nto add a new partition. Press Return. - Enter
pto choose primary partition. Press Return. - Enter
1to choose partition number. Press Return. - Press Return to accept the default.
- Press Return to accept the default.
- Enter
wto write the table to disk and exit. Press Return. - Enter the
mkfs.ext4 /dev/sdf1command (wheresdf1is the 50GB disk) to make a file system. - Enter the
mkdir -p /imagescommand to create animagesdirectory. - Enter
mount /dev/sdf1 /imagesto mount the 50GB disk to the/imagesdirectory.Or using the UUID if the disk name changed, for example
blkid /dev/sdf1 /dev/sdf1: UUID="d4a5b82f-6e73-456b-ab08-d6e6d845d1aa" TYPE="ext4"
mount -U d4a5b82f-6e73-456b-ab08-d6e6d845d1aa /images
- Enter
- Enter the
df -hcommand to get the file system disk space usage.The following screen shot illustrates Steps 13 and 14.
- Download the 6.1.1 FortiSIEM image file,
6.1.1/HW/FSM_Full_All_RAW_VM_6.1.1_build0118.zip, from the support site and copy it to the/imagesdirectory. - Use unzip to extract the file.
# unzip FSM_Full_All_RAW
_VM_ 6.1.1_build0118.zipNote: The image size is about 5.5GB after extracting.
- Create a soft link to the image folder, for example:
# ln -sf /images/FortiSIEM-
RAW-VM- 6.1.1.0118.img /images/latest - Enter the
llcommand to ensurelatestlink is defined, for example:# ll
Migrate All-in-one Installation
- Download the Bootloader
- Prepare the Bootloader
- Load the FortiSIEM 6.1.1 Image
- Prepare the FortiSIEM VM for 6.1.1
- Migrate to FortiSIEM 6.1.1
Download the Bootloader
Install and configure the FortiSIEM bootloader to start migration. Follow these steps:
- Download the bootloader
FSM_Bootloader_6.1.1_Build0118.zipfrom the support site and copy it to the/imagesdirectory. - Unzip the
.zipfile, for example:# unzip FSM_Bootloader_6.1.1_Build0118.zip

Prepare the Bootloader
Follow these steps to run the prepare_bootloader script:
- Go to the
bootloaderdirectory, for example:# cd /images/FSM_Bootloader_6.1.1_build0118
- Run the
prepare_bootloaderscript to install and configure the bootloader. This script installs, configures, and reboots the system. The script may take a few minutes to complete.# sh prepare_bootloader
- The script will open the FortiSIEM bootloader shell.
Note: you might have to reboot the system manually if auto-reboot does not work.
- Go to the console view in your Nutanix-AHV Prism Console.
- In the FortiSIEM bootloader shell, choose FortiSIEM Boot Loader. Press Return.

Load the FortiSIEM 6.1.1 Image
Follow these steps to load the FortiSIEM image:
- Log in to the bootloader shell as user
rootwith passwordProspectHills.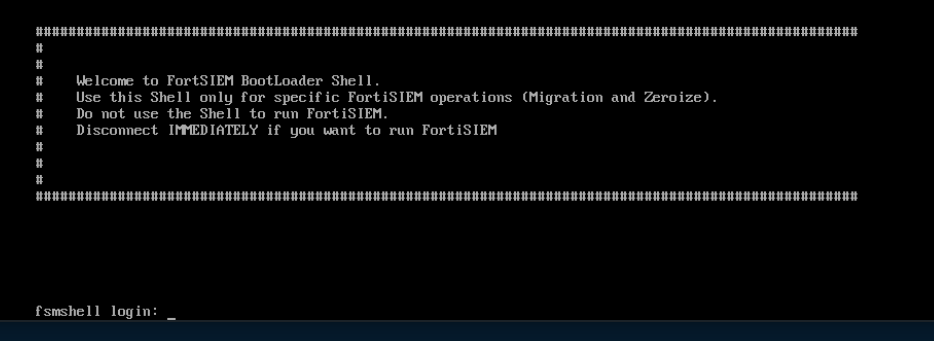
- Create and mount the
/imagesdirectory:- Create a
/imagesdirectory if it is not already present, for example:# mkdir -p /images
- Mount the
sdf1(the 50GB disk) to the/imagesdirectory, for example:# mount /dev/sdf1 /images
Use
# fdisk -lto find the image drive, which should be the 50GB disk.Or using the UUID if the disk name changed, for example:
# blkid /dev/sdf1 /dev/sdf1: UUID="d4a5b82f-6e73-456b-ab08-d6e6d845d1aa" TYPE="ext4"# mount -U d4a5b82f-6e73-456b-ab08-d6e6d845d1aa /images
- Change to the
/imagesdirectory, for example:# cd /images
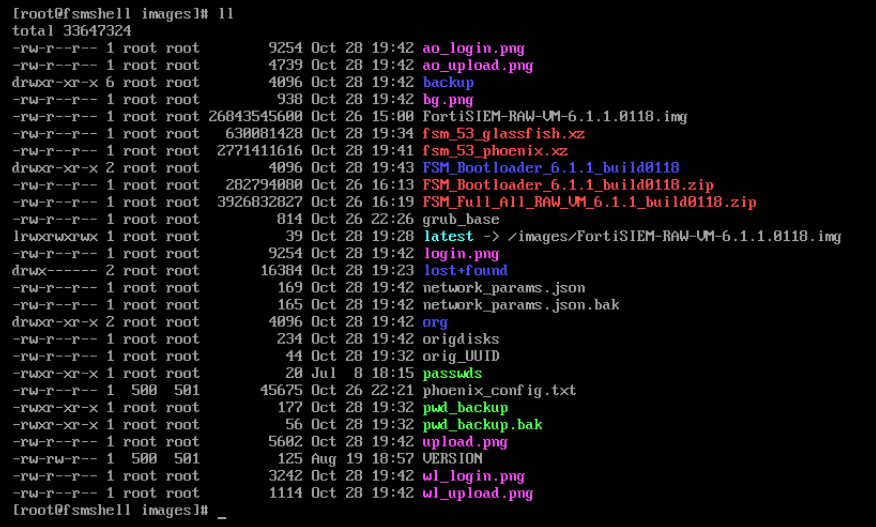
- Run the
llcommand to check disk usage.# ll
These steps are illustrated in the following screen shot.
- Create a
- Run the
load_imagescript to swipe the old image with the new image, for example:- Change to the
rootdirectory and check the contents, for example:# cd /
# ll

- Run the
load_imagescript, for example:# sh load_image

When the script completes, press Return.
- Press Return again to end the
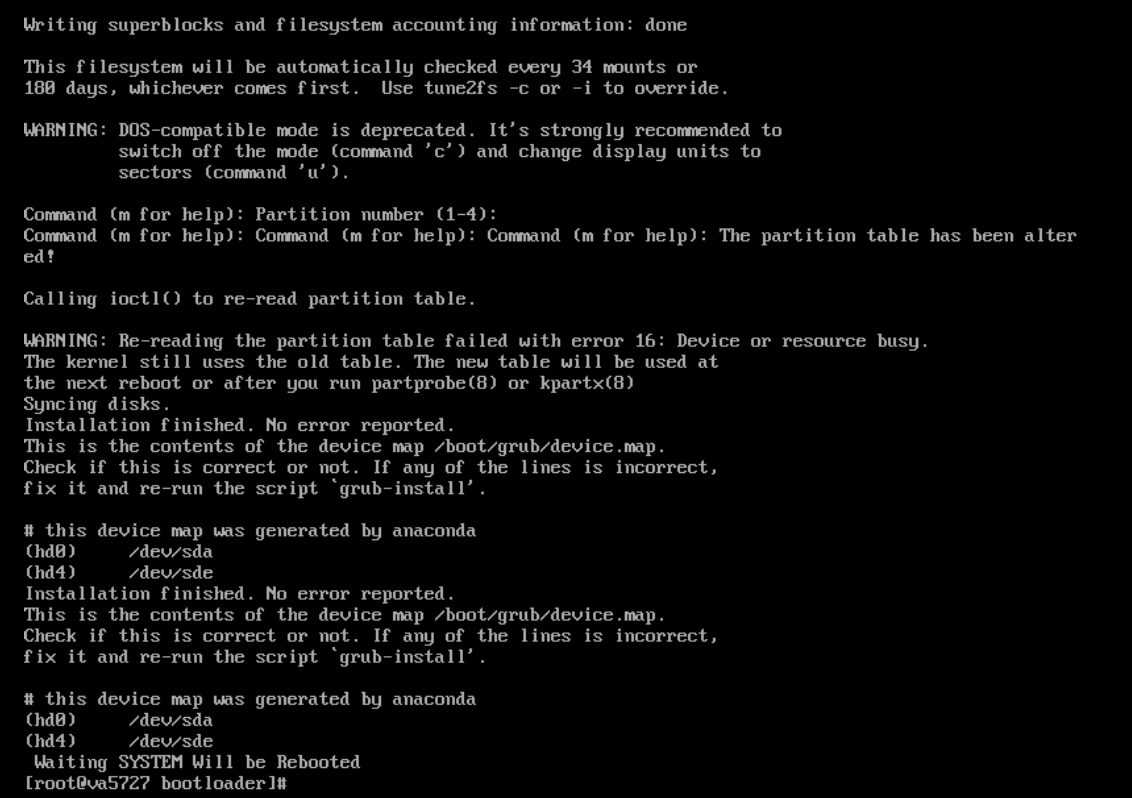
load_imagescript. - Run the
fdisk -lcommand to check that the disks have been configured, for example:# fdisk -l

- Change to the
- In the Nutanix-AHV Prism Console, power off the VM after
load_imagecompletes. - Important: At this stage, you must change the boot disk as follows:
- Identify the 25GB disk which is the boot disk. In our example, it is identified by scsi.6 (Note that it is not in any particular order).
- Select the 25GB boot disk under Boot Configuration > Legacy BIOS > Set Boot Priority. In this case, it is DISK (scsi.6).
- Click Save to save the result.

- Power on the image and move to the next step for the migration.
Migrate to FortiSIEM 6.1.1
Follow these steps to complete the migration process:
- Log in to the bootloader shell as user
rootwith passwordProspectHills. You will immediately be asked to change your password. - Create and mount the
/imagesdirectory:- Change directory to
root, for example:# cd /
- Create the
/imagesdirectory, for example:# mkdir -p /images
- Mount the
sdf1(the 50GB disk) to/images, for example:# mount /dev/sdf1 /images
Or using the UUID if the disk name changed, for example:
# mount -U d4a5b82f-6e73-456b-ab08-d6e6d845d1aa /images
- Change directory to
- Run the
configFSM.shcommand to configure the migration via a GUI, for example:# configFSM.sh - In the first screen of the GUI select 1 Yes to set a timezone.
Press Next.

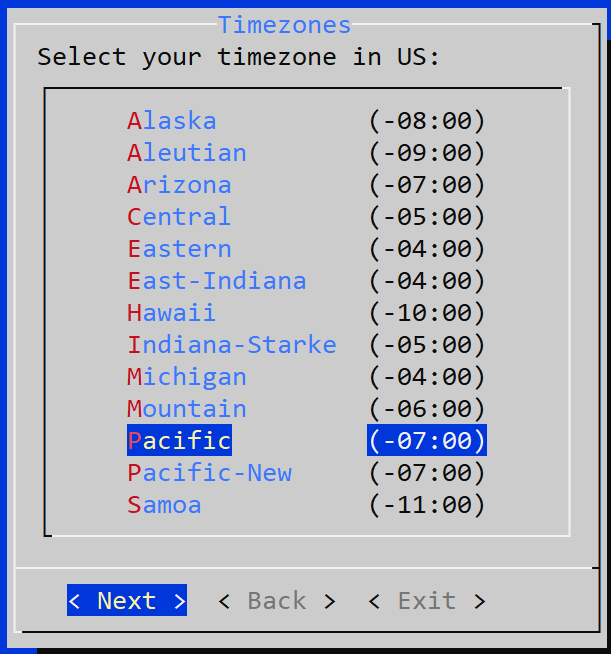
- Select a region for the timezone. In this example, US is selected. Press Next.

- Select a timezone in the selected region. In this example, Pacific is selected. Press Next.
- Select a target to configure. In this example, the Supervisor is selected. Press Next.

- Select the 6 migrate_6_1_1 Operation option. Press Next.

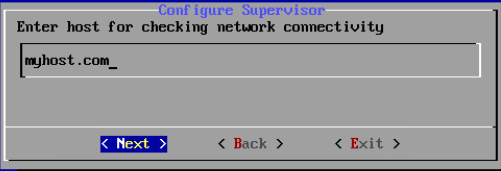
- Test network connectivity by entering a host name that can be resolved by your DNS Server (entered in the previous step) and can respond to a ping. The host can either be an internal host or a public domain host like google.com. Press Next.
- Press the Run command to complete migration, for example:

- The script will take some minutes to run. When it is finished, migration is complete.
- To ensure
phMonitoris running, execute thephstatuscommand, for example:# phstatus -
13.On Nutanix AHV, the system UUID has changed because you booted from a different OS disk than prior one you were running in 5.3.x or 5.4.0. You can obtain this UUID using the
phgetUUIDcommand. You will need to work with Forticare support to reset your license to use this new UUID. When you have the updated license, navigate to the GUI and upload this license. Until this is done, the backend processes will not run and migration is not complete.
The options for the configureFSM.py script are described in the table here.
Migrate Cluster Installation
This section provides instructions on how to migrate Supervisor, Workers, and Collectors separately in a cluster environment,
- Delete Workers
- Migrate Supervisor
- Install New Worker(s)
- Register Workers
- Set Up Collector-to-Worker Communication
- Working with Pre-6.1.0 Collectors
- Install 6.1.1 Collectors
- Register 6.1.1 Collectors
Delete Workers
- Login to the Supervisor.
- Go to Admin > License > Nodes and delete the Workers one-by-one.
- Go to the Admin > Cloud Health page and make sure that the Workers are not present.
Note that the Collectors will buffer events while the Workers are down.
- Shutdown the Workers.
SSH to the Workers one-by-one and shutdown the Workers.
Migrate Supervisor
Follow the steps in Migrate All-in-one Installation to migrate the supervisor node. Note: FortiSIEM 6.1.1 does not support Worker or Collector migration.
Install New Worker(s)
Follow the steps in Cluster Installation > Install Workers to install new Workers. You can either keep the same IP address or change the address.
Register Workers
Follow the steps in Cluster Installation > Register Workers to register the newly created 6.1.1 Workers to the 6.1.1 Supervisor. The 6.1.1 FortiSIEM Cluster is now ready.
Set Up Collector-to-Worker Communication
- Go to Admin > Systems > Settings.
- Add the Workers to the Event Worker or Query Worker as appropriate.
- Click Save.
Working with Pre-6.1.0 Collectors
Pre-6.1.0 Collectors and agents will work with 6.1.1 Supervisor and Workers. You can install 6.1.1 collectors at your convenience.
Install 6.1.1 Collectors
FortiSIEM does not support Collector migration to 6.1.1. You can install new 6.1.1 Collectors and register them to 6.1.1 Supervisor in a specific way so that existing jobs assigned to Collectors and Windows agent associations are not lost. Follow these steps:
- Copy the http hashed password file (
/etc/httpd/accounts/passwds) from the old Collector. - Disconnect the pre-6.1.1 Collector.
- Install the 6.1.1 Collector with the old IP address by the following the steps in Cluster Installation > Install Collectors.
- Copy the saved http hashed password file (
/etc/httpd/accounts/passwds) from the old Collector to the 6.1.1 Collector.This step is needed for Agents to work seamlessly with 6.1.1 Collectors. The reason for this step is that when the Agent registers, a password for Agent-to-Collector communication is created and the hashed version is stored in the Collector. During 6.1.1 migration, this password is lost.
Register 6.1.1 Collectors
Follow the steps in Cluster Installation > Register Collectors, with the following difference: in the phProvisionCollector command, use the --update option instead of --add. Other than this, use the exactly the same parameters that were used to register the pre-6.1.1 Collector. Specifically, use this form of the
phProvisionCollector command to register a 6.1.1 Collector and keep the old associations:
# /opt/phoenix/bin/phProvisionCollector --update <user> '<password>' <Super IP or Host> <Organization> <CollectorName>
The password should be enclosed in single quotes to ensure that any non-alphanumeric characters are escaped.
Re-install new Windows Agents with the old InstallSettings.xml file. Both the migrated and the new agents will work. The new Linux Agent and migrated Linux Agent will also work.