Fortinet black logo

Administration Guide

Directly connecting cameras to the FortiRecorder

Copy Link
Copy Doc ID f41cea3c-ee48-11eb-97f7-00505692583a:995135

Directly connecting cameras to the FortiRecorder

This scenario may be used to test the FortiRecorder and FortiCam equipment in a lab environment. If you install the FortiRecorder and FortiCam cameras in a dedicated network, the topology of this scenario will also apply.

To connect your camera directly to FortiRecorder

  1. If this is the first time you connect to FortiRecorder, change your PC’s IP address to be on the same subnet as the FortiRecorder port1’s default IP address 192.168.1.99. For example, set your PC’s IP to 192.168.1.98.
  2. Connect your PC and FortiRecorder’s port1 to a PoE switch. Do not connect the camera to the switch at this stage.
  3. On your PC, open a web browser and connect to https://192.168.1.99. Log in to the admin administrator account with Name: admin and Password: (none).
  4. If you want to use the FortiRecorder DHCP service, configure the DHCP server as described in the next step. If you already have a DHCP server to use on your network, skip the next step.
  5. On the FortiRecorder web UI, go to System > Network > DHCP, and select New to create a new DHCP server on port1.
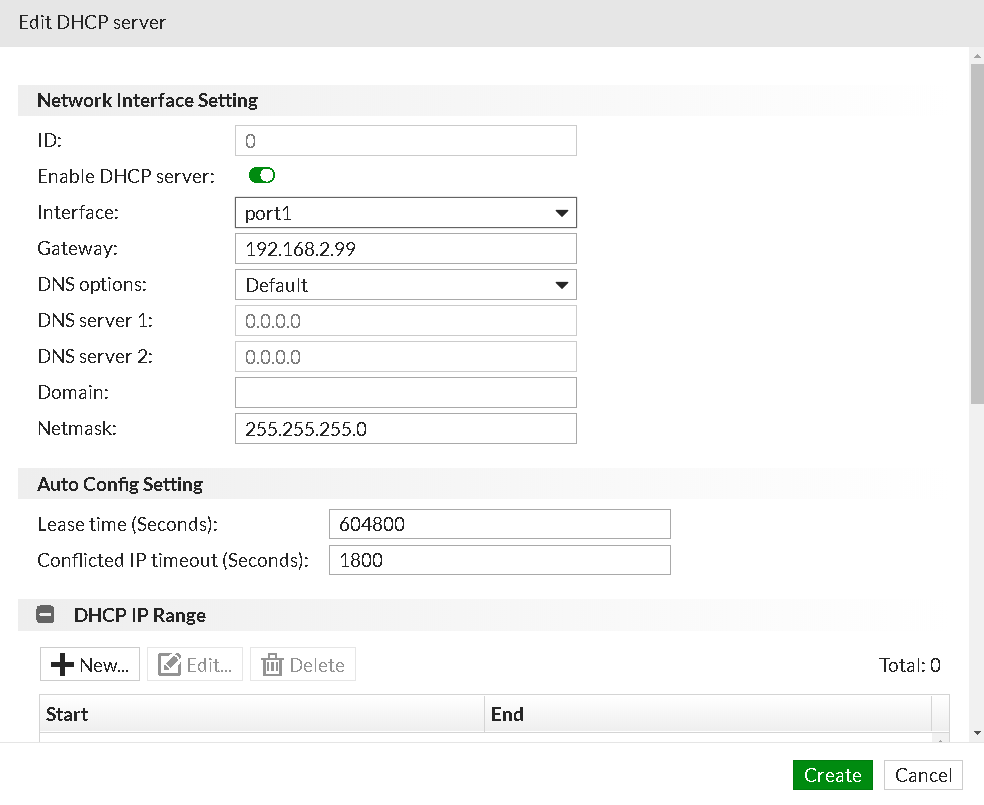
  6. Enable DHCP server and select port1 from the Interface drop-down menu.
  7. Go to System > Network > Interface. Select port1 and select Edit.
  8. Enable Discover cameras on this port if not already enabled.
  9. Connect the camera to the PoE switch now.
    Caution

    If you connect the camera to the switch before you have configured and enabled the DHCP server on FortiRecorder, the camera will use its default IP address, which might not be working on your network. Therefore, you must reboot the camera to get an IP address from the FortiRecorder DHCP server by unplugging the camera from the switch and plugging it back.

  10. Go to Camera > Configuration > Camera and select Discover. After several seconds, a list of discovered cameras should appear. Newly discovered cameras will be highlighted in yellow, and their Status column will contain Not Configured.
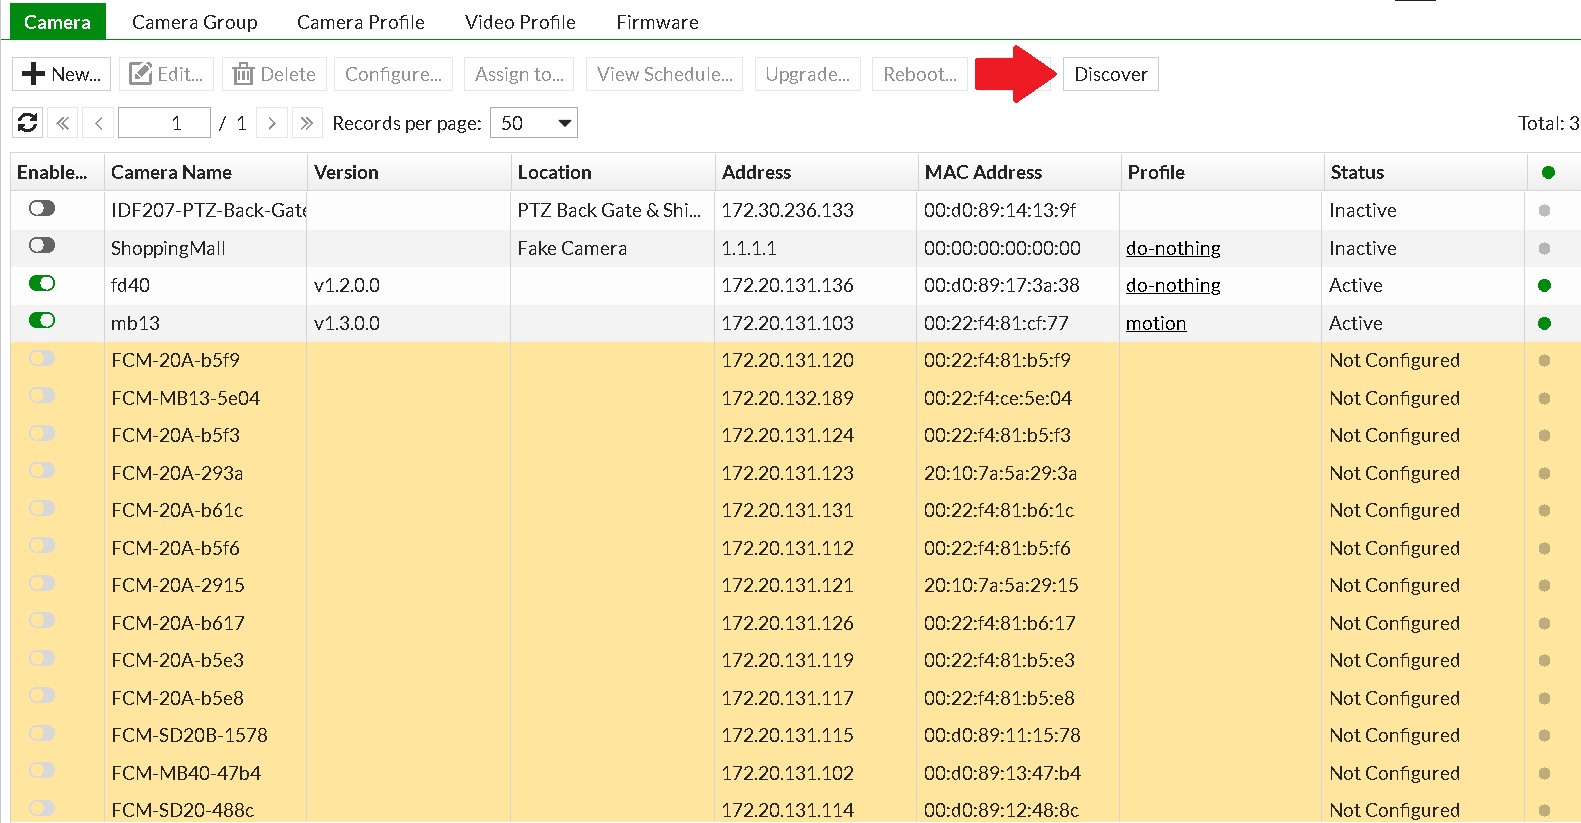
  11. Double click on the discovered camera to configure the camera settings.
  12. Go to Monitor > Video > Video to view the live feed from the camera.

Once you have finished connecting your cameras to FortiRecorder, you will need to configure your cameras. For more information, read the configuring cameras section.