


FortiGate
Follow this procedure on the FortiGate GUI to configure captive portal.
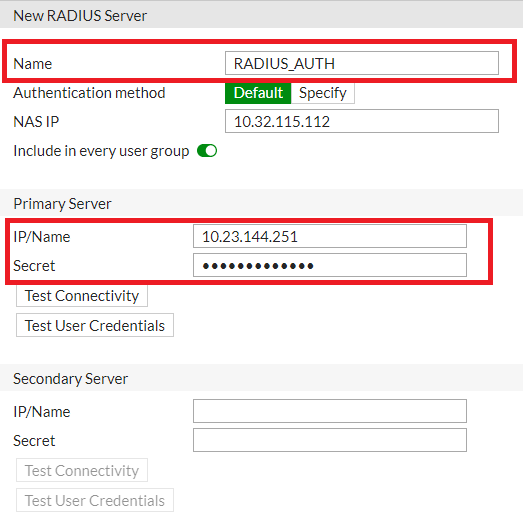
- Navigate to User and Device > RADIUS Servers and create a new RADIUS server authentication profile. Select Create New.
- Enter the primary RADIUS server details. The Primary Server IP/Name - (Application server IP address). The Primary Server Secret should be the same as the RADIUS Secret Key configured on the FortiPresence VM GUI (Portal > Portal Settings > Radius Clients).
- Enter the NAS IP and click OK.
- Configure RADIUS server accounting profile via the FortiGate CLI mode. Run the following commands in the same order.
config user radius
edit <RADIUS profile created in Step 2>
config accounting-server
edit < integer>
set status enable
set server <IP address of the RADIUS server>
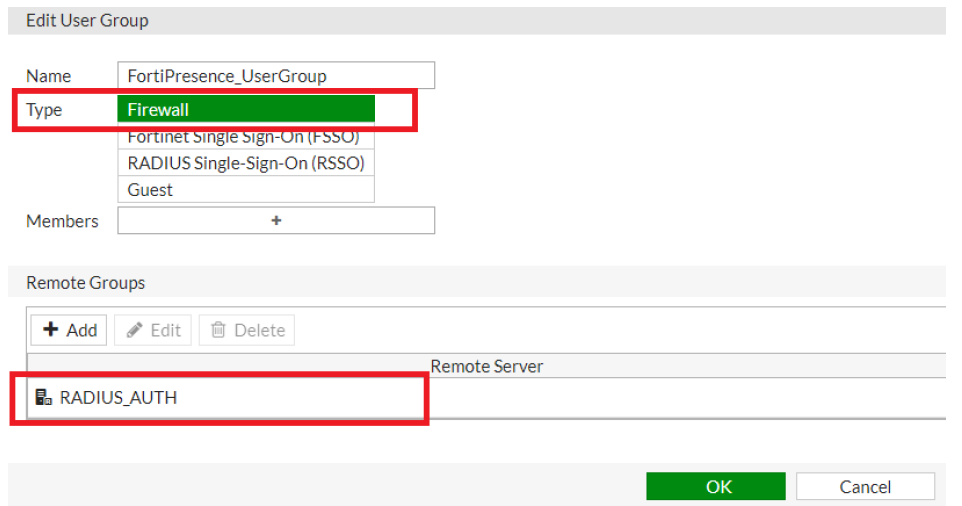
set secret <same as the RADIUS Secret Key configured on the FortiPresence VM GUI (Portal > Portal Settings > Radius Clients) - Navigate to User and Device > User Groups and create a new user group to map the RADIUS servers to the user group for ease of configuration. Select Create
- Click Add in the Remote Groups section and select the configured RADIUS authentication server. Click OK.
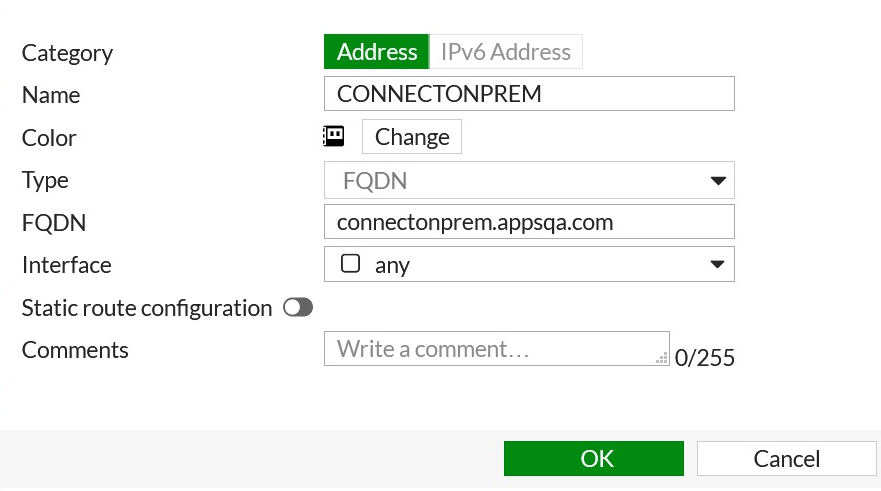
- Navigate to Policy and Objects > Addresses to create individual addresses for exemption FQDNs. Select Create New > Addresses and update the configuration parameters as required.
- Select Type as FQDN and enter the exempt FQDN. Click OK.
- Repeat Steps 7 and 8 to create exclusion based addresses for all FQDNs.
- Create address groups to easily map the individual FQDNs. Select Create New > Address Group and update the configuration parameters as required and populate the FQDN entries in the Members field. The FQDN entries are displayed in the right-side panel.
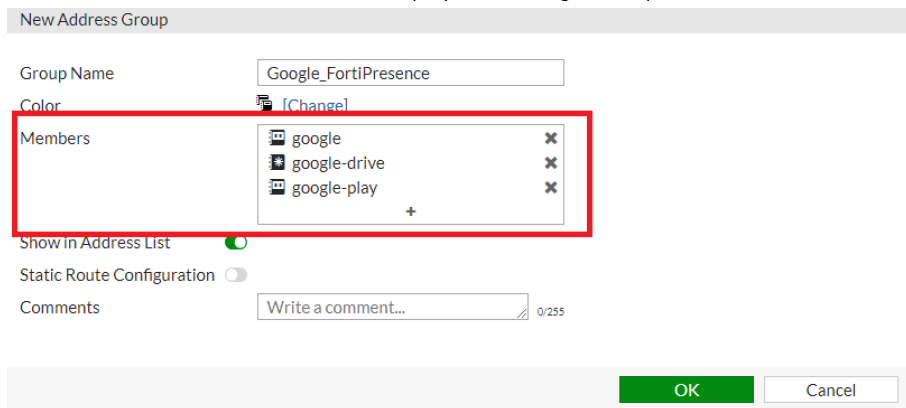
You can create a single address group or multiple groups based on your requirement. - Navigate to WiFi and Switch Controller > SSID to create an SSID. Click Create New > SSID and update the configuration parameters as required.
- Select the Security Mode as Captive Portal and the Authentication Portal type as External.
- Enter the Authentication Portal, (Captive Portal URL copied from the FortiPresence VM GUI – Portal Management > Radius Configuration) and select the created User Group.
- Select the address groups created for exempted FQDNs in Exempt Destination/Services. Click OK.
- Set the Redirect After Captive portal to Specific URL and specify https://<FortiPresence Connect FQDN>/portal/success. The actual redirect option can be specified while creating the portal on FortiPresence VM GUI - Adding a New portal
- Navigate to Policy & Objects > IPv4 Policy to configure Firewall policies. Select Create New.
You are required to create the following three Firewall policies:- Policy to allow access to the DHCP and DNS services before authentication.
- Policy to allow access to the exempted FQDNs for authentication.
- Policy to allow access to the internet after authentication.
The following is an example of a policy to allow access to the exempted FQDNs for authentication.
