


Add an Application
To add an Application, perform the following steps:
-
From the navigation menu, click Monitoring > Applications.
-
Select any of the Default Applications or Add custom Application. If you select any of the Default Applications, you may directly go to Monitoring Locations.
-
Enter a name and description for the application. You can also upload an image to be used as a logo for the application.

-
Click Save. The application is added to the Application Monitoring page.
You can now add instances to the application.
Add instances
To add an instances, perform the following steps:
-
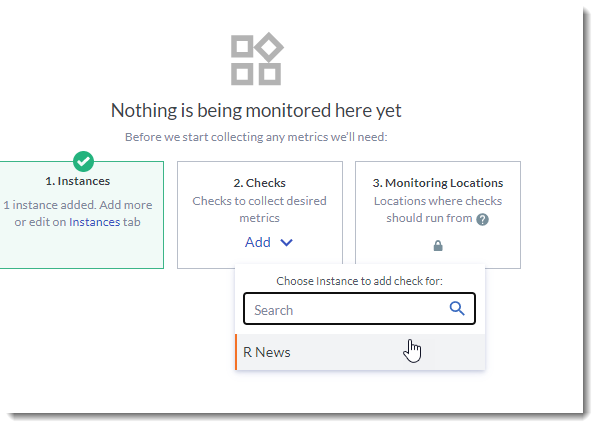
From the Overview tab of the application during initial set up, click Add under Instances. Alternatively, you can also go to the Instances tab and click Add Instance.

The Add Instance modal is displayed.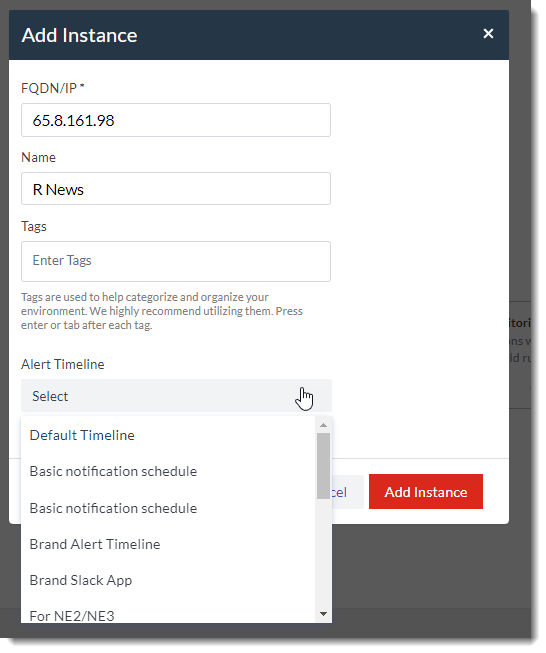
-
Enter the required information. The fields are defined in the following table.
|
Field |
Description |
|---|---|
|
FQDN/IP |
Required Enter the FQDN or IP address of the instance. |
|
Name |
Optional Enter a name for the instance. |
|
Tags |
Optional Apply Tags to the instance. To add more than one tag, press the Enter or Tab key after each tag. |
|
Alert Timeline |
Optional The Alert Timeline to use for the instance. |
3. Click Add Instance to create the instance. To add more instances, go to the Instances tab and click Add Instance.
Create checks
To create a check, perform the following steps:
-
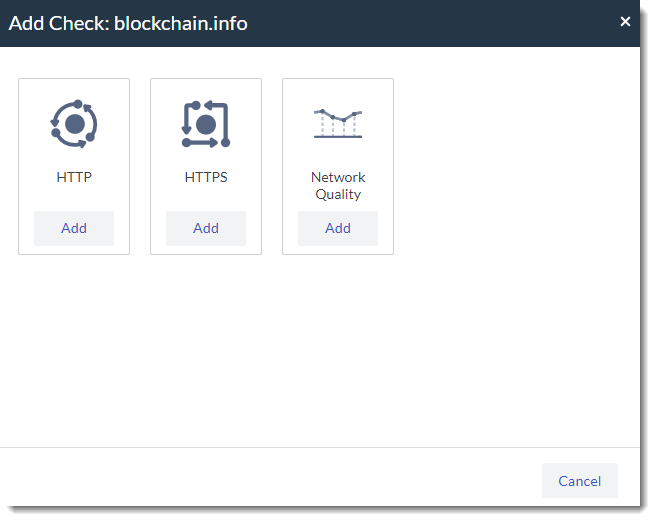
From the Overview tab of the application during initial set up, click Add under Checks. Alternatively, you can also go to the Checks tab and click Add Check.
-
The Add Check modal is displayed. From here, you can select the check that you want to add by clicking Add.
-
Configure the metric. For specific instruction on how to add and configure each metric, see Application plugins.
Add monitoring locations
Application Monitoring supports three location types:
- Public probe - Global network of monitoring nodes designed to track the availability of your servers 24 hours a day from outside your network.
-
OnSight - The OnSight vCollector sits behind your firewall and functions similarly to our public monitoring nodes, which runs uptime checks and synthetic monitoring against your publicly available servers and web endpoints. The OnSight can be used to verify performance from core office or data center environments.
-
Endpoint Agents (DEM Agent) - Collects key OS health and application performance metrics from remote locations like employee computers, retail locations, or public probes for external verification.
To add a monitoring location, perform the following steps:
-
From the Overview tab of the application during initial set up, click Add under Monitoring Location. Alternatively, you can also go to the Locations tab and click Add Location.

-
Select a location type from the following options:
-
Endpoint Agent
-
OnSights
-
Public probes
-
-
Choosing any of the above location types launches a modal where you can search for and add an existing location to the application.
-
4. Click Add to assign the location to the application. To add more locations, go to the Locations tab and click Add Location.