Part 5: Team Management
This article describes how to manage users and groups in FortiMonitor, including creating users and setting up access control levels and system roles. Select Settings > Users, Groups & On-Call from the navigation bar to access the page.
Users and groups
User accounts, groups, and on-call schedules in FortiMonitor are managed in the Users, Groups & On-Call page. You can use this page to add, edit, or delete users and groups to your FortiMonitor account.
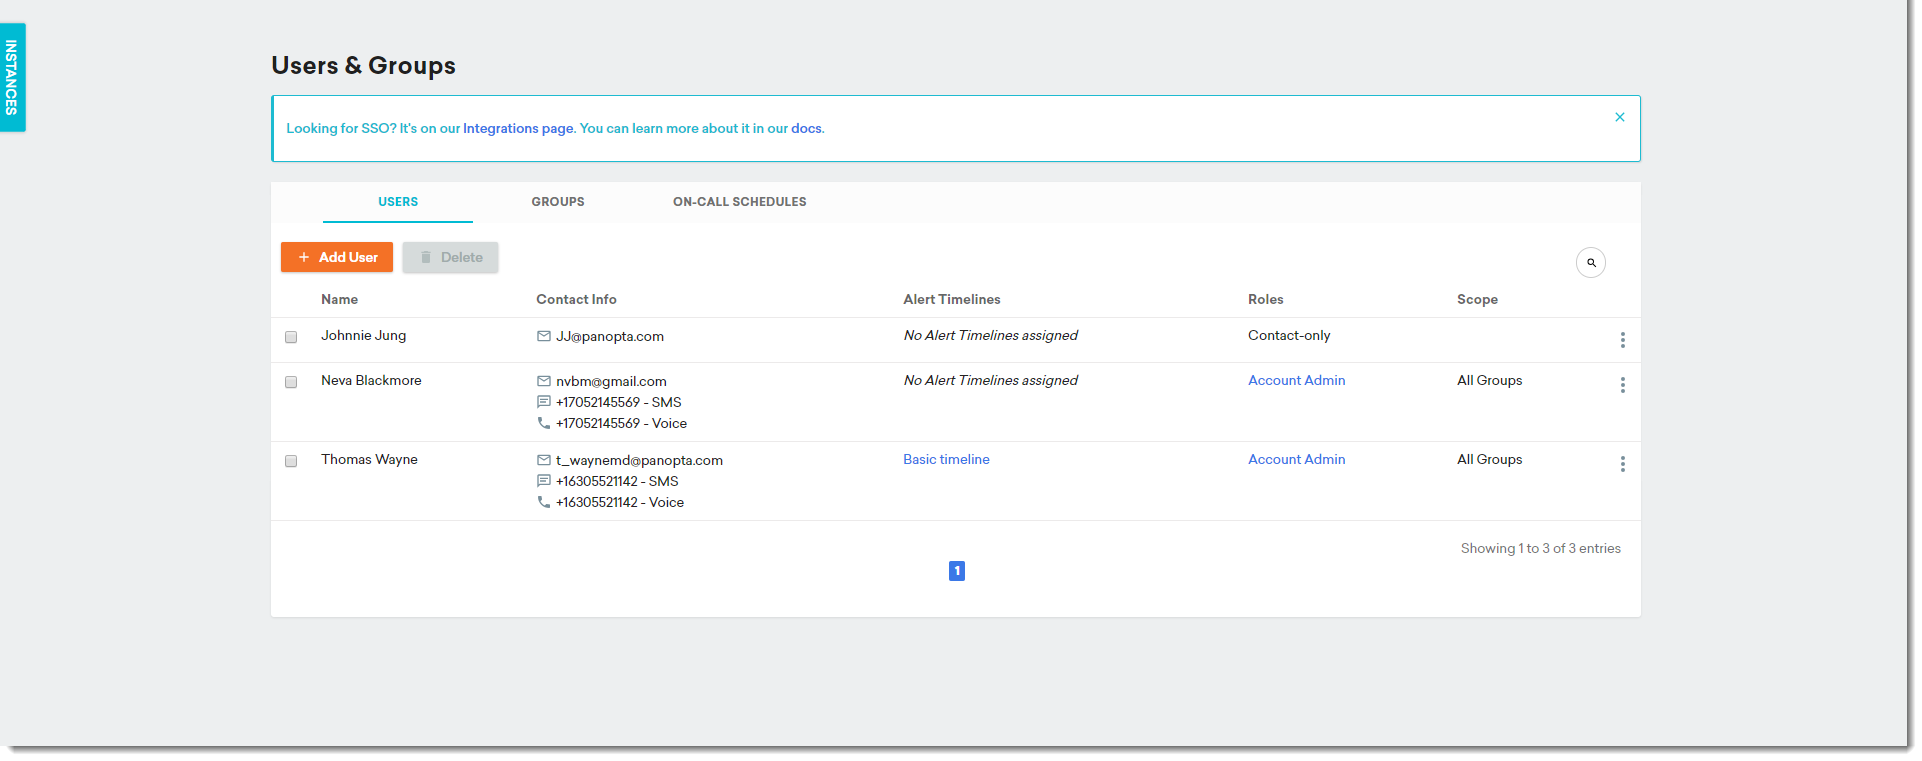
The following table provides a description of the fields available in a user account.
|
Field |
Description |
|---|---|
|
Name |
The user's name. The name defined here will be used in the control panel and in all communications. |
|
Timezone |
The user's timezone. |
|
Account type |
Indicates whether the user can log in and access the control panel (Control Panel Access) or merely receives notifications (Alerting Only). |
|
Tags |
(Optional) User tags are used to restrict access to dashboards. |
|
Default dashboard |
(Optional) If a default dashboard is selected, the user will be redirected to this dashboard when they log in to FortiMonitor. |
|
ACL roles |
The scope of actions and infrastructure the user has access to within FortiMonitor. Learn more about access control in Access control. |
|
Contact information |
The |
|
Note: By default, only accounts with the Account Admin role can add, delete, and modify users. Create or clone a custom role if you want to add these permissions to users but not necessarily have all the permissions of an Account Admin. |
See Add users to your account for more information about adding users to your account.
Groups
To streamline management of users you assign to Alert Timelines, you can optionally add multiple users to alerting groups. Instead of assigning users one by one to a timeline, you can create a group and assign that group to the timeline. For example, if you have a group of Linux admins that you want to assign to an Alert Timeline for Linux servers, you can create a group called Linux Admins and assign that group to the timeline. If an incident occurs, all members of the group will be alerted.
To create and manage groups, see Create a Group.
Access control
FortiMonitor's access control (ACL) provides you with the ability to control which actions a team member can perform in FortiMonitor. The system is driven by roles, which are logical groupings of actions that a user can perform.
|
Note: A user can have multiple roles. These roles are layered on top of one another. For example, a user can both have the Dashboard Admin and Server Admin roles. |
FortiMonitor provides the following system roles out of the box:
|
Role |
Description |
|---|---|
|
Account Admin |
Able to perform any activity within FortiMonitor |
|
Server Admin |
Able to perform most activities, with the exception of user, integration, and API management, as well as a few other ancillary activities |
|
Dashboard Admin |
Full management of dashboards |
|
Dashboard Viewer |
Read-only access to dashboards |
|
Incident Responder |
Slightly more advanced than a read-only user. Allows the user to view instances, start maintenance, pause monitoring, and more |
|
Billing Admin |
Access to billing only |
|
API Full Access |
Full access to API functionality, including read and write operations |
|
API Read-only Access |
Read-only access to all API operations |
See Access control for more information.
Custom roles
You can create a custom role if you want to fine-tune the roles you use in FortiMonitor. Custom roles can be comprised of any number of actions that are available in FortiMonitor. For instance, you may want a role that allows a user to view and edit instances, but read-only access for network devices. When creating a custom role, you may choose to either start from scratch or clone an existing role.
See Add Custom roles for more information.
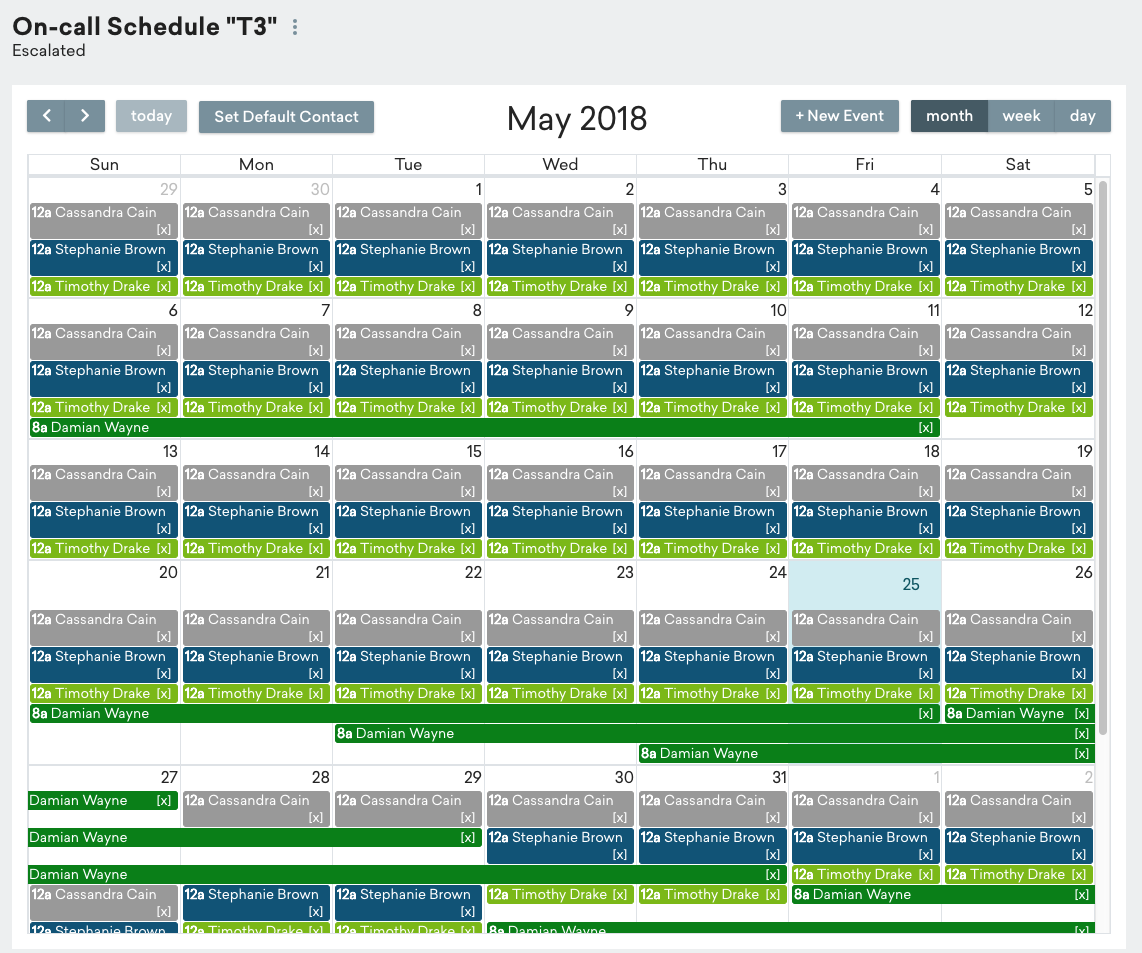
On-Call schedules
You can create, modify, or view On-Call schedules in the Users, Groups & On-Call page.
For more information, see Set up an On-Call schedule:
Single Sign-On (SSO)
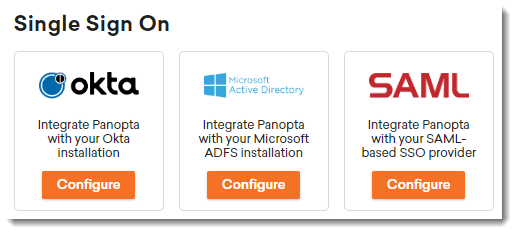
Setting up SSO for your FortiMonitor account allows you to use credentials configured in your organization's internal authentication tool (Active Directory, SAML, Okta). When you use SSO, users can benefit from not specifying separate credentials when logging into FortiMonitor. Administrators can also save time by having a central management location for user accounts and authentication. To set up and use SSO, select Settings > Integrations then follow the steps provided in Single sign-on (SSO).
.
User configuration
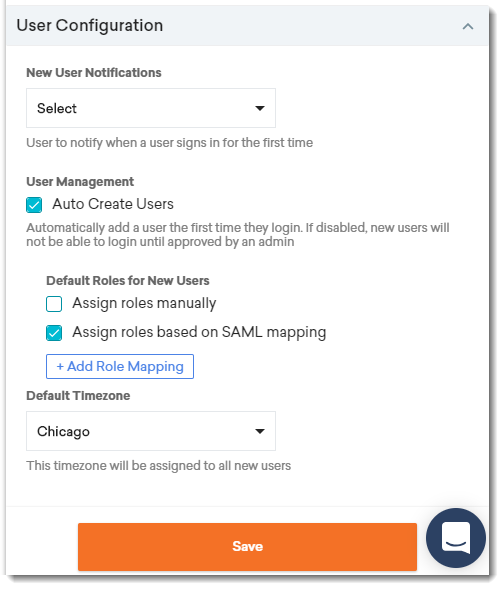
During SSO configuration, you have several options to control what happens when new users with your SSO credentials log in for the first time to FortiMonitor. This includes:
-
New user notification - The user to notify when a user logs in for the first time.
-
Auto-create users - Select this option to automatically add users the first time they log in. If this option is not selected, new users will not be able to log in until approved by an administrator.
-
Default roles for new users
-
Assign roles manually - Manually select a role to assign to new users. You can select more than one role. See Access Control.
-
Assign roles based on SAML mapping - Automatically assign roles to new users based on the configured SAML mapping. See SSO-based roles for more information.
-
-
Default timezone - The timezone to assign to the new user.
These options are available under the User Configuration module. See Single sign-on (SSO) for more information.