


Using Postman with FortiMonitor's API
Postman is a GUI based application that can interact with query RESTful APIs made by others or test ones you have made yourself. When exploring API endpoints, it’s helpful to have a program that can make these requests without needing programming or network experience. We highly recommend using the desktop version which supports Windows, OSX, and Linux systems.
Authenticating with Postman
-
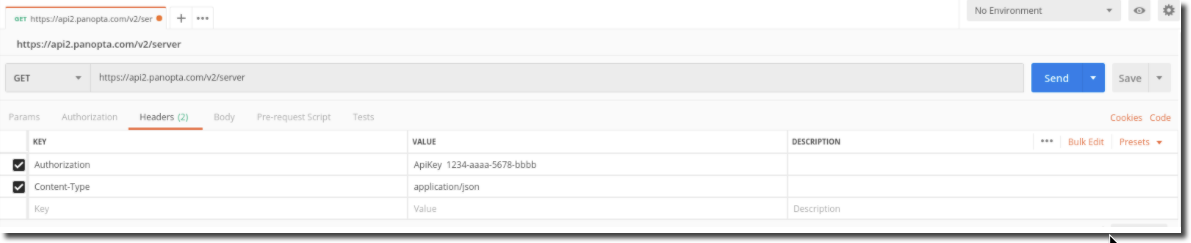
Obtain your API key here.
-
Open Postman.
-
Create a new request.
-
Under Headers add a new key for Content-Type.
-
Set the value to application/json.
-
Add a new Key for Authorization.
-
Set the value to ApiKey $TOKEN.
-
Test by getting a list of servers: 'https://api2.panopta.com/v2/server'
Your end result should look similar to this:
Using a GET request
In this example, we’ll be gathering all servers in our account with a basic GET call.
-
Set the request method to GET.
-
Grab the /v2/server URL from the API explorer.
-
Send the request.
-
Once a response is received, under Body set the mode to Pretty and the type to JSON to view more easily readable responses.
Your output should be readable and contain information about your servers.

Filtering servers by FQDN
-
In the Params tab, create a new key labeled fqdn.
-
In the value section enter your IP or FQDN - here we’re using
192.168.0.3.

3. Send - Expected response 200 OK.
4. Set your Body to Pretty JSON again and you can view the information for only servers that match that FQDN.

Using a POST request
In this example, we're creating a maintenance schedule for our security patches tonight at midnight UTC. We've disabled alerting, set it to end currently active outages, and exclude any outages that pop up from counting against our instance’s availability percentage.
-
Query for your server using GET (see Using a GET request).
-
In the output look for url to grab from the response Body.
-
Set method to POST.
-
Build your JSON payload. The API explorer contains more description for each key but our example JSON payload is below:
5. Send - Expected response 201 CREATED
6. Either use another GET or look in the Control Panel to see the updates.
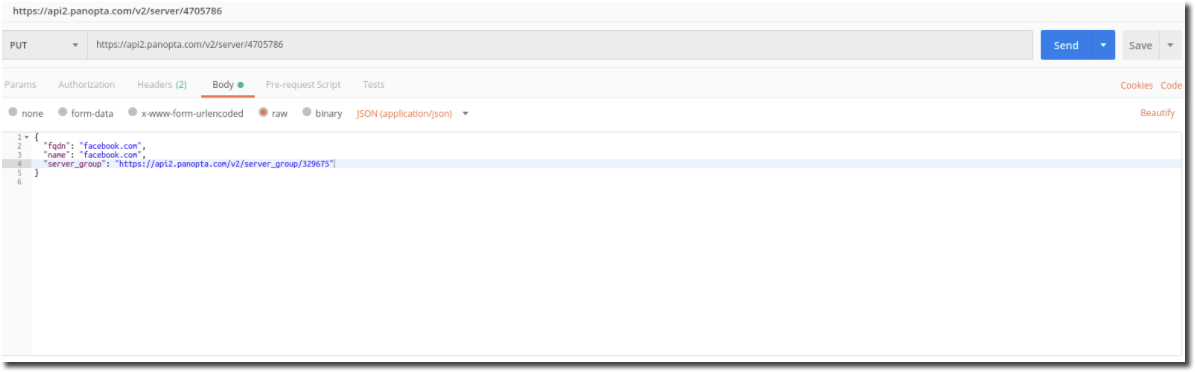
Using a PUT request
-
Get your server's server_groupURL (see Using a GET request).
-
Create a new JSON payload with your updated name field:
3. Send - Expected response 204 NO CONTENT.
4. Either use another GET or look in the Control Panel to see the updates.
Using a DELETE request
-
Use GET method to search for your instance (see Using a GET request).
-
Modify the URL to be https://api2.panopta.com/v2/server/$YOUR_SERVER_ID.
-
Here we’re deleting the server https://api2.panopta.com/v2/server/4705786.
-
-
Set method to DELETE.
-
Send - Expected response 204 NO CONTENT.
-
Either use another GET or look in the Control Panel to see the updates.
