


Set Up SSO with Azure AD
Before getting started, see SSO Configuration to learn more about our general SSO settings.
Note: See Quickstart: Enable single sign-on for an enterprise application - Azure AD for the prerequisites.
To set up SSO with Azure AD, perform the following procedures:
Create an SSO integration in FortiMonitor
-
Log in to fortimonitor.forticloud.com.
-
Create an SSO integration by clicking Settings > Integrations > Microsoft Active Directory.
-
Enter a URL Fragment. The URL Fragment is any custom word (text only) that will be attached to the FortiMonitor login URL. For example, if you set testing your FortiMonitor login will be fortimonitor.forticloud.com/sso/testing. Note that the URL fragment must be unique across all FortiMonitor customers. If you get an error saying the fragment is in use, please use something relevant to your organization.
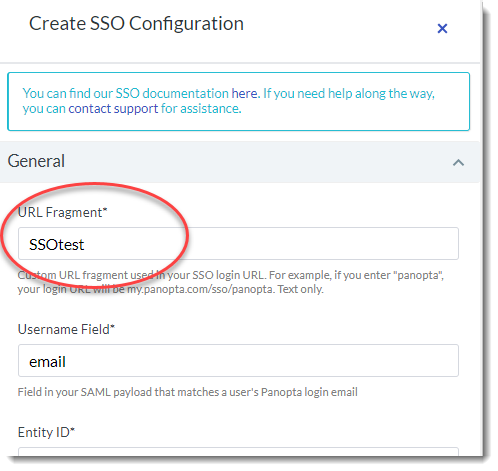
Note: New users should use fortimonitor.forticloud.com for the SSO URL. For long time customers of Panopta, continue using my.panopta.com. -
Open a new tab then go to Azure Active Directory Admin Center using one of the roles mentioned in the Prerequisites (Global Administrator, Cloud Application Administrator, Application Administrator, or owner of the service principal).
Note: Do not close the FortiMonitor tab.
Enable and configure Azure Active Directory SSO in Azure
-
Form the Azure Active Directory Admin Center, click Azure Active Directory.

-
From this page, create an Application for the SSO by clicking Add > Enterprise Application.
-
Click Create your own application.
-
Enter a name for the application then select Integrate any other application you don't find in the gallery (Non-gallery).

-
Click Create. The dashboard for the newly created application will be displayed.

-
Click Set up single sign on > SAML. The Set up Single Sign-On with SAML configuration
page is displayed.
-
Edit the Basic SAML Configuration then fill in the required information:
-
Identifier (Entity ID): https://fortimonitor.forticloud.com/sso/<URL_Fragment>/metadata or https://my.panopta.com/sso/<URL_Fragment>/metadata
-
Reply URL: https://fortimonitor.forticloud.com/sso/<URL_Fragment>/acs or https://my.panopta.com/sso/<URL_Fragment>/acs
Note: New users should use fortimonitor.forticloud.com for the SSO URL. For long time customers of Panopta, continue using my.panopta.com.
-
-
Save the configuration. Once the SAML is configured, the succeeding steps in Azure will be unlocked, which will allow you to proceed to the following procedure.
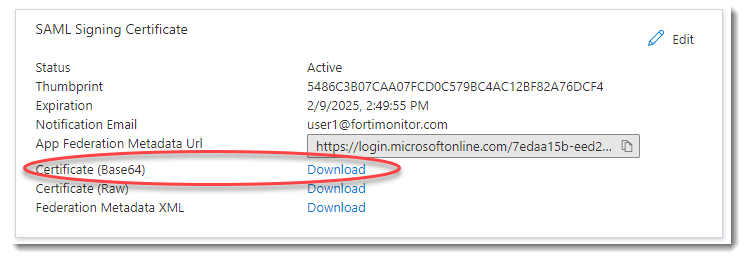
Create a SAML signing certificate and download the Azure metadata
-
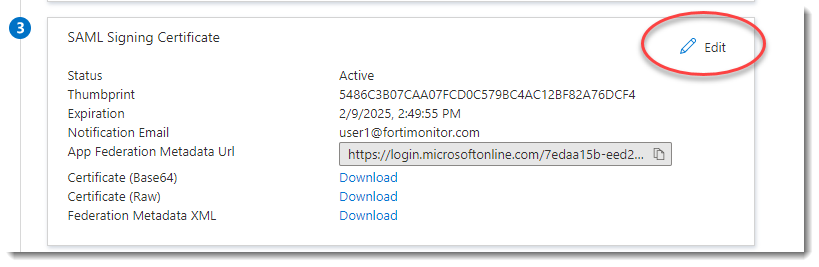
To create a new SAML signing certificate, click Edit in the SAML signing certificate section.
-
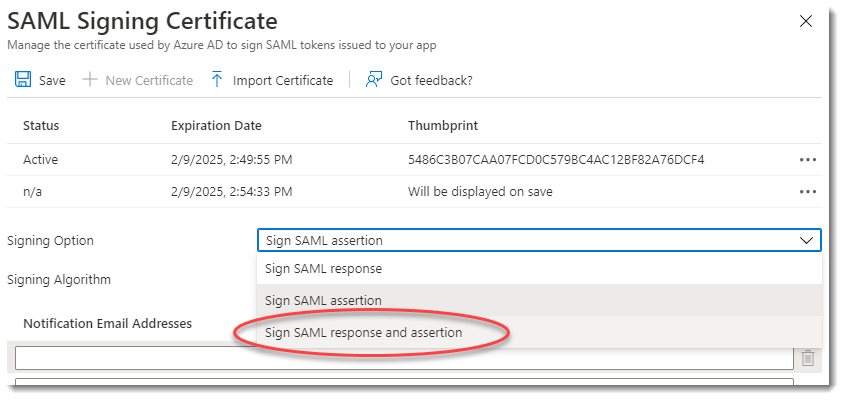
Click New Certificate.
-
For the Signing Option, select Sign SAML response and assertion.
-
Once the new certificate is created, set this to Active.
-
Click Save to close the configuration drawer.
-
From the SAML Signing Certificate section, click Download to download the Federation Metadata XML.

Continue the SSO configuration in FortiMonitor
-
Go back to the FortiMonitor tab and fill in the required information. The fields are described in Single sign-on (SSO).

-
The following values can also be acquired from Azure.
-
Username Field is the field that Azure uses for your email address. The correct value must exist in Azure.

-
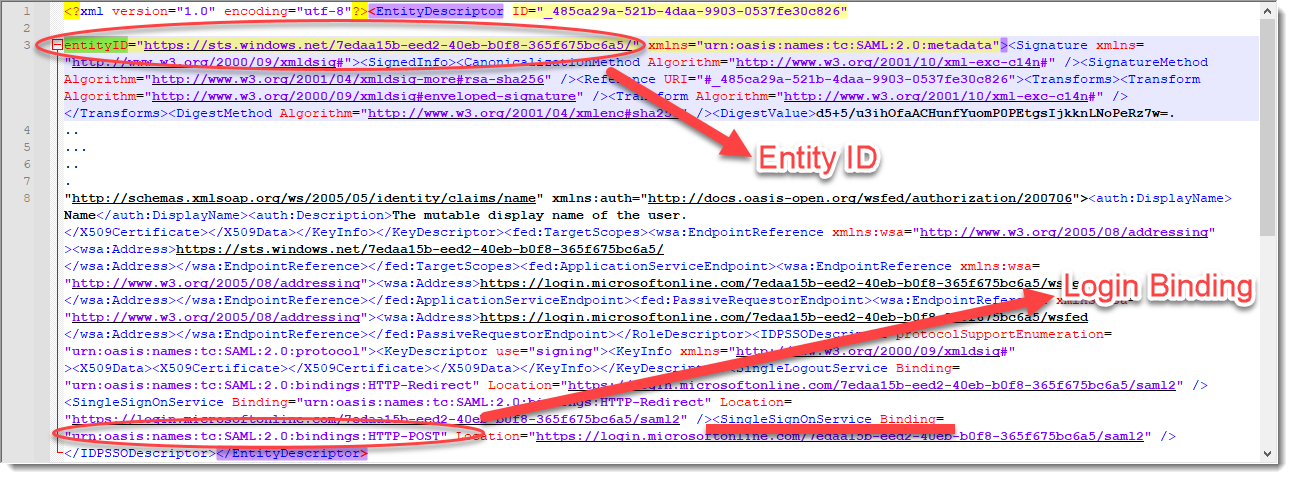
The Entity ID and the Login Binding can be found in the Federation Metadata XML file that you downloaded from Azure.
-
Copy the Login URL from Azure.

-
Download the certificate from Azure and copy the content to the Certificate field in FortiMonitor.
-
-
In the User Configuration section of the configuration drawer, enable Auto Create Users.
You may want to assign the roles manually so that the new user will get that role when they are added to FortiMonitor. -
Save the changes by clicking on Save.
Upload the metadata.xml file from FortiMonitor to Azure
-
Download the metadata.xml file from FortiMonitor by going to a browser and entering:
https://fortimonitor.forticloud.com/sso/{URL_Fragment}/metadata or https://my.panopta.com/sso/{URL_Fragment}/metadata -
Right-click and select Save As to save the xml file.
-
Go back to Azure and upload the metadata file. From the Application created previously, upload the metadata.xml file.

-
You can test the integration from the Azure SSO configuration page by clicking Test at the bottom of the page.

Note: If you are using Microsoft Edge Web Browser, switch to an InPrivate Edge window or a different browser to test the SSO integration.