


Performance SLA
Create a Performance SLA in FortiManager that can be used to monitor the SD-WAN performance in FortiGate devices.
If all links meet the SLA criteria, the FortiGate uses the first link, even if that link isn’t the best quality. If at any time, the link in use doesn’t meet the SLA criteria, and the next link in the configuration meets the SLA criteria, the FortiGate changes to that link. If the next link doesn’t meet the SLA criteria, the FortiGate uses the next link in the configuration if it meets the SLA criteria, and so on.
To create a new performance SLA:
- If using ADOMs, ensure that you are in the correct ADOM.
-
Go to Device Manager > Provisioning Templates > SD-WAN Templates.
- Double-click an SD-WAN template to open it for editing, or click Create New in the toolbar.
The SD-WAN template opens.
- In the Performance SLA toolbar, click Create New. The Create Performance SLA dialog-box opens
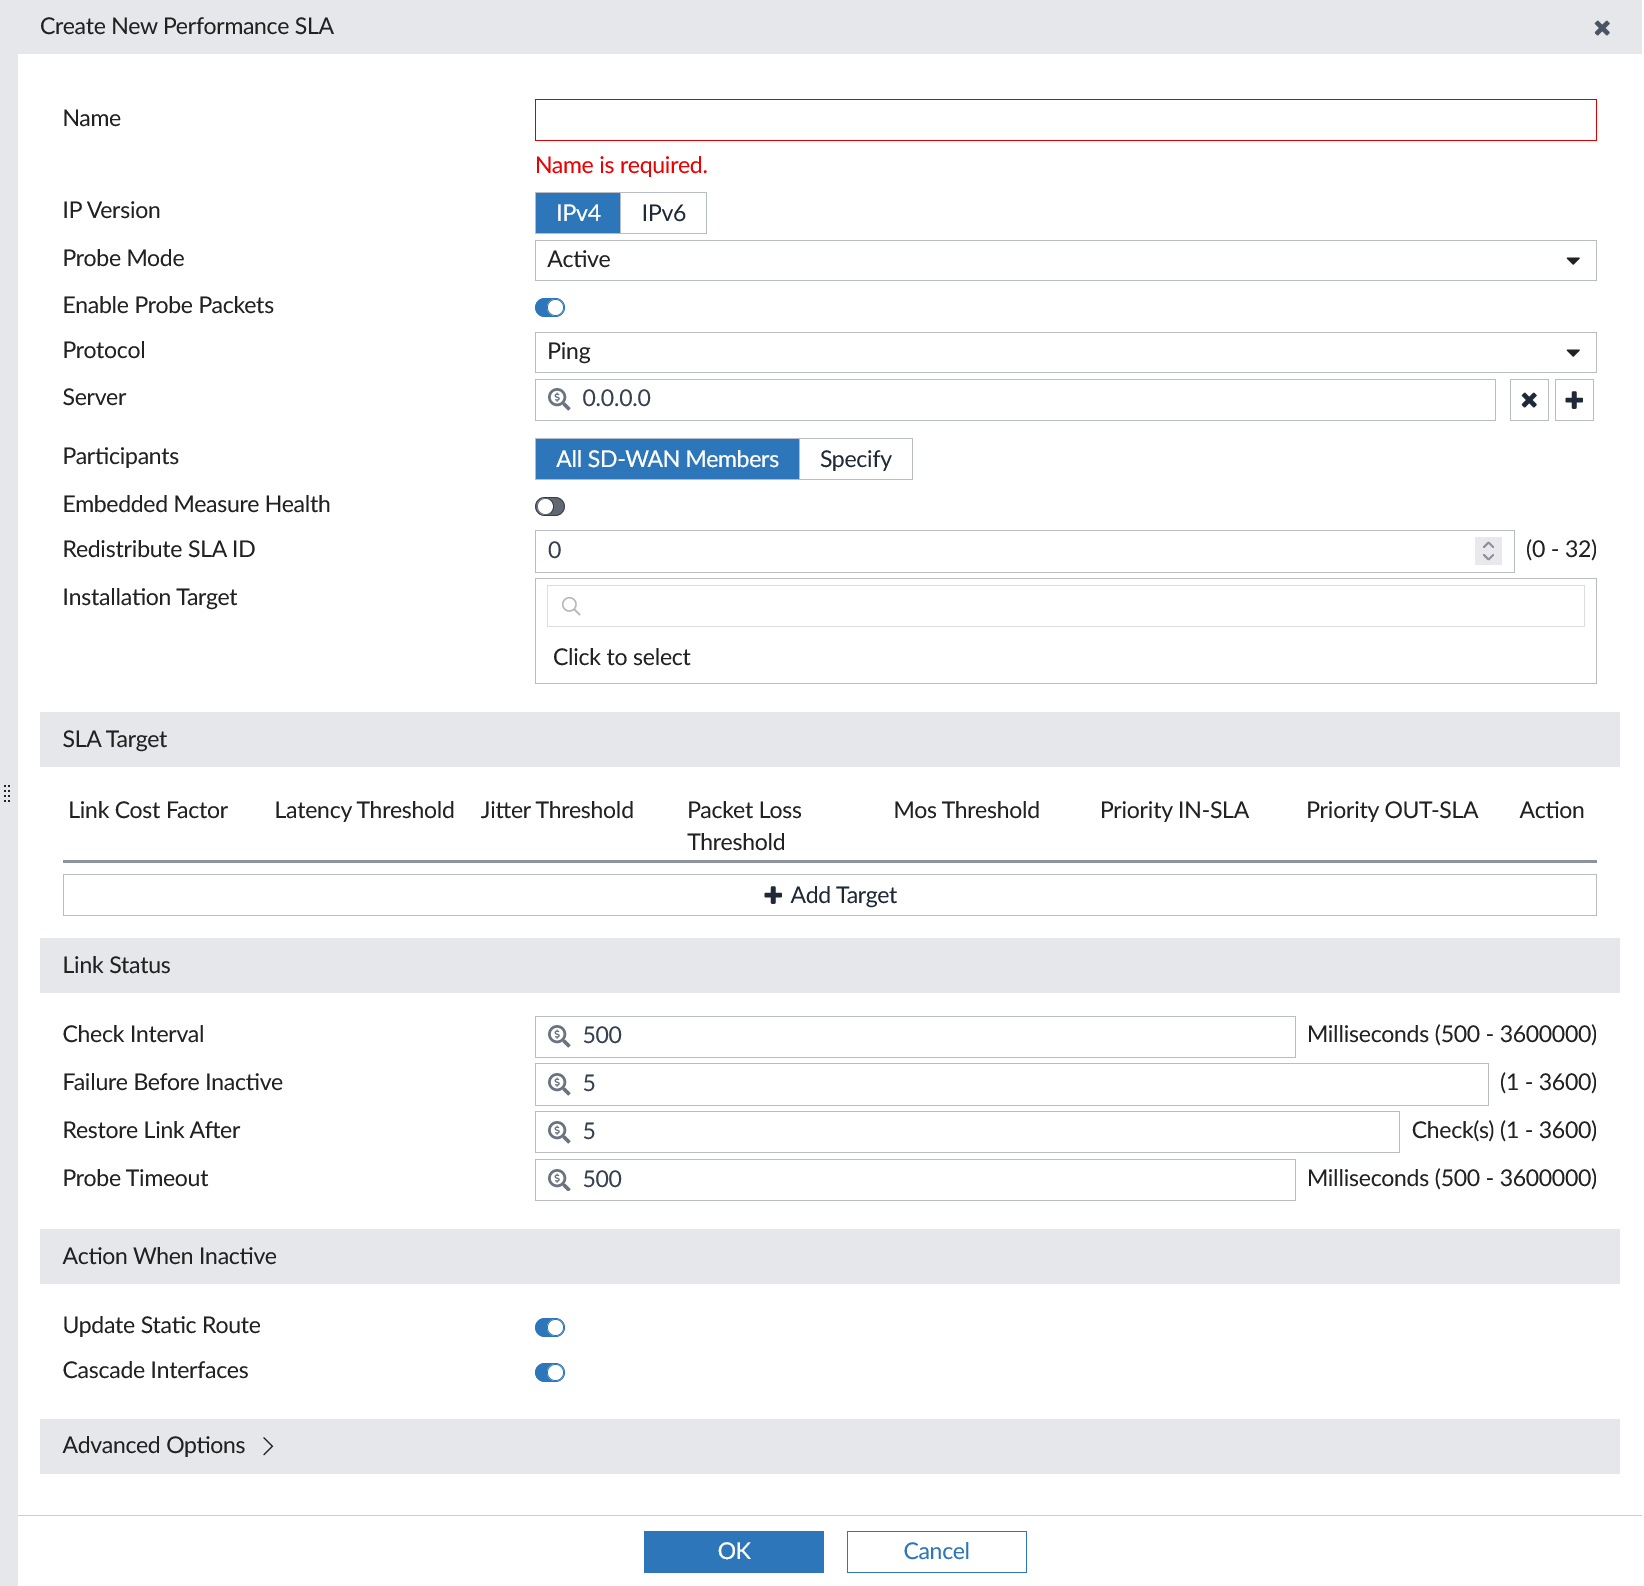
- Enter the following information, and click OK to create the performance SLA:
Name
Enter the name of the performance SLA.
IP Version
Select IPv4 or IPv6.
Probe Mode
Set the mode that determines how to detect the server:
- Active: the probes are sent actively (default).
- Passive: the traffic measures health without probes.
- Prefer-passive: the probes are sent in case of no new traffic.
- Remote: the link health is obtained from remote peers.
Enable Probe Packets
Set Enable probe packets to enable or disable sending probe packets.
Protocol Select the detection method for the profile check: - Ping
- TCP ECHO
- UDP ECHO
- HTTP
- TWAMP
- DNS
- TCP Connect
- FTP
Server Click Add (+), and type the IP address of the health-check server. Participants Select available interface members or select All SD-WAN Members. The interfaces must already be added to the template. Embedded Measure Health
Enable/disable embedding SLA information in ICMP probes (default = disable).
Redistribute SLA ID
Set the SLA entry (ID) that will be applied to the IKE routes (0 - 31, default = 0).
Installation Target
Click the box to specify installation targets for the performance SLA.
SLA Targets Click Add Target to add a new SLA. Enable and enter the Latency Threshold (in milliseconds), Jitter Threshold (in milliseconds), Packet Loss Threshold (in percent), Priority IN-SLA, and Priority OUT-SLA, then click OK to create the SLA.
SLAs can also be edited and deleted as required.
Link Status
Interval
Status check interval, or the time between attempting to connect to the server, in seconds (1 - 3600, default = 1).
Failure Before Inactive
Specify the number of failures before the link becomes inactive (1 - 10, default = 5).
Restore Link After
Specify the number of successful responses received before server is considered recovered (1 - 10, default = 5).
Action When Inactive
Specify what happens with the WAN link becomes inactive. Update Static Route
Select to update the static route when the WAN link becomes inactive. Cascade Interfaces
Select to cascade interfaces when the WAN link becomes inactive. Advanced Options
Expand to display the advanced options.
Hover the mouse over each advanced option to view a description of the option.
Set the options as desired.