Adding a disk to the FortiManager-VM for logging (optional)
In the future or depending on your license requirements, you may need to add more disks to your FortiManager-VM instances.
|
|
For details about Azure disks, refer to Azure Managed Disks Overview. |
- Click Add data disk > Create disk.
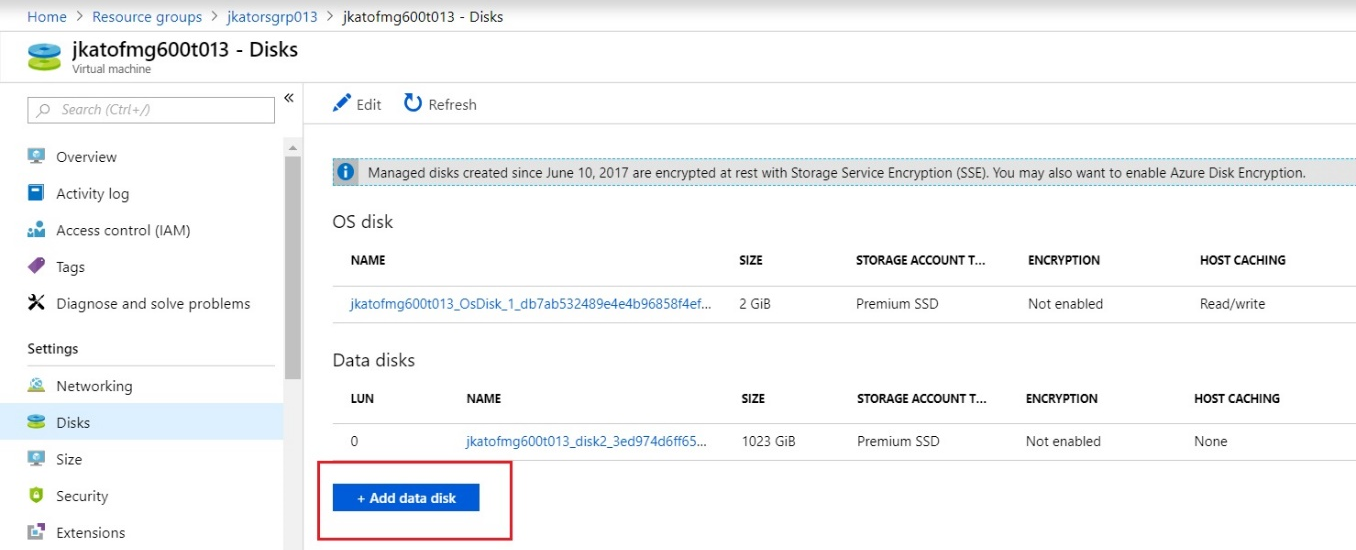

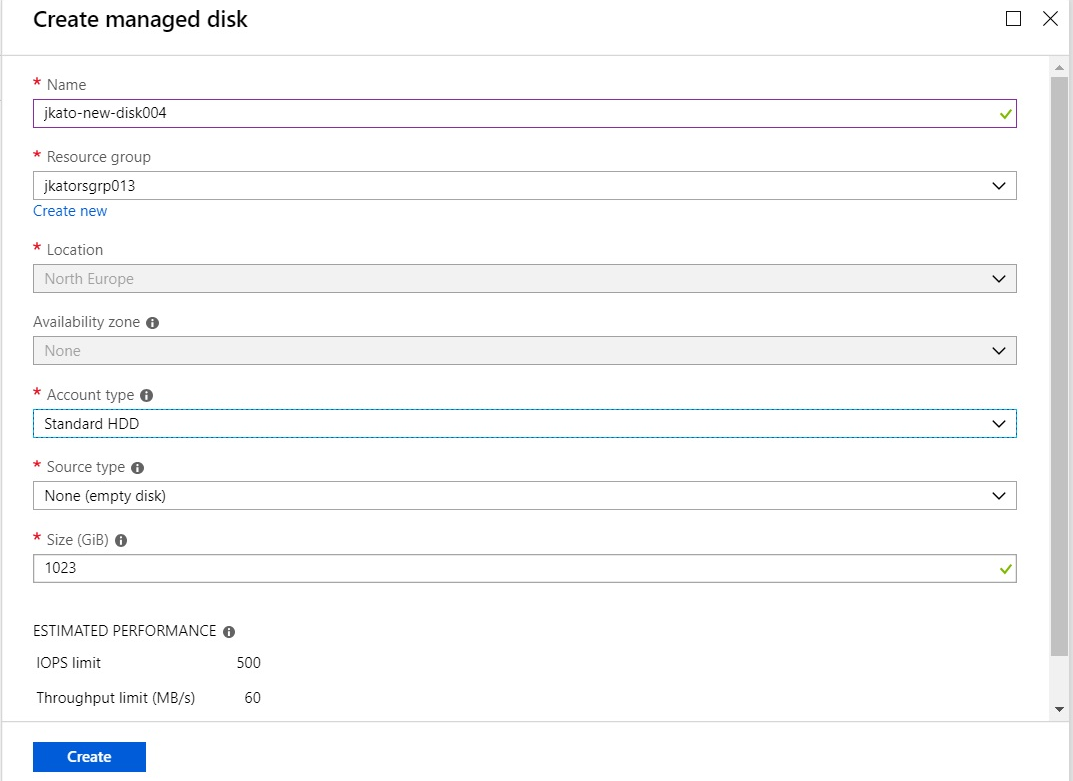
- Create and configure an additional empty disk as shown below.
Click Create.
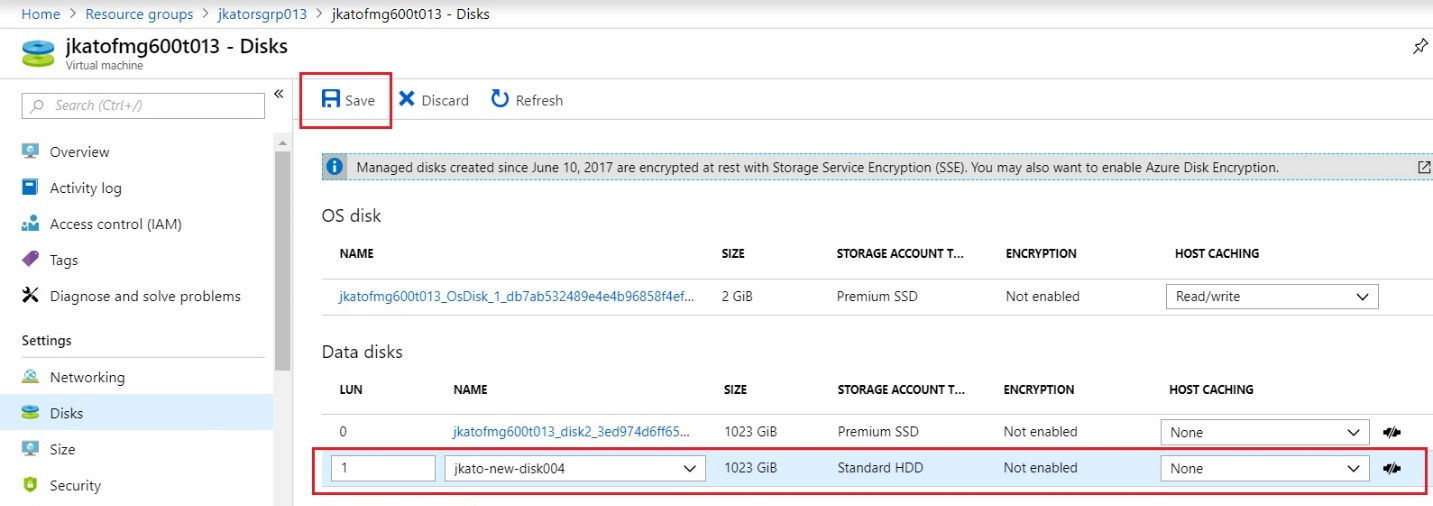
- Save the disk.
- Log into the FortiManager-VM management GUI console.
- Go to System Settings. Invoke the CLI console.

- In the command prompt window, enter
exec lvm info. The newly added disk appears asUnused.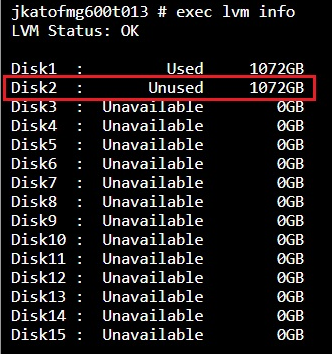
- Enter
exec lvm extendto incorporate the disk to the FortiManager system. Enteringyreboots the instance.
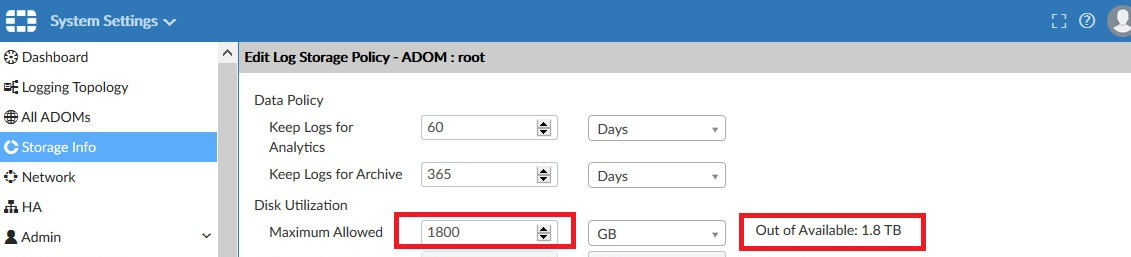
- Navigate to the FortiManager dashboard. You will see now that the available disk size has changed. You can also run
exec lvm infoagain in the CLI to see that the additional disk is now in use.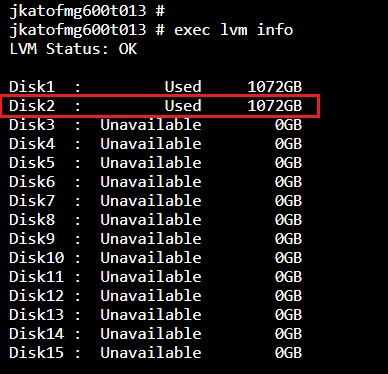
The FortiManager system reserves a certain portion of disk space for system use and unexpected quota overflow. The remaining space is available for allocation to devices. Reports are stored in the reserved space. The following describes the reserved disk quota relative to the total available disk size (other than the root device):
- Small disk (less than or equal to 500 GB): reserves 20% or 50 GB of disk space, whichever is smaller.
- Medium disk (less than or equal to 1 TB): reserves 15% or 100 GB of disk space, whichever is smaller.
- Medium to large disk (less than or equal to 5 TB): reserves 10% or 200 GB of disk space, whichever is smaller.
- Large disk (less than 5 TB): reserves 5% or 300 GB of disk space, whichever is smaller.
- Configure the consumable disk space for logging. 200 GB is reserved. Therefore, 1.8 TB is available for consumption out of the 2 TB of disks.