


Asset Identity Center page
The Asset Identity Center page unifies information from detected addresses, devices, and users into a single page, while building a data structure to store the user and device information in the backend. Asset view groups information by Device, while Identity view groups information by User. Hover over a device or a user in the GUI to perform different actions relevant to the object, such as adding a firewall device address, adding an IP address, banning the IP, quarantining the host, and more.
To view the Asset Identity Center page:
- Go to Security Fabric > Asset Identity Center.
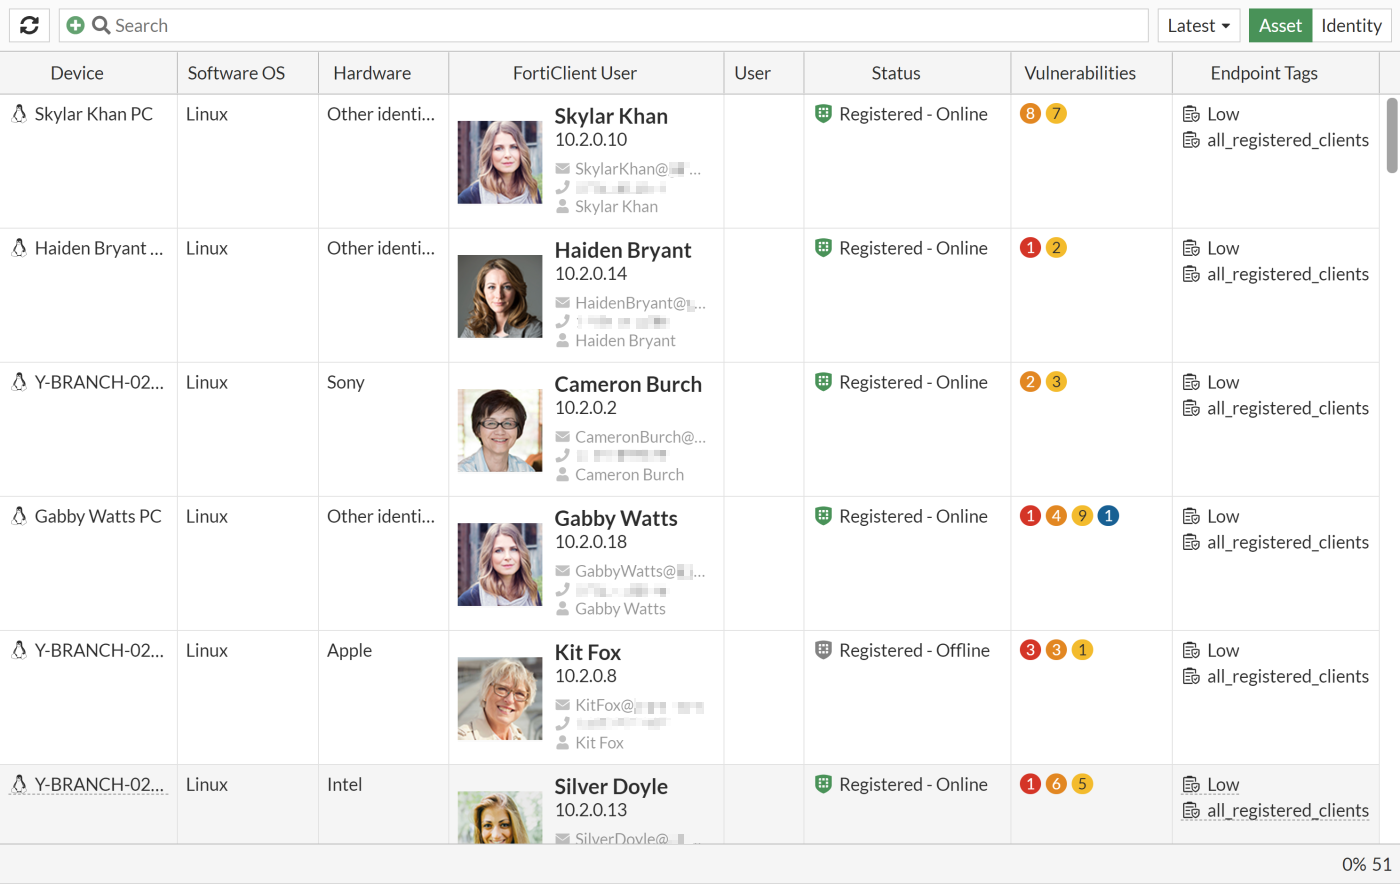
- Click Asset to view information by device. The default columns are Device, Software OS, Hardware, FortiClient User, User, Status, Vulnerabilities, Endpoint Tags, and Last Seen. The optional columns are Address, Firewall Address, Hostname, IP Address, and Server.
- Click Identity to view information by user. The default columns are User, Device, and Properties. The optional columns are IP Address, Logoff Time, and Logon Time.

Each view has a dropdown option to view the information within different time frames (Latest, 1 hour, 24 hours, and 7 days). Vulnerability information is displayed when applicable. The page displays user and device relationships, such as which users are logged in to multiple devices or if multiple users are logged in to single devices.


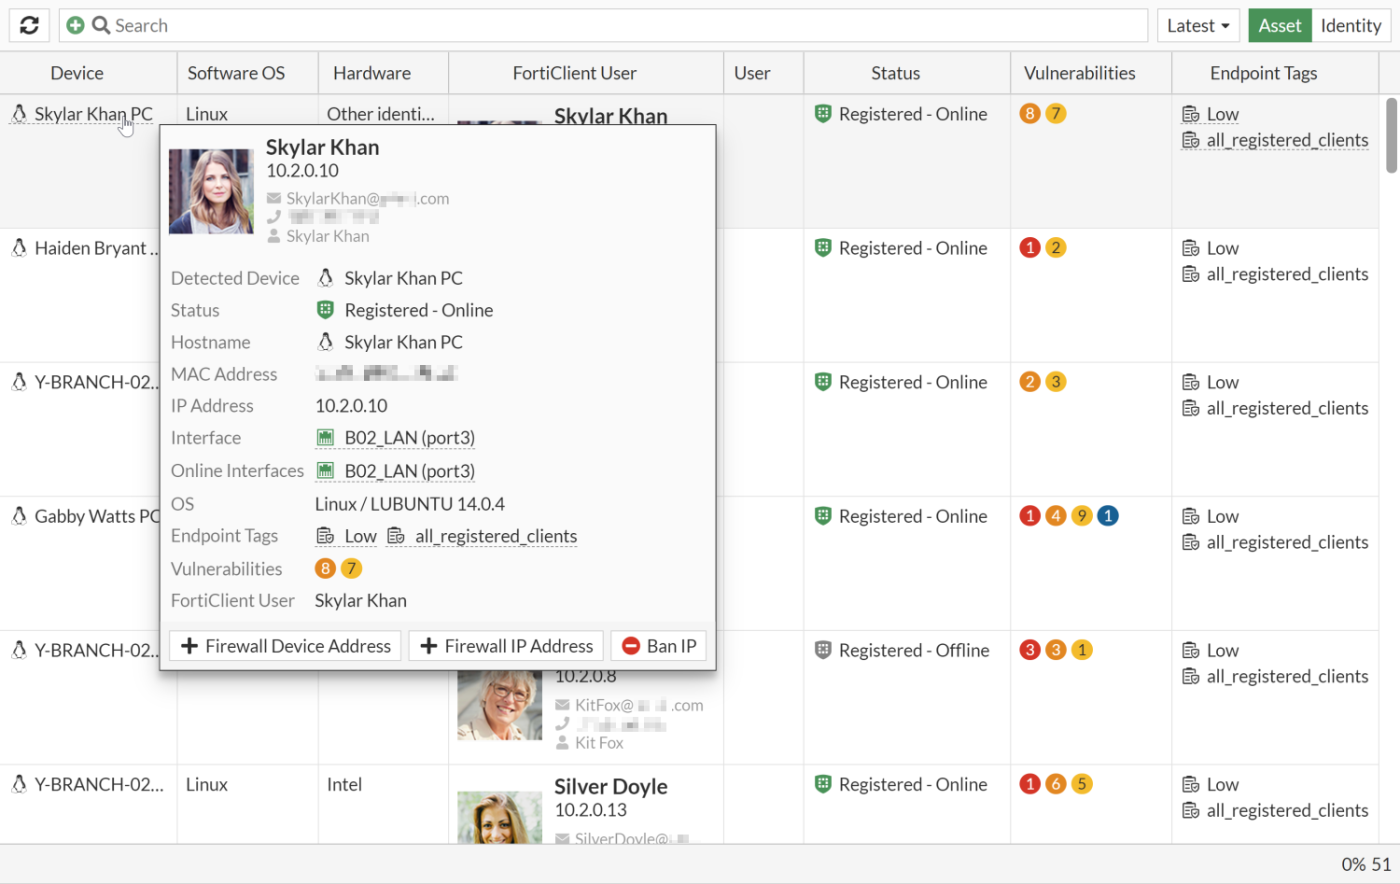
- Hover over a device in the list to view the tooltip and possible actions. In this example, the available actions are add firewall device address, add firewall IP address, and ban the IP.
Diagnostics for the unified user device store
The following options are available for diagnose user-device-store unified <option>:
|
Option |
Description |
|---|---|
|
device-memory-query |
Get device records and associated user records from memory. |
|
device-query |
Get device records and associated user records from memory and disk. |
|
user-memory-query |
Get user records and associated device records from memory. |
|
user-query |
Get user records and associated device records from memory and disk. |
|
re-query |
Retrieve query by |
|
list |
List unified queries. |
|
clear |
Delete all unified queries. |
|
dump |
Dump unified query stats by |
|
delete |
Delete unified query by |
|
stats |
Get statistics for unified queries. |
|
debug |
Enable/disable debug logs for unified queries. |
IoT devices
IoT device information (such as the device name, software OS, hardware vendor, status, IP address, hostname, time last seen, port, and VLAN) can be viewed on the Asset Identity Center page.
The following settings are required to display IoT devices:
-
The FortiGate must have a valid IoT Detection Service license.
-
Device detection must be configured on a LAN interface used by IoT devices.
To configure device detection in the GUI:
- Go to Network > Interfaces and edit a LAN interface.
- Enable Device detection.
- Click OK.
To configure device detection in the CLI:
config system interface edit <name> set device-identification enable next end -
Configure a firewall policy with an application control sensor.
OT asset visibility and network topology
When the Operational Technology (OT) feature is enabled, tabs are added in the Asset Identity Center page to view the OT asset list and OT network topology using Purdue Levels. This feature is available regardless of whether a Security Fabric is enabled.
To enable the OT features in the GUI:
- Go to System > Feature Visibility.
- In the Additional Features section, enable Operational Technology (OT).
- Click Apply.
To enable the OT features in the CLI:
config system settings
    set gui-ot enable
end
Once enabled, the Security Fabric > Asset Identity Center page displays an Asset Identity List tab and an OT View tab.
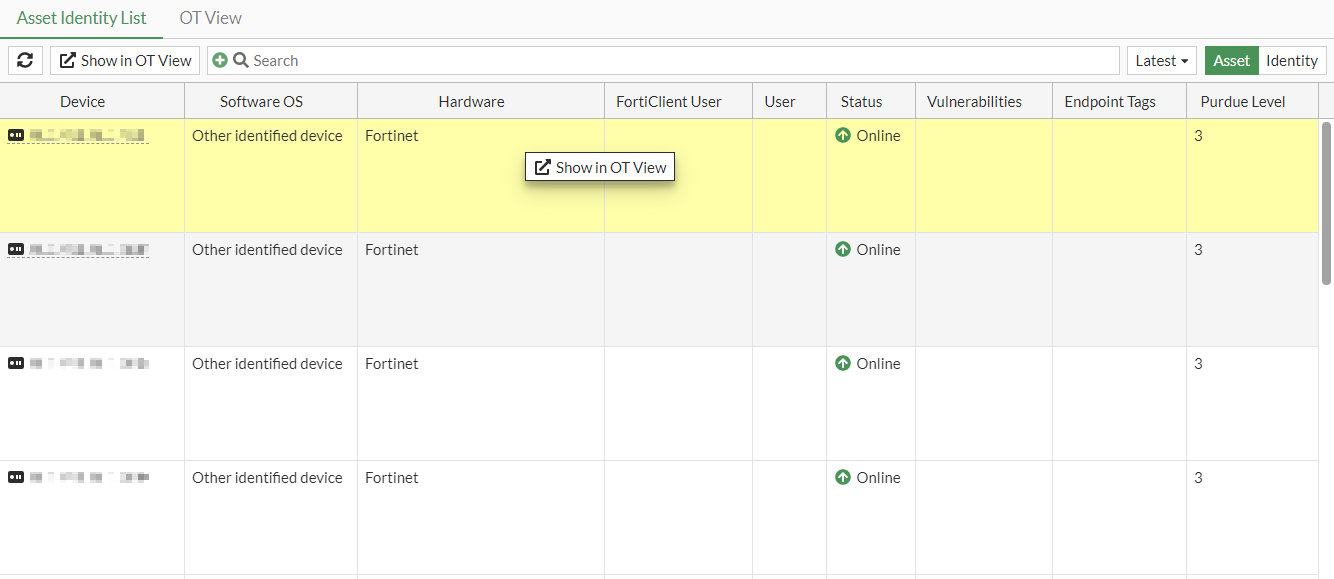
- The Asset Identity List tab includes a configurable Purdue Level column and a Show in OT View option for selected devices in the table.
- The OT View tab shows a topology of detected components and connections mapped to Purdue Levels. The default view is locked, but devices can be dragged and dropped to other Purdue Levels if the view is unlocked.
FortiGates and managed FortiSwitches are statically assigned Purdue Level 2 and cannot be changed. Other detected devices are assigned Purdue Level 3 by default and can be changed (except to level S, 0, or external).
The following diagram lists the Purdue Levels based on OT network topologies:

To change the Purdue Level in the Asset Identity List tab:
- Go to Security Fabric > Asset Identity Center and select the Asset Identity List tab.
- Add the Purdue Level column to the table:
- Hover over the table header and click the gear icon (Configure Table).
- Select Purdue Level.
- Click Apply.
- Select a device and hover over the Purdue Level value.
- Click the pencil icon to edit the level.
- Select a value from the dropdown.
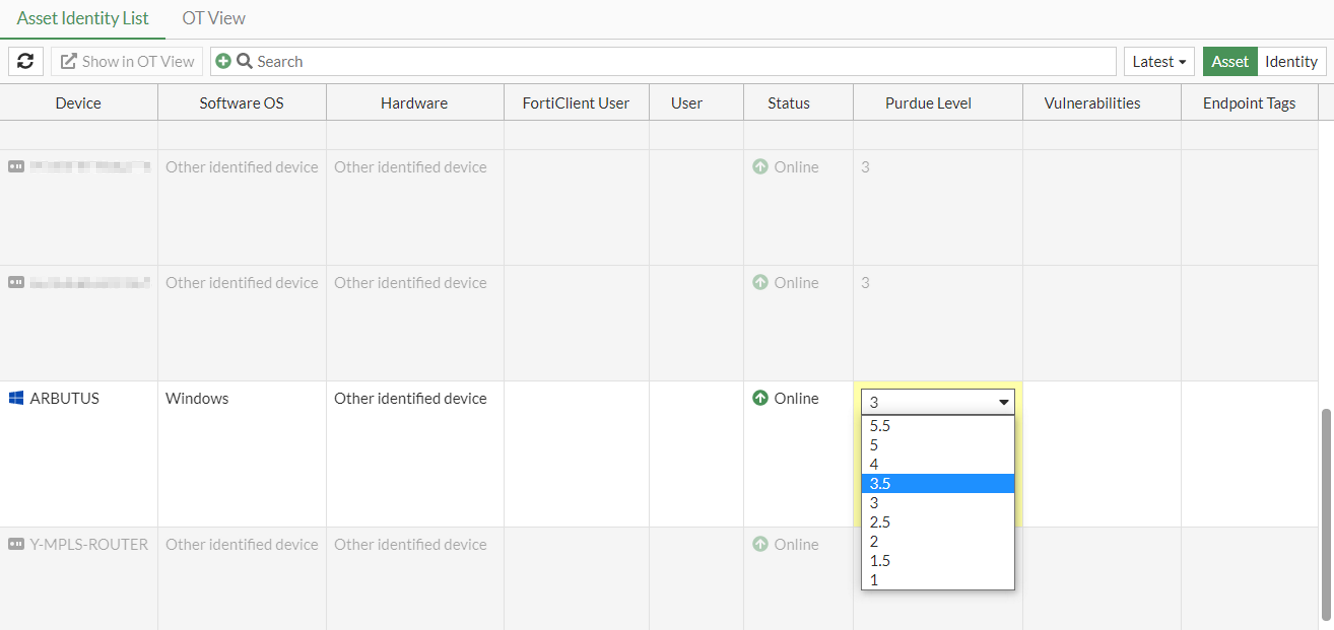
- Click Apply.
To change the Purdue Level in the OT View tab:
- Go to Security Fabric > Asset Identity Center and select the OT View tab.
- Click Unlock View.
- Select a device.
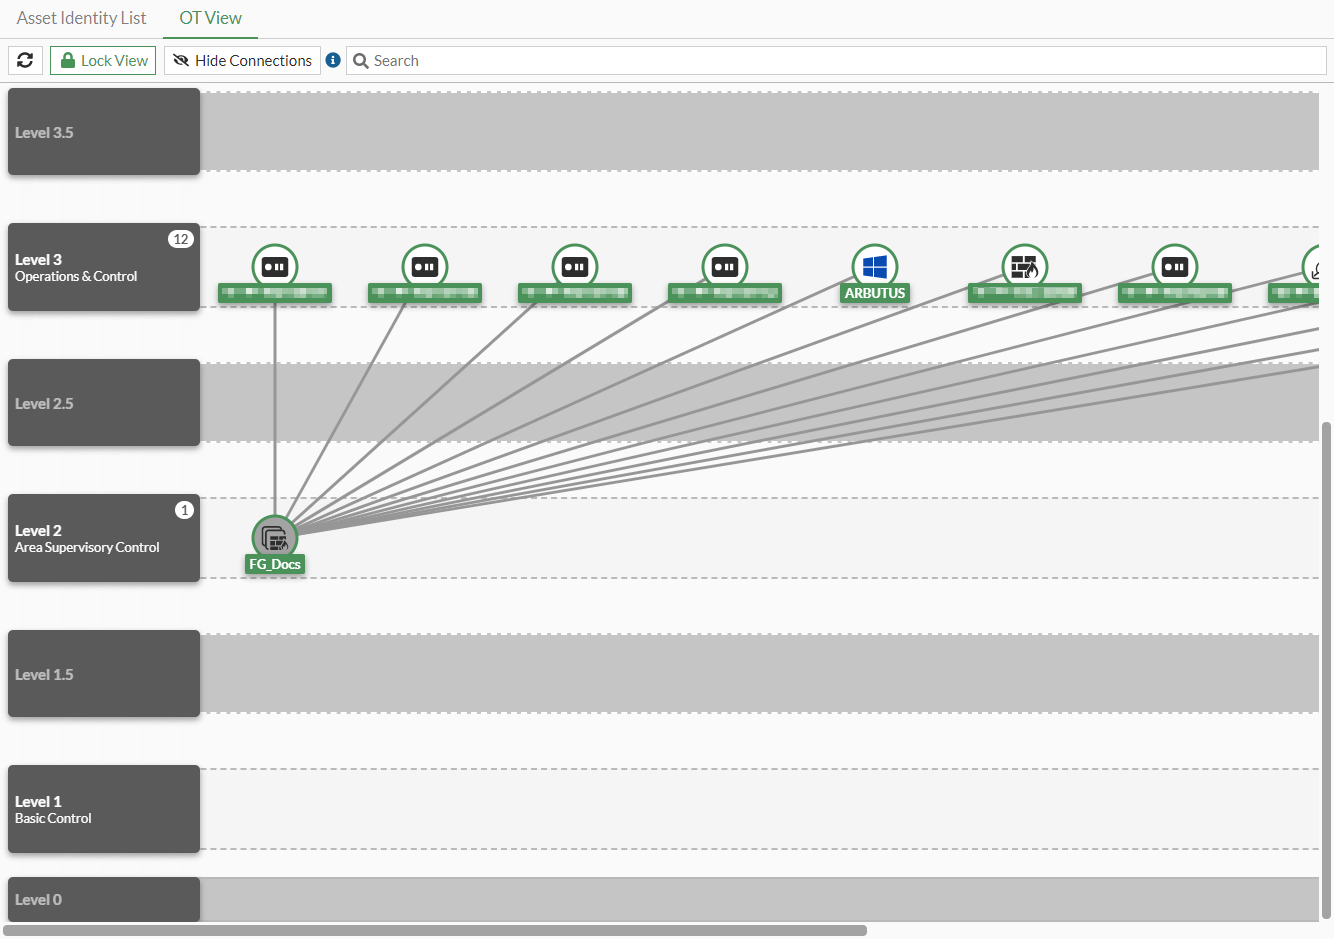
- Drag the device icon to another level row.
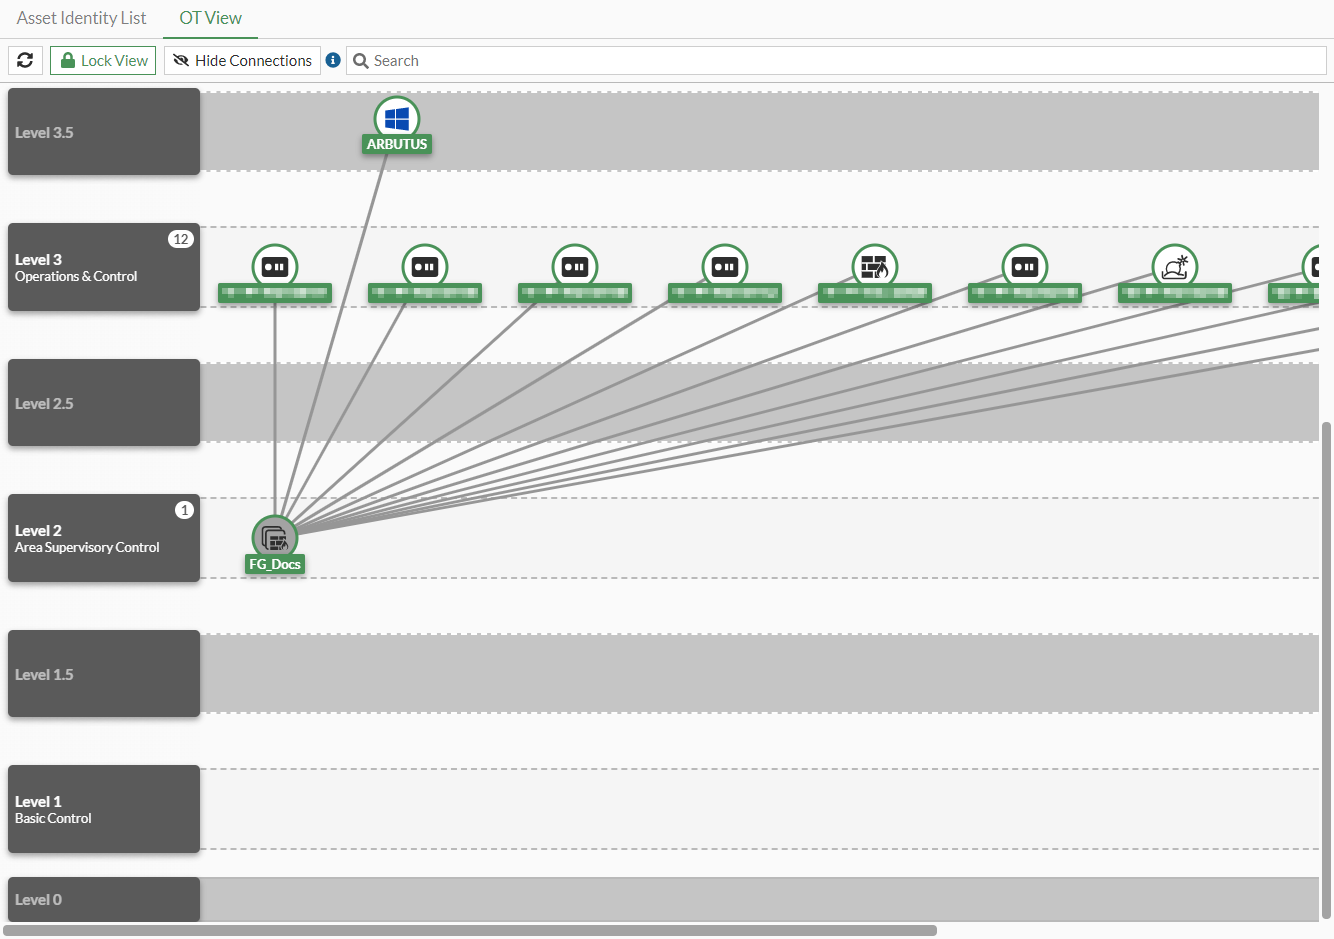
- Optionally, click Lock View to revert to the locked view.
To change the Purdue Level in the CLI:
# diagnose user-device-store device memory ot-purdue-set <mac> <ip> <level>
|
mac |
Enter the MAC address of the device. |
|
ip |
Enter the IPv4 address of the device. |
|
level |
Enter the Purdue Level: 1, 1.5, 2, 2.5, 3, 3.5, 4, 5, 5.5. |