


Automation workflow improvements
This redesign simplifies the workflow for managing multiple chained actions, and makes it clearer which order the actions will be processed in. The enhancements include:
- Add new flow for creating and managing automation stitches, triggers, and actions.
- Add tabs for Stitch, Trigger, and Action on the Automation page.
- Improve FortiOS Event Log trigger by allowing multiple log IDs and adding a log field filter.
- Add Any report type for the Security Rating Summary trigger.
- Simplify the URI configuration for cloud actions.
- Add JSON parameter support for Slack and Microsoft Teams notifications.
- Rename
ios-notificationaction type tofortiexplorer-notification.
GUI changes to Automation page
Automation stitches, actions, and triggers have separate dialogs and are no longer part of the main stitch dialog. When creating a stitch, clicking Add Trigger and Add Action displays a list of available triggers and actions, and the option to create a new one.
![]()
Once the stitch is configured, a process diagram of the trigger, actions, and delays is displayed.

Tabs on the Automation page
On the Security Fabric > Automation page, there are tabs for Stitch, Trigger, and Action. The Stitch tab is the default view that lists the trigger and actions used in each stitch. Individual triggers and actions can be created or edited in the corresponding tabs.

Click Trigger to view the list of triggers.
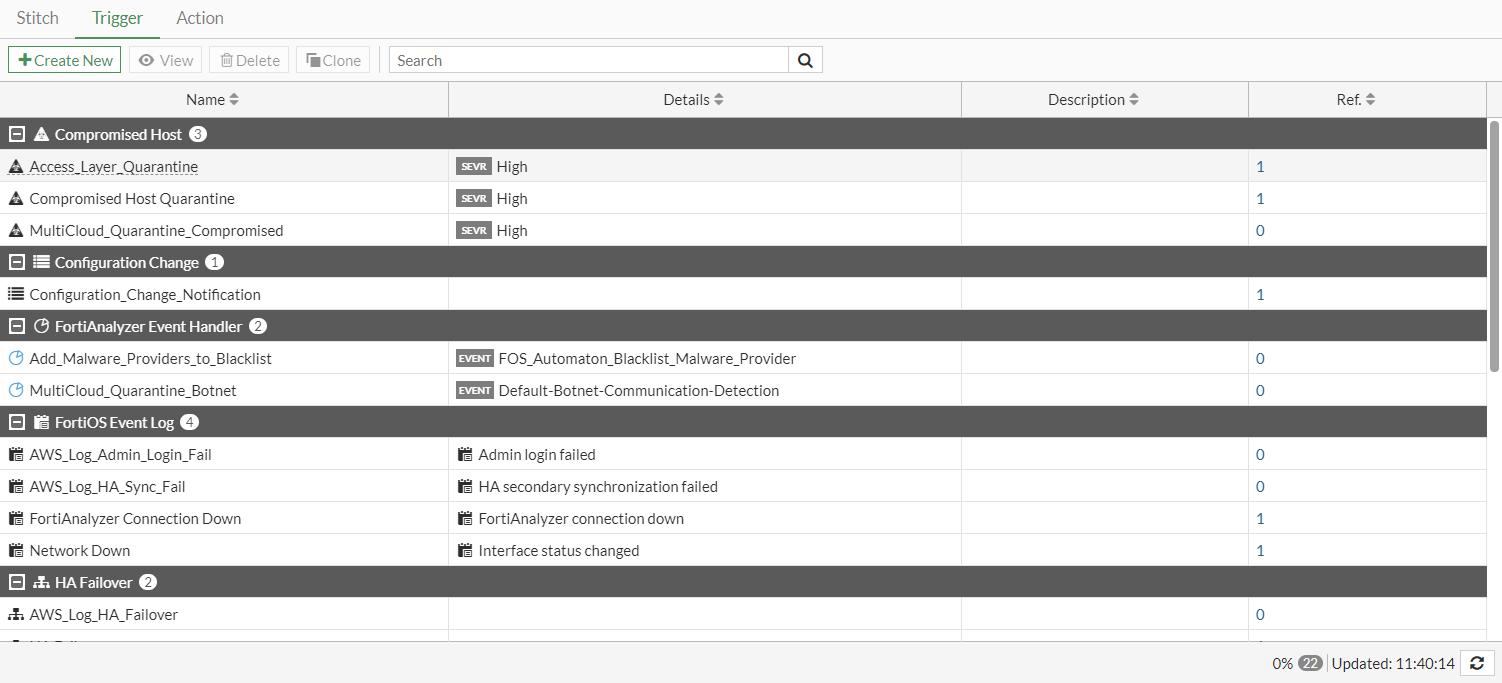
Click Action to view the list of actions.

The following example shows how to configure a Security Rating Summary automation stitch with AWS Lambda and Email actions.
To configure the automation stitch in the GUI:
- Go to Security Fabric > Automation and click Create New.
- Enter the stitch name and description.
- Configure the trigger:
- Click Add Trigger.
- Click Create and select Security Rating Summary.
- Enter the following:
Name
aws_no_delay
Report
Security Posture
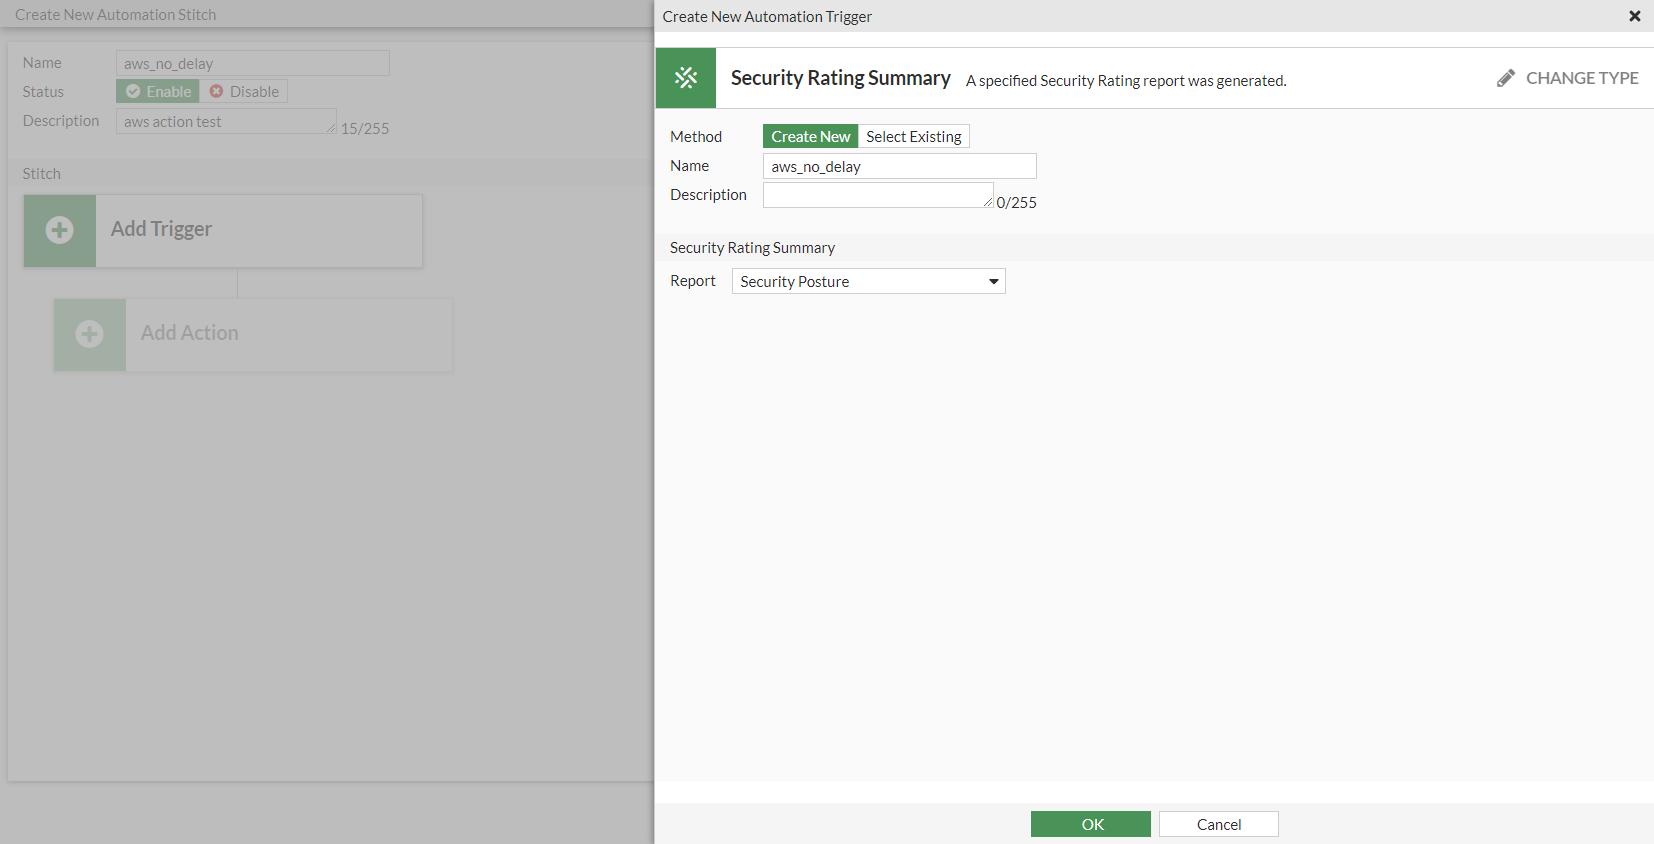
- Click OK.
- Select the trigger in the list and click Apply.
- Configure the AWS Lambda function action:
- Click Add Action.
- Click Create and select AWS Lambda.
- Enter the following:
Name
aws_no_delay
URL
Enter the request API URI
API key
Enter AWS API gateway API key
HTTP header
header2 : header2_value

- Click OK.
- Select the action in the list and click Apply.
- Configure the Email notification action:
- Click Add Action.
- Click Create and select Email.
- Enter the following:
Name
email_action
Delay
60
To
Enter an email address
Subject
email action for test
Replacement message
Enable

- Click OK.
- Select the action in the list and click Apply.
- Click OK.
To configure the automation stitch in the CLI:
- Configure the trigger:
config system automation-trigger edit "aws_no_delay" set event-type security-rating-summary next end - Configure the actions:
config system automation-action edit "aws_no_delay" set action-type aws-lambda set aws-api-key xxxxxxxxxxxx set uri "xxxxxxxxxx.execute-api.us-east-1.amazonaws.com/xxxxxxxxxx" set headers "header2:header2_value" next edit "email_action" set description "email action for test" set action-type email set email-to "test@fortinet.com" set email-subject "email action for test" set delay 60 set replacement-message enable next end - Configure the stitch:
config system automation-stitch
    edit "aws_no_delay"
        set description "aws action test"
        set trigger "aws_no_delay"
        set action "aws_no_delay" "email_action"
    next
end
Updates to actions in 7.0.1
Starting in 7.0.1, when creating a new stitch in the GUI, the stitch Action execution can be set to either Sequential or Parallel. In sequential execution, actions will execute one after another with a delay (if specified). If one action fails, then the action chain stops. This is the default setting. In parallel execution, all actions will execute immediately when the stitch is triggered.
Delays are configured per stitch, and can be added before an action if Sequential action execution is used. Executing the next action can be delayed by up to 3600 seconds (one hour). Click Add delay in the process diagram to configure a delay.
In the CLI, the delay and required settings from config system automation-action have moved to config system automation-stitch where they can be configured per action.
config system automation-stitch
    edit <name>
        set trigger <name>
        config actions
            edit 1
                set action <name>
                set delay <integer>
                set required {enable | disable}
            next
            edit 2
                set action <name>
            next
        end
    next
end
FortiOS Event Log trigger
To configure a FortiOS Event Log trigger in the GUI:
- Go to Security Fabric > Automation and click Create New.
- Enter the stitch name and description.
- Configure the trigger:
- Click Add Trigger.
- Click Create and select FortiOS Event Log.
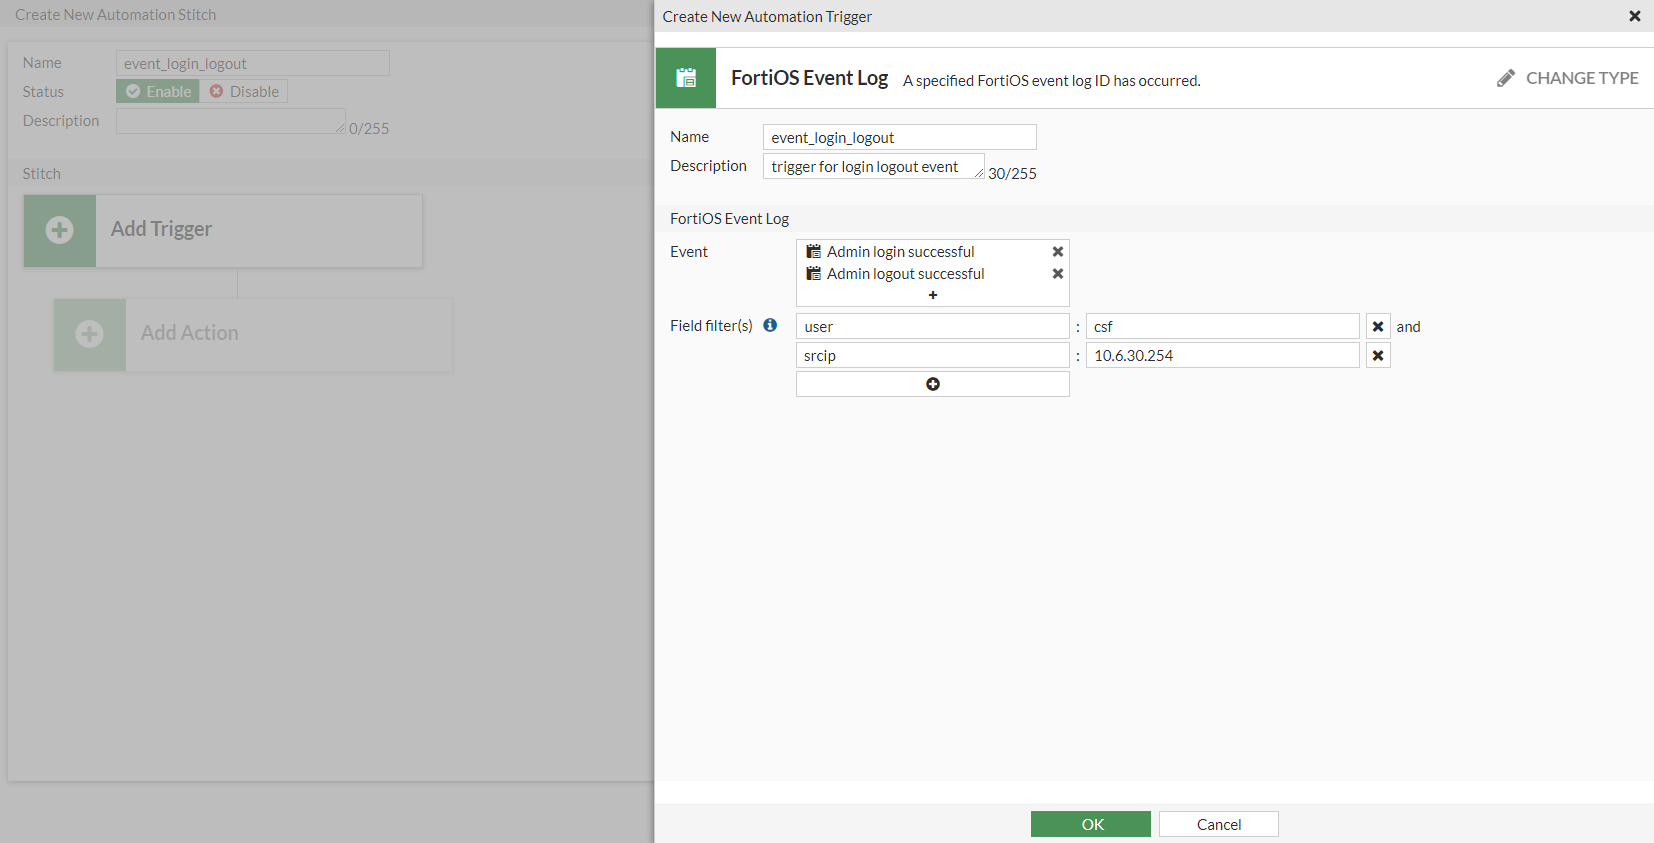
- Enter a name and description.
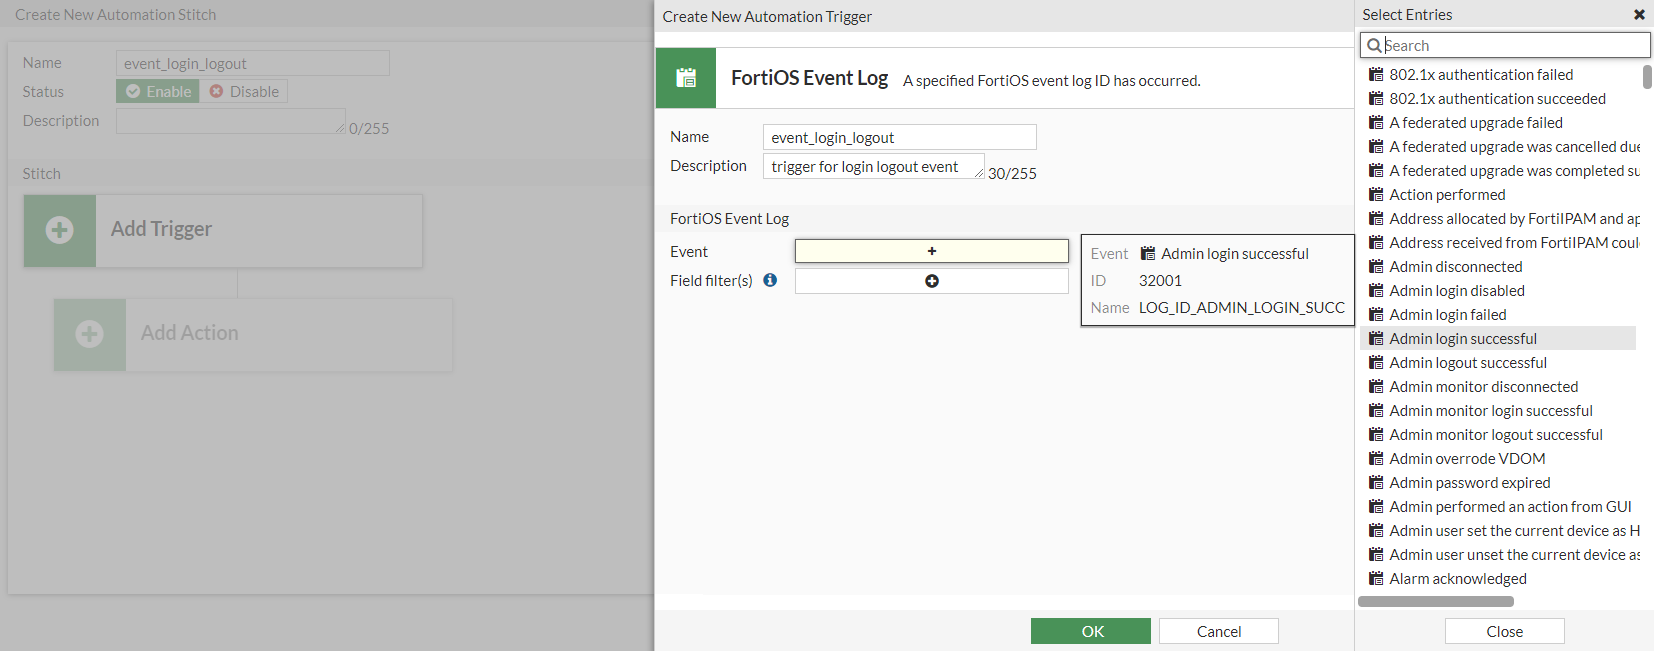
- In the Event field, click the + to select multiple event log IDs.
The Event options correspond to the Message Meaning listed in the FortiOS Log Message Reference. Hover over an entry to view the tooltip that includes the event ID and log name. In this example, the Admin login successful event in the GUI corresponds to log ID 32001, which is LOG_ID_ADMIN_LOGIN_SUCC.
- In the Field filter(s) field, click the + to add multiple field filters. The configured filters much match in order for the stitch to be triggered.

To view the list of available fields for a log, refer to the FortiOS Log Message Reference by appending the log ID to the document URL (https://docs.fortinet.com/document/fortigate/7.0.0/fortios-log-message-reference/<log_ID>).
- Click OK.
- Select the trigger in the list and click Apply.
- Configure the rest of the stitch as needed.
To configure a FortiOS Event Log trigger in the CLI:
config system automation-trigger
    edit "event_login_logout"
        set description "trigger for login logout event"
        set event-type event-log
        set logid 32001 32003
        config fields
            edit 1
                set name "user"
                set value "csf"
            next
            edit 2
                set name "srcip"
                set value "10.6.30.254"
            next
        end
    next
end
Any report type for Security Rating Summary trigger
To configure a Security Rating Summary trigger in the GUI:
- Go to Security Fabric > Automation and click Create New.
- Enter the stitch name and description.
- Configure the trigger:
- Click Add Trigger.
- Click Create and select Security Rating Summary.
- Enter a name and description.
- In the Report field, select Any.

- Click OK.
- Select the trigger in the list and click Apply.
- Configure the rest of the stitch as needed.
To configure a Security Rating Summary trigger in the CLI:
config system automation-trigger
    edit "rating_any"
        set description "rating any type"
        set event-type security-rating-summary
        set report-type any
    next
end
URI configuration for cloud actions
For AWS Lambda, Google Cloud, Azure, and AliCloud functions, the URI has been combined into a single attribute instead of having separate attributes for each URI path segment. In the GUI, use the URL field. In the CLI, use the set uri parameter.
JSON option for Slack and Microsoft Teams notifications
Users have the option to select either a text or JSON message for Slack and Microsoft Teams notifications. The following example shows how to configure a Slack notification with a JSON message.
To configure a Slack notification action with a JSON message in the GUI:
- Go to Security Fabric > Automation and click the Action tab.
- Click Create New and select Slack Notification.
- For Message, select JSON, and enter the message in the text box.
- Configure the other settings as needed.

- Click OK.
To configure a Slack notification action with a JSON message in the CLI:
config system automation-action
    edit "slack_json"
        set action-type slack-notification
        set delay 30
        set message-type json
        set uri "hooks.slack.com/services/xxxxxxxxxx/xxxxxxxxx/xxxxxxxxxxxxxxxxxxxxxxxx"
        set http-body "{\'text\':\'%%log%%\'}"
    next
end
FortiExplorer notification
To configure a FortiExplorer notification action in the GUI:
- Go to Security Fabric > Automation and click the Action tab.
- Click Create New and select FortiExplorer Notification.
- Configure the settings as needed.

- Click OK.
To configure a FortiExplorer notification action in the CLI:
config system automation-action
    edit "fortiexplore_notification1"
        set description "fortiexplore_notification action"
        set action-type fortiexplorer-notification
    next
end