Defining SSIDs
The topic describes how to create the needed SSIDs. Following is a summary of the procedures:
- Configure an SSID named Wired_Bridge that will bridge wireless clients into the VLAN named Wired_Lan. See Defining the Wired_Bridge SSID.
- Configure an SSID in tunnel mode named Wireless_Lan that will be segregated from the Wired_Lan.
This section describes how to use the GUI and CLI templates.
- For information about using the GUI, see Defining the Wireless_Lan SSID with the GUI.
- For information about using CLI templates, see Defining the Wireless_Lan SSID with CLI templates.
- Configure a guest WiFi that will be used for local breakout and will use a simple email collection captive portal. See Defining the Guest SSID.
|
|
FortiAP sends bridge SSID data as VLAN traffic, according to the VLAN ID configured in the SSID menu. In that mode, FortiAP Manager will not configure a VLAN interface on the FortiGate. On the contrary, tunnel SSID data is encapsulated using a CAPWAP tunnel to the FortiGate. As such, FortiAP Manager will generate a VLAN interface with the name and VLAN ID specified in the SSID menu on the FortiGate. |
Defining the Wired_Bridge SSID
To define the Wired_Bridge SSID:
- Go to AP Manager > WiFi Profiles > SSID, and click Create new.
The Create New SSID Profile pane is displayed.
- In the Interface Name box, type Wired_Bridge.
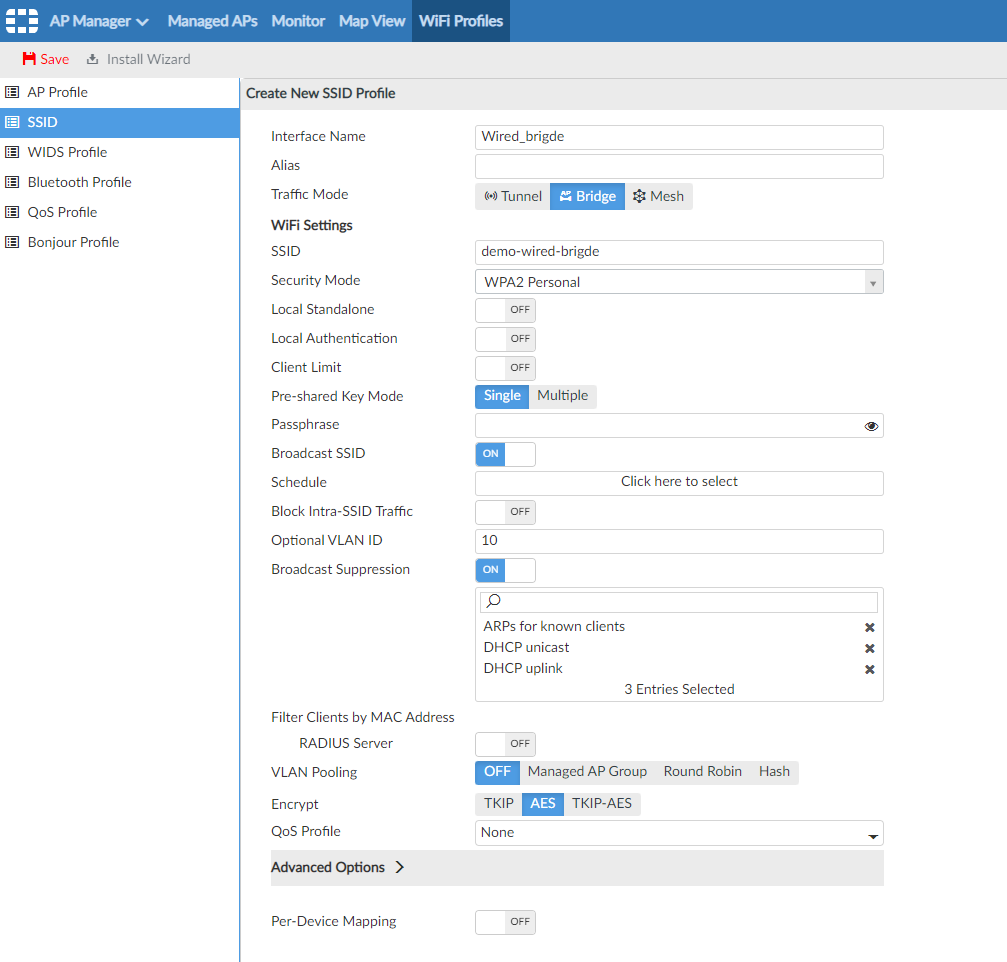
- Beside Traffic Mode, select Bridge.
- In the SSID list, select demo-wired-bridge.
As mentioned previously, we will use the bridge mode for the SSID named demo-wired-bridge. As the FortiAP will bridge the data from this SSID directly as VLAN traffic, we must use the same VLAN ID as the VLAN named Wired_Lan, if we want the wireless clients and the wired clients to communicate and to reach the Wired_Lan interface on the FortiGate as our default gateway.
- In the Security Mode list, select WPA2 Personal.
For the sake of simplicity, we will use the WPA2 Personal authentication scheme.
- In the Optional VLAN ID box, type the same VLAN ID as the Wired_Lan.
- Click OK to save the SSID.
Defining the Wireless_Lan SSID with the GUI
We will create the Wireless_Lan SSID to use tunnel traffic mode. As with the VLAN named Wired_Lan, we can choose per-device mapping or create a CLI template to configure the IP address for the interface. See also Defining VLANs.
To define the Wireless_Lan SSID:
- Go to AP Manager > WiFi Profiles > SSID, and click Create new.
The Create New SSID Profile pane is displayed.
- In the Interface Name box, type Wireless_Lan.
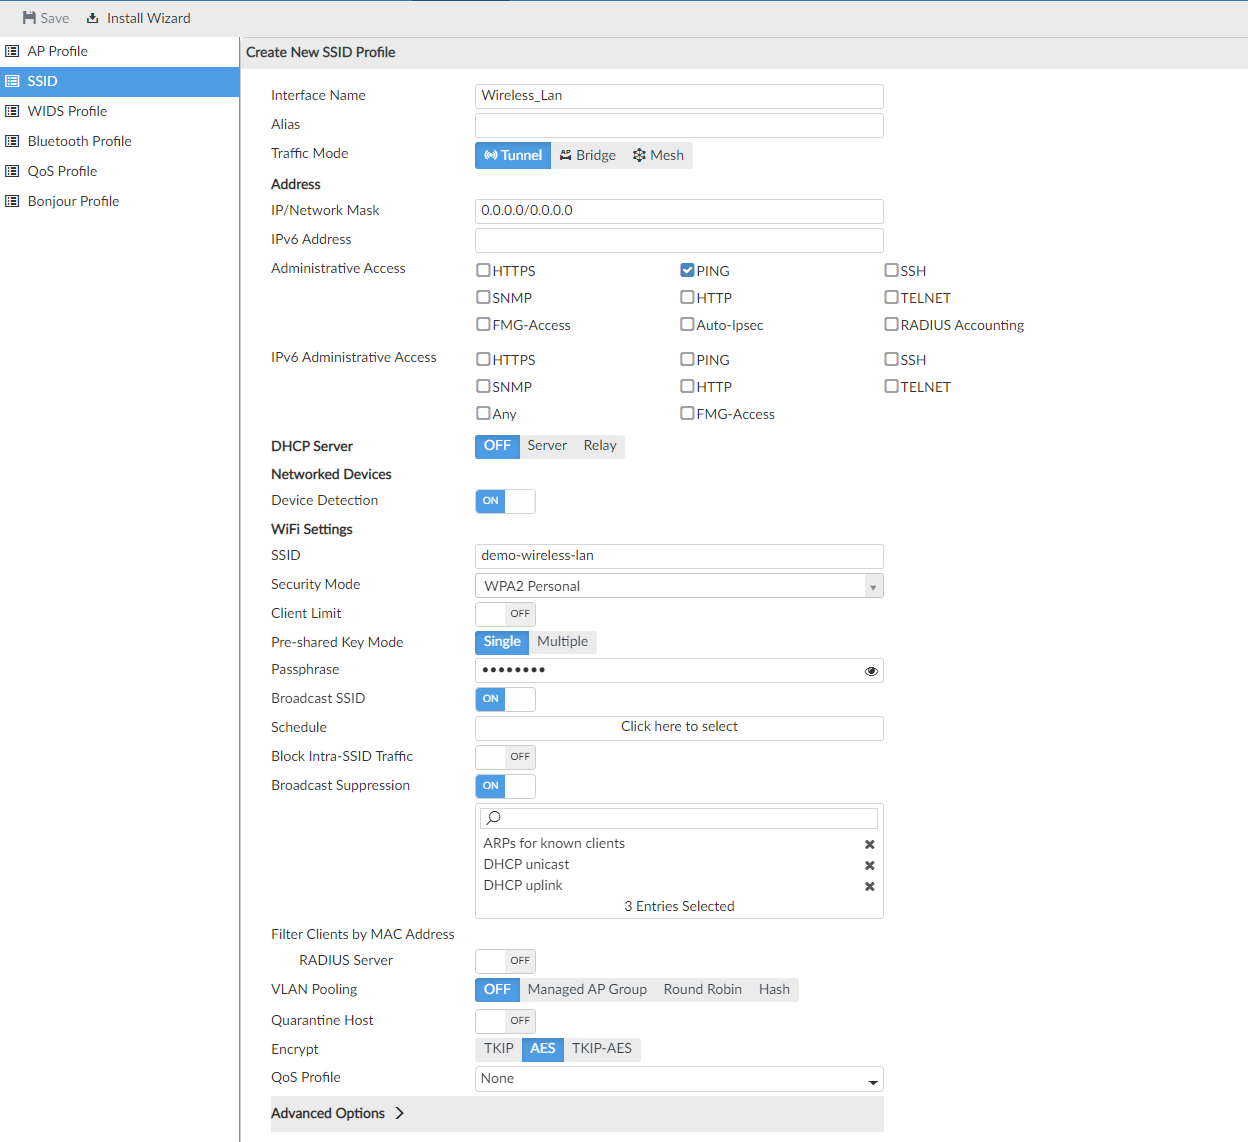
- Beside Traffic Mode, select Tunnel.
- Toggle Per-Device Mapping to ON, and click Create New to create a mapped device.

Defining the Wireless_Lan SSID with CLI templates
With CLI templates, we use the following new variables:
- wireless_lan_net
- wireless_lan_netmask
Before you can use the new variables in a CLI template, you must create the variables. Go to System Settings > Meta Fields > Create New > (Device type).
Below is an example of a CLI template that uses variables to define the SSID named Wireless_Lan:
config system interface
edit "Wireless_Lan"
set vdom "root"
set ip $(wireless_lan_net:4,1) $(wireless_lan_netmask)
set allowaccess ping
set type vap-switch
set alias "demo-wireless-lan"
set role lan
next
end
config system dhcp server
edit 2
set dns-service default
set ntp-service default
set default-gateway $(wireless_lan_net:4,1)
set netmask $(wireless_lan_netmask)
set interface "Wireless_Lan"
config ip-range
edit 1
set start-ip $(wireless_lan_net:4,10)
set end-ip $(wireless_lan_net:4,250)
next
end
next
end
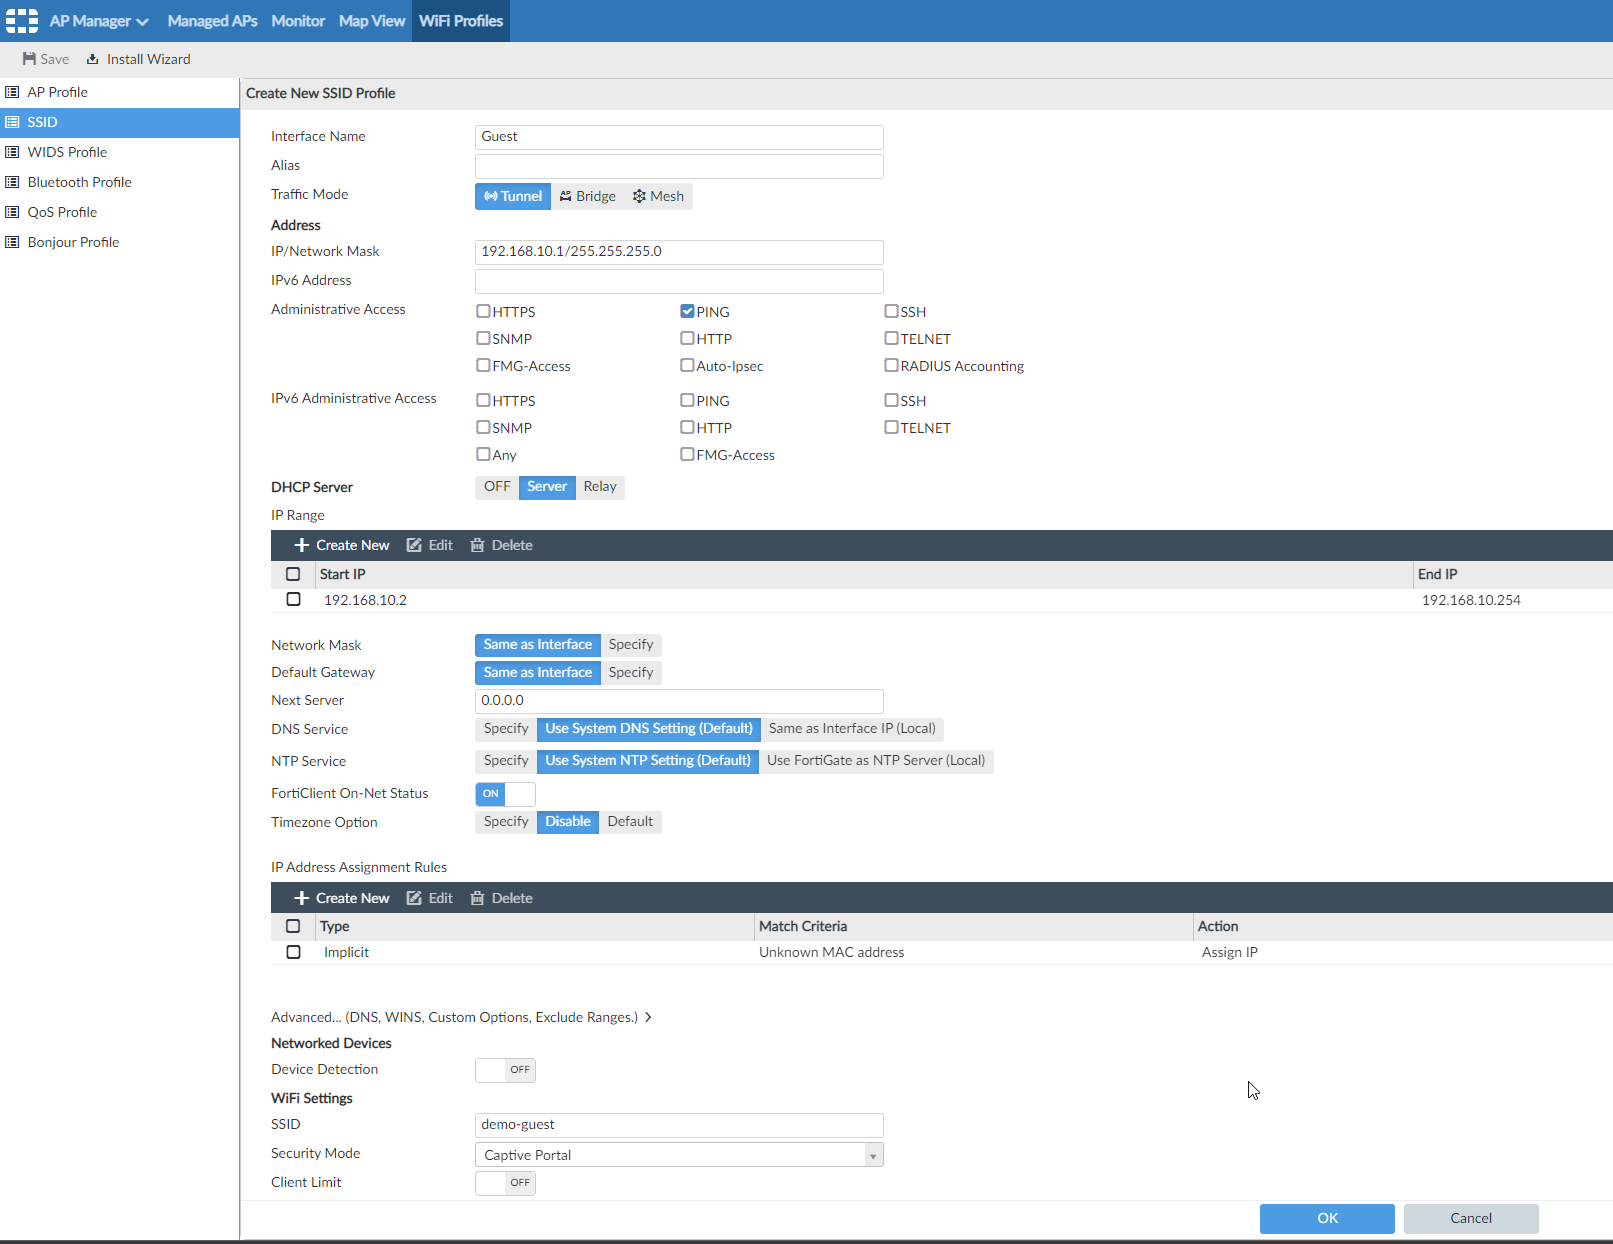
Defining the Guest SSID
Finally, we configure our SSID named Guest. For the Guest SSID, we use tunnel traffic mode and the same subnet for all our branches, as well as a captive portal.
To define the guest SSID:
- Go to AP Manager > WiFi Profiles > SSID, and click Create new.
The Create New SSID Profile pane is displayed.
- In the Interface Name box, type Guest.
- Beside Traffic Mode, select Tunnel.
- Set the remaining options, and click OK to create the SSID named Guest.